This guide assumes you’re running Tomato version 1.28.
We will be demonstrating all examples on a Linksys WRT54GL.
To start open up a web surfing app and navigate to your Tomato router.

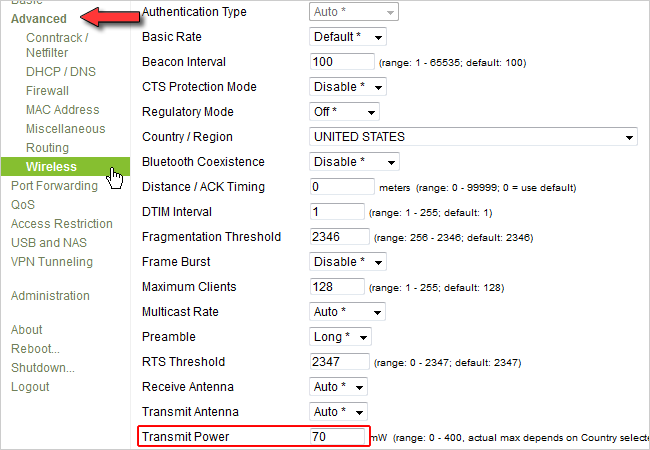
poke the Advanced link and then Wireless in the left sidebar.
Further down on this page you’ll notice a section called “Transmit Power”.
The default value for Tomato is 42mW (milliwatts).

We are not responsible for your cat walking across your keyboard when entering the overclocking commands.
Let’s get started!
Overclocking your router has its advantages: faster responses from websites, faster downloads, and lower latency.
However, each router has different clock frequencies that its CPU can handle.
Check out theDD-WRT Wikifor more information about your router’s CPU and speed.
Sounds good, right?
All you have to do is enable SSH access on your router and run three simple commands.
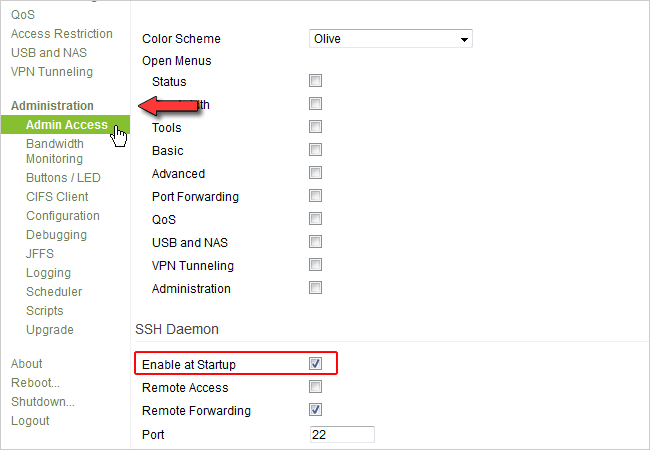
First, sign in to your router and smack the Administration link in the sidebar.
Scroll down until you see “SSH Daemon”.
Be sure that “Enable at Startup” is checked.
Scroll down until you see “Password”.
throw in in a password for SSH access, and then click Save at the bottom.
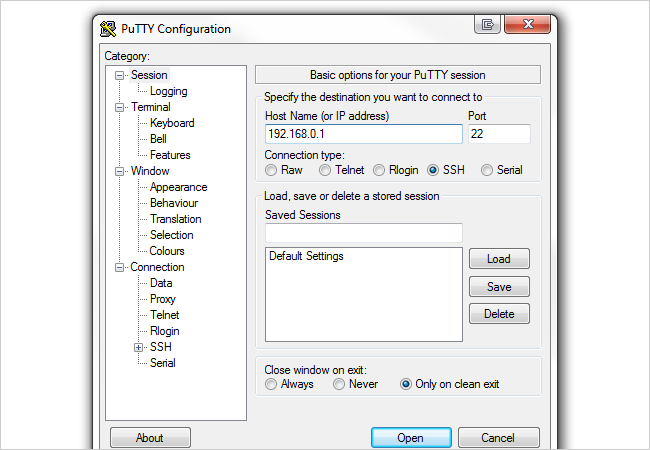
We suggest usingPuTTYfor Windows and the built-in Terminal applications for Mac and Linux users.
For this example we will be using PuTTY on Windows.
poke the Open button.
You will be prompted to login in as an username.
key in “root” and hit Enter.
Now you will be prompted for a password.
throw in in the password we set above earlier.
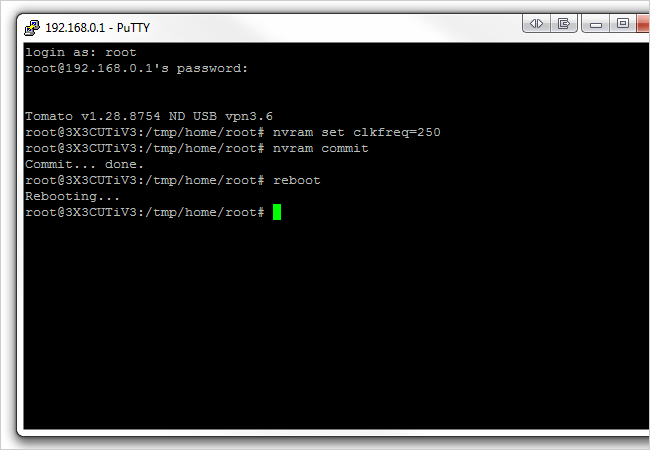
Now jot down the following three commands and hit Enter after each one.
Be sure to replace the 3 x’s with your desired clock frequency.
Donottype in anything else but one of these frequencies.
nvram set clkfreq=xxx
nvram commit
reboot
Your router will reboot.
When it turns back on your router’s CPU will be set at whatever clock frequency you specified.
connection discovery of devices should be much faster and less of a hassle.
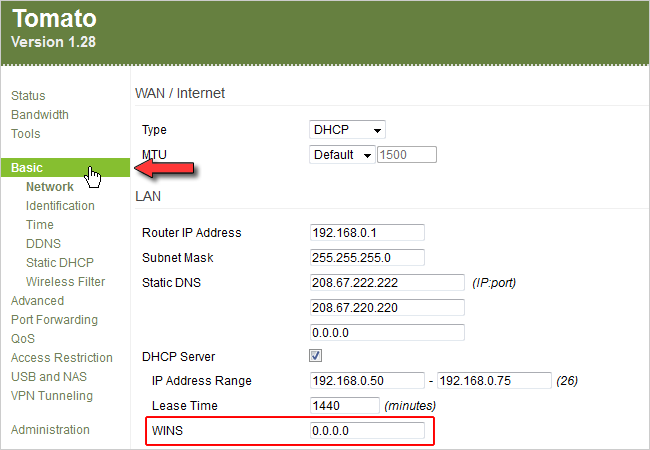
Click Basic and scroll down until you see “DHCP Server”.
Change the “WINS” IP address to 0.0.0.0.
Click Save at the bottom.
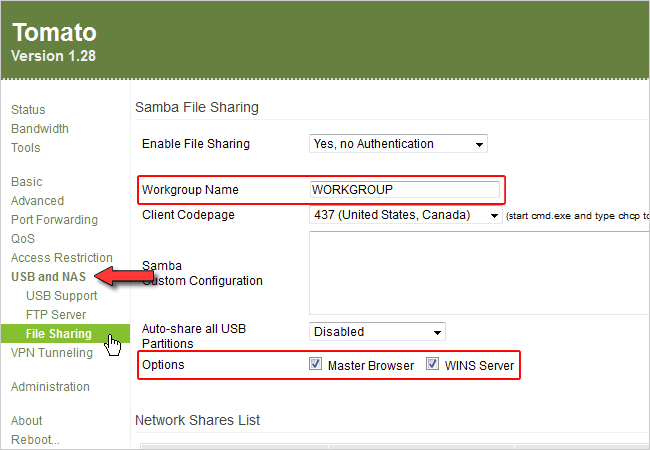
Next, nudge the USB and NAS link in the sidebar.
The pick the sub-link File Sharing.
verify your workgroup name is set to the same workgroup name all your devices on your internet.
Then check both boxes next to “Master net surf tool” and “WINS Server”.
Click Save at the bottom.
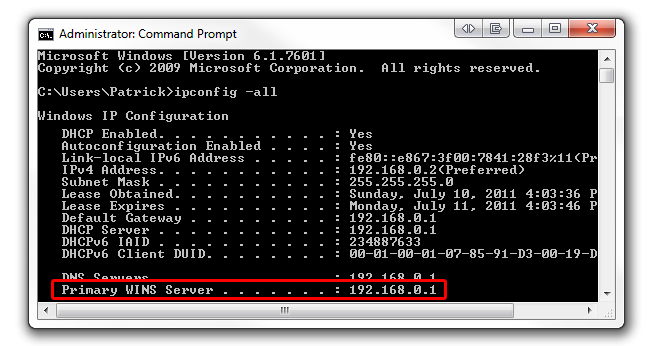
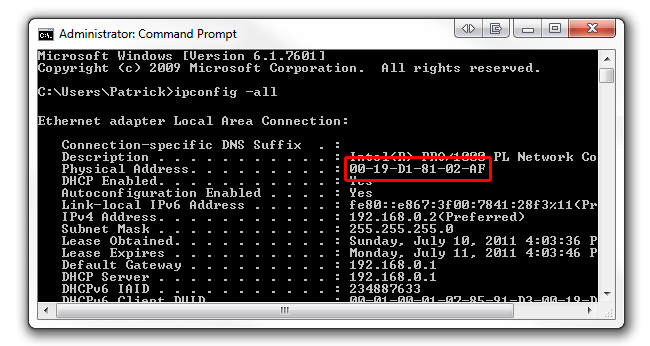
Now let’s verify that our computer is actually using the WINS server we just set up.
Go ahead and open up a command prompt and punch in “ipconfig –all”.
Next to that you should see your router’s IP address.
Sometimes the WINS server doesn’t update until a new IP is renewed from the DHCP server.
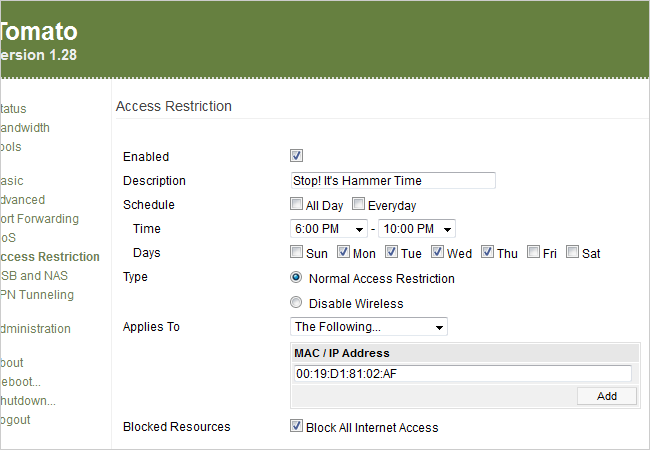
Tomato’s Access Restriction feature allows you, the administrator, to create rules for your web link.
This rule will be effective on weekdays from 6 PM to 10 PM.
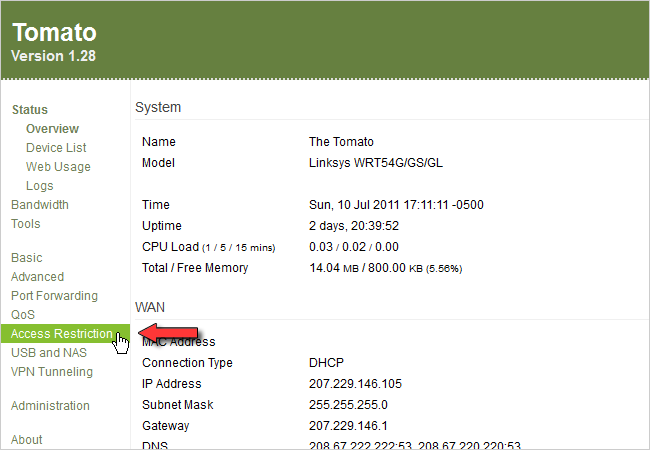
To start, access to your Tomato router and opt for Access Restriction link on the left sidebar.
From here, you’ll see a blank page with an “Add” button.
In the description field, enter anything that describes your rule (i.e.
“Work Time”).
Next, use the dropdown menus adjacent to “Time” and choose 6:00 PM and 10:00 PM.
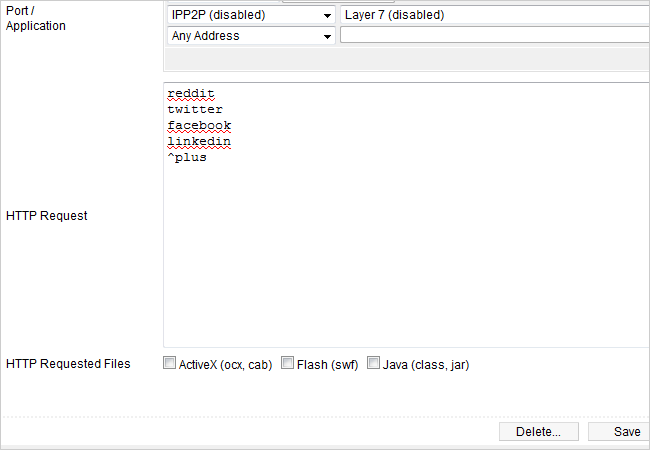
If left checked, your system won’t be able to jump into the Internet at all.
A new set of options will appear.
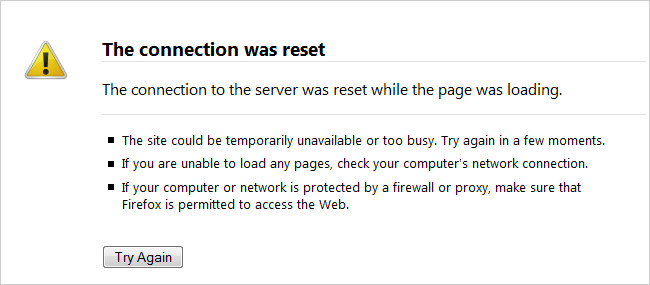
Tomato will load the rule and soon after your websites will be blocked.
Let the productivity begin!
This rule is becomes effective at 6 PM on every weekday and ends at 10 PM.
Now what determines which traffic is better than others?
That’s completely up to you, and we’ll show you how to set that up in Tomato.

Everyone has different preferences as to which protocols/traffic are important to them.
The first step is setting up our speed classes which dictate what protocols/traffic get the most or least bandwidth.
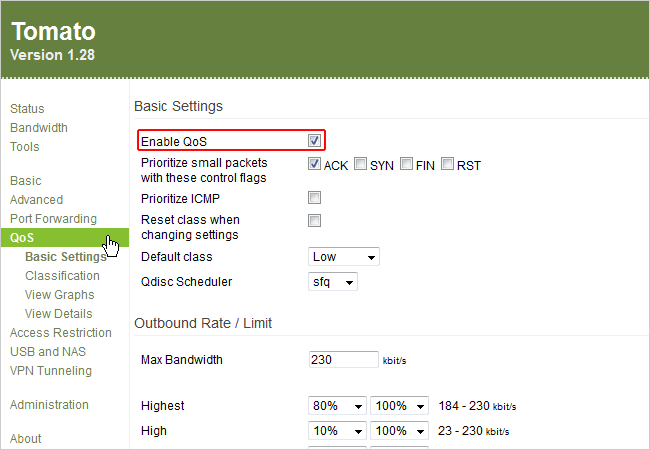
Click QoS on the sidebar and then Basic prefs.
Check off “Enable QoS” to activate the other options below.
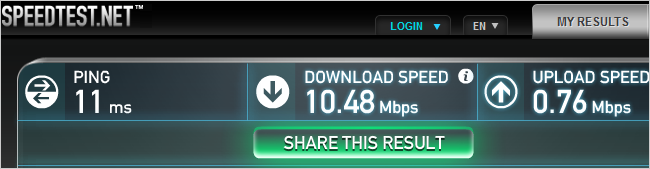
Head over to your favorite speed test website.
Find a server located near you geographically and begin the test.

Take note of your upload speed in kilobits per second.
For example, my upload speed was 0.76 Mbps (don’t laugh!
), so my speed would be 778 in Kbps.
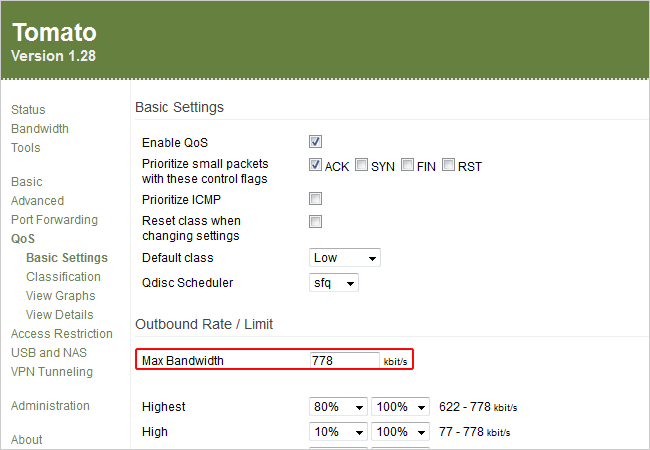
You’ll notice Tomato will do some work for you by automatically adjusting the speed classes below.
Now let’s take note of the download speed from our speed test earlier.
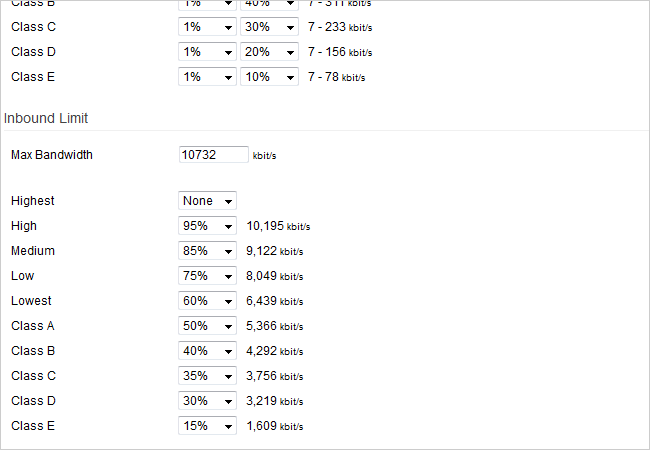
Convert that into kilobits per second and enter it in “Max Bandwidth” underneath “Inbound Limit”.
These parameters work for us in our environment.
Click Save near the bottom of the page.
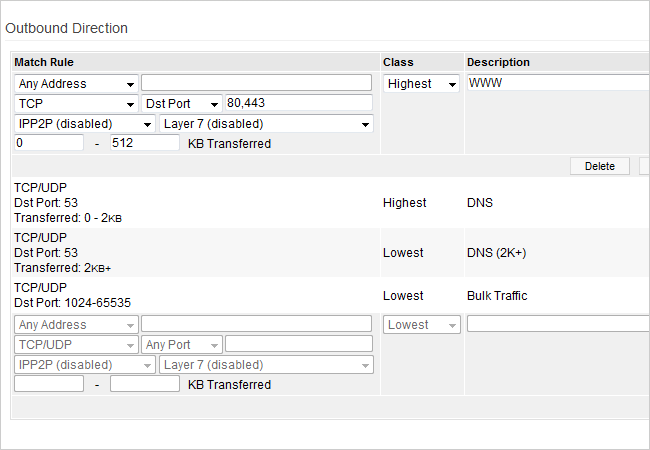
Now that we have our speed classes set up, we have to apply them to specified protocols/traffic.
Click Classification underneath QoS in the sidebar to begin pairing speed classes with protocols.
It helps having both the Classification page and Basic parameters page open in two separate tabs for reference.
The first rule, and arguably the most important, we set up was WWW traffic.
We’re going to set up one more rule that is very dear to us: Xbox Live.
Then we’re going to prioritize the traffic at the highest priority.
We also set our L7 (Layer 7) filter to “xboxlive” just in case.
Be careful adding too many L7 filters to multiple classes because it may bog down your router.
That’s it for our list of Tomato tips.
Your WiFi strength should be at its best along with faster rig discovery on your internet.
And with your new overclocked router, sending packets should be lightning fast!
