UsingAutomator on Mac, you’re free to set up automations that save you time.
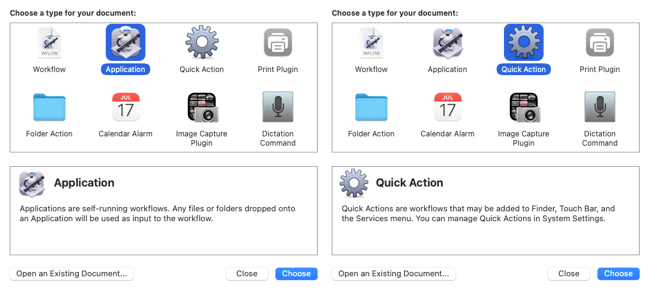
For the purposes of this tutorial, we’ll create either an utility orQuick Action.
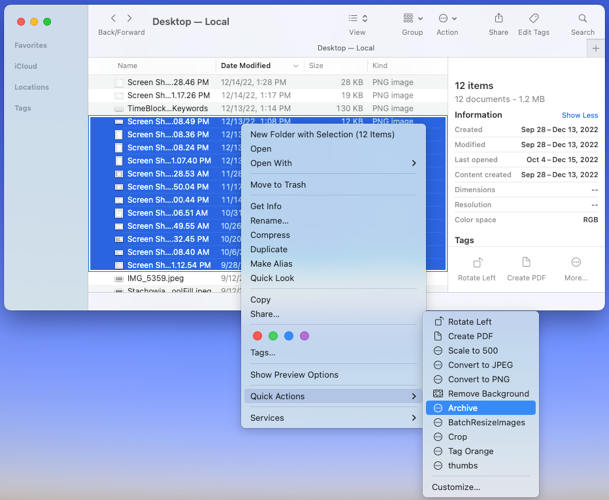
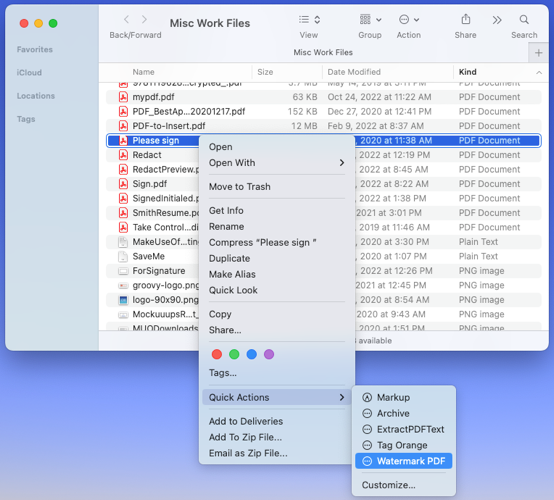
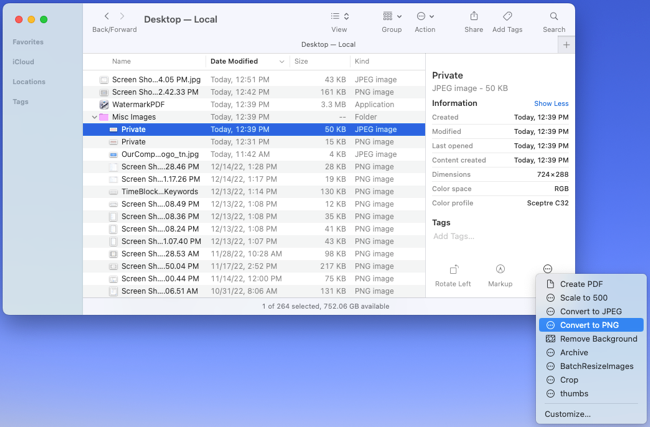
A Quick Action is a service you might access byright-clickingor opening the More menu below the Finder Preview.

Justin Duino / How-To Geek
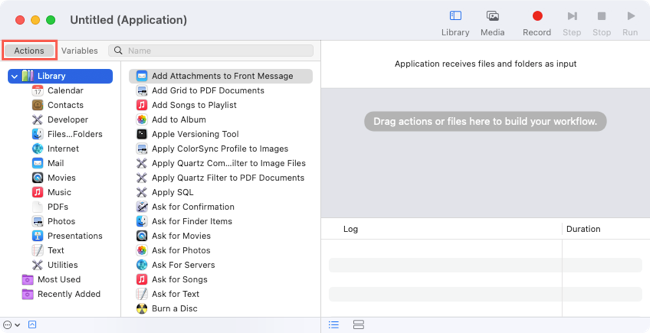
To get started, open Automator from Finder > Go > Applications.
Then, select “Actions” on the top left and expand the Library beneath if necessary.
Split PDFs
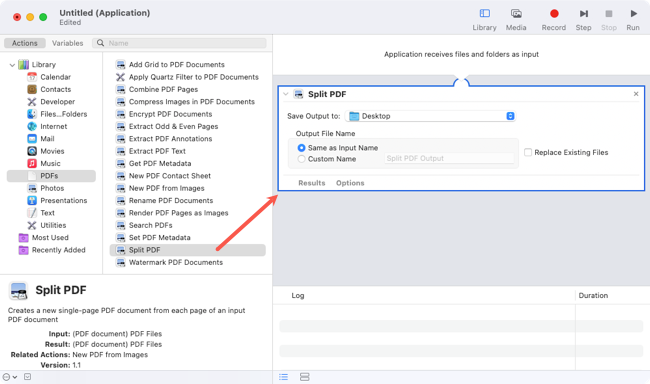
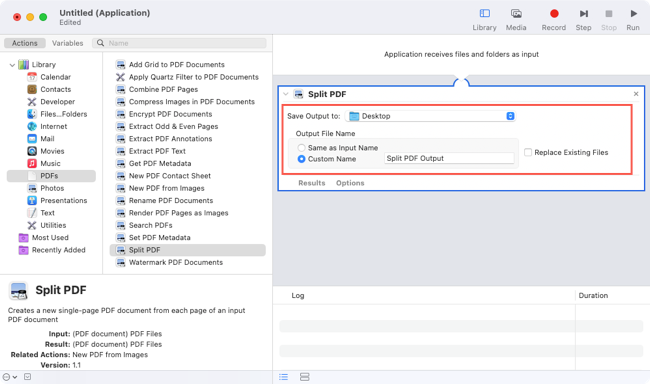
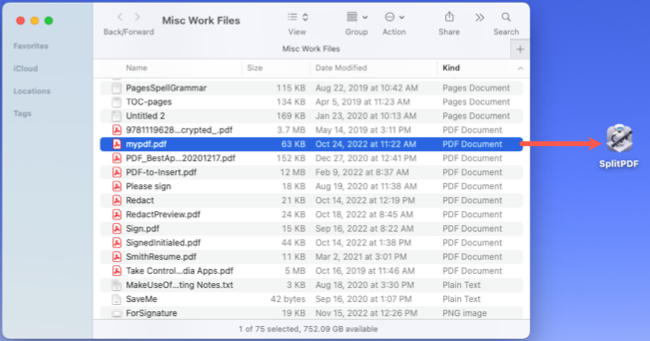
When you receive lengthyPDF documents, you may need tosplit them into separate files.
Select “PDFs” in the Library and then drag Split PDF into the workflow window on the right.
In the Split PDF action box, choose the folder where you want to save the split files.
Then, pick the Output File Name.
it’s possible for you to make it the same as the input or enter a Custom Name.
Optionally check the box to Replace Existing Files.
Save the software using the File menu as described earlier.
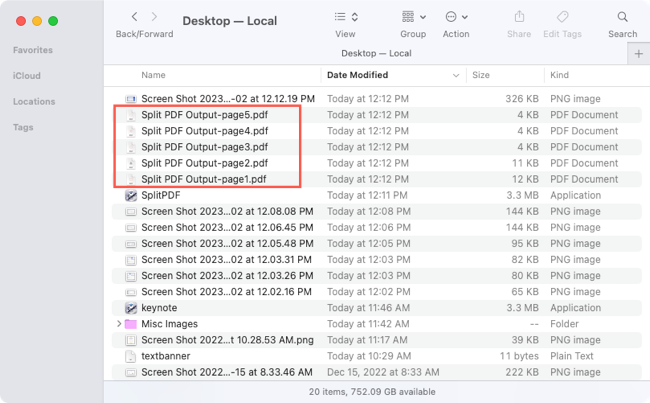
To split a PDF, just drag it into the utility or onto its icon.
You’ll then see each of your pages as separate files.
Watermark PDFs
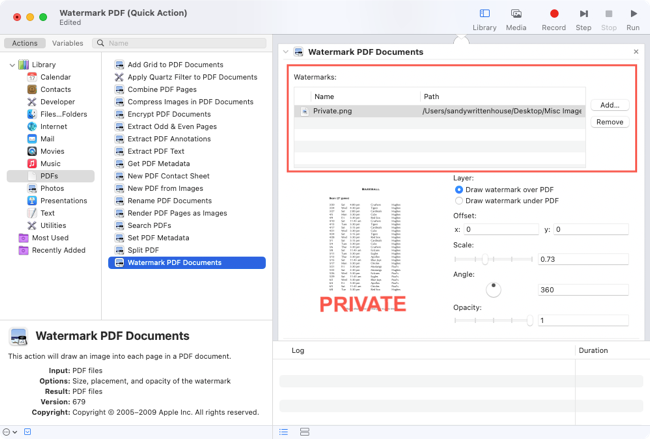
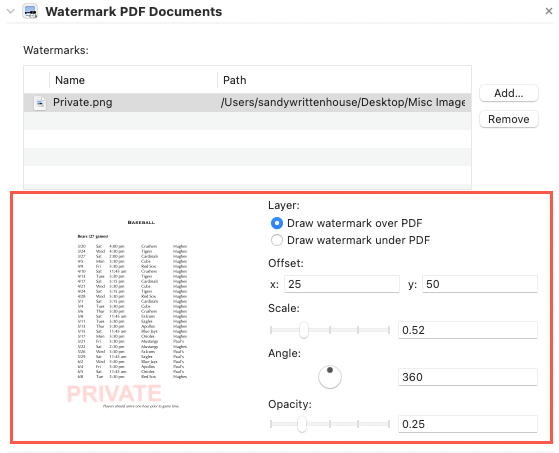
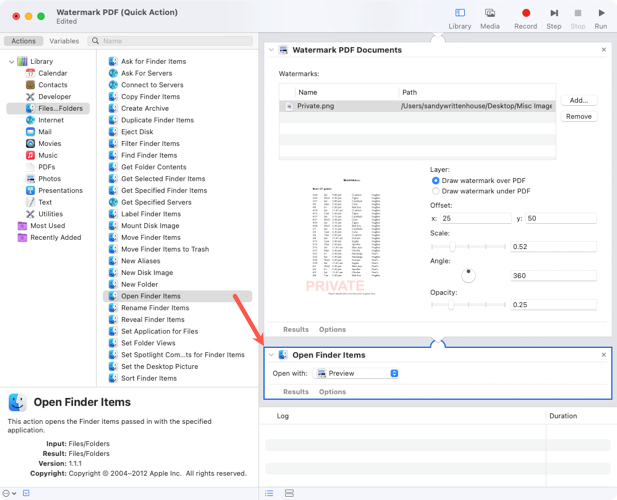
Another task you may perform with PDF files is to watermark them.
Click “Add” to choose the image watermark.
You’ll then see a preview at the bottom where you could make adjustments to it.
For our example, we’ll add the action to launch the file in Preview.
Choose an software in the Open With drop-down list.
Save the Quick Action using the File menu and then choose a PDF to try it out.
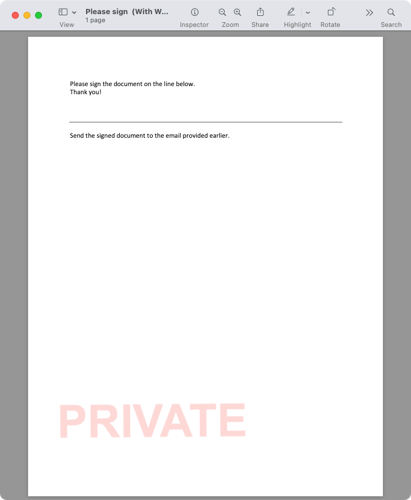
You should then see your watermarked PDF open in the program you set up.
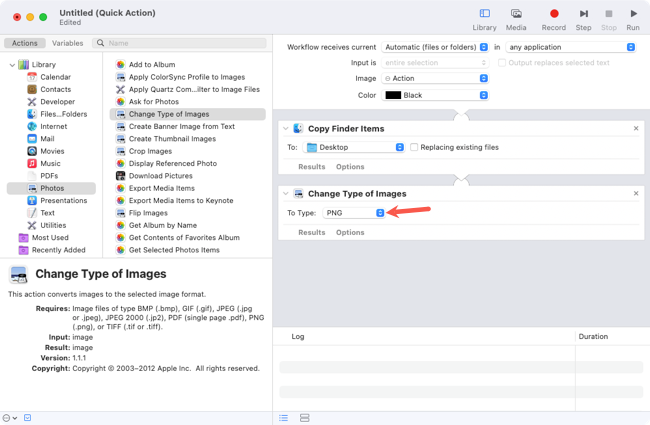
Convert Images
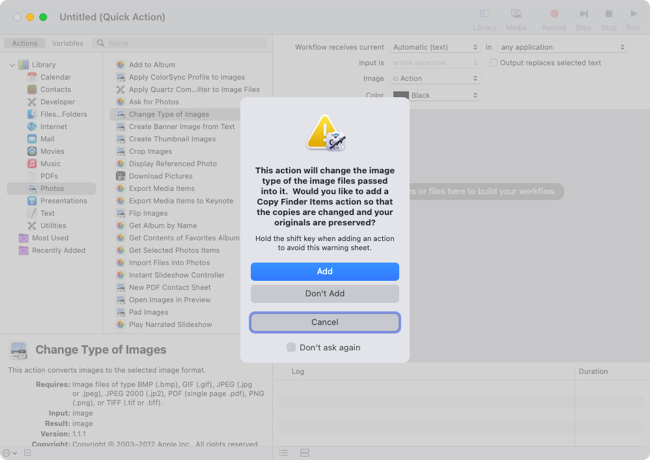
Another tedious task that Automator can help with isconverting imagesfrom one file bang out to another.
For this process, we’ll also use a Quick Action.
You’ll be asked if you want to create a copy of the image before converting it.
Save the Quick Action using the File menu and then give it a try.
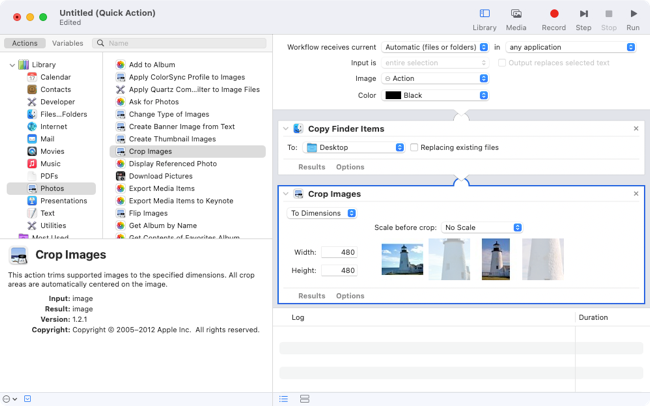
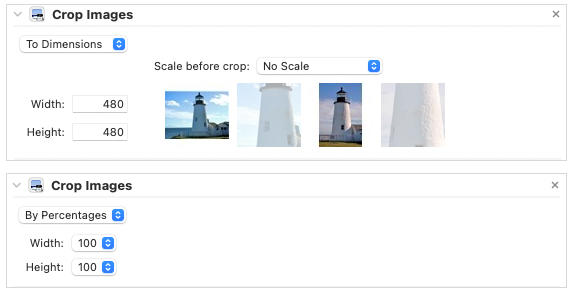
Crop Images
Maybe it’s cropping images to the same exact size you should probably do often.
you’re able to do this with Automator by selecting the size you want to use upfront.
We’ll also use a Quick Action for this so we can crop the image with a simple click.
Select “Photos” in the Library and drag Crop Images to the workflow.
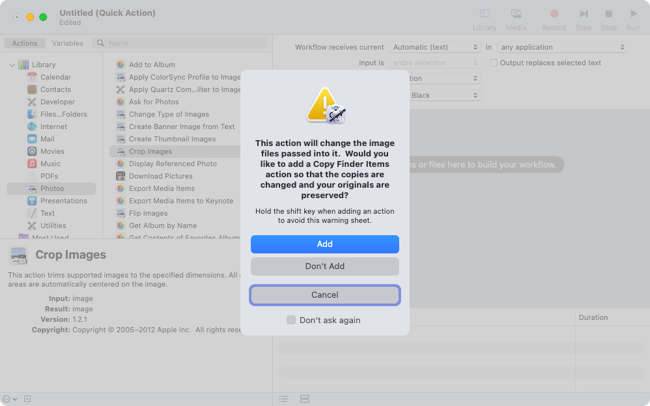
Likeconverting images, you’ll be asked if you’d like to retain a copy of the original.
Pick “Add” or “Don’t Add” for the copy action per your preference.
Then enter the numbers in the Width and Height fields.
If you choose To Dimensions, you also have the option to scale the image before cropping it.
Use the Scale Before Crop drop-down to pick an option if you like.
But when you do, this places the file within the current folder.
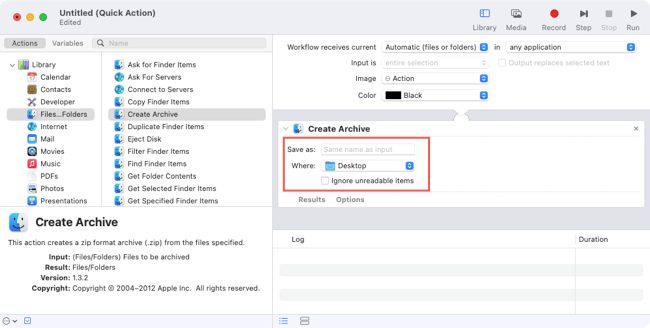
Maybe you want tocompressseveral files and create an archive elsewhere, like a certain folder on your Desktop.
you’ve got the option to set up an Automator action for this in under a minute.
Once again, we’ll use a Quick Action for this process.
Select “Files & Folders” in the Library and drag Create Archive to the workflow.
Next, choose the location for the archive folder like Desktop, Pictures, Documents, or another folder.
Optionally check the box to Ignore Unreadable Items.
Save the Quick Action using the File menu and you’re ready to create your archive.
Use the shortcut menu by right-clicking or the More menu below the Preview to pick your action.
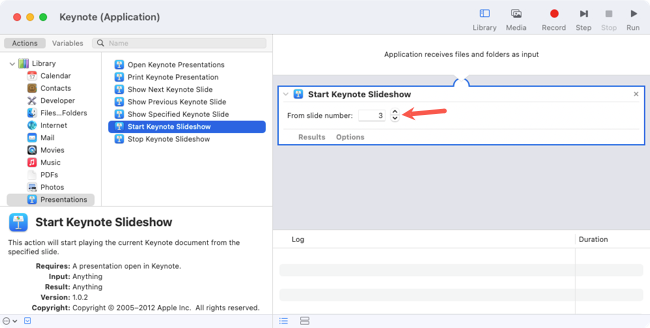
This is convenient if you present Keynote slideshows often, especially various ones to different audiences.
Because drag-and-drop works great for Applications, we’ll use that key in this time.
Select “Presentations” in the Library and drag Start Keynote Slideshow to the right.
Choose a specific slide number in the Start Keynote Slideshow action box.
Remember, each presentation will start with this slide.
If you simply want to start from the beginning, enter a 1 in the From Slide Number box.
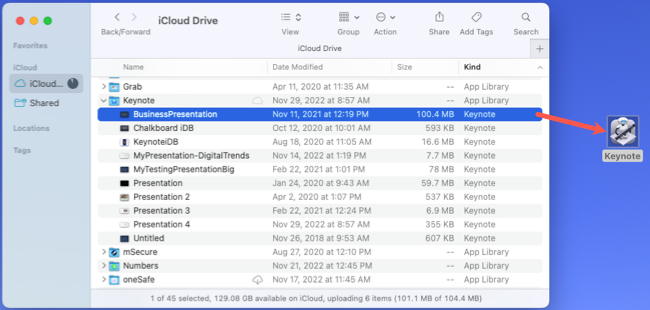
Save the program using the File menu and then test it out.
First, open a file in Keynote.
This does not have to be the slideshow you want to present; it can be any Keynote file.
Then, drag the presentation you want to start into the utility or onto its icon.
You should then see your presentation begin immediately and with the slide number you set up.
For additional ways to use it, take a look athow to resize imagesorhow to quit applicationsusing Automator actions.
Related:10 Hidden Mac Features You Should Be Using