But, before you do, these Windows 11 tweaks tweaks can be a big help.
Enable Windows 11 Game Mode
Windows 11 arrived with a brand new feature called Game Mode.
Enabling this mode results in several background changes designed to improve game performance.
Hannah Stryker / How-To Geek
Changes include disabling automatic driver installation and restart notifications.
To enable Game Mode, bring up the controls app and go to Gaming > Game Mode.
switch on the mode using the toggle switch.
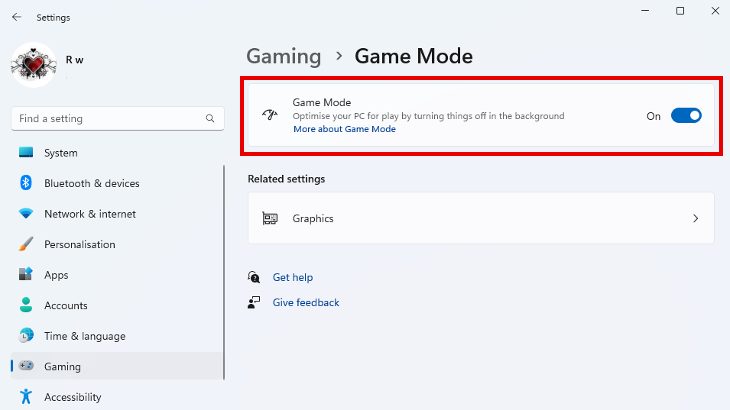
It can be an easy win and a good way to start optimizing your PC for gaming.
Many games, particularly older ones, use SDR (Standard Dynamic Range) to display video content.
As the name implies, Auto HDR automatically upscales compatible SDR games toHDR.
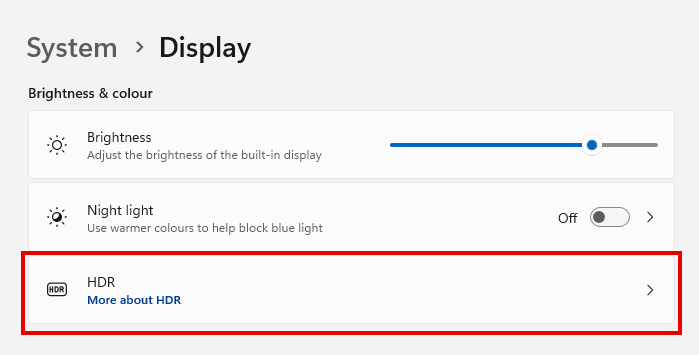
To check, and enable it if it’s available, go to tweaks > System > Display.
If using multiple displays, opt for correct one and click “Use HDR.”
If Auto HDR is available to use, you will see the option to enable it here.
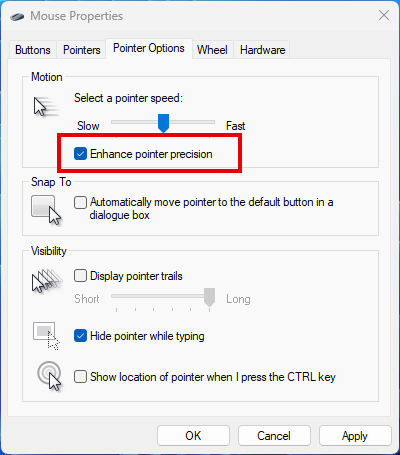
In Windows Search, throw in “Mouse Properties” and bring up the mouse parameters panel.
snag the Pointer Options tab and uncheck “Advanced Pointer Precision.”
Switching to the High Performance will allow your rig to prioritize performance features over saving energy.
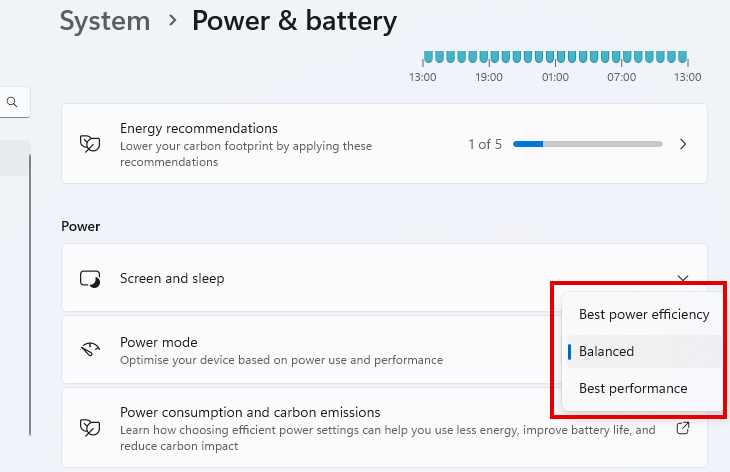
Not always ideal on alaptop using battery power, but rarely a problem for desktop gaming rigs.
you’re able to find it in System > Power > Power & Battery.
Specify GPU Priority
When playing graphically-intensive games, you want to ensure that they use your most powerfulGPU.
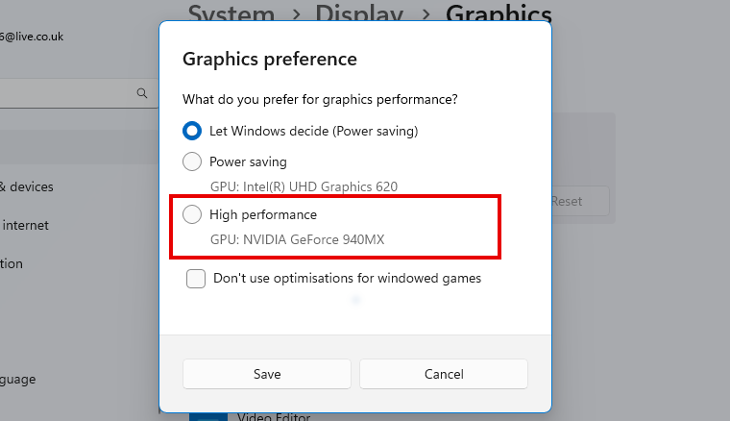
Thankfully, Windows 11 allows you to specify which GPU your games use.
initiate the prefs app and navigate to System > Display > Graphics.
Find the installed game in the software list, select it, and click “Options.”
Here it’s possible for you to select a default GPU for that game to use.
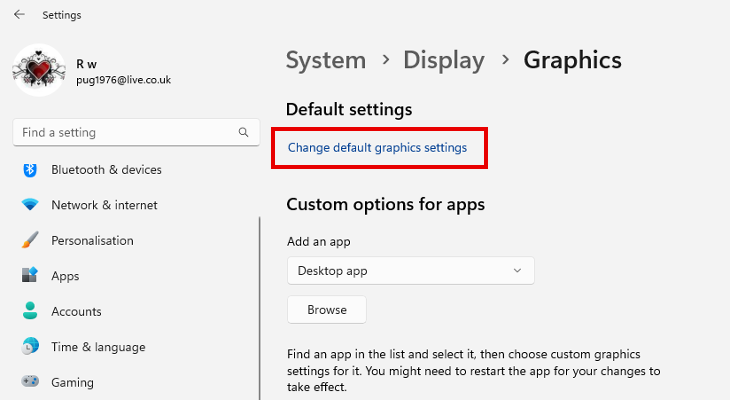
This can lighten the load on the processor and result in better game performance.
It can be particularly effective if you have a capable graphics card but your CPU is old or mid-tier.
Toenable GPU scheduling, fire up the options app and navigate to Gaming > Game Mode > Graphics.
Click “Change default graphics prefs,” and turn on the feature.
If you don’t see this option, it means that your hardware is not compatible.
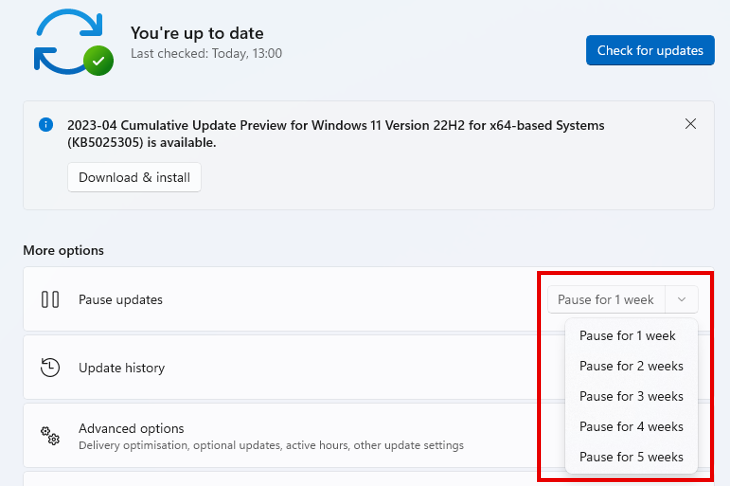
you’ve got the option to find the prefs to pause updates in prefs > Windows Update.
It is, of course, advisable to keep Windows 11 updated when not gaming.
That said, there are ways to permanentlyprevent Windows from updating in the background.

Most of the time, this process works well to make your web connection connection more efficient.
Luckily there is a way to disable Nagle’s Algorithm on your online grid.
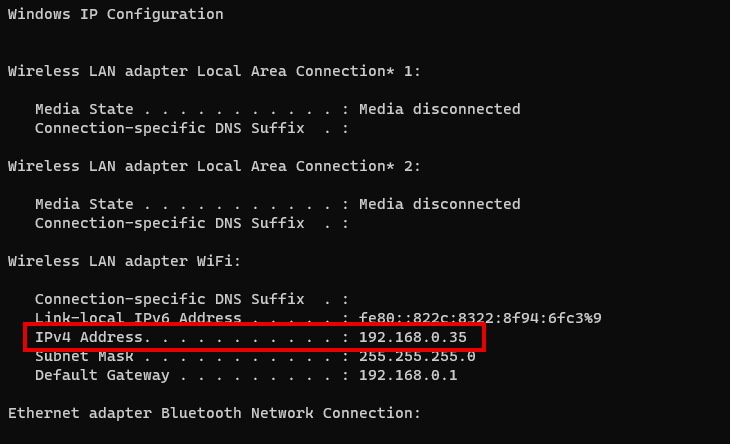
InCommand Prompt, bang out “ipconfig” to see your web link details.
Make a note of the “IPv4 Address” for the Wireless LAN Adapter and then close Command Prompt.
You will probably see several entries in the Interfaces directory.
Select each in turn, looking for the string value with the IPv4 address you noted earlier.
The value will probably be named IPAddress or DhcpIPAddress.
Name the value “TcpAckFrequency,” double-punch it, and set the value data to 1.
Nagle’s Algorithm should now be disabled on your Wi-Fi internet.
