Converting the files is easy…right-click a .wtv file and select Convert to .dvr-ms Format.
After you launch it the first time, you’ll be prompted to navigate through the setup wizard.
Select if you want iPodifier to add the transcoded video to iTunes and sync with your iPod or not.
If you’re low on system resources you might want to select Idle.
After a few other screens basic setup is complete.
Video Sources
Expand the Video Sources pane on the left side and select Video Source Wizard.
![sshot-2010-10-10-[20-19-09]](https://static1.howtogeekimages.com/wordpress/wp-content/uploads/2010/10/sshot-2010-10-10-20-19-09.png)
Select a name for the new video source…something easy to remember like Live TV or Movies.
pick the path where your Recorded TV is stored.
Select h.264 for the video codec.
![sshot-2010-09-02-[18-25-29]](https://static1.howtogeekimages.com/wordpress/wp-content/uploads/2010/10/sshot-2010-09-02-18-25-29.png)
you’re able to also choose mpeg4, but h.264 usually offers better quality.
choose the encoding quality…this is up to you but why not go for the best?
Also, keep in mind that we can make changes to these prefs at any time.
![sshot-2010-09-02-[18-26-25]](https://static1.howtogeekimages.com/wordpress/wp-content/uploads/2010/10/sshot-2010-09-02-18-26-25.png)
When the encoding process completes, you’ll get a notification letting you know it’s done.
You’ll also find the converted MP4 / h.264 files in the output location.
Notice here the files are much smaller compared to the lossless originals that were recorded with WMC.
![sshot-2010-10-10-[00-02-48]](https://static1.howtogeekimages.com/wordpress/wp-content/uploads/2010/10/sshot-2010-10-10-00-02-48.png)
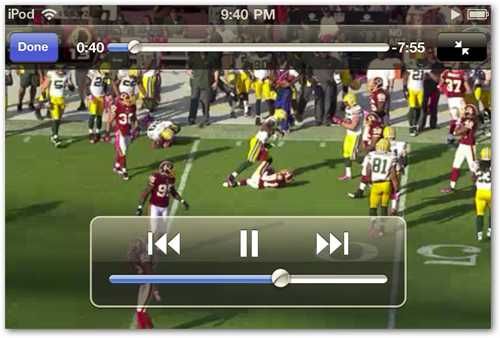
We also had it add the files to our iPod and that worked out great too.
Now all there is to do is enjoy your quality recorded Live HD TV on your machine.
Of course you could watch the converted files inside QuickTime as well if you want to.
![sshot-2010-10-10-[00-03-02]](https://static1.howtogeekimages.com/wordpress/wp-content/uploads/2010/10/sshot-2010-10-10-00-03-02.png)
![sshot-2010-10-10-[00-03-30]](https://static1.howtogeekimages.com/wordpress/wp-content/uploads/2010/10/sshot-2010-10-10-00-03-30.png)
![sshot-2010-10-10-[00-21-41]](https://static1.howtogeekimages.com/wordpress/wp-content/uploads/2010/10/sshot-2010-10-10-00-21-41.png)
![sshot-2010-10-10-[00-17-41]](https://static1.howtogeekimages.com/wordpress/wp-content/uploads/2010/10/sshot-2010-10-10-00-17-41.png)
![sshot-2010-10-10-[00-22-38]](https://static1.howtogeekimages.com/wordpress/wp-content/uploads/2010/10/sshot-2010-10-10-00-22-38.png)
![sshot-2010-10-10-[00-23-45]](https://static1.howtogeekimages.com/wordpress/wp-content/uploads/2010/10/sshot-2010-10-10-00-23-45.png)
![sshot-2010-10-10-[00-26-35]](https://static1.howtogeekimages.com/wordpress/wp-content/uploads/2010/10/sshot-2010-10-10-00-26-35.png)
![sshot-2010-10-10-[19-28-58]](https://static1.howtogeekimages.com/wordpress/wp-content/uploads/2010/10/sshot-2010-10-10-19-28-58.png)
![sshot-2010-10-10-[00-30-18]](https://static1.howtogeekimages.com/wordpress/wp-content/uploads/2010/10/sshot-2010-10-10-00-30-18.png)
![sshot-2010-10-10-[00-30-29]](https://static1.howtogeekimages.com/wordpress/wp-content/uploads/2010/10/sshot-2010-10-10-00-30-29.png)
![sshot-2010-10-10-[00-30-39]](https://static1.howtogeekimages.com/wordpress/wp-content/uploads/2010/10/sshot-2010-10-10-00-30-39.png)
![sshot-2010-10-10-[19-37-38]](https://static1.howtogeekimages.com/wordpress/wp-content/uploads/2010/10/sshot-2010-10-10-19-37-38.png)
![sshot-2010-10-10-[19-39-21]](https://static1.howtogeekimages.com/wordpress/wp-content/uploads/2010/10/sshot-2010-10-10-19-39-21.png)
![sshot-2010-10-10-[00-51-51]](https://static1.howtogeekimages.com/wordpress/wp-content/uploads/2010/10/sshot-2010-10-10-00-51-51.png)
![sshot-2010-10-10-[19-55-39]](https://static1.howtogeekimages.com/wordpress/wp-content/uploads/2010/10/sshot-2010-10-10-19-55-39.png)
![sshot-2010-10-10-[20-44-51]](https://static1.howtogeekimages.com/wordpress/wp-content/uploads/2010/10/sshot-2010-10-10-20-44-51.png)
![sshot-2010-10-10-[20-47-27]](https://static1.howtogeekimages.com/wordpress/wp-content/uploads/2010/10/sshot-2010-10-10-20-47-27.png)
![sshot-2010-10-10-[20-59-12]](https://static1.howtogeekimages.com/wordpress/wp-content/uploads/2010/10/sshot-2010-10-10-20-59-12.png)
![sshot-2010-10-10-[22-12-21]](https://static1.howtogeekimages.com/wordpress/wp-content/uploads/2010/10/sshot-2010-10-10-22-12-211.png)
![sshot-2010-10-10-[22-14-48]](https://static1.howtogeekimages.com/wordpress/wp-content/uploads/2010/10/sshot-2010-10-10-22-14-48.png)
![sshot-2010-10-10-[00-51-01]](https://static1.howtogeekimages.com/wordpress/wp-content/uploads/2010/10/sshot-2010-10-10-00-51-01.png)
![sshot-2010-10-10-[23-17-33]](https://static1.howtogeekimages.com/wordpress/wp-content/uploads/2010/10/sshot-2010-10-10-23-17-33.png)
![sshot-2010-10-10-[23-19-38]](https://static1.howtogeekimages.com/wordpress/wp-content/uploads/2010/10/sshot-2010-10-10-23-19-38.png)
![sshot-2010-10-10-[01-37-27]](https://static1.howtogeekimages.com/wordpress/wp-content/uploads/2010/10/sshot-2010-10-10-01-37-27.png)
![sshot-2010-10-10-[23-06-25]](https://static1.howtogeekimages.com/wordpress/wp-content/uploads/2010/10/sshot-2010-10-10-23-06-25.png)

