Today we’ll walk through creating a new partition in Windows 7 then installing XP on it.
check that to take a moment and decide how much space to use for the XP partition.
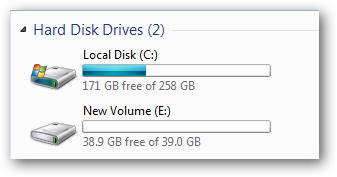
check that you have enough space on your hard drive for files you’ll be adding to each.
Luckily we can do it without any 3rd party software.
Right-tap on the drive and select Shrink Volume.
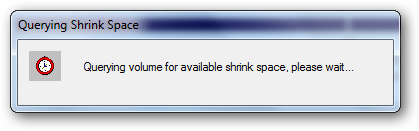
A window pops up showing the drive is being queried for available space.
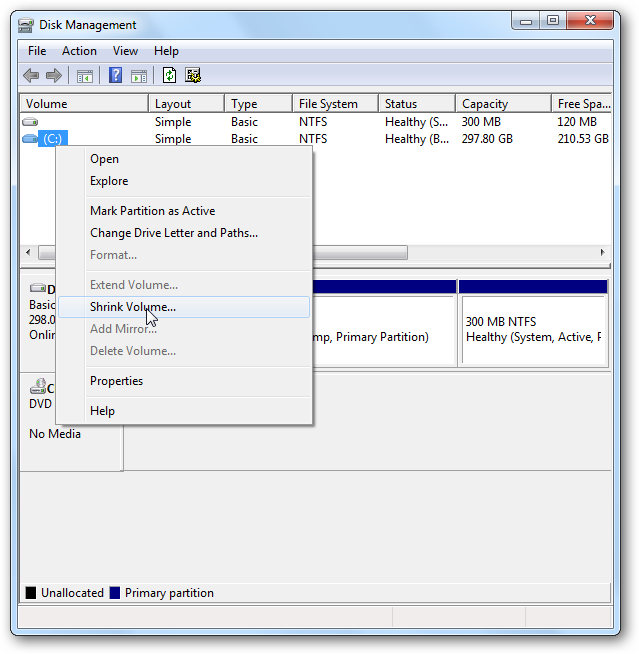
Now enter the amount of space you want to shrink the volume.
You’re shown the total size of the disk and the amount of size that is available to shrink.
In this example we’re freeing up 40GB of space.
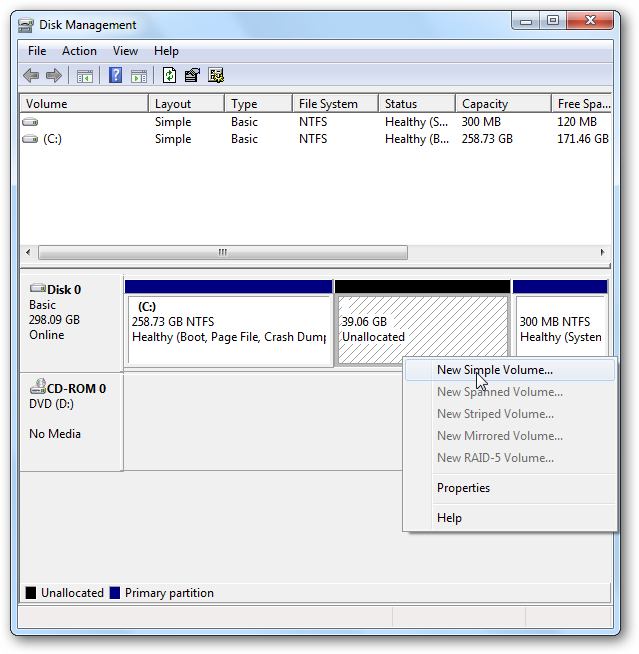
After the process completes you’ll see the new Unallocated space.
Right-click that and select New Simple Volume.
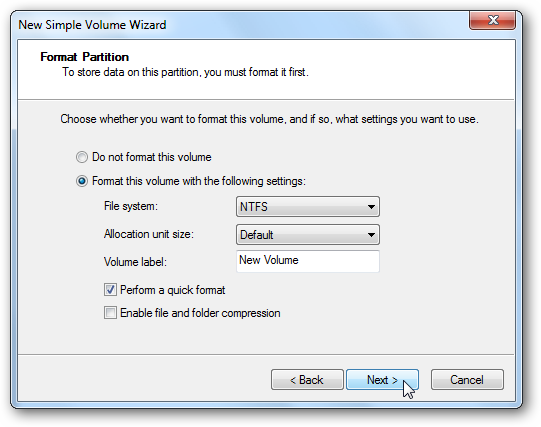
The New Simple Volume Wizard launches which is a straight forward process.

Also you’ll probably want to confirm to check Perform a Quick Format.
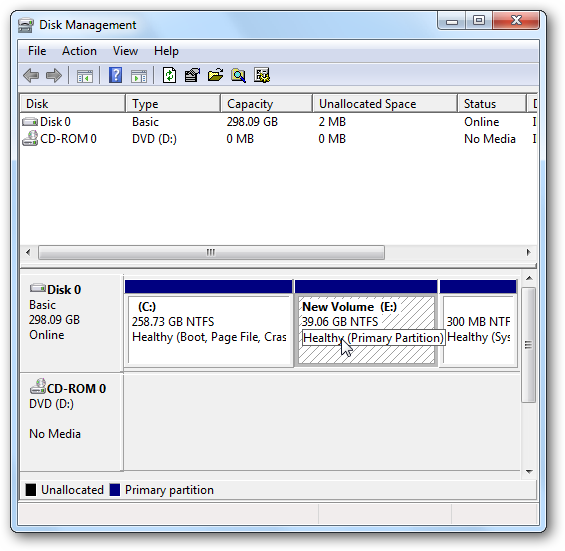
After the format is complete you will see the new volume as a healthy partition listed.
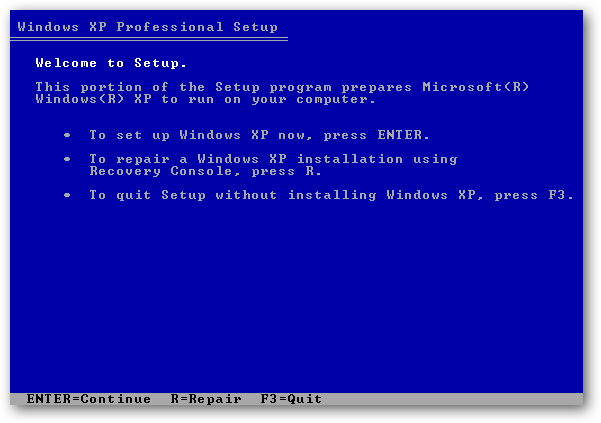
Here we’re installing XP Professional on the new partition.
Boot from the XP installation disk and start the install process.
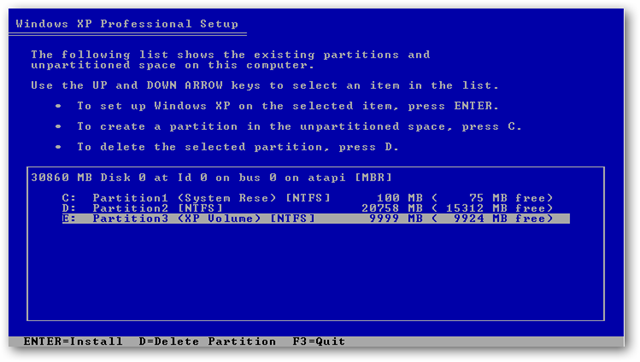
When it comes to choosing a partition, verify you grab the one you created using the steps above.
In this example we made a 10GB partition for the XP install.
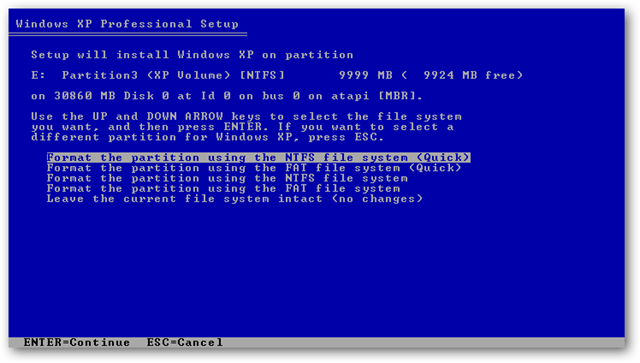
Basically you continue through as if you were doing a clean install on any hard drive.
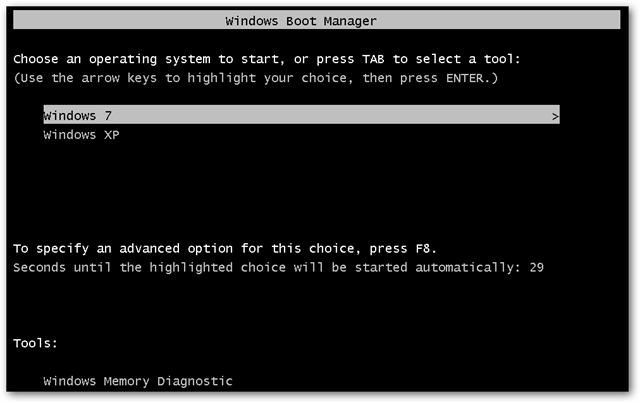
You will undoubtedly notice that the machine is booting directly into XP at this time.
This is due to XP writing it’s bootloader over Windows 7’s.
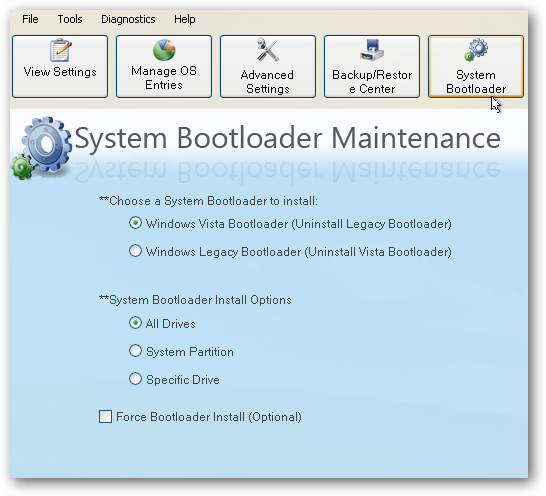
VistaBootPRO 3.3 (free version) will still work too which you could downloadhere.
To download the EasyBCD 2.0 Beta, you’ll need to register with the NeoSmart Technologies Forum first.
EasyBCD 2.0 Beta (Forum Registration Required)

![sshot-2010-01-04-[23-04-48]](https://static1.howtogeekimages.com/wordpress/wp-content/uploads/2010/01/sshot20100104230448.png)