Here’s what you’re gonna wanna know to use them.
Update: Microsoftremoved the HomeGroup feature from Windows 10 in the April 2018 update.
HomeGroups debuted back in Windows 7.
They’re designed to simplify sharing folders and printers between Windows computers on small, local networks.
And, let’s face it.
you’re able to do this on any PC that you want to be part of the HomeGroup.
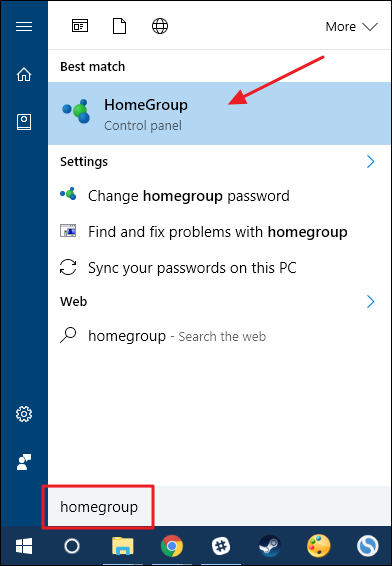
Click Start, punch in “homegroup,” and then poke the “HomeGroup” control panel app.
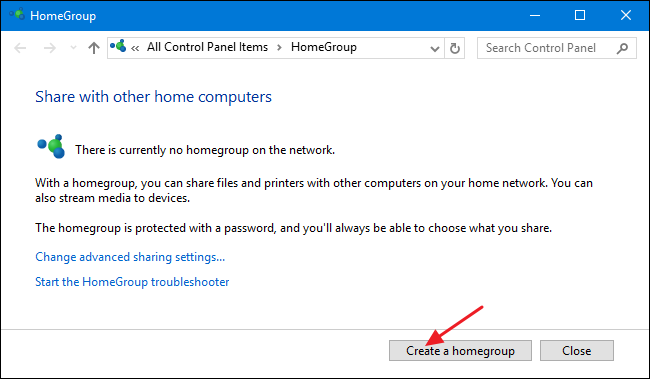
hit the “Create a homegroup” button.
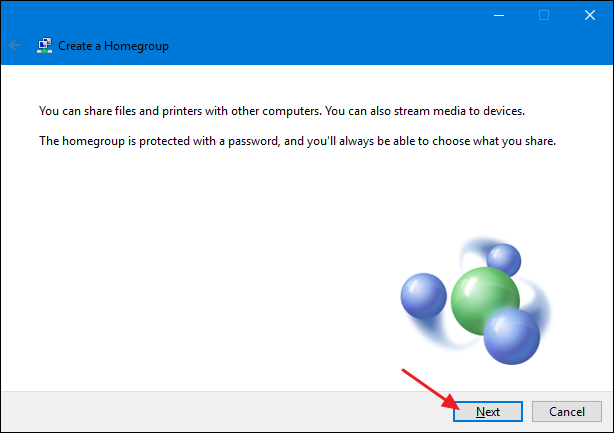
Click “Next” on the first page of the “Create a Homegroup” wizard.
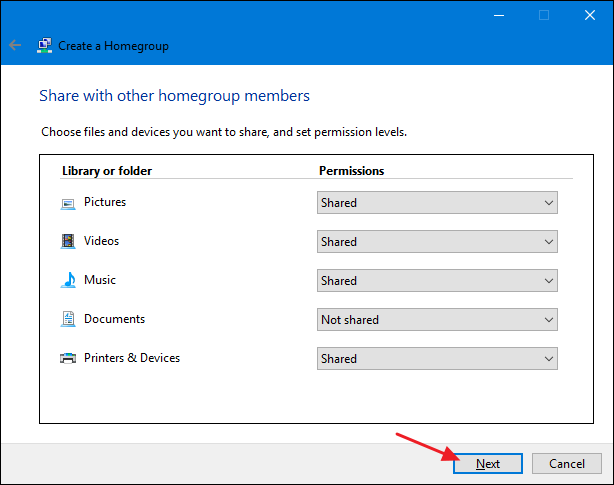
Share the items you want to share and then click “Next.”
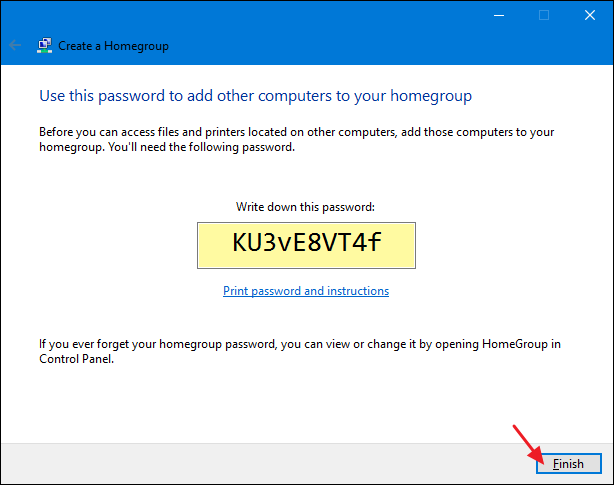
Click “Finish” when you’re done.
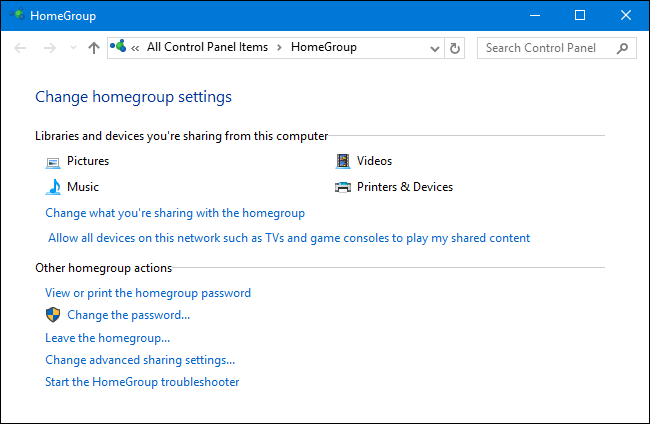
You’ll then be able to see what you’ve shared.
You don’t need to wait for sharing to finish, though.
But first…
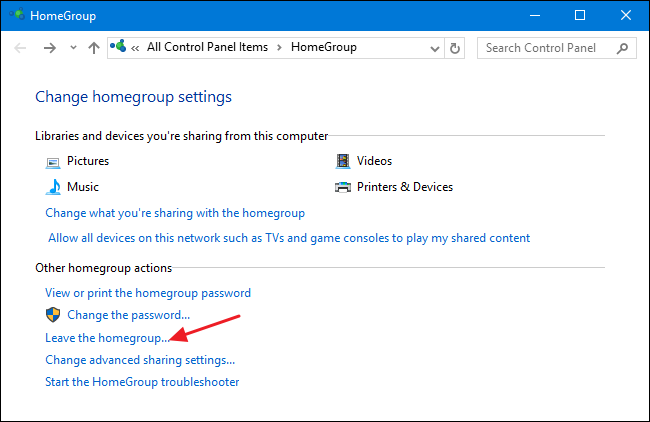
How to View or Change the HomeGroup Password
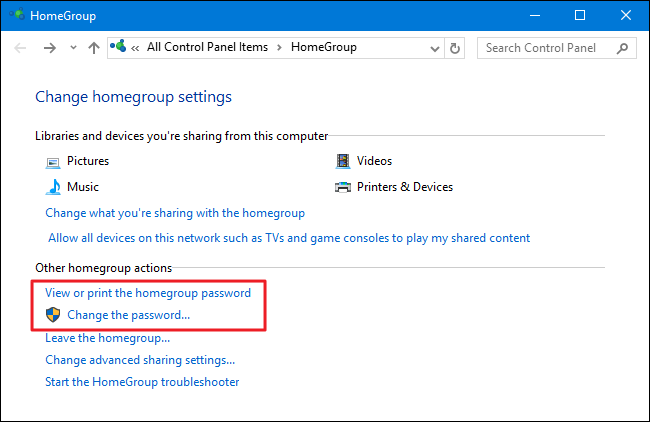
Forgot your password already?
Or want to change it before you join other PCs?
you could also click “Change the password” to enter a new password for the HomeGroup.
You won’t need to know the old password to make this change.
You also won’t need to do anything to PCs that are already joined to the HomeGroup.
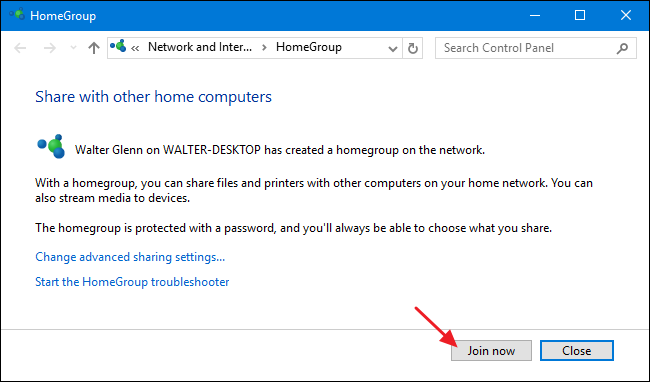
poke the “Join now” button to join the HomeGroup.
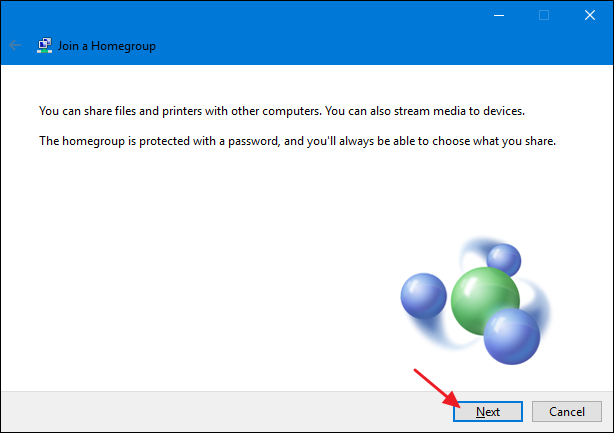
On the first page of the “Join a Homegroup” wizard, click “Next.”
Share the items you want to share and then click “Next.”
throw in the HomeGroup password in the box and then click “Next.”
You’ve now successfully joined the HomeGroup.
Click “Finish” to exit the wizard.
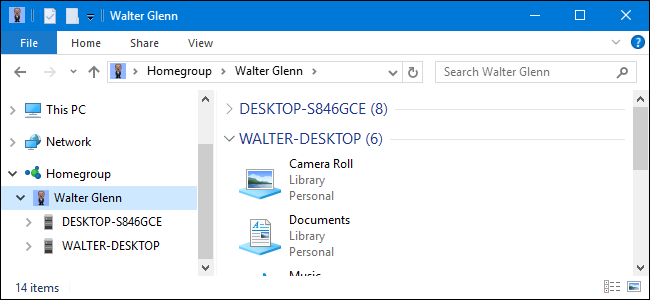
Here, you could see that I’ve got two desktop PCs in the HomeGroup.
Both are grouped under my name because I’m signed into both with my Microsoft user account.
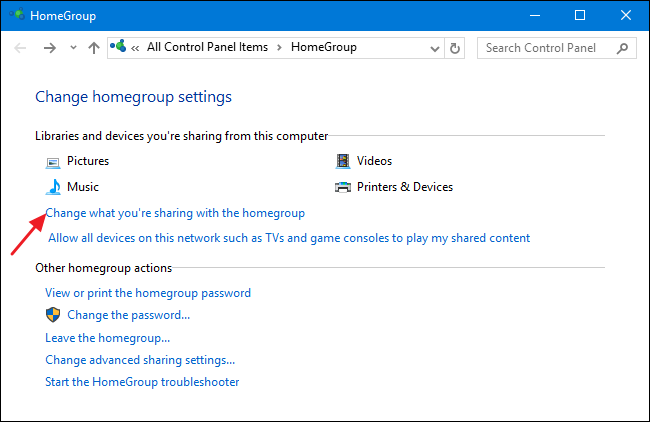
That will get you to the same sharing screen you saw when you created or joined the HomeGroup.
For full instructions, check out our article onchanging what you have shared with a HomeGroup.
Hopefully, this is enough to get you started using HomeGroups and simplifying your online grid sharing life.