Summary
Photoshop has a built-in neural filter for restoring old scratched photos.
But you dont need to spend 20 bucks a month just to use that feature.
Microsoft has developed a more robust AI for the job and its completely free.

Lucas Gouveia / How-To Geek |zentilia/ZinetroN/ Shutterstock
Heres the only guide you gotta bring your old photos back to life.
There was a time when it took Photoshop gurus hours of painstaking labor tofix up old degraded photos.
Today, AI can do most of the heavy lifting.
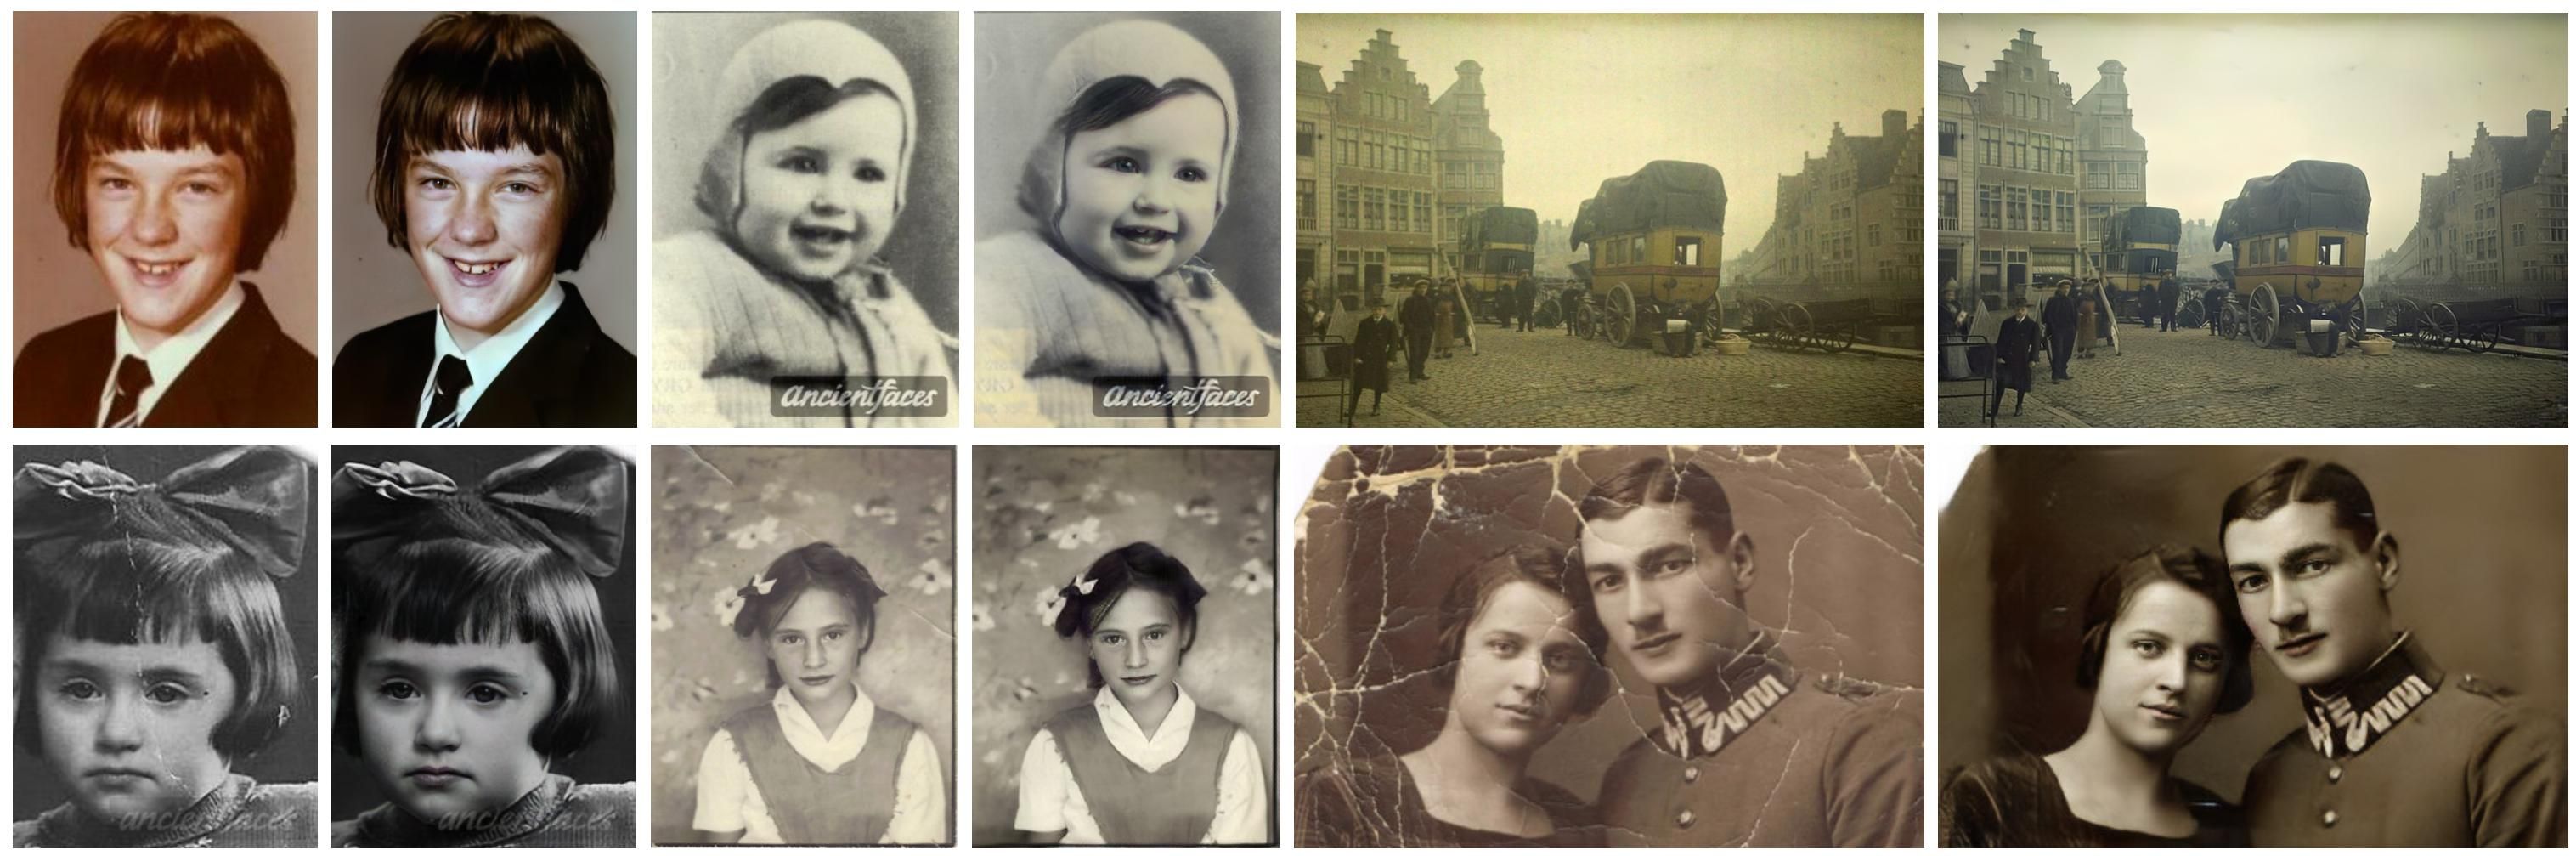
So much so that you’re free to restore a photo with just one click!
Unfortunately, Microsoft has yet to offer an official app to use this AI.
But the easiest way is to run it for free on the cloud.
you’re free to either use:
Replicatelets you run open-source AI models with ease.
Thats why well be using it for this demonstration.
This demonstration also includes two AI tools for colorizing and enhancing your restored photos.
Theyre both freely available on Replicate and Google Colab.
I highly recommend trying them, but Microsofts AI alone is enough to cover basic restoration.
Finally, I use a third AI to upscale the whole image.
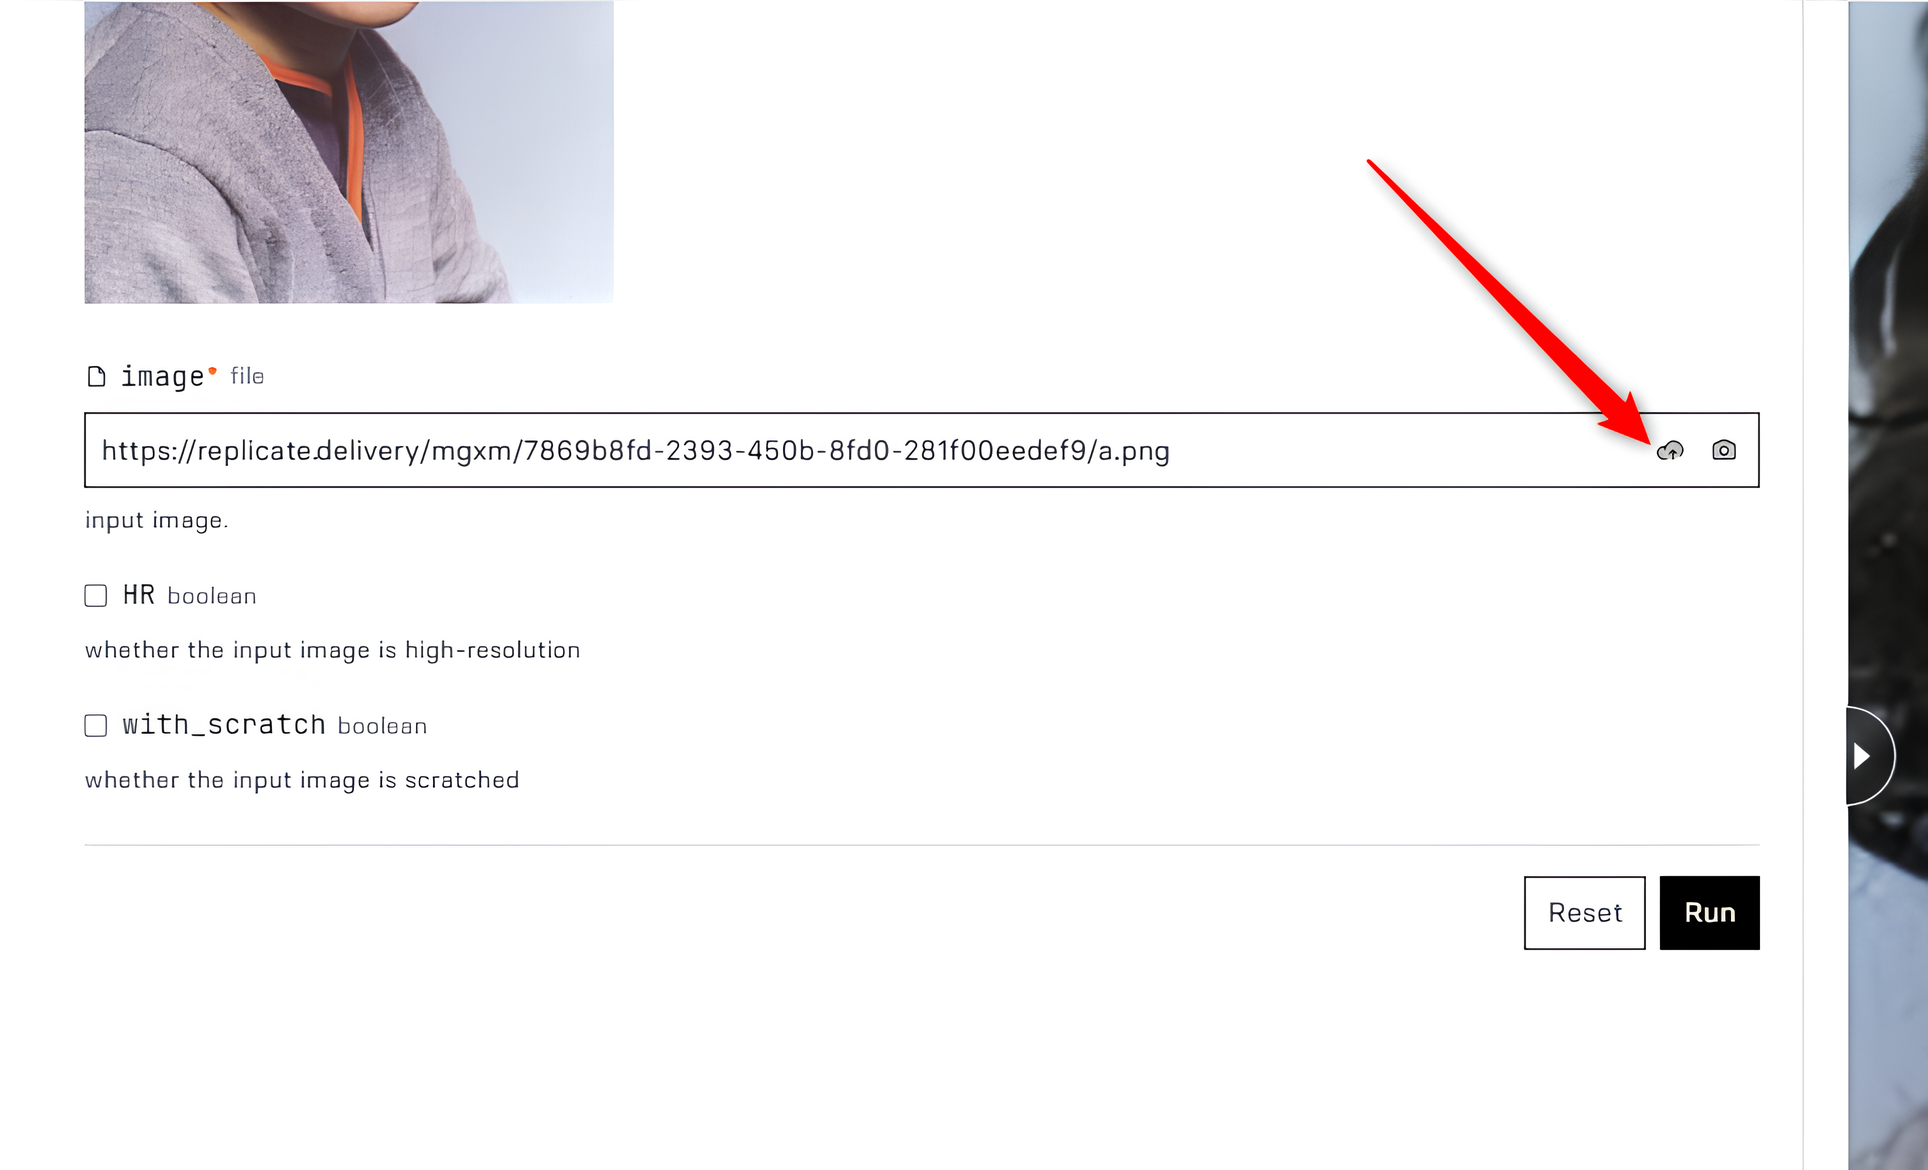
To get started with Replicate, all we need is a GitHub account.
If you already have a GitHub, skip this step, otherwise, head over toGitHub.
You need a valid email to join GitHub and the sign-up only takes a few minutes.
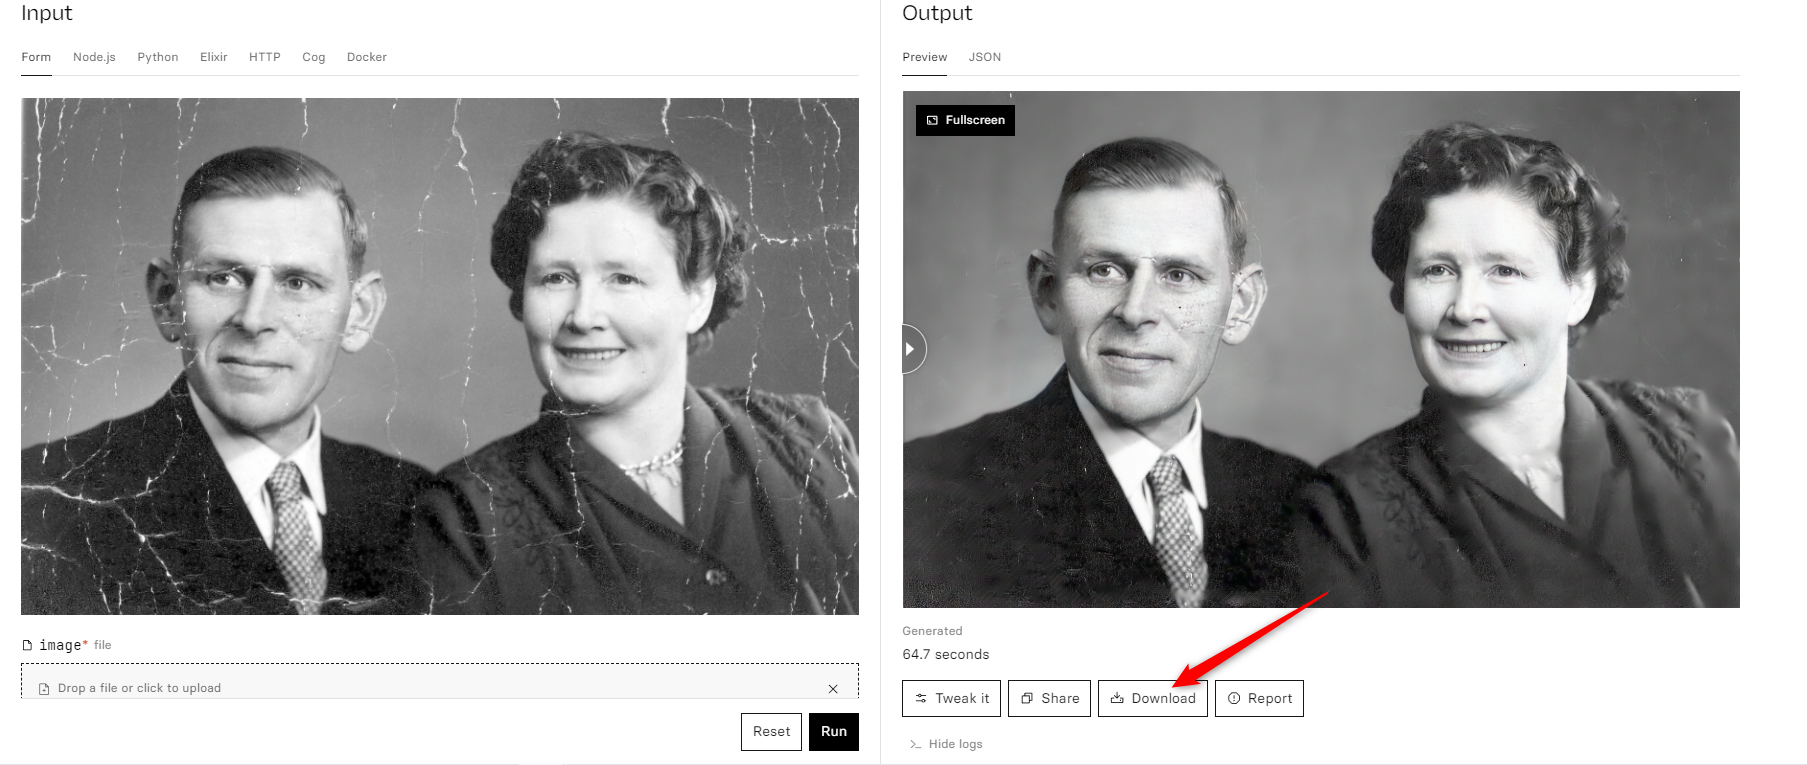
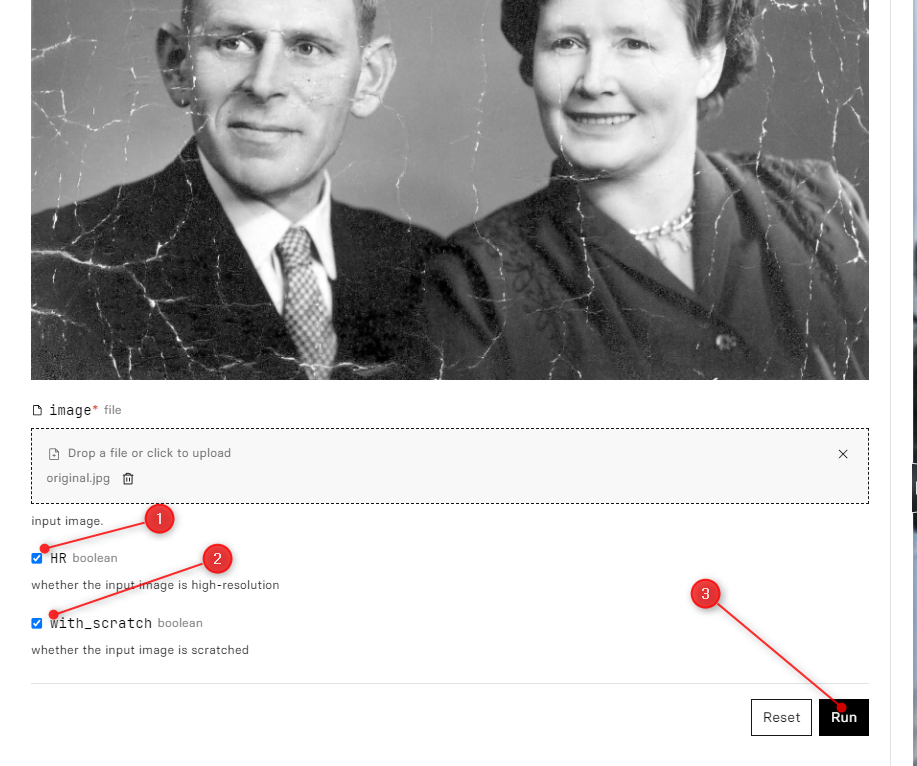
Check the relevant boxes if you have a high-resolution scan and if your photo has scratches.
It should take roughly 2 minutes to process the output.
The tool has a helpful slider to view the before and after.
Keep an eye on the Warm or Cold tag under the title of the AI model.
A cold tag means the model is booting, and your photo will take longer to process.
If the model is already warm, youll get the output sooner.
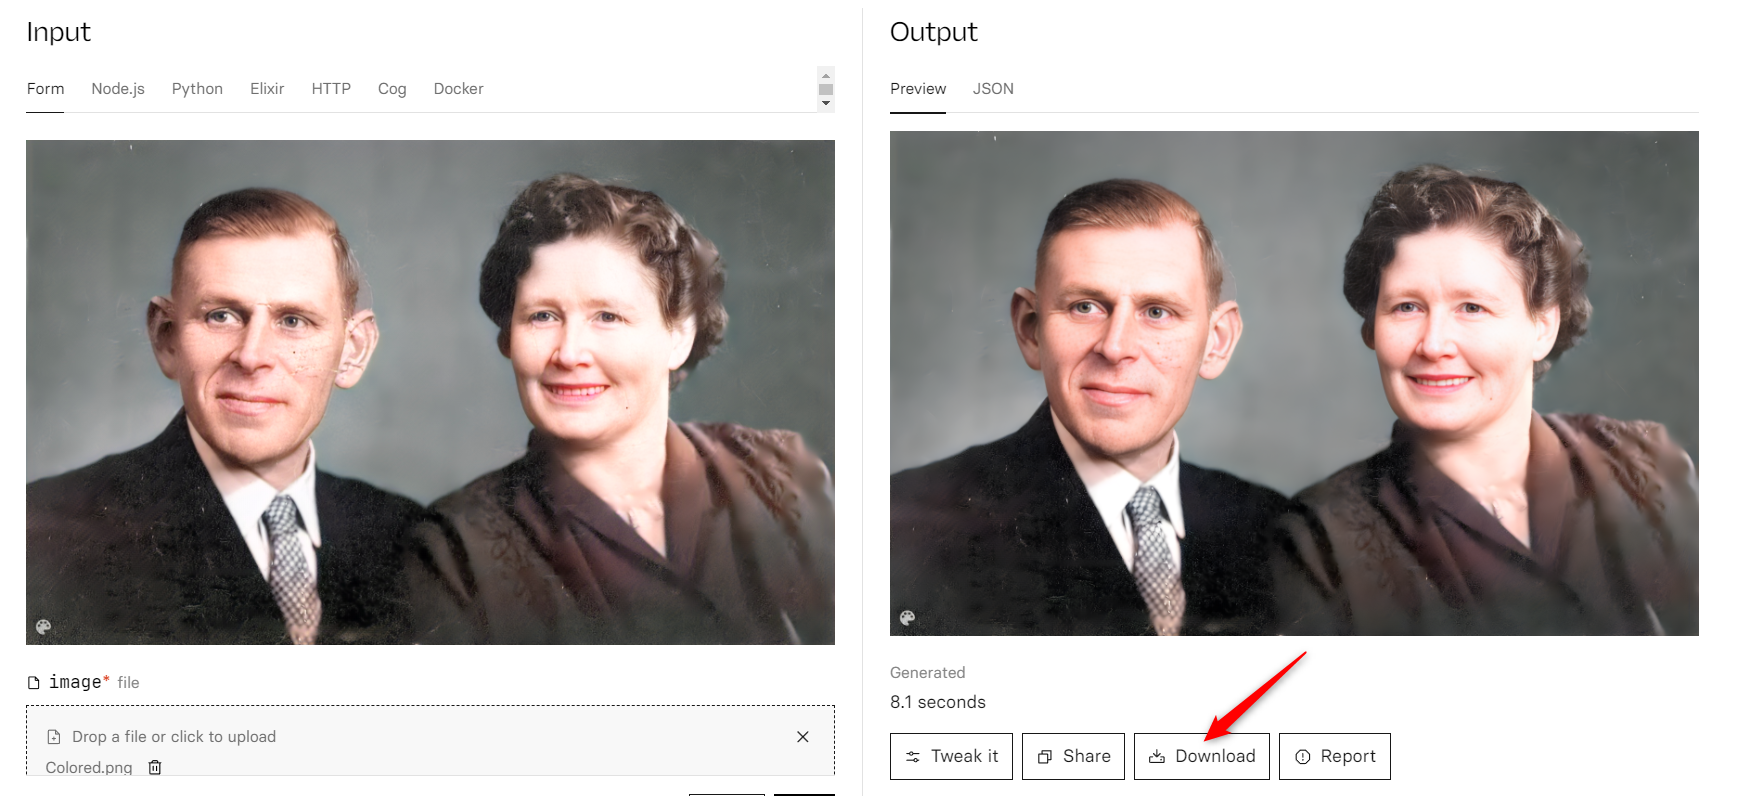
Click Download to get your restored image in full resolution.
Or click Tweak to execute the AI again with different controls.
you might skip this step if you want to keep the original colors.
Well be using the Deoldify AI.
I tested almost half a dozen other models on Replicate built for the same job.
But Deoldify consistently produced the best results.
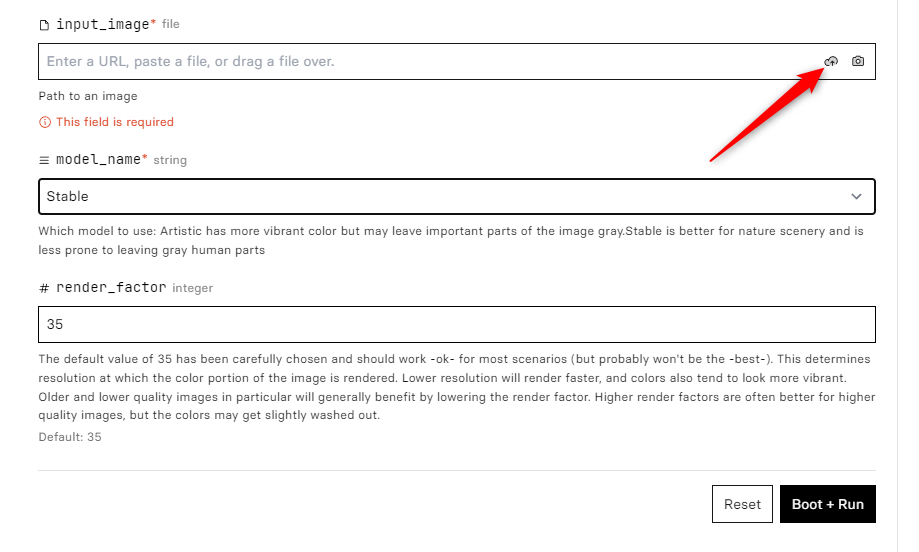
To run Deoldify on your restored image, searchdeoldifyin the Replicate search bar orvisit the Deoldify page directly.
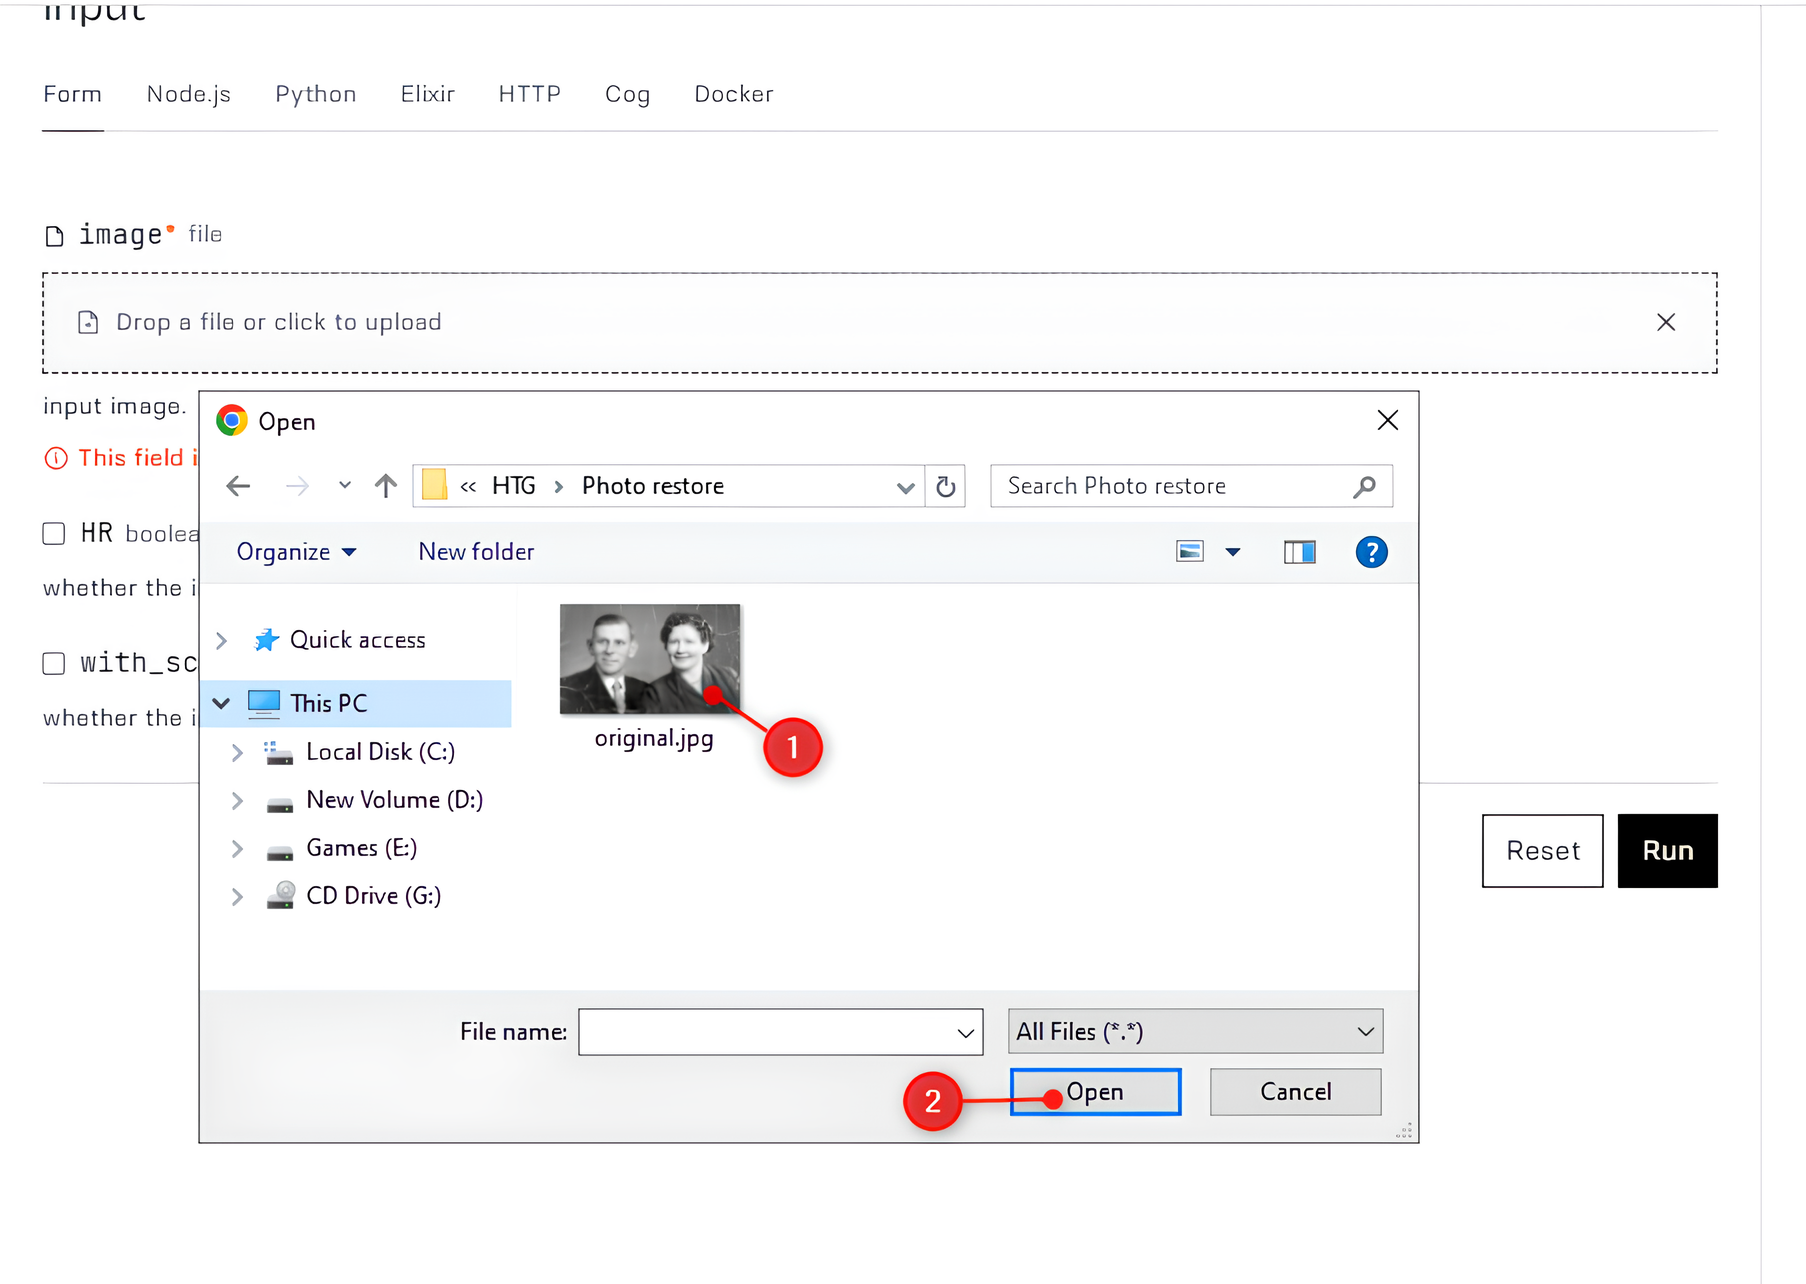
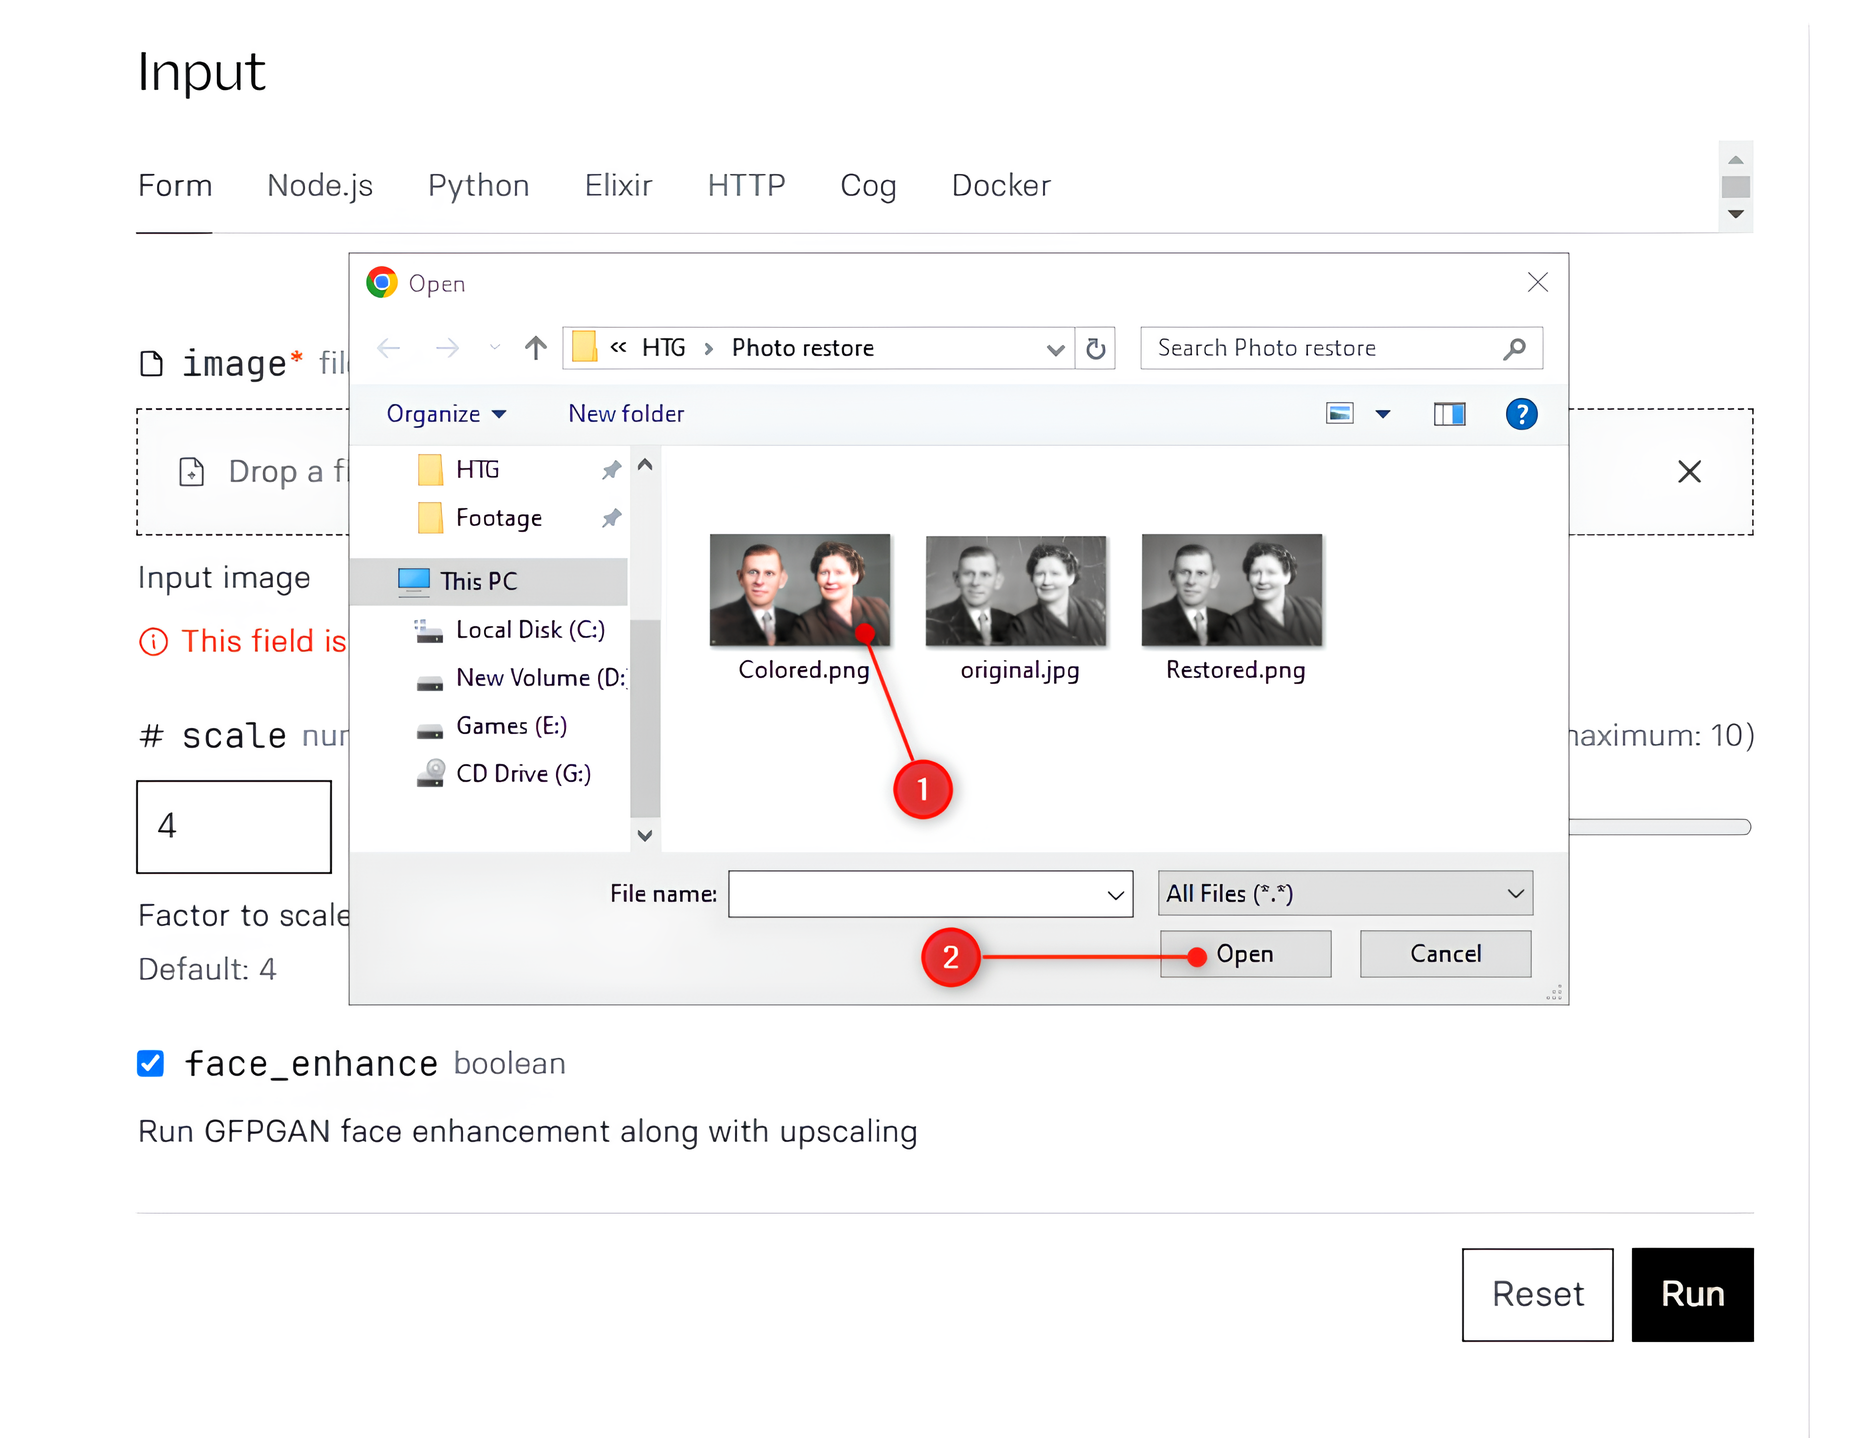
pick the upload icon and pick the restored file you just downloaded.
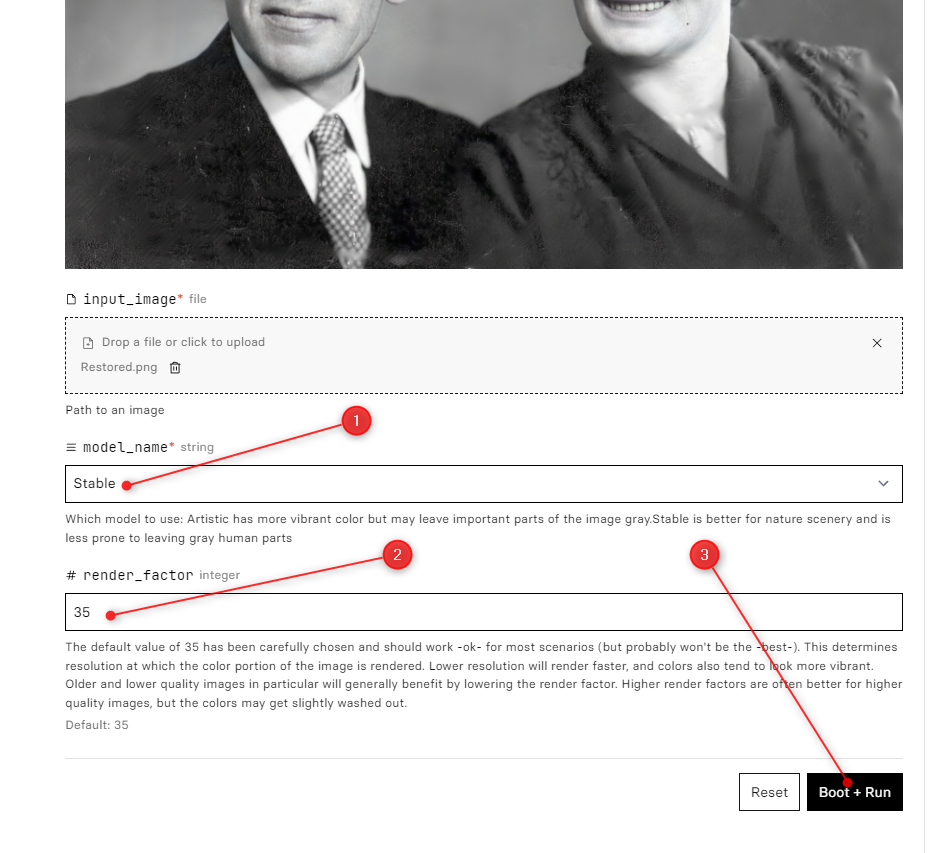
Deoldify has two options: the model name and the render factor.
you’re able to play around with both until you get the best result.
The default is the Artistic model and a render factor of 35 which should work in most scenarios.
I got a better result with Stable here.
Click Run once youve selected your preferred options.
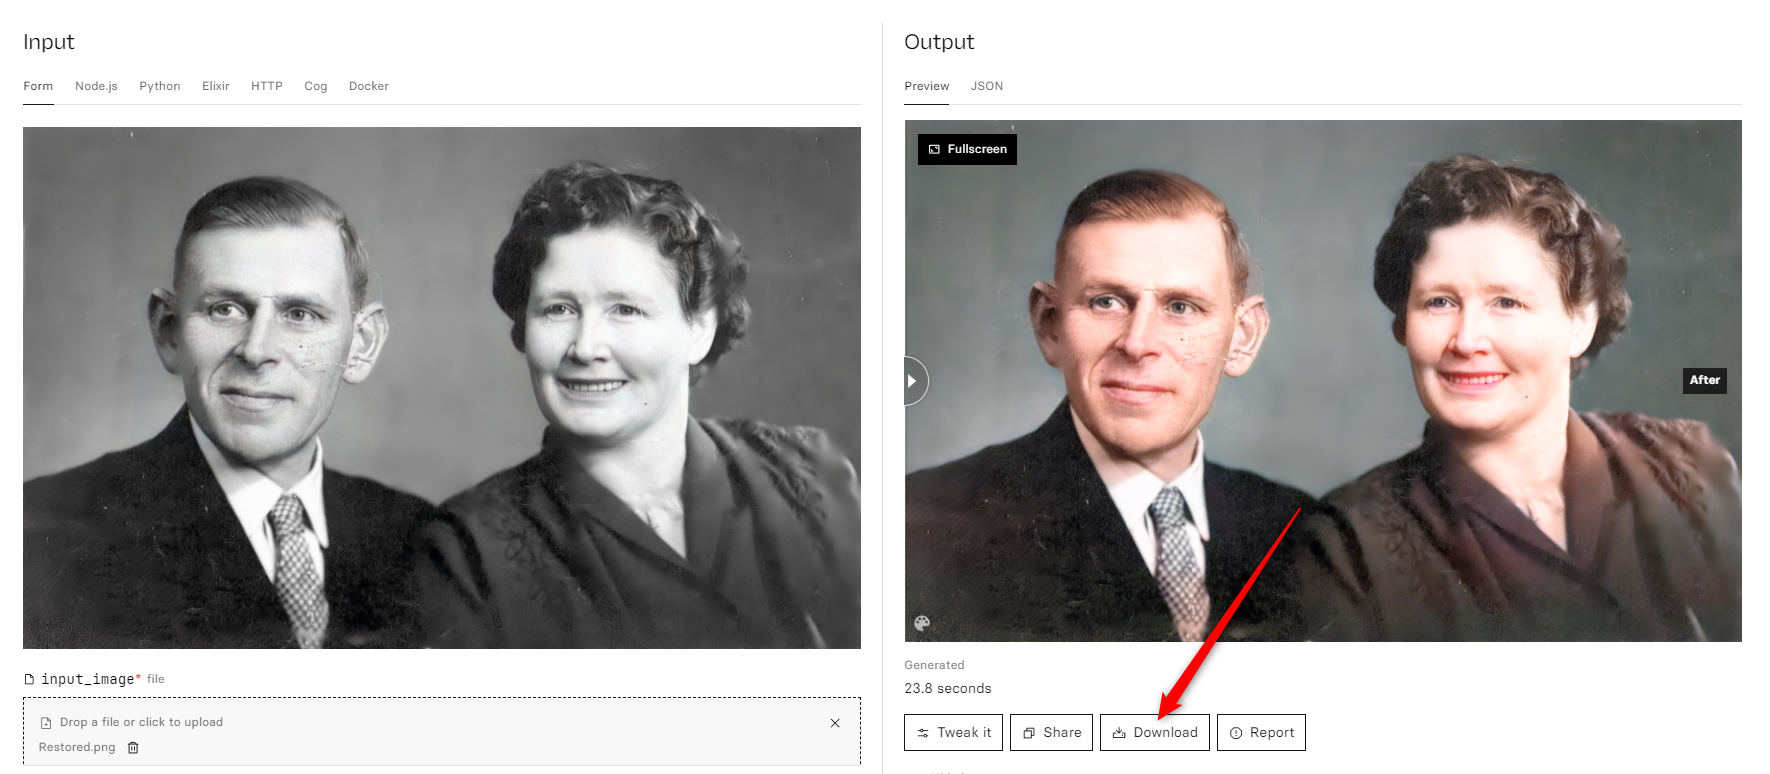
Wait for the processed output.
If youre happy with the result, click Download.
Or click Tweak it to re-process it with different tweaks.
To top off this restoration job, well upscale the processed photo.
Upscaling uses AI to add more pixels to an image, making it bigger, sharper, and clearer.
Think of thezoom and enhancetrope from CSI.
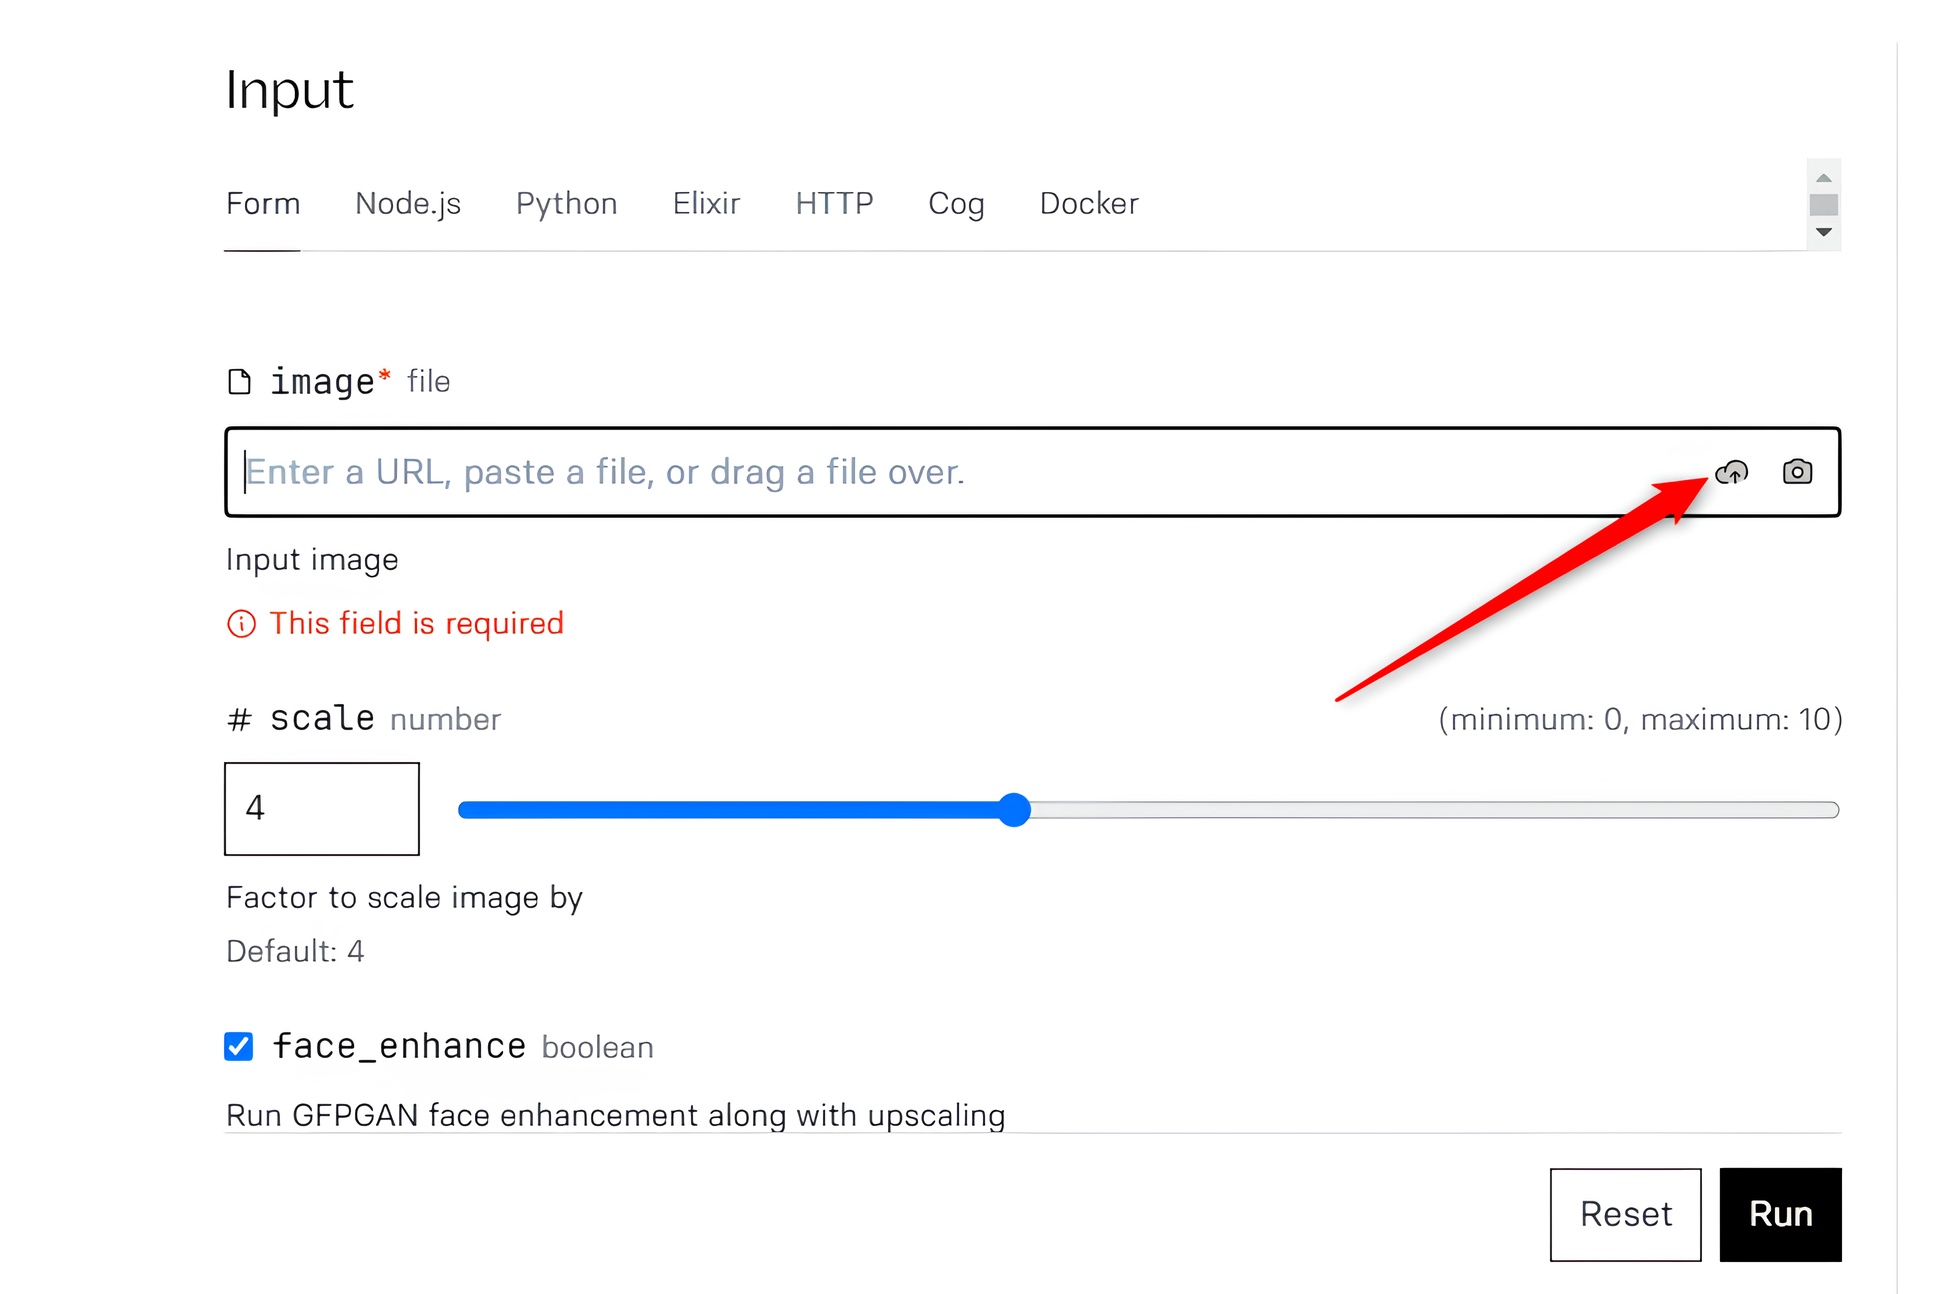
grab the upload button and drop the colorized image as input.
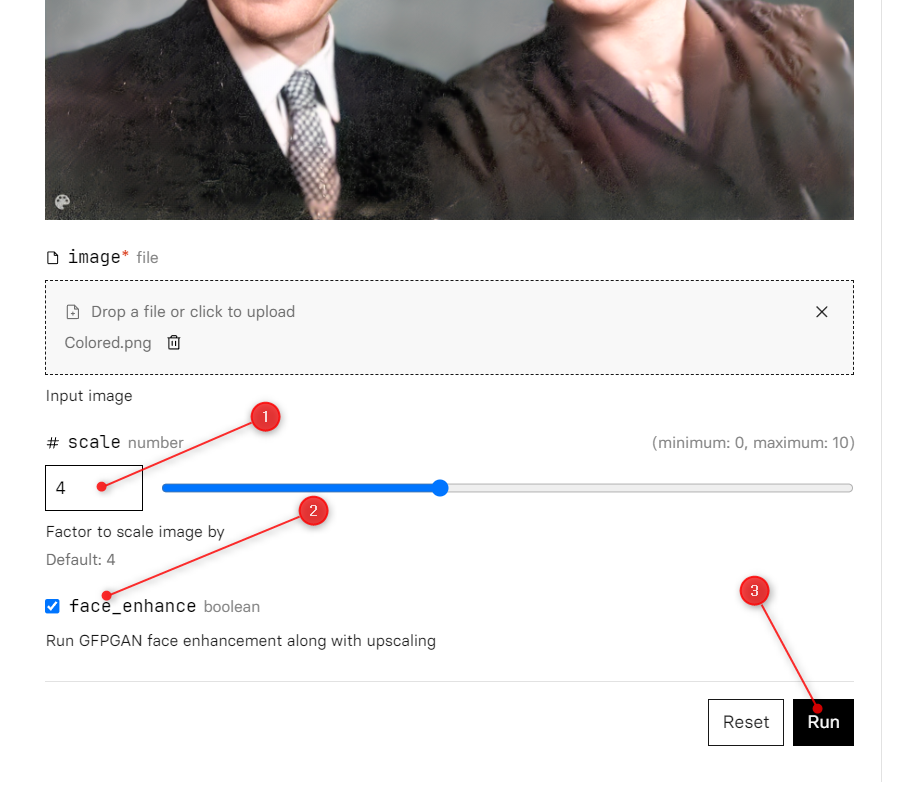
Next, we enter the scale.
The scale here refers to the image size.
Ive set it to 4, which will give me an image 4 times bigger than my input.
So for a 1080P image, Ill get4Kas output.
you’ve got the option to also select Face Enhance to clear up details on faces.
Finally, click Run.
When it’s done, the before and after previews look identical.
But when you download the processed file, it has a much higher resolution.
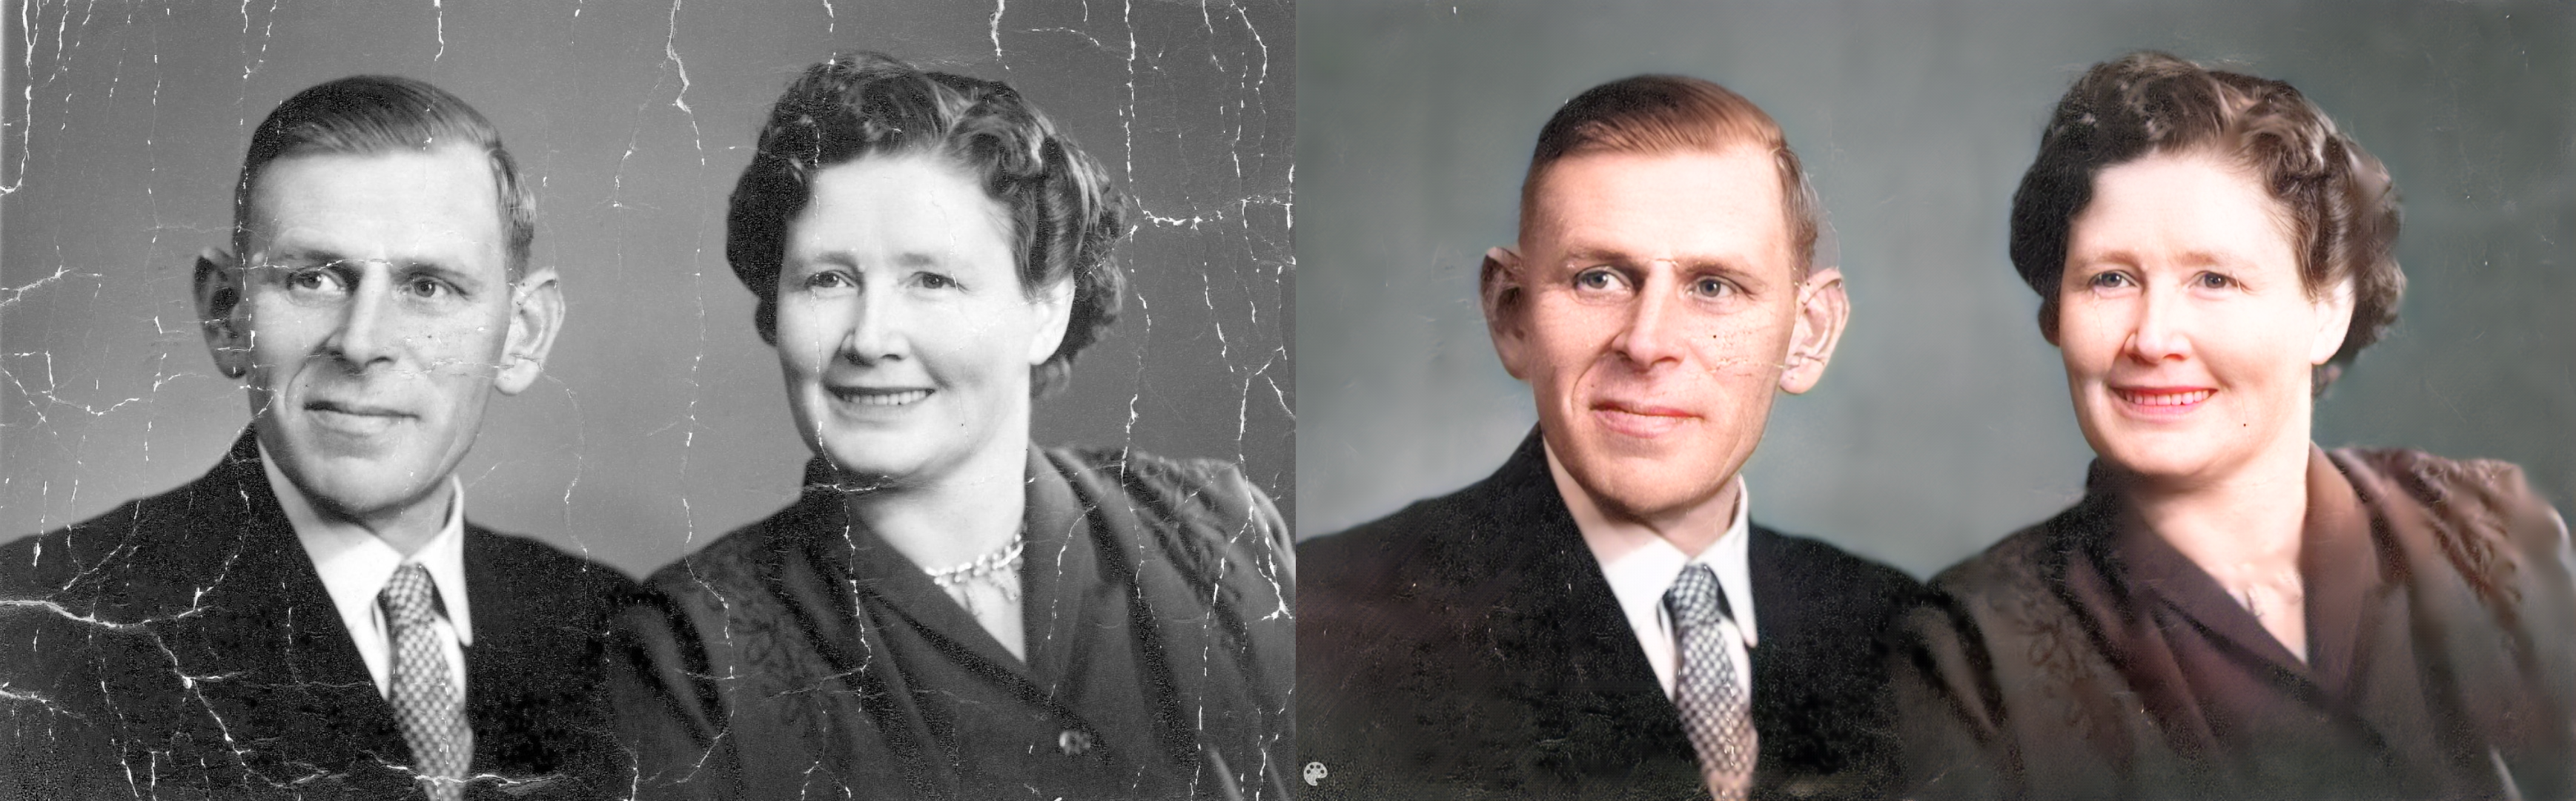
Now our restored photo is ready for your digital or print album.
Heres a side-by-side comparison.
Including these three AI models, Replicate has a wholecollection of image restoration models.
Theres also a catalog dedicated to imageupscaling and refining models.
Googles Maxim AI caught my eye in particular.
It can deblur, denoise, derain, and dehaze photos with one click.
The results are simply astonishing.
It works wonders on Polaroids or photos taken with low-resdumbphonecameras.
you’re free to retouch those old low-light photos with Googles AI magic too.
But you may have to fiddle with the parameters to get the perfect output.
I also suggest playing around with other restoration models freely available on Replicate.
You could modify my workflow or create your own.
