Volumio makes this dream a reality, offering a seamless blend of power, flexibility, and affordability.
you’ve got the option to finally get your music out of subscription cloud services.
What is Volumio?
Volumio is a free, open-source music player designed to unify all your music in one convenient place.
Their lineup includes official streaming boxes like the Volumio Motivo, Primo, and Rivo, among others.
For more information on the Volumio project, visit theirofficial website.
Why Run Volumio on Raspberry Pi?
Some Volumio streaming boxes boast impressive hardware but come with a hefty price tag of up to USD 1,099.
First, download and set up the latest version of theRaspberry Pi Imager tool.
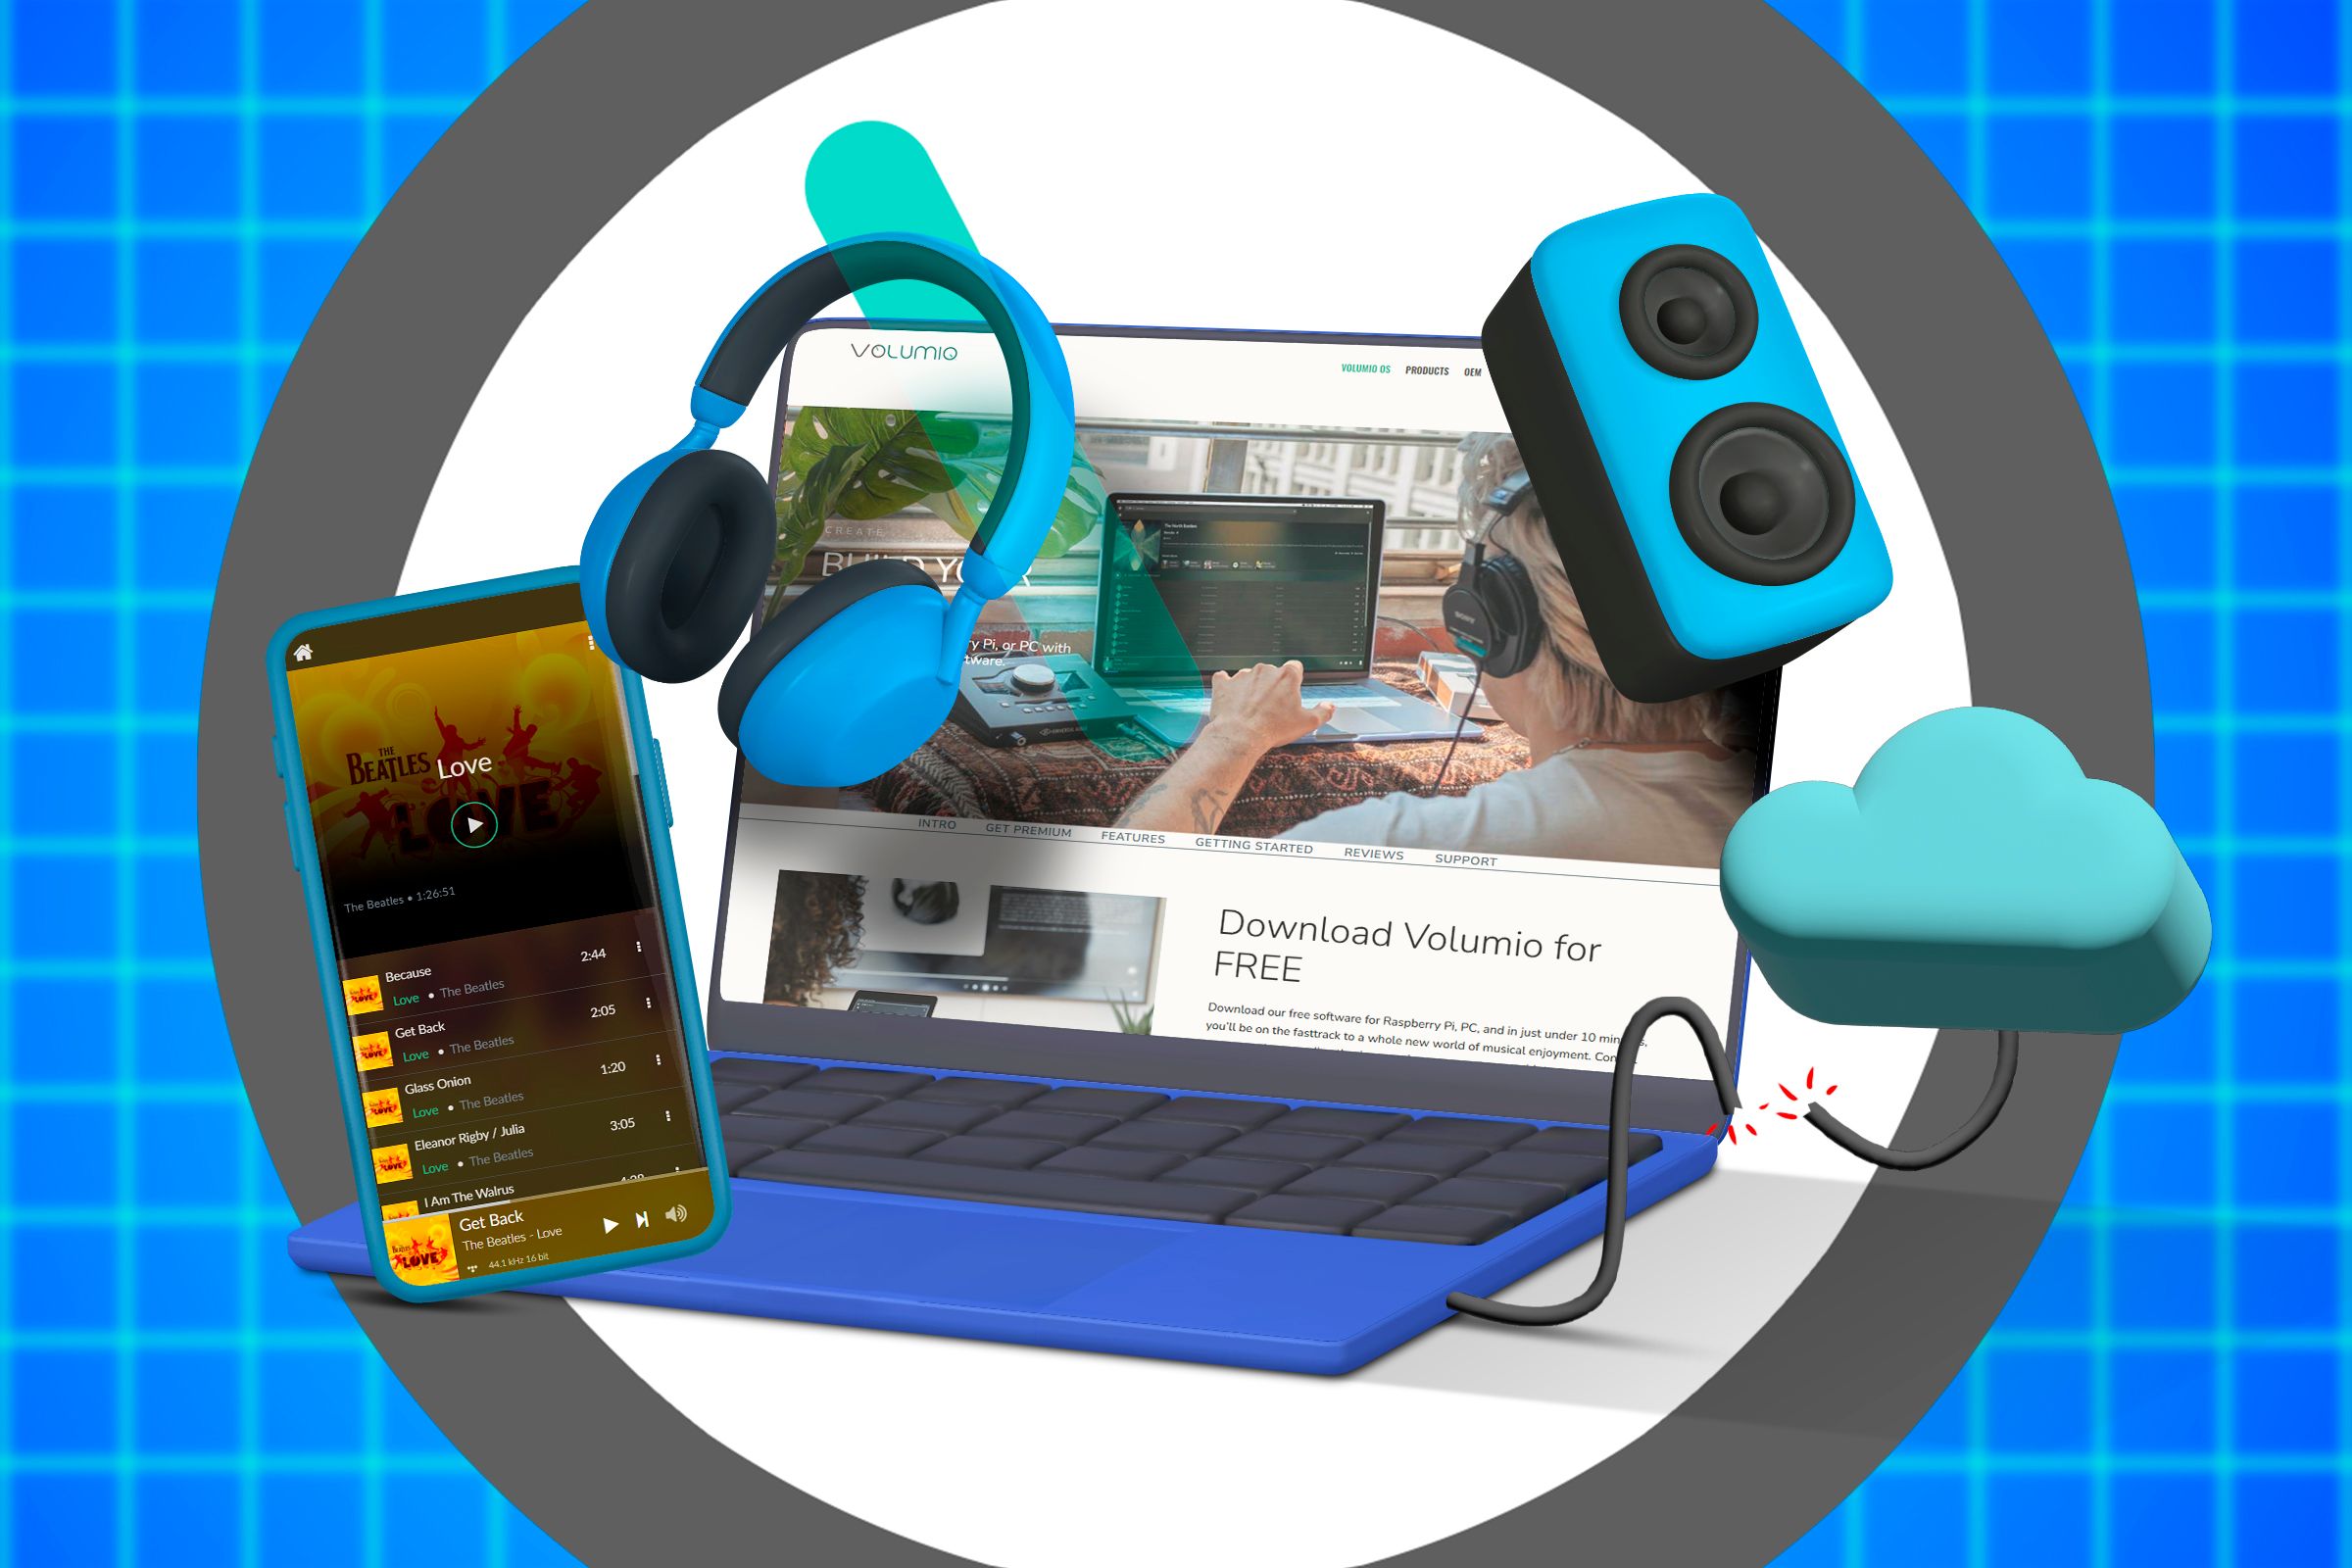
Lucas Gouveia / How-To Geek | Oleh Svetiukha /Shutterstock
Once installed, insert the SD card and SD card reader and launch the tool.
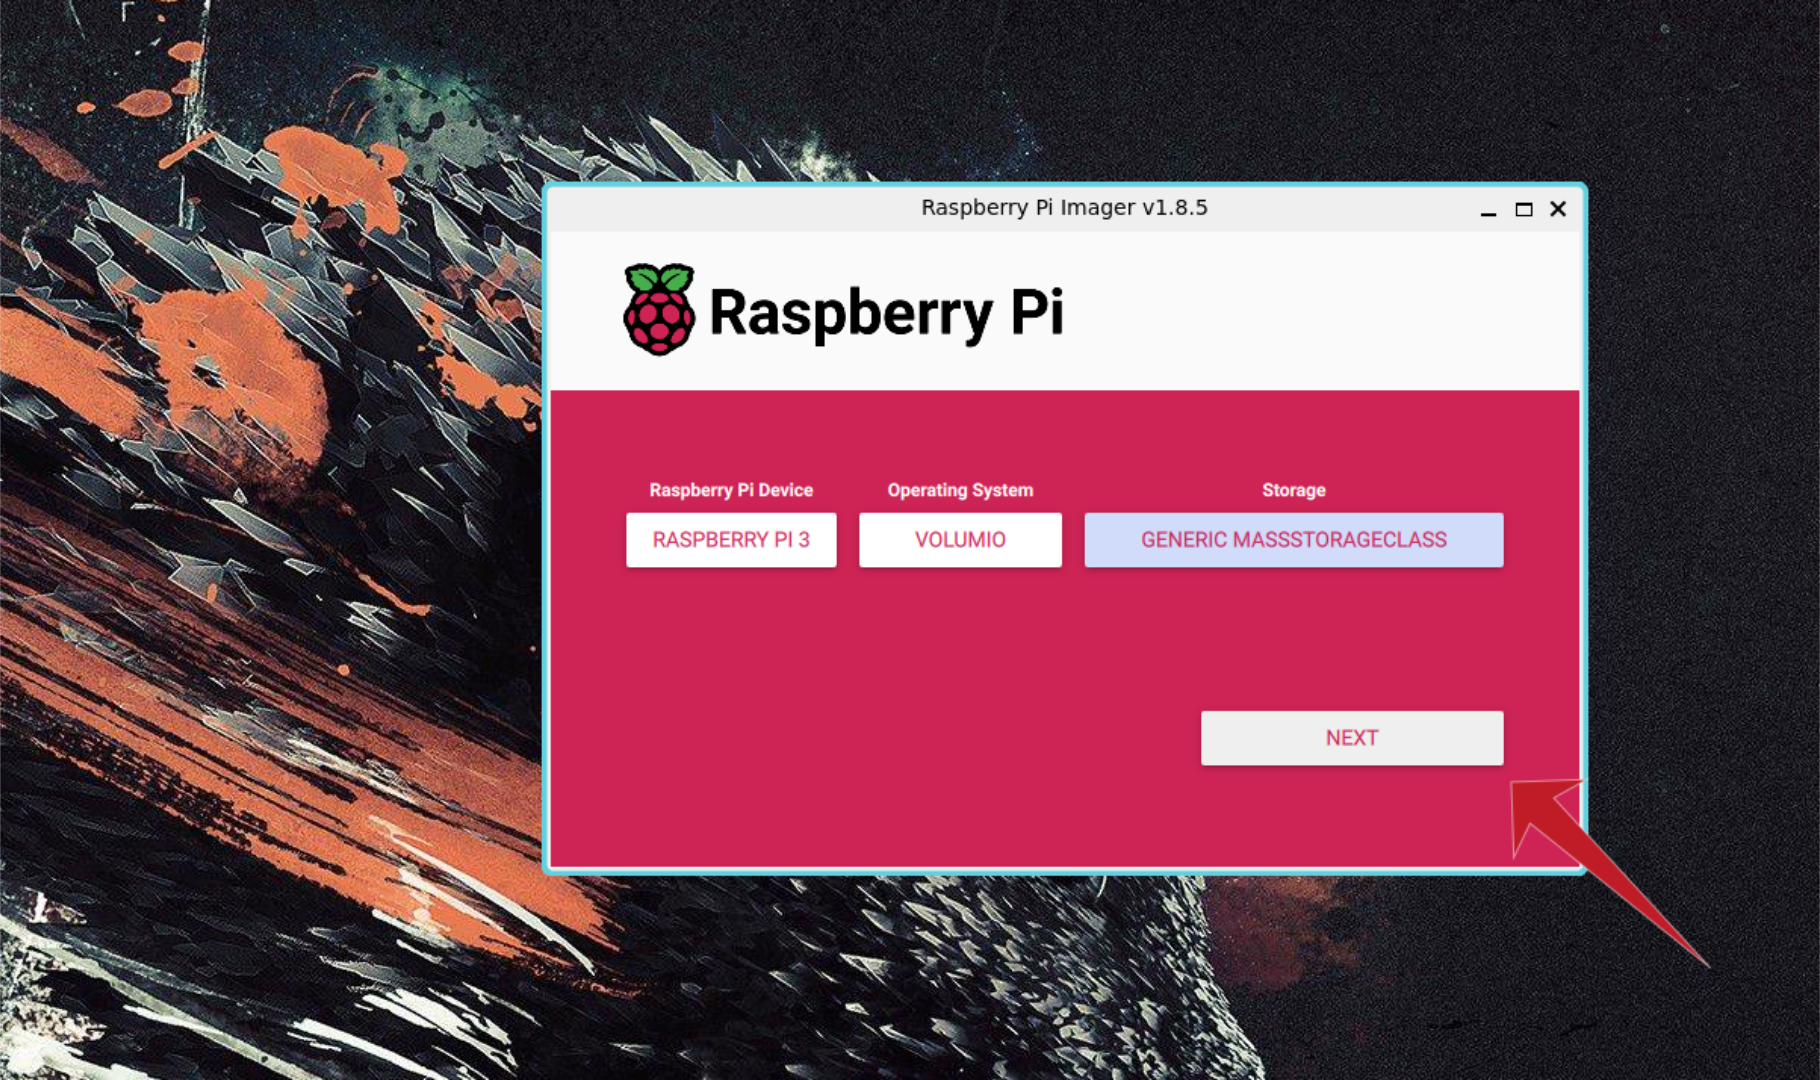
In the RPi Imager, navigate to the “Raspberry Pi gear” section and select it.
Volumio officially supports the Raspberry Pi 2, 3, 4, and 5 models.
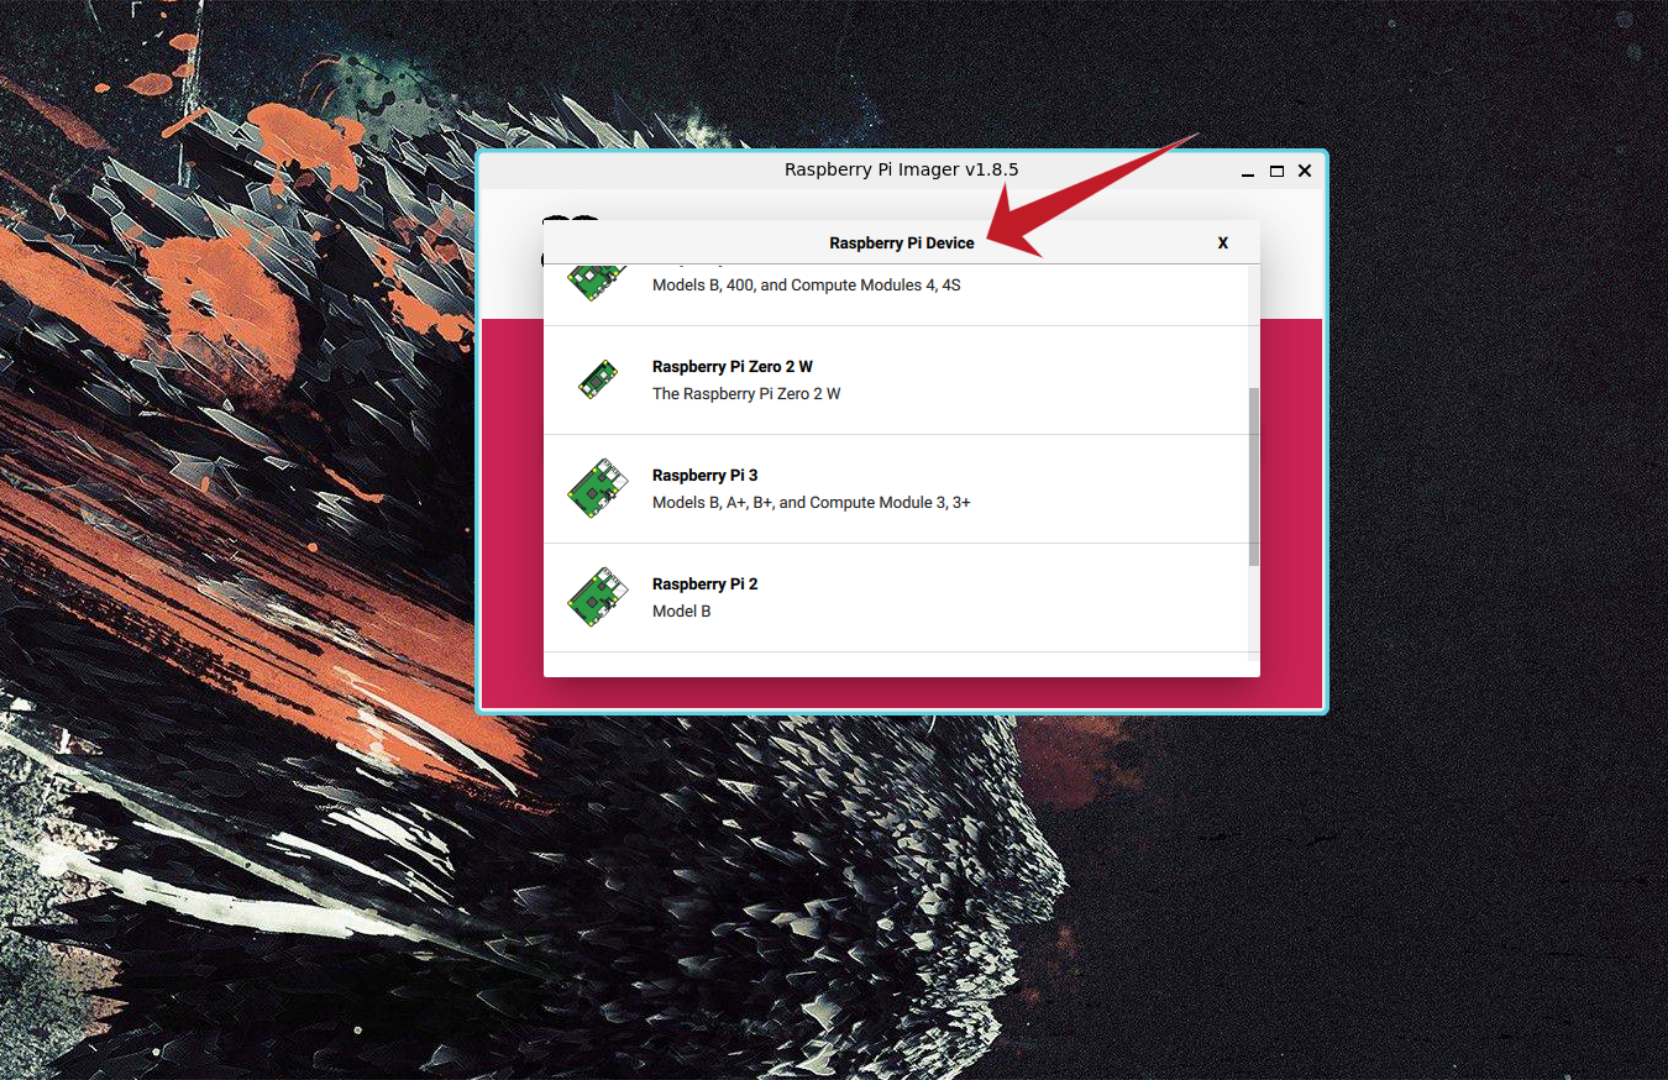
Choose your rig from the menu to proceed.
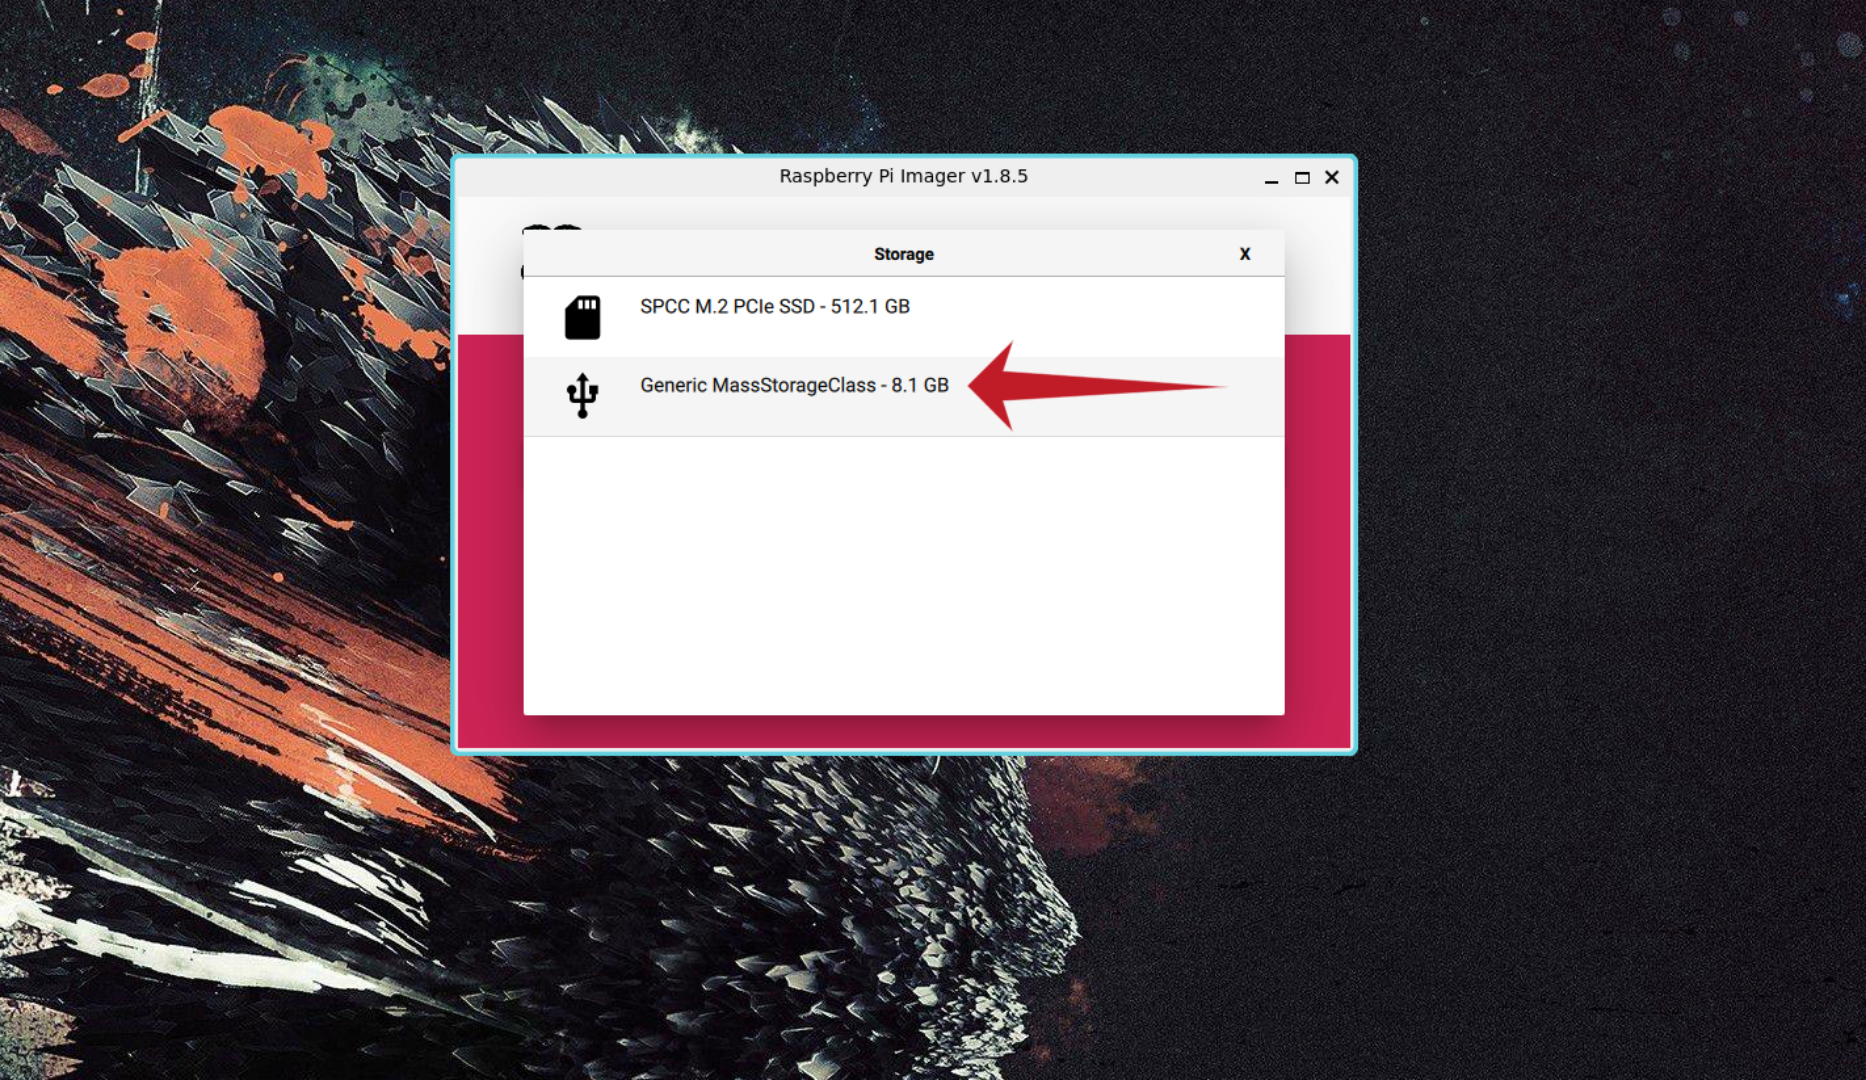
Then, poke the “Choose Storage” button and select your SD card.
Click “Next” to create your Volumio SD card for the Raspberry Pi.
When you click “Next,” the RPi Imager tool will prompt you to apply OS customization options.
If you prefer to use the default controls, select “No.”
kindly be patient, as this process may take some time to complete.
If Ethernet is unavailable, an additional step is required to access your Volumio box initially.
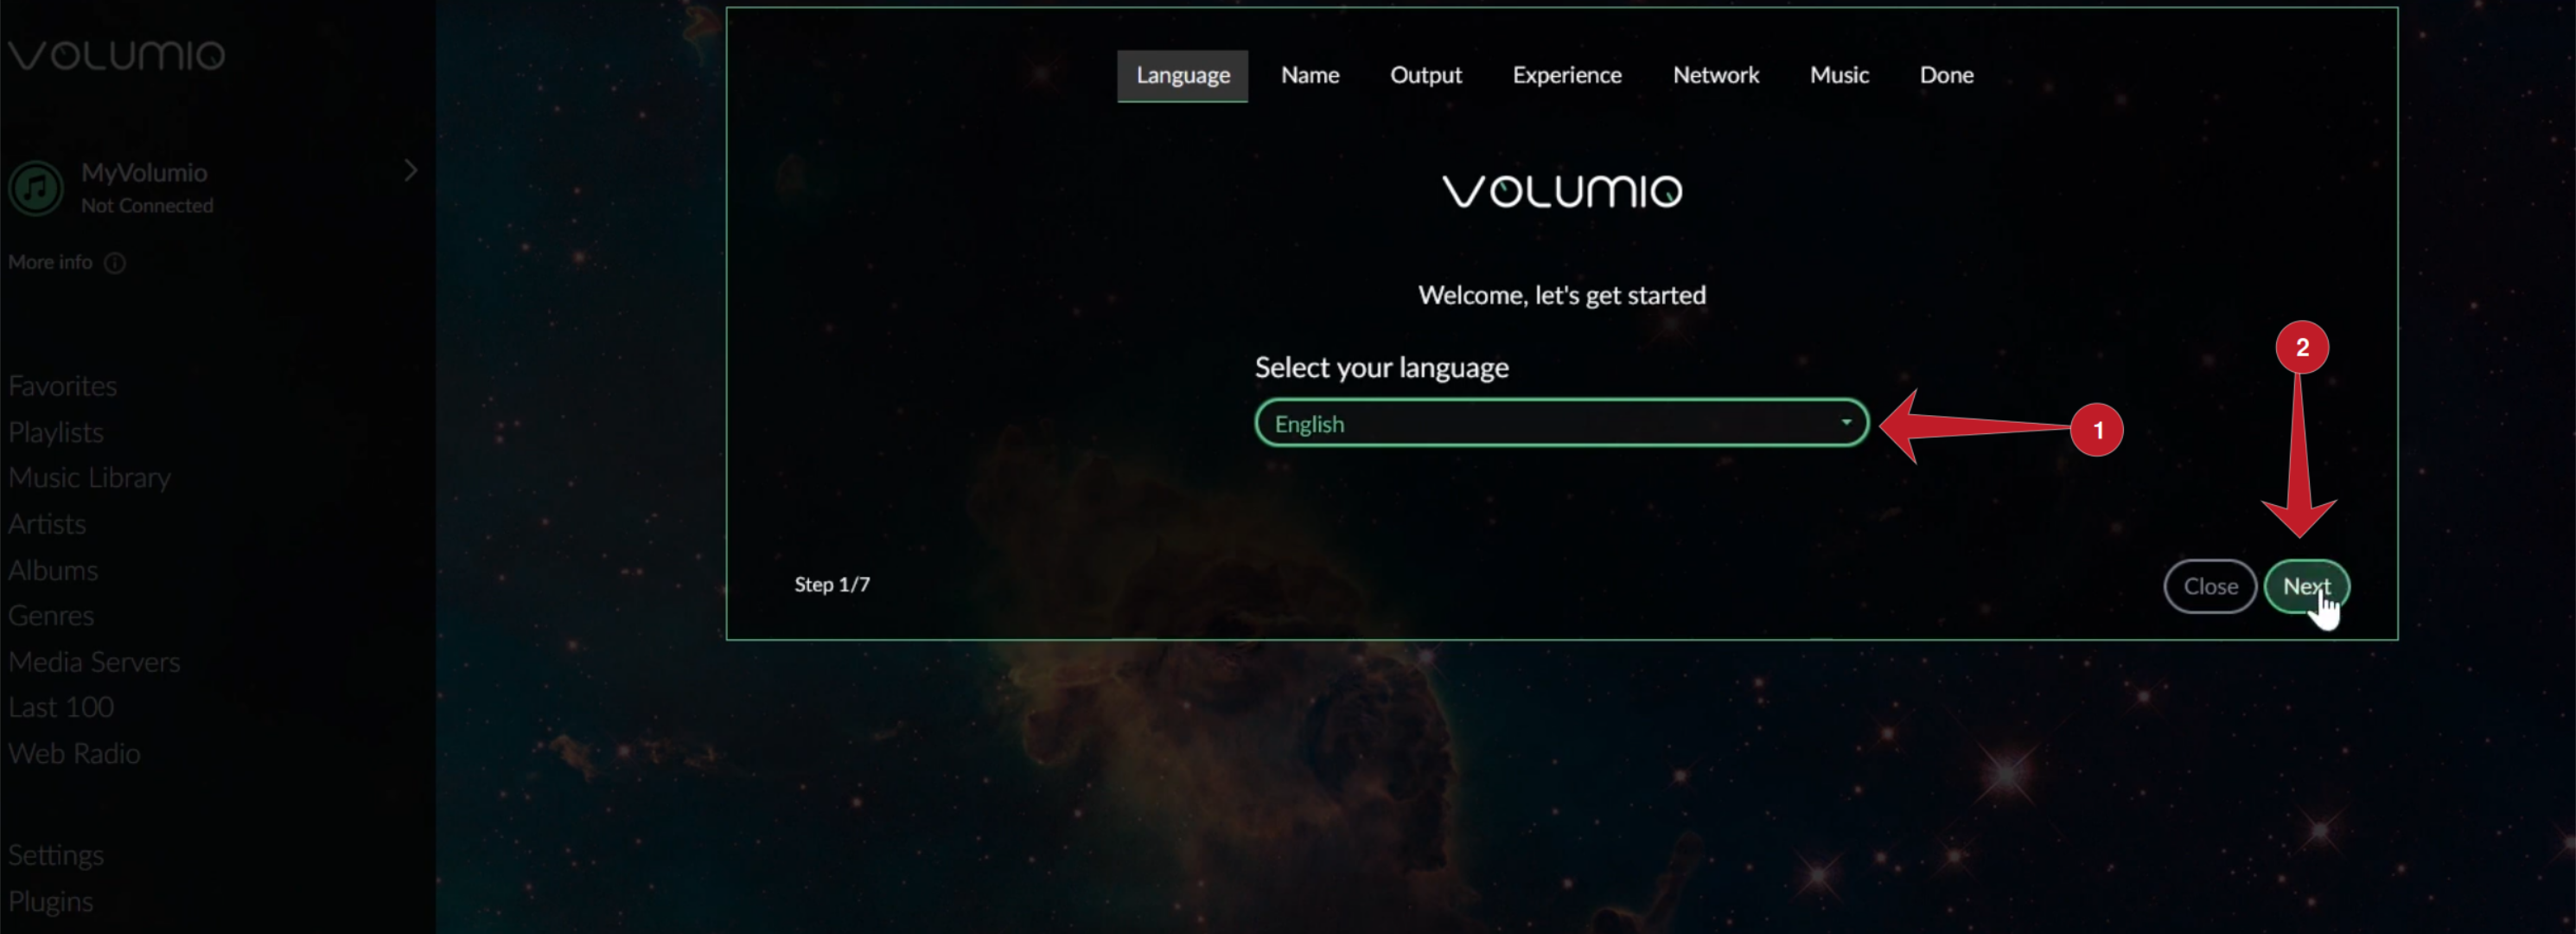
To begin configuration, connect to this online grid using the password “volumio2”.
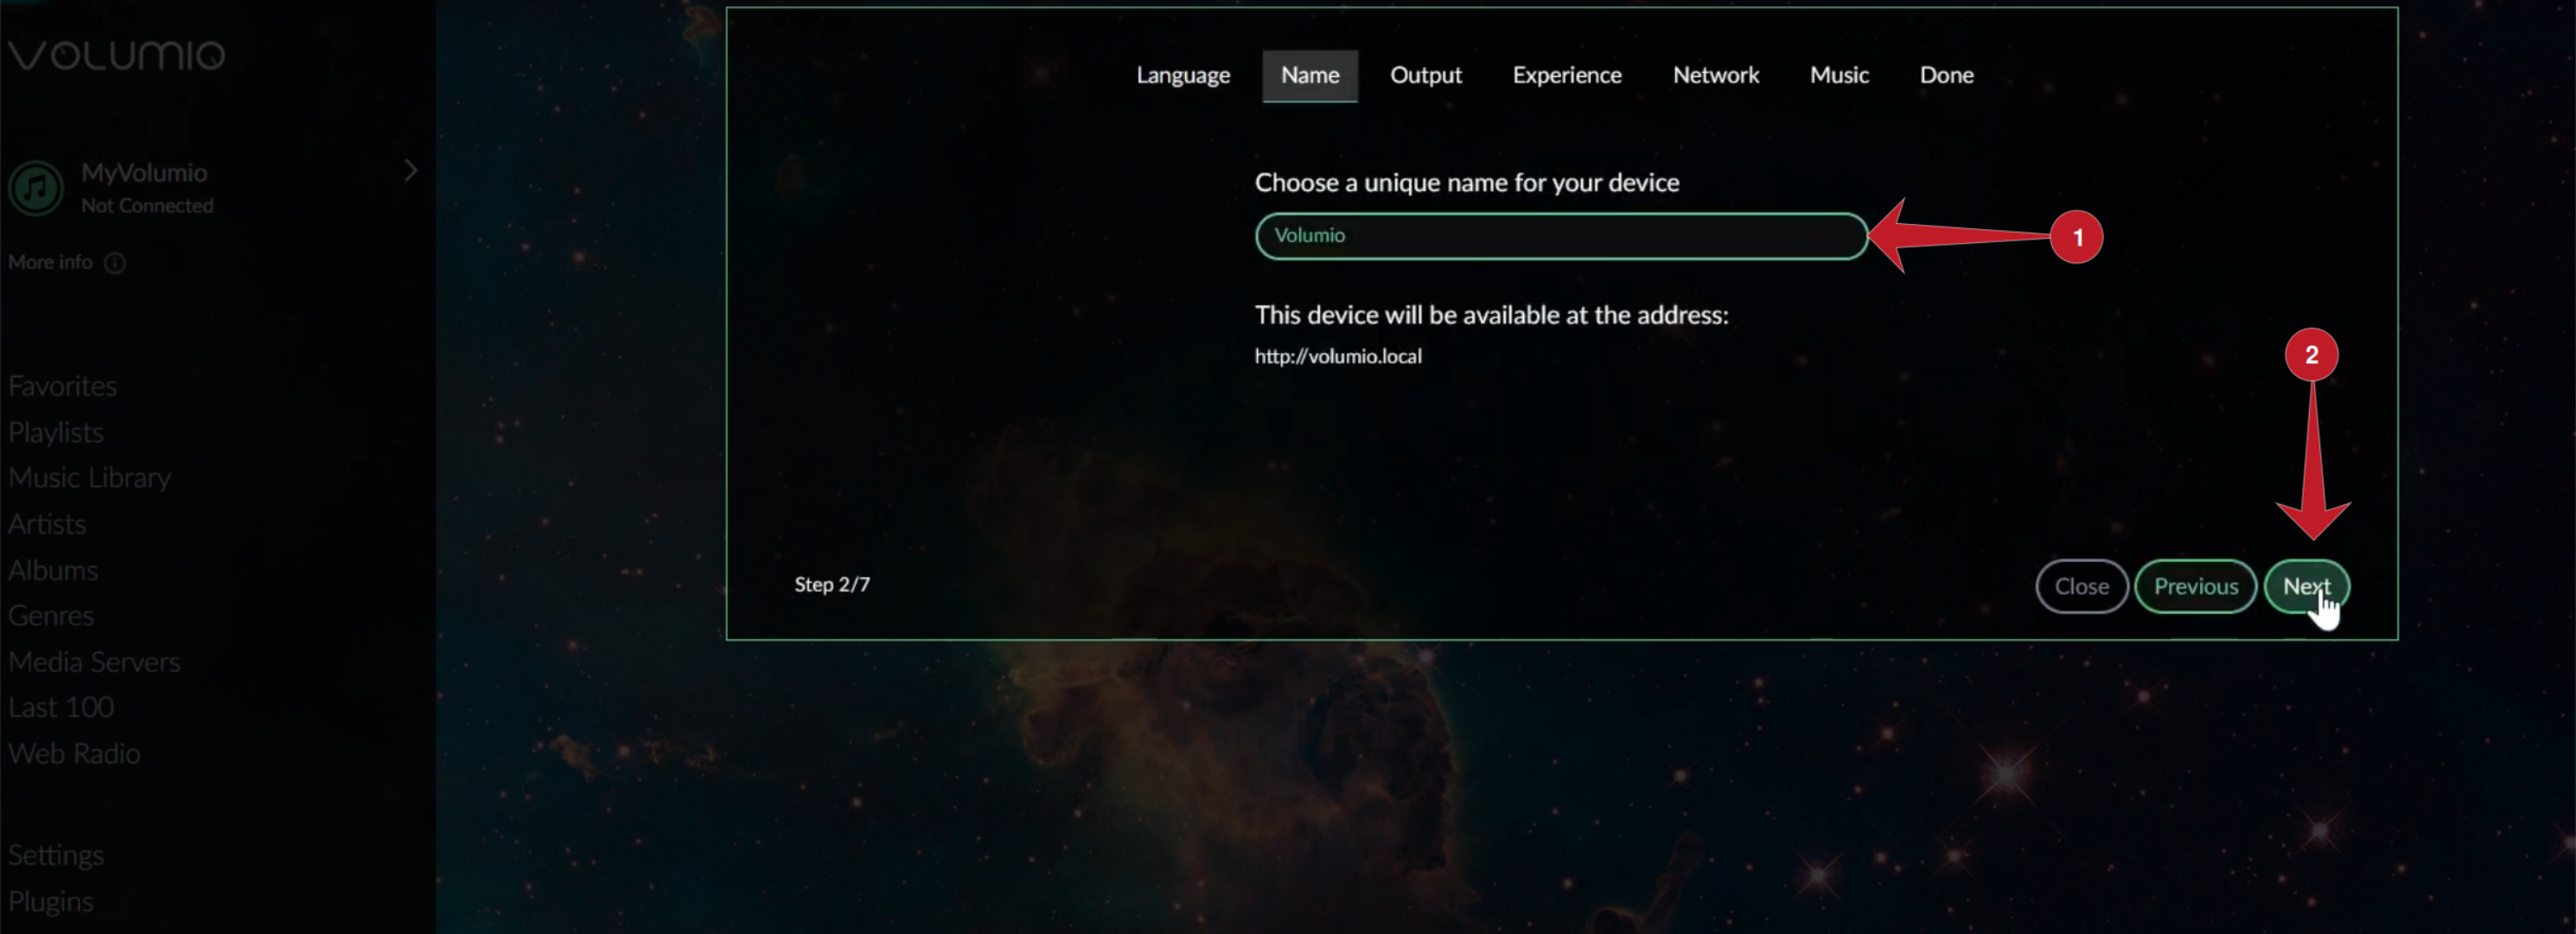
nudge the “Next” button to continue.
You’ll now need to choose a name for your unit.
The default is “Volumio”.
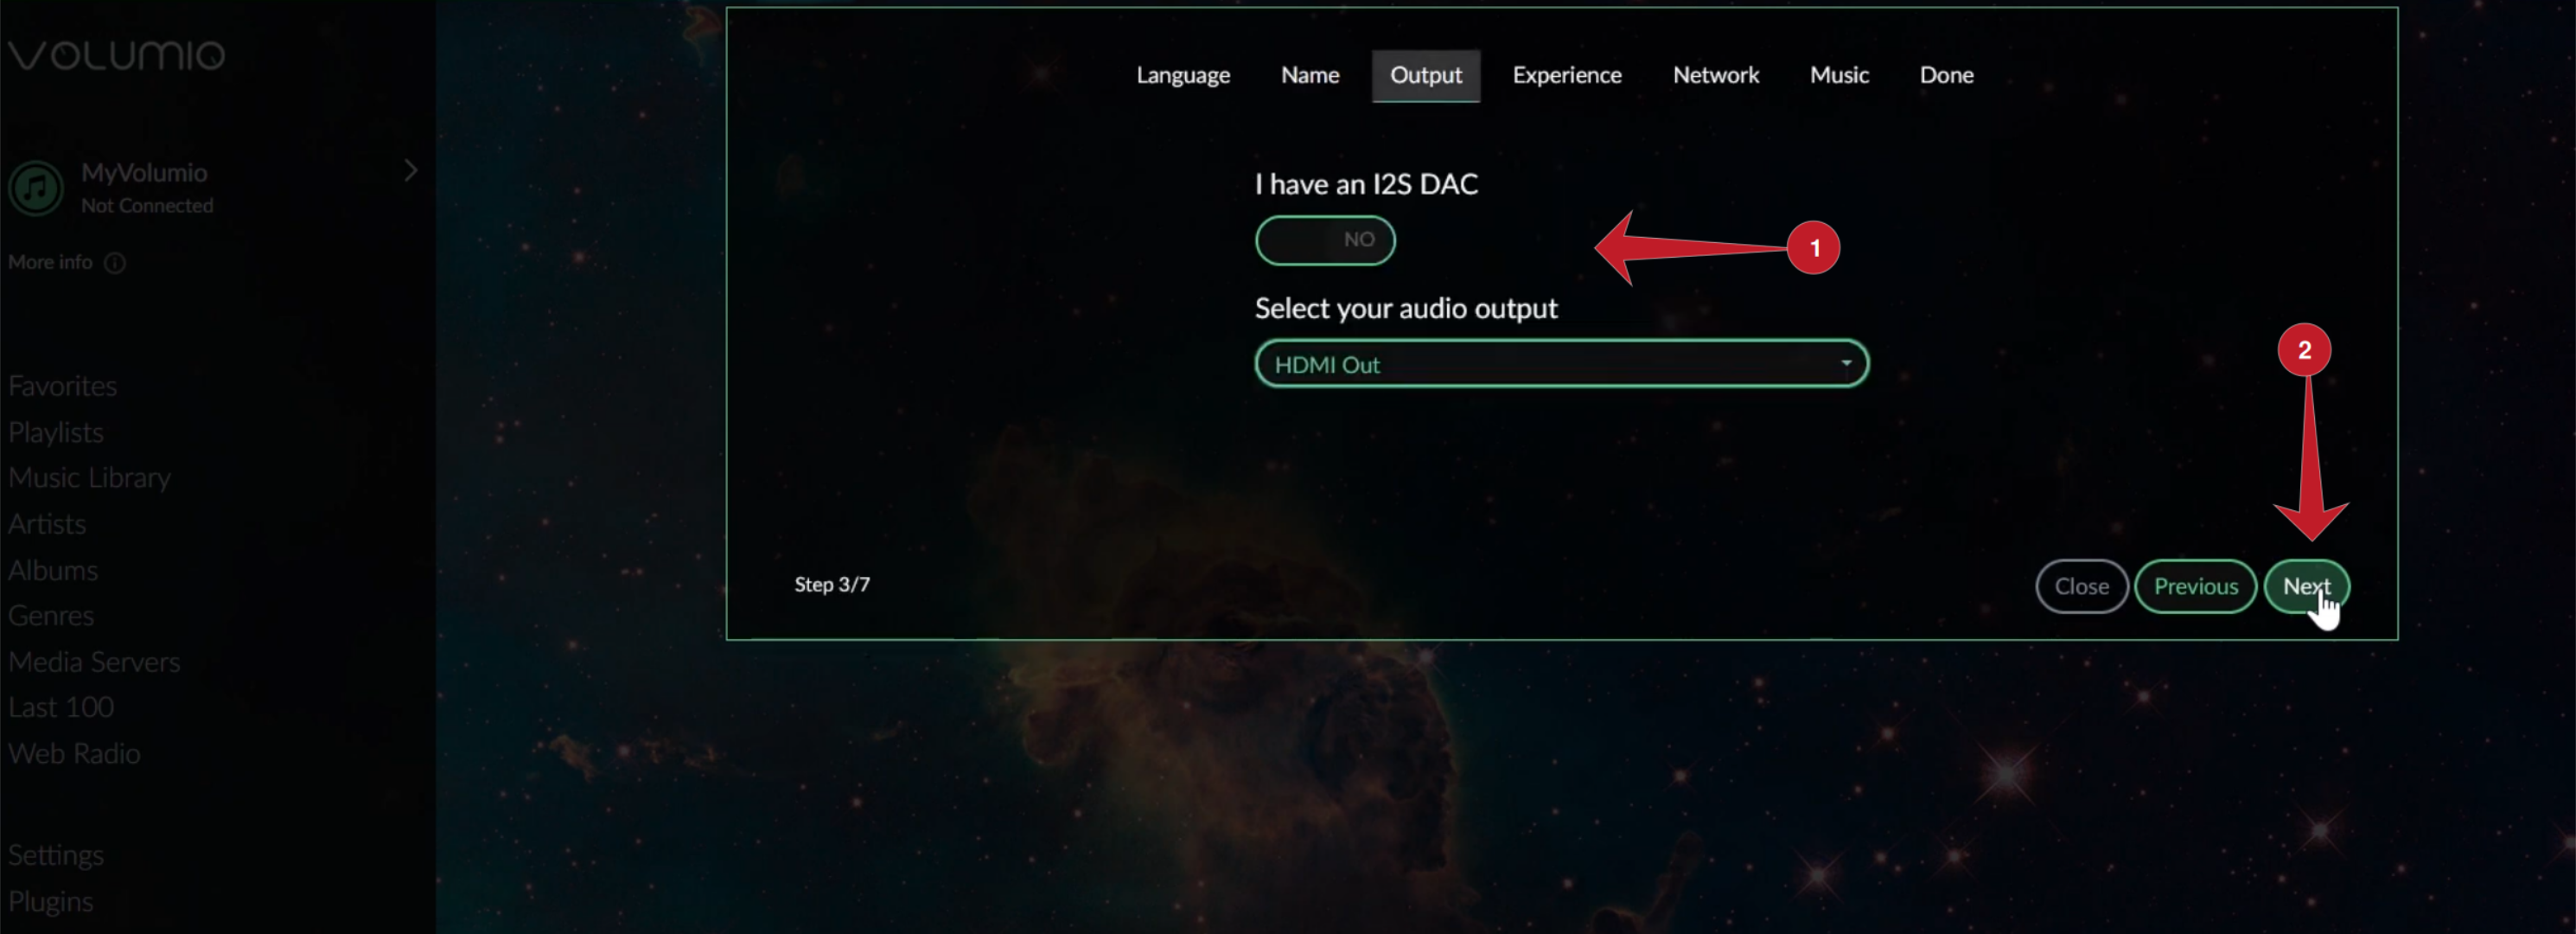
After choosing a name, Volumio will ask if you have an I2S DAC.
If you’re not sure what that is, you don’t need to check the box.
Next, select your audio output.
This depends on how you’re delivering sound from Volumio to your speaker system.
Choose the option that best suits your needs, then click “Next”.
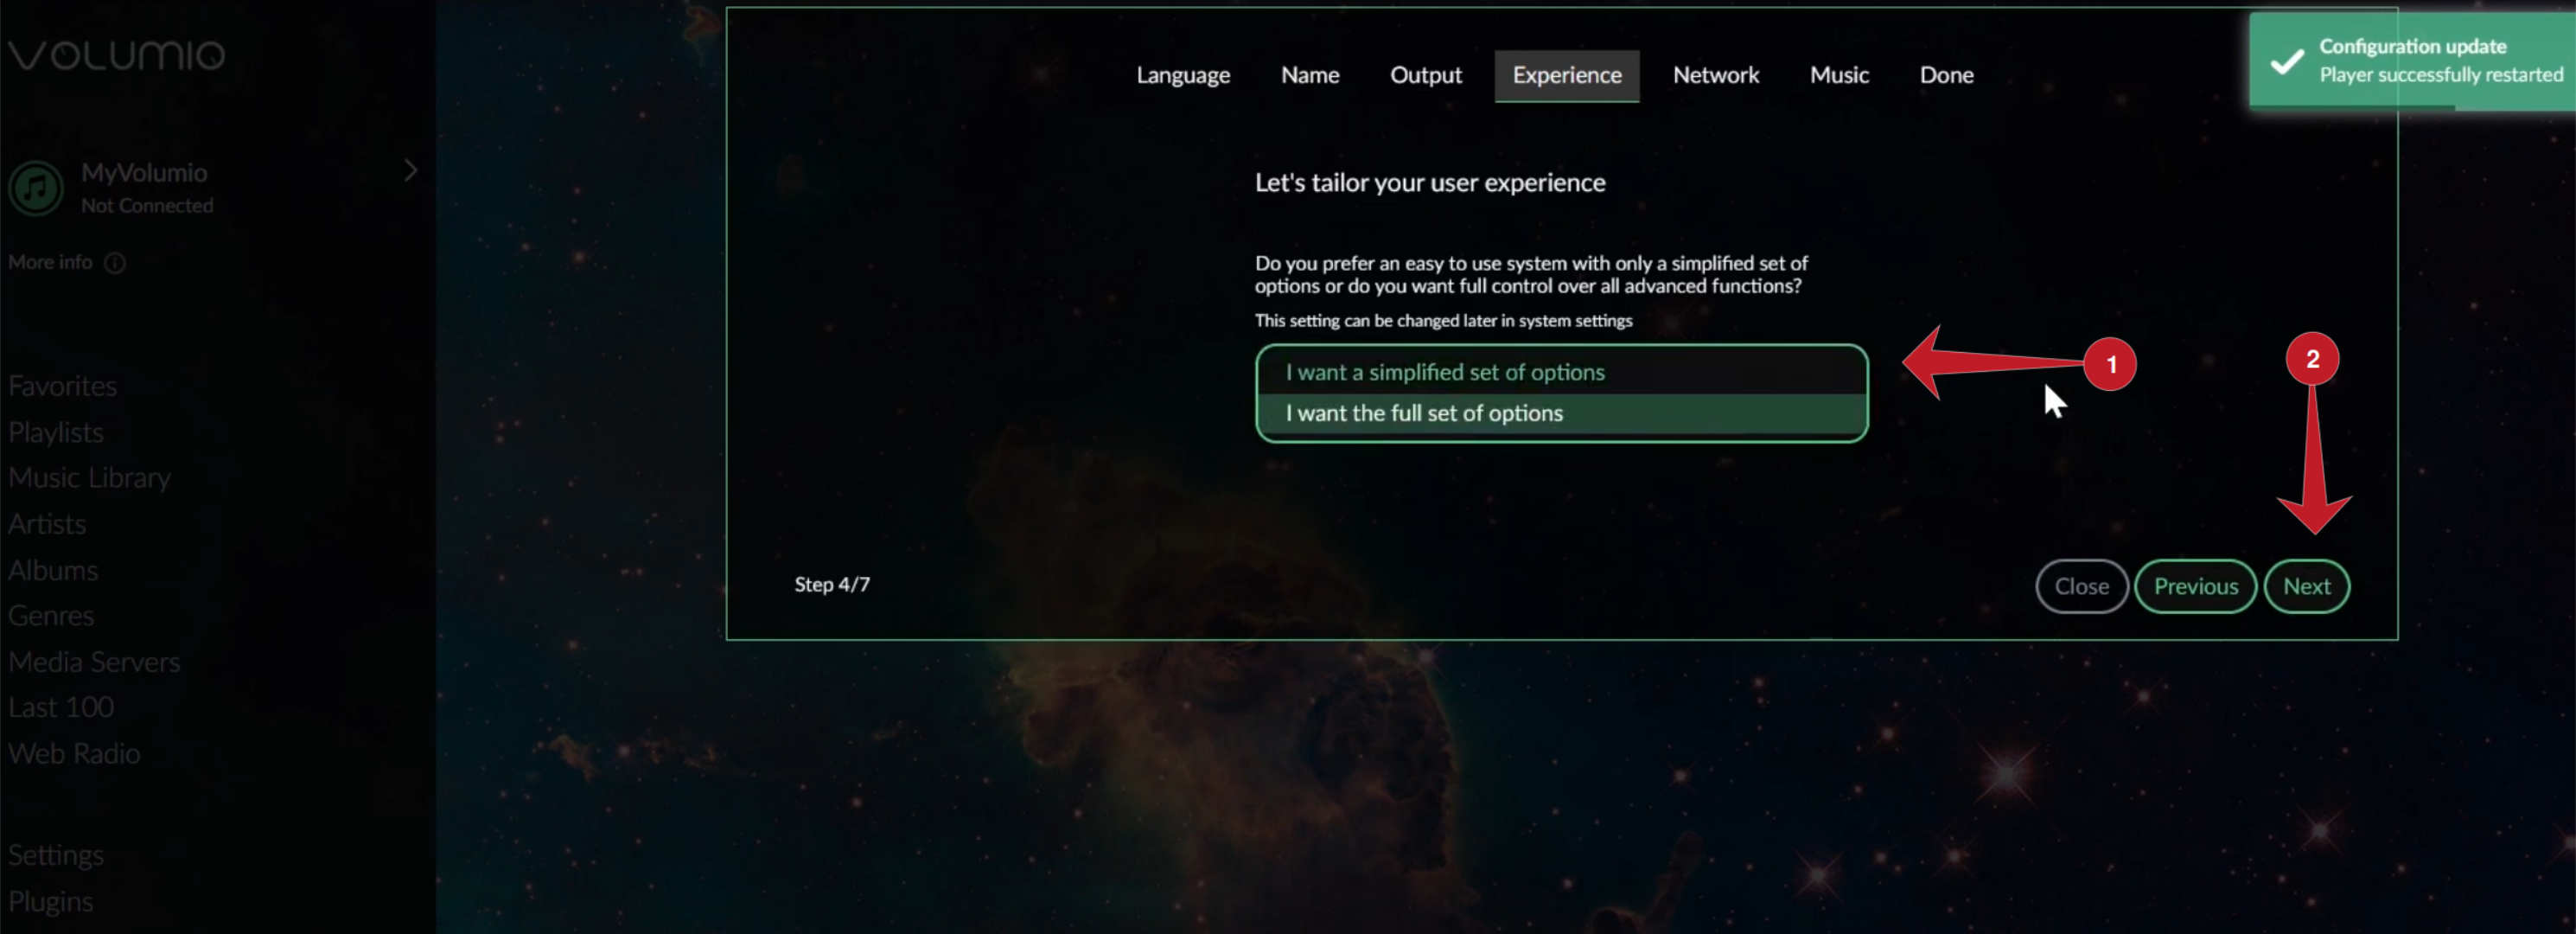
Once you’ve configured your sound options, Volumio will want to tailor your user experience.
However, if you’re an advanced user, feel free to select this option.
Click “Next” when you’ve made your selection to continue.
Next, if you choose to use Wi-Fi, you better configure the wireless connection that Volumio will use.
Select your data pipe from the menu, and hit the “Next” button to continue.
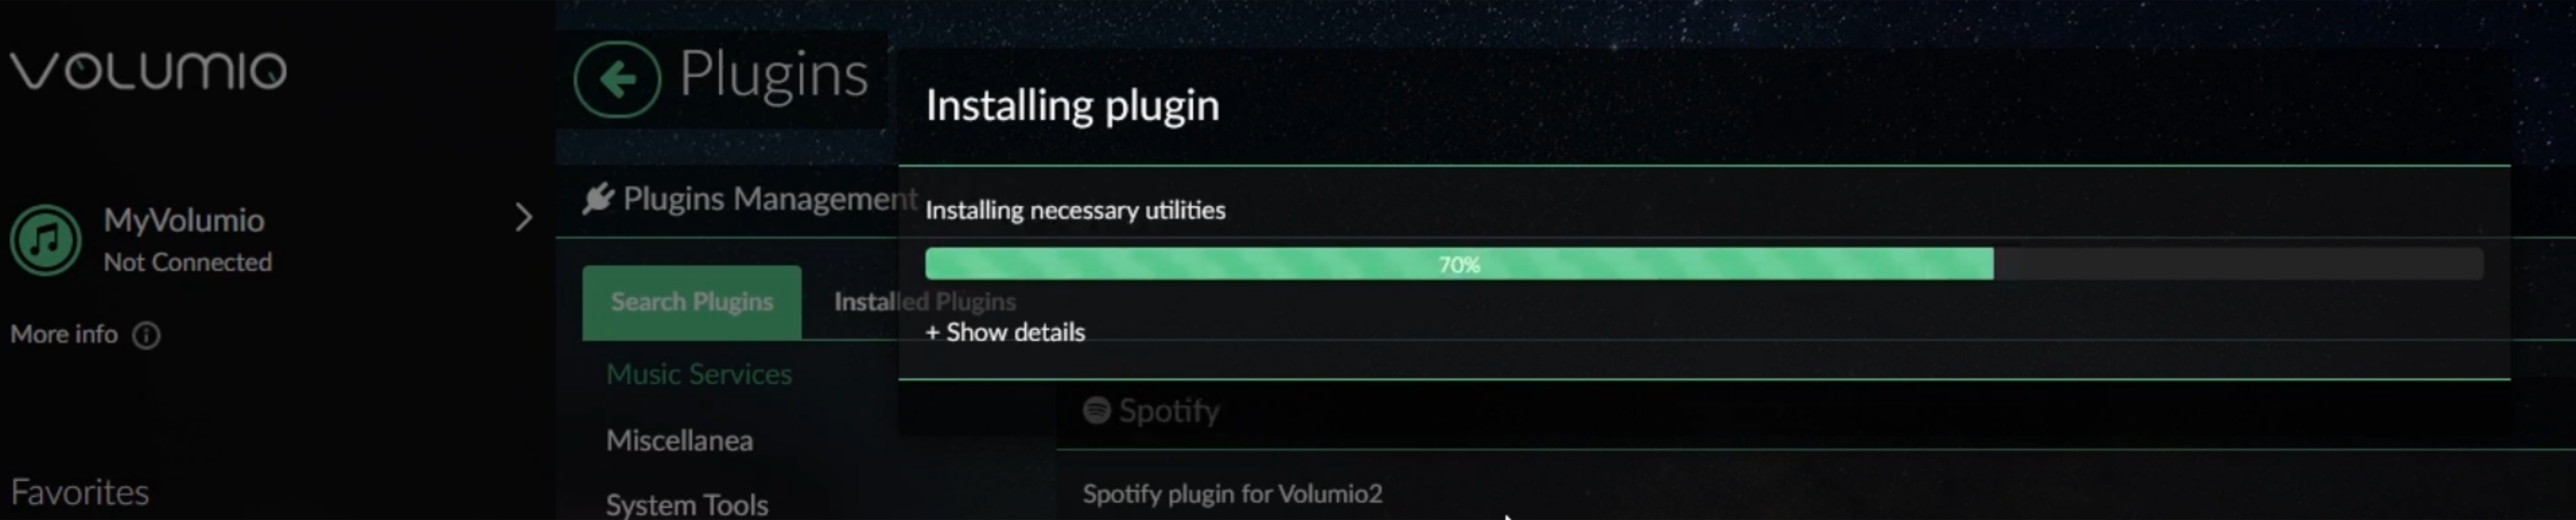
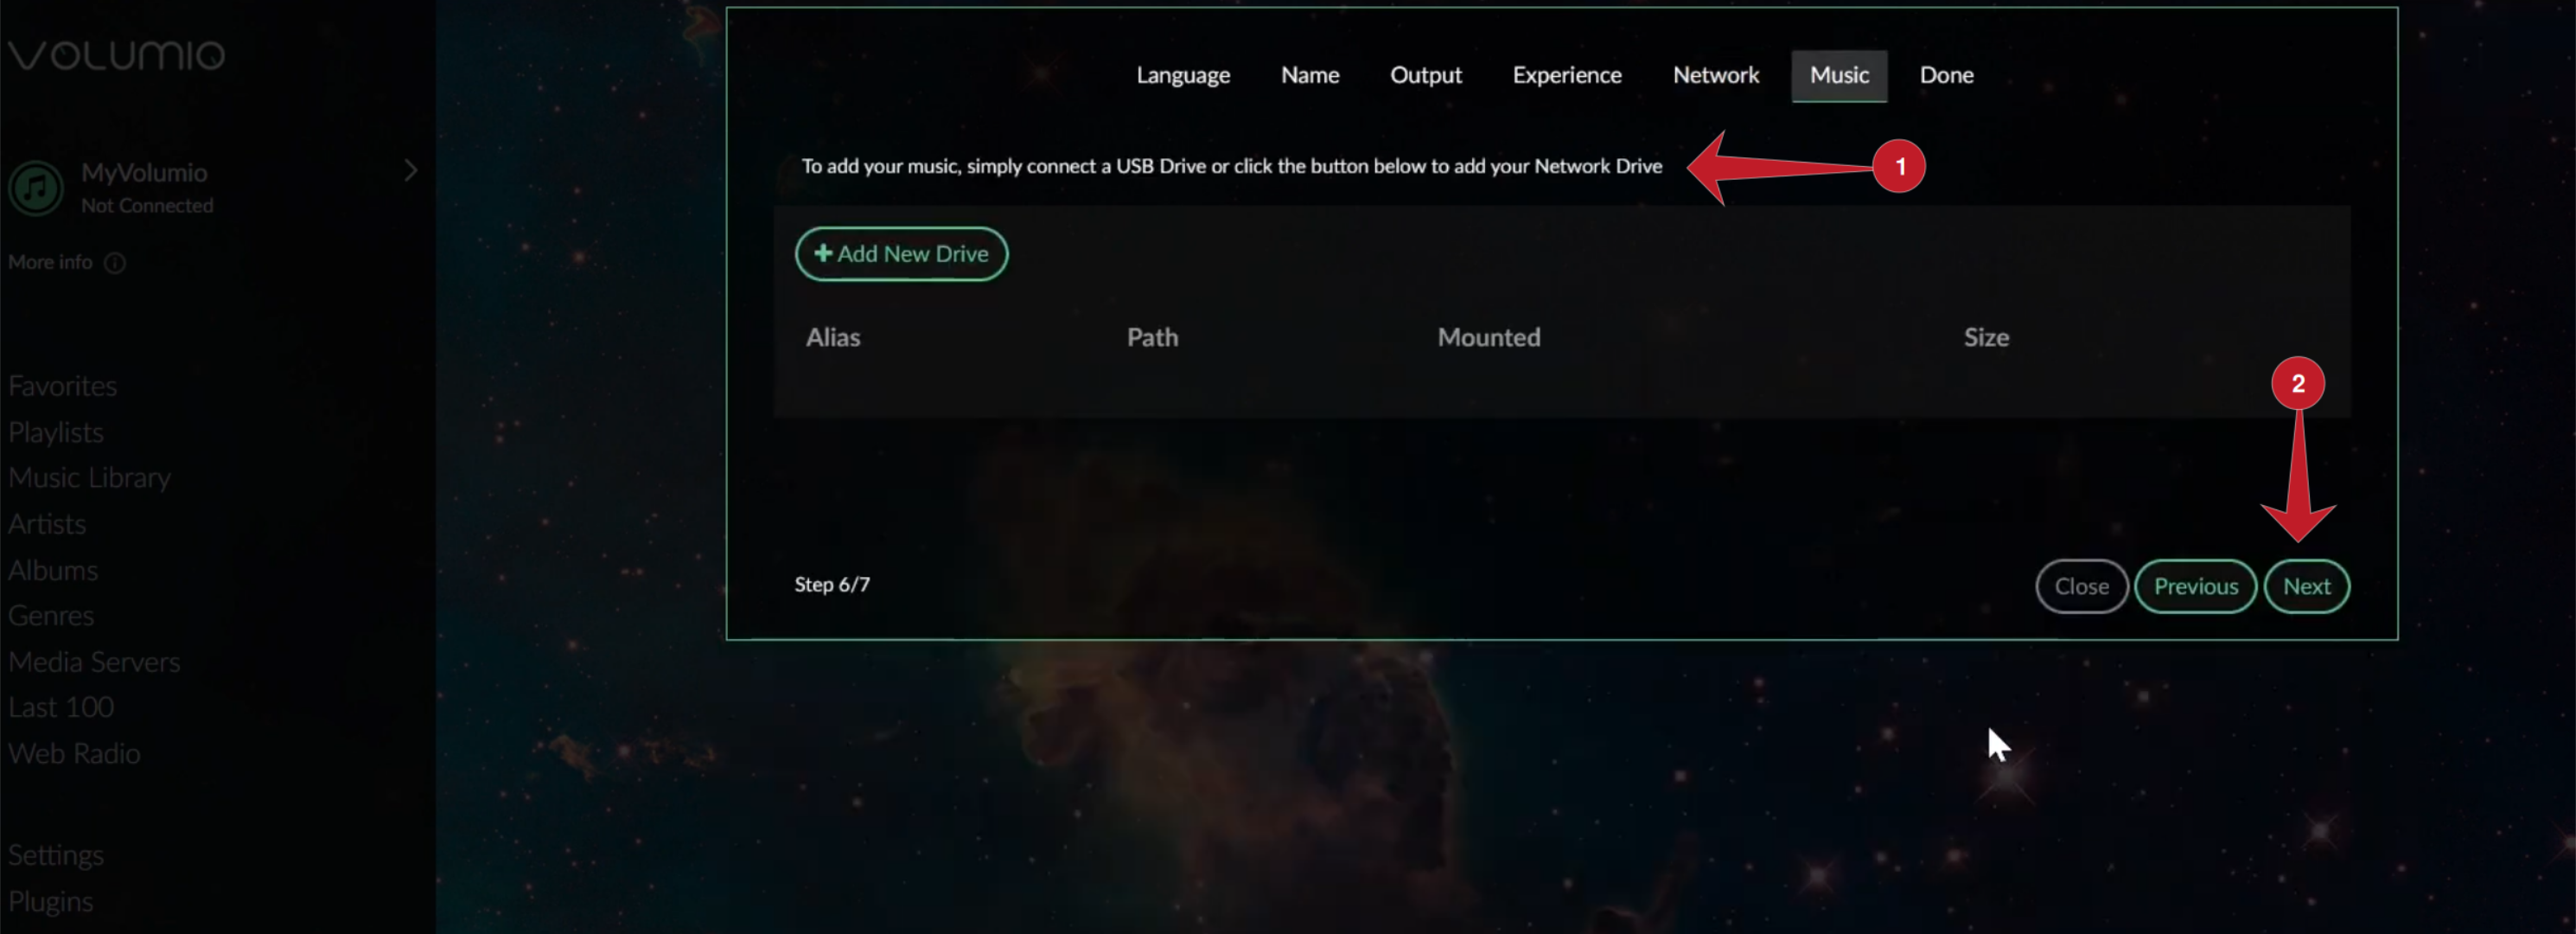
After choosing your data pipe, it’s time to add your music to Volumio.
From here, you might connect a USB hard drive or connect to a file share on your internet.
When your share is connected, smack the “Next” button to continue.
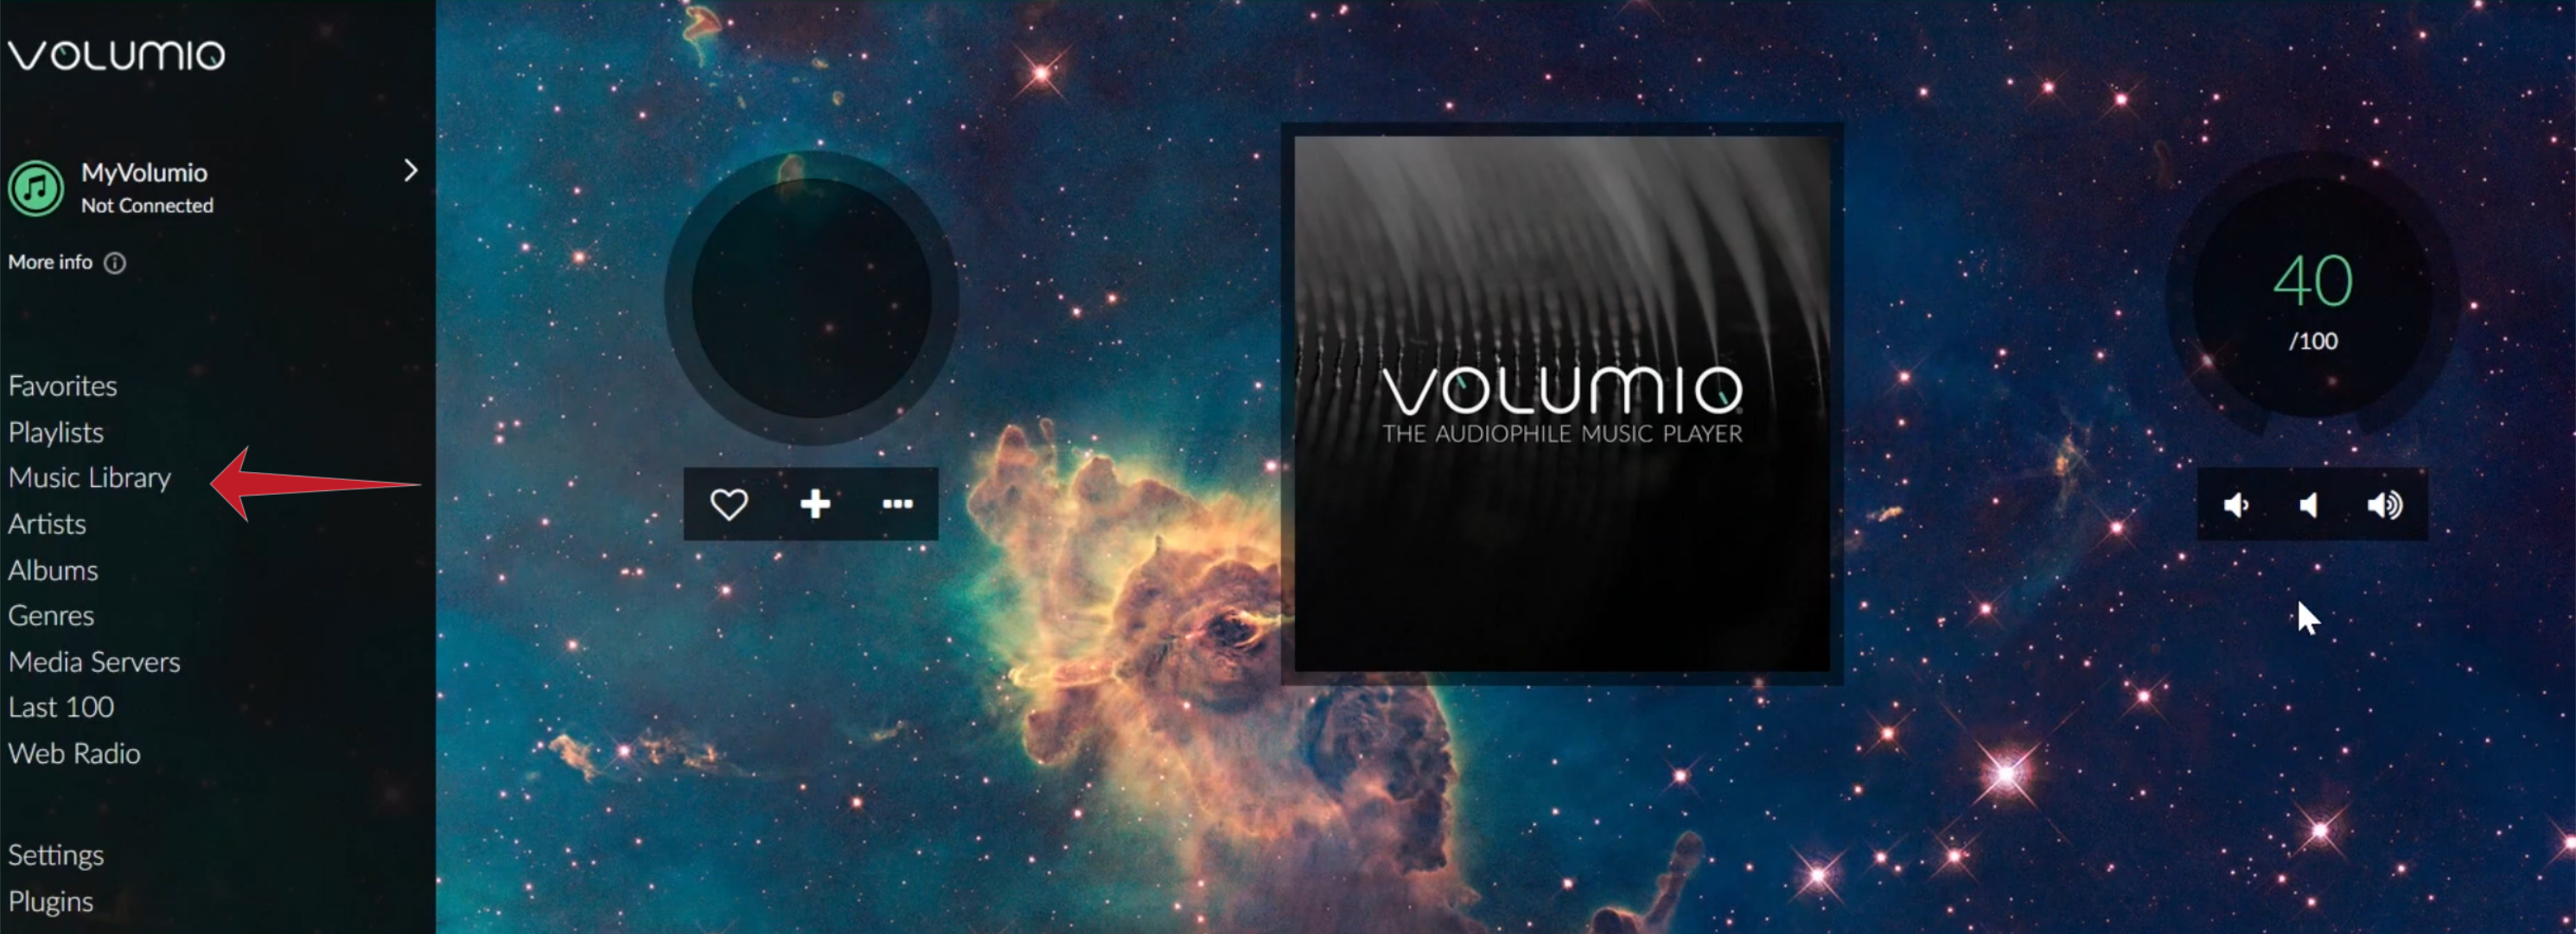
This process will take a bit of time, especially if you have a large music library.
These are just a few examples; many soundcard options are available for the Raspberry Pi line of devices.
Look for soundcards with high-quality DACs (digital-to-analog converters) and low-noise floors for the best sound quality.
Additionally, ensure the soundcard is compatible with your Raspberry Pi model and Volumio version.
Break Free from Cloud Music Limitations
With Volumio, you’re not tied to cloud music services.
By storing your music library on your Pi with Volumio, you have full control over your collection.
However, it’s possible for you to still access cloud music services if you want to.
you might also use Volumio to listen to internet radio and podcasts.
Volumio provides a flexible way to manage and play your music.