But it can also be used to amend existing commits and to revert commits, too.
A basic requirement of any version control system is to store different versions of files for you.
In Git, the command that does this iscommit.
fatmawati achmad zaenuri/Shutterstock.com
Here’s everything you oughta know.
What Is a Commit in Git?
Commits are the series of snapshots made throughout the lifecycle of a project that make up its development history.

Why is that important?
Version control systems(VCSs) are most commonly used with software source code and development projects.
This adds them to the version control view of the project.

They’ll be monitored for changes.
Another way to achieve this isto use an ignore list.
This tells Git which files, directories, or types of files it should always ignore.

In Git, this is handled by theaddcommand.
Actually, theaddcommand does double service, as we’ll see.
This is where theaddcommand reappears in our workflow.
We use theaddcommand to tell Git which changed files we want to have included in the snapshot.
Then we usecommitto tell Git to create the snapshot.
Some of this metadata is captured at commit-time, such as the commit message.
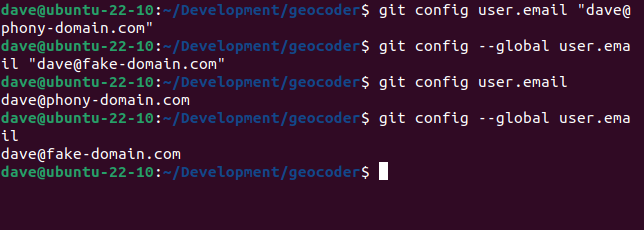
To set your name globally for all repositories on your rig, use this command.
To verify your name has been set, use this command.
These prefs are held in config files.

Thecommitcommand references and uses these values as it operates.
A Basic Commit
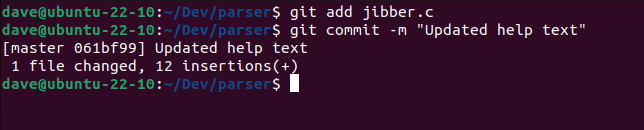
We’ve got a project with a changed file.
We’ll use theaddcommand to stage the file, then commit it.

It’s more convenient to add one on the command line.
The commits are displayed inless.
Auto-Staging Files
Staging many files can take a little time.
A different approach is to use the-A(all) option withadd.
This automatically stages all modified files along with all currently untracked files.
The staging of untracked files respects the parameters in your “.gitignore” file.
Git won’t stage files you’ve told it you don’t want to be included.
Finally, files in the index that are no longer in the working directory are removed from the index.
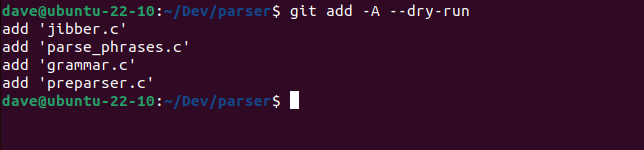
Plainly, the-Aoption can cause a lot to happen all at once.
The–dry-runoption gives you a preview of the changes without actually performing them.
In our example, it’ll stage two modified existing files, and two new files.
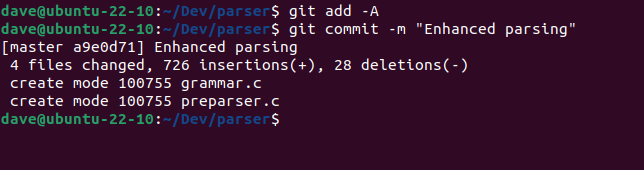
Let’s go ahead and use the-Aoption before we use thecommitcommand.

We can see that altogether four files are changed.
Two of them are the newly created files, which are listed.
Staging and Committing at the Same Time
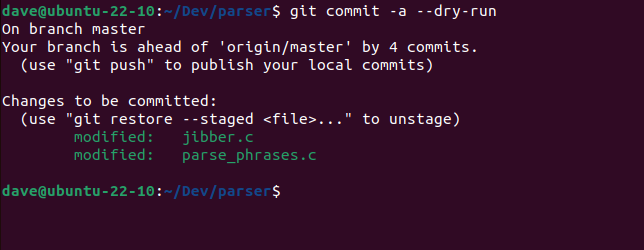
Thecommitcommand has a lowercase-a(all) option.
This performs the staging and the committing of files in one step.
It doesn’t automatically stage untracked files.
Now let’s carry out the command.

The files are staged and committed for us.
Git doesn’t have a command for committing to a different branch.
But it’s possible for you to rectify this situation with a little bit of Git dexterity.
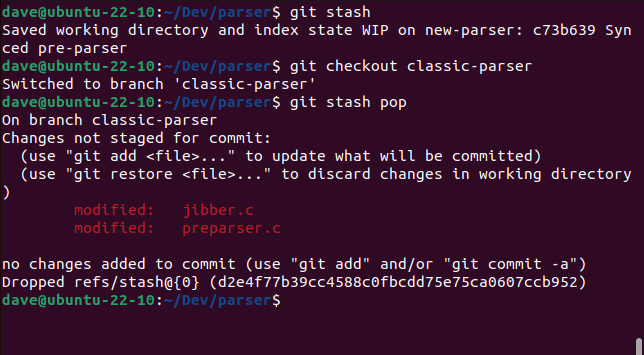
We’ll usethe Gitstashcommandto make a copy of the changes.
Then we’ll check out the correct branch and apply the changes from the stash.
To apply the stashed changes we’re using thepopcommand rather than theapplycommand.
Thepopcommand applies the changes and also removes them from the stash.
We’ve made some changes in our repository’snew-parserbranch.
They should have been made in theclassic-parserbranch.
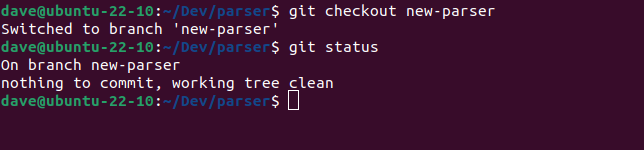
We can now perform acommit, and update this branch.
The caveat is, this shouldn’t be used on commits that have been pushed to a remote repository.
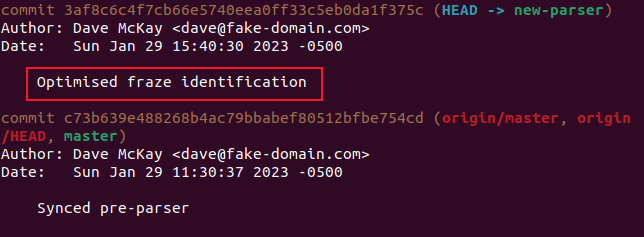
In our last commit message, “fraze” should have been “phrase.”
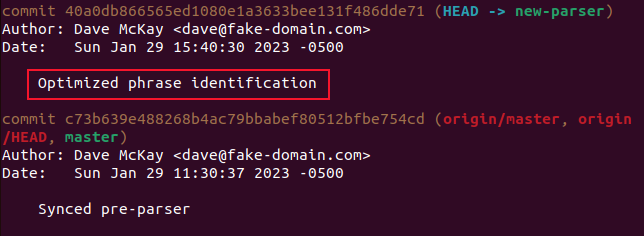
If we usegit logwe can see this.
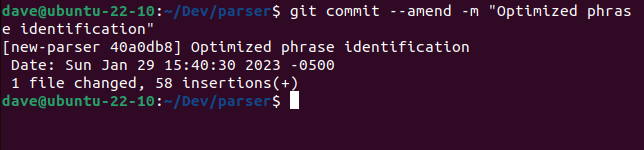
To correct this, we’ll use the–amendoption like this.
We’ll useaddto stage the file, then make a commit with the–amendoption.
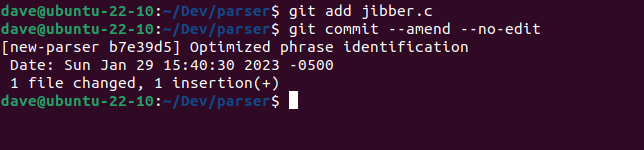
The–no-editoption means we don’t need to provide a new commit message.
The previous commit message is retained.
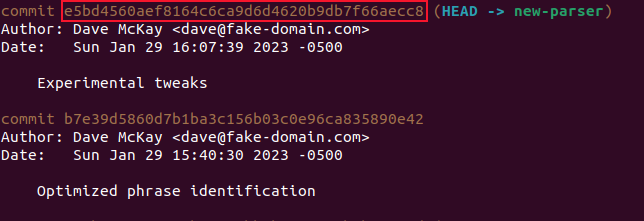
We’ll reset the commit back to the staging area, or index.

Then we’ll remove the file, and re-commit the rest of the files.
To remove the file that shouldn’t have been included, we use thereset –mixedcommand.
We need to commit the other files that are left in the index.

The other two files that were in the original commit are re-committed for us.
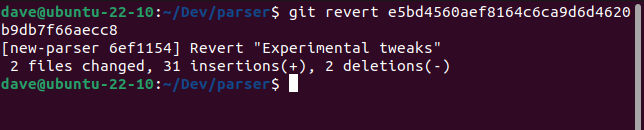
Reverting an Entire Commit
Sometimes undoing an entire commit is the easiest thing to do.
It puts your working directory and repository back to the state they were in before you committed.

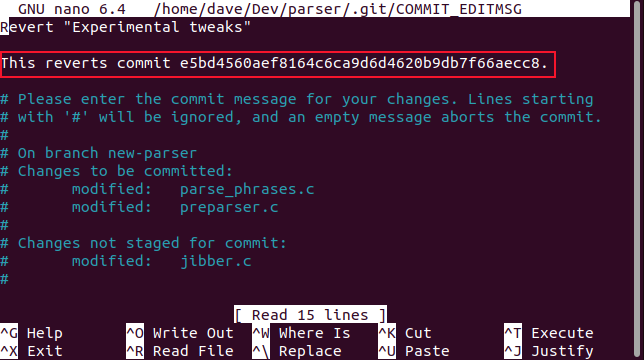
We need to use the commit’s hashed reference ID.
There is a default message entered for you.
it’s possible for you to either use this, or edit it to your liking.
When you’re happy with your revert message, save the file and exit the editor.
Innano, you do this with “Ctrl+O”, and “Ctrl+X.”
The Git Swiss Army Knife
Obviously,commitis one of the most important Git commands.

It can do a lot, so there’s a lot to learn.
Getting to grips with its lesser-used features is time well spent.
Related:How to Use Git merge