Here’s how to get it done for Windows 10, 8, or 7.
You’ll also need a minimum of a 4GB flash drive to create your installer.
Be sure to copy anything you want off of it, because this process will erase it.
when you land both your ISO and flash drive in hand, you’re ready to continue.
Don’t let that worry you.
The tool works just fine for Windows 7, 8, and even 10.
Once you’ve got the tool installed, creating your USB installation drive is a pretty straightforward process.
fire off the tool and give it permission to make changes to your PC.
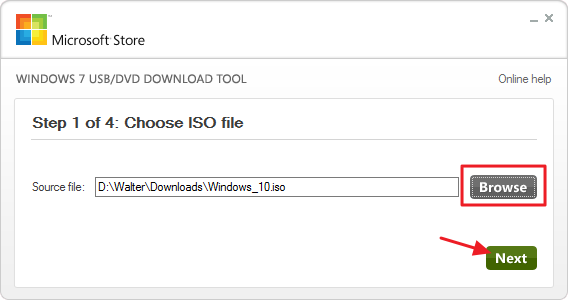
Click “Browse” to locate your Windows ISO file and then click “Next.”
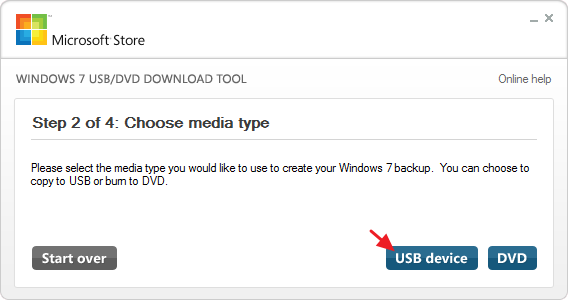
On the next page, click “USB gear.”
The tool can also burn the ISO to a DVD if you need that option.
Use the drop-down menu to choose the USB flash drive you want to use.
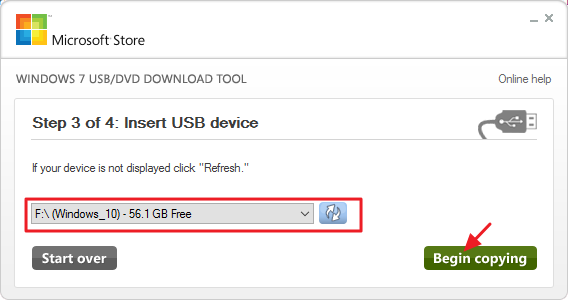
If you haven’t inserted it yet, do that now, and then choose the Refresh button.
Once you’ve got the right drive selected, click “Begin copying.”
Go ahead and click “Erase USB equipment.”
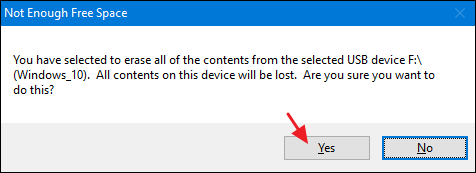
If you started with a newly-formatted USB drive, you won’t see this warning.
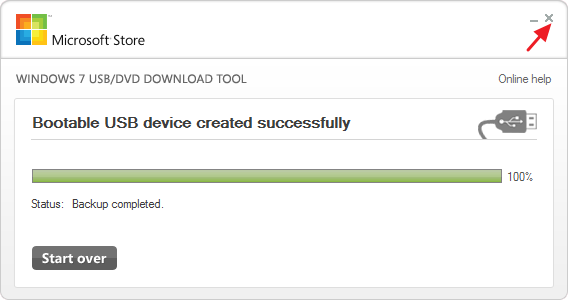
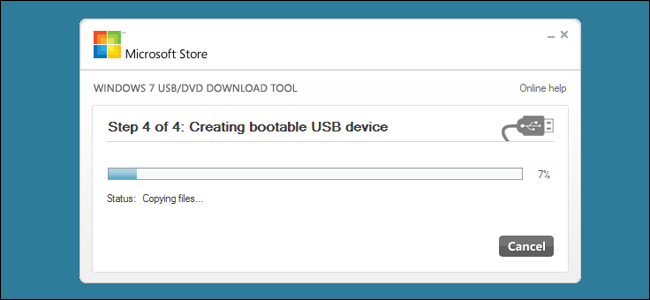
Now you just have to wait for the process to complete, which usually takes 15-20 minutes.
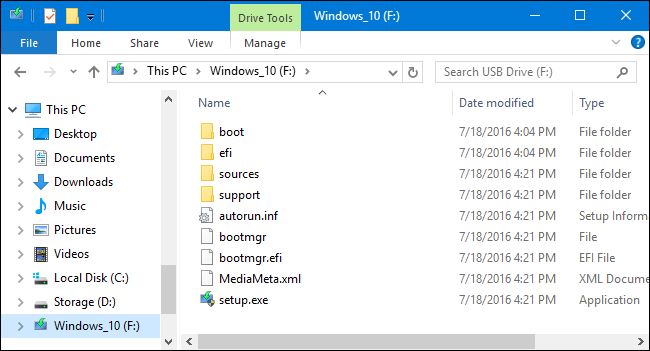
The drive will be formatted and files copied to the flash drive.

When the process is finished, you could kill the download tool.
Related:Boot From a USB Drive Even if your BIOS Wont Let You