Quick Links
Taking ownership of files or folders in Windows is not simple.
Both the GUI and command line take too many steps.
Why not add a simple context menu command that lets you take ownership of any file or folder?
you’re free to also just download our one-step Registry hacks to make those changes for you.
Or you might have a hard drive from another computer that you better control files on.
But both methods require that you complete several steps.

It’s a fair list of changes, and you’ll be working in two separate Registry locations.
But take your time, follow the steps, and you’ll get there.
We would recommend at least skimming this section, though, so you understand the changes getting made.
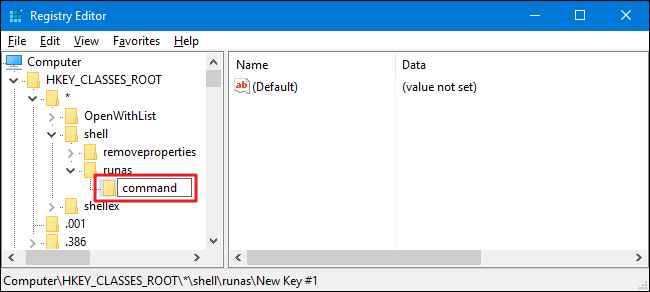
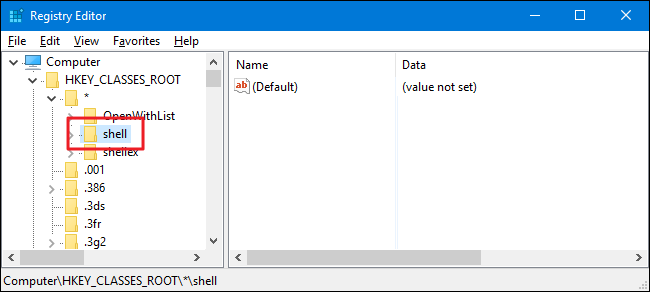
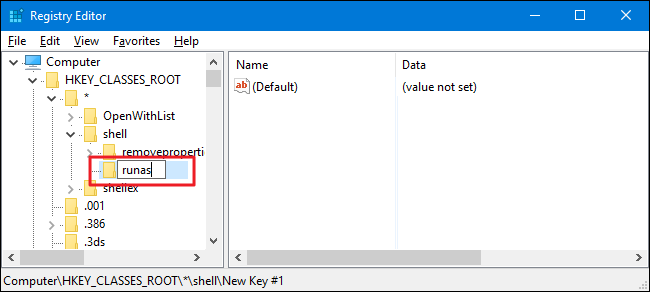
Right-click theshellkey and choose New > Key.
Name the new key “runas.”
If you already see arunaskey inside theshellkey, you might skip this step.
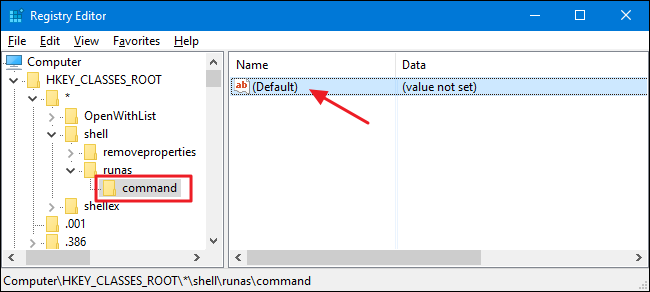
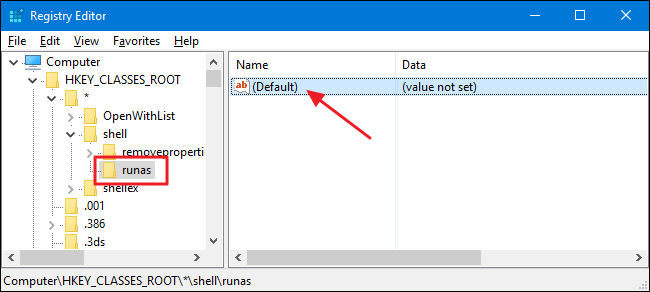
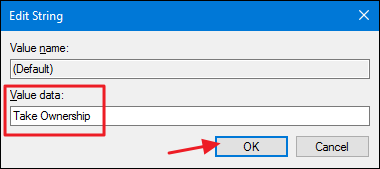
Next, you’re going to change the(Default)value inside therunaskey.
With therunaskey selected, double-nudge the(Default)value to open its properties window.
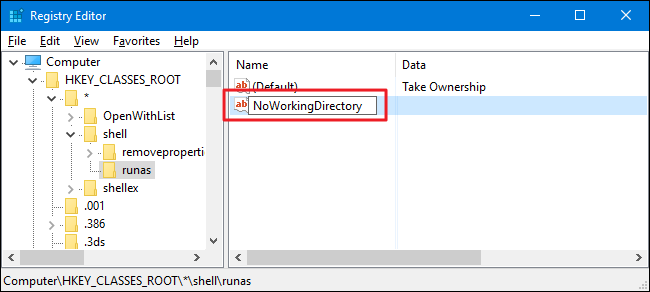
Next, you’re going to create a new value inside therunaskey.
Right-click therunaskey and choose New > String Value.
Name the new value “NoWorkingDirectory.”
Now, you’re going to create a new key inside therunaskey.
Right-click therunaskey and choose New > Key.
Name the new key “command.”
Right-smack the command key and choose New > String Value.
Name the new value “IsolatedCommand” and then double-click it to open its properties window.
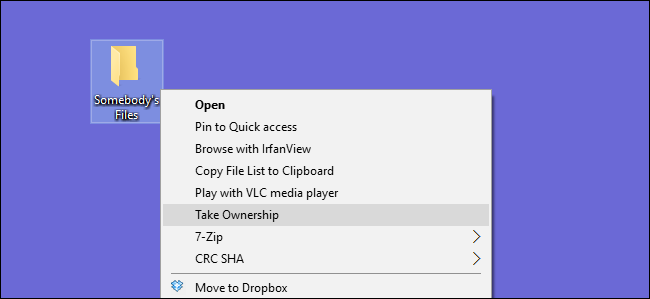
And that adds the “Take Ownership” command to the context menu for files.
This will also delete everything you created inside.
Both hacks are included in the following ZIP file.
Double-smack the one you want to use and click through the prompts.
Running the hacks just creates or deletes the keys for adding the command to the context menu.