you’ve got the option to perform the entire procedure in less than an hour.
Next, you’ll need anexternal hard driveoran SSDthat matches or surpassesyour Steam Deck’s internal SSDsize.
We used an old Samsung 850 EVO 512GB SSD which we put inside an external SSD enclosure.

Finally, verify theSteam Deck’s batteryis at or near 100 percent since the process can take a while.
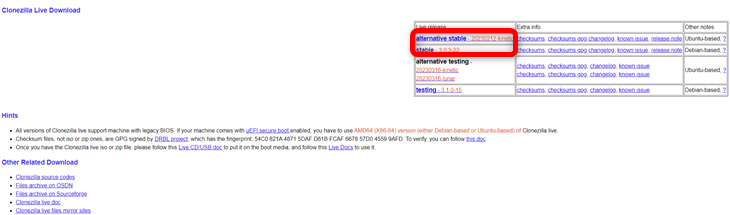
Go to theClonezilla websiteand tap the “Download” button.
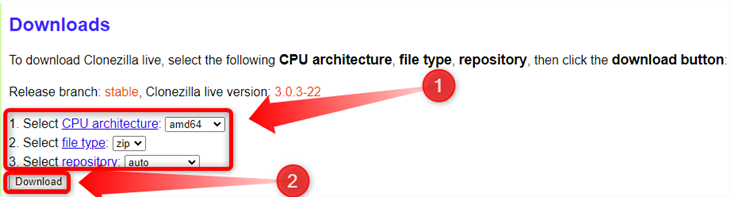
Once on the Download page either grab the “Stable” or “Alternative Stable” download option.
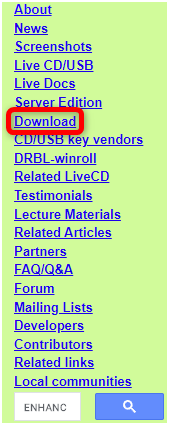
Next, poke the “Download” button.
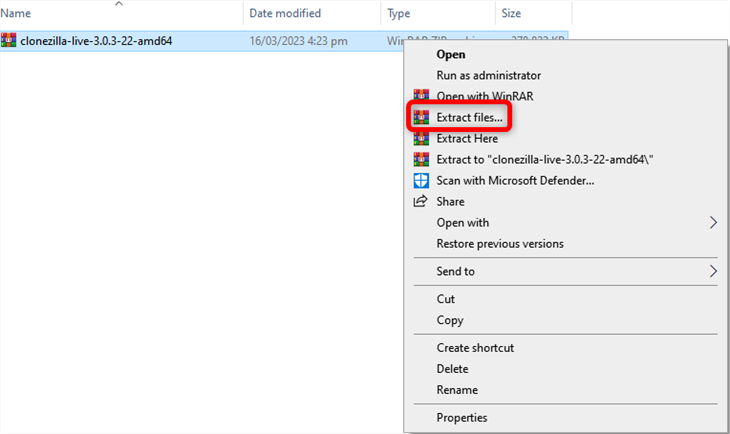
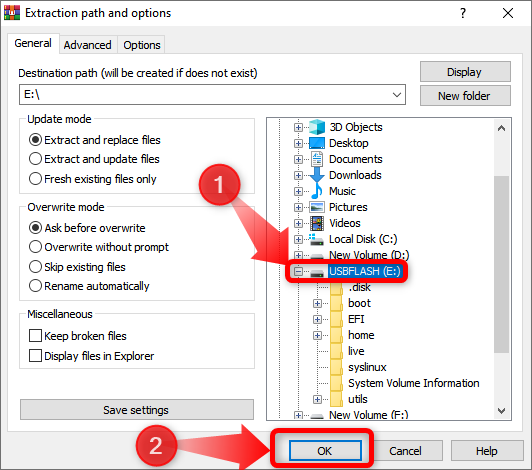
Once you’ve downloaded Clonezilla, hook your USB drive to your PC.
If the drive isn’t formatted already, do that now.
If you’re not using Windows, learnhow to format USB drives on Macorformat a drive with Linux.
Ensure that the “Quick Format” is ticked, and then nudge the “Start” button.
you’re able to useWinRAR,7-Zip, or any other zip tool you prefer.
Just hold the power button and select “Shutdown.”
Once everything’s connected, hold the volume down button and then press the power button.
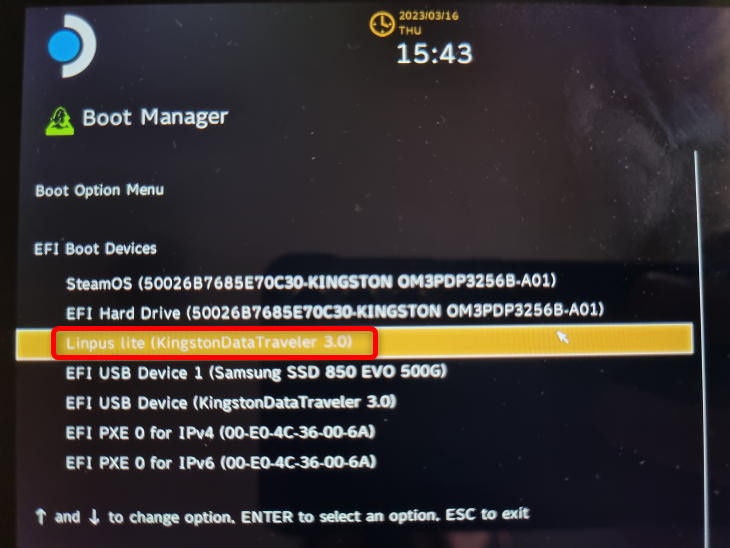
You should have a bunch of boot devices listed in the boot manager.
go for the machine listed as “Linpus Lite” and press the “A” button.
Your Steam Deck should boot into the Clonezilla live environment now.
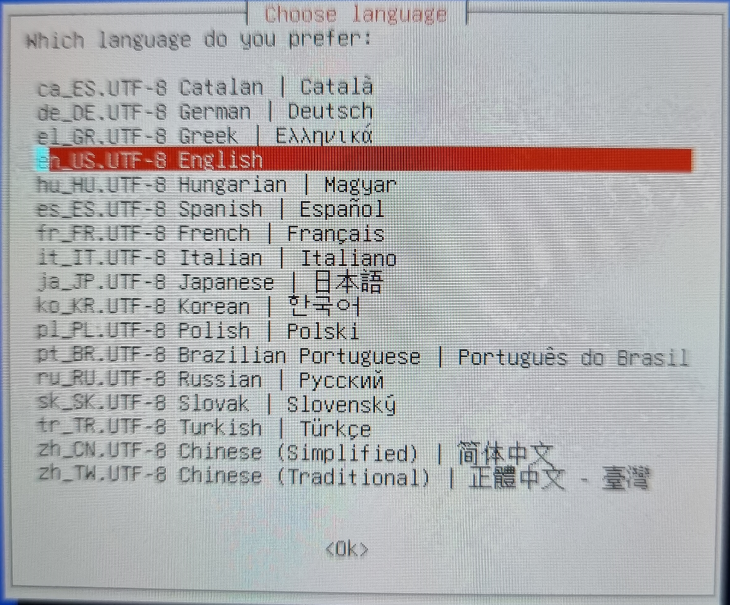
It will switch back to landscape after you set up the keyboard options.
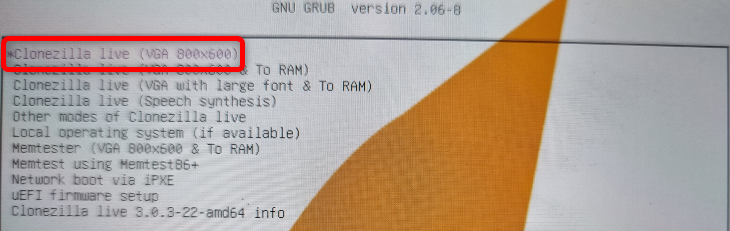
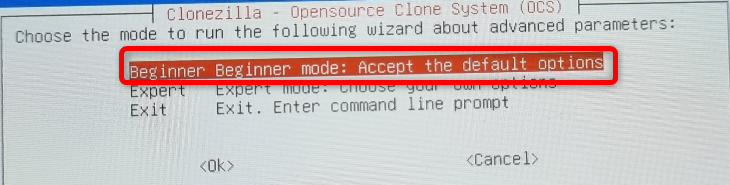
The first option is picking which version of Clonezilla Live you want to run.
Unless you have a special case, just pick the first option and move on.
After you set up the language and keyboard, the screen should return to landscape orientation.
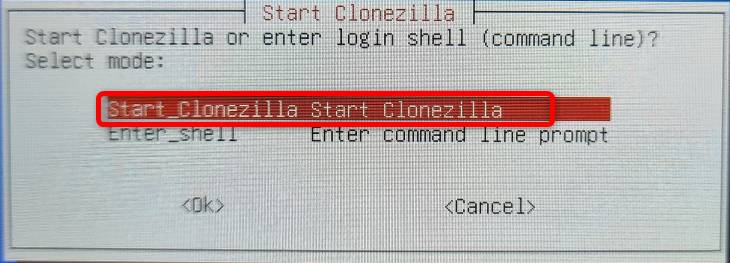
The next window is for starting Clonezilla.
Again, pick the first option and press “Enter” or the “A” button.
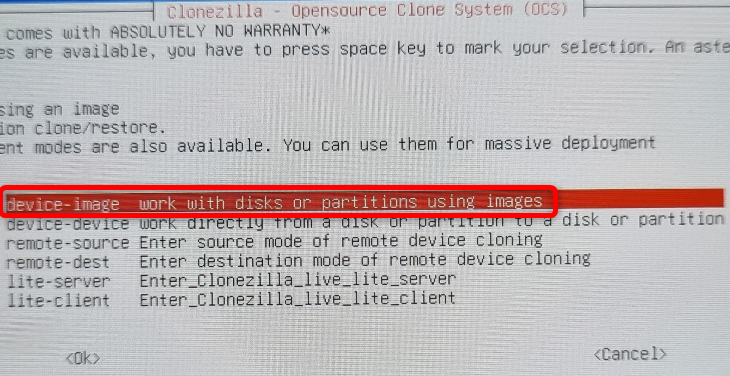
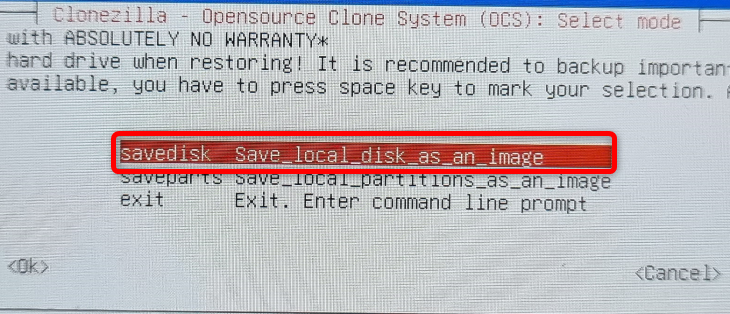
Next, pick the “machine-image” option and continue.
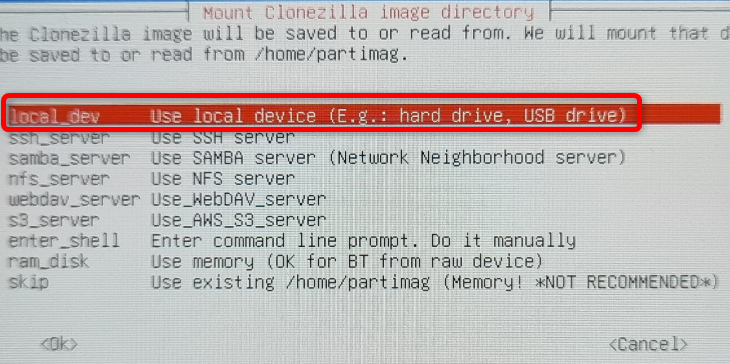
The following screen lets you choose where the clone image will be saved or read from.
Pick the first option on the list, “Local_dev” since we’re backing up files locally.
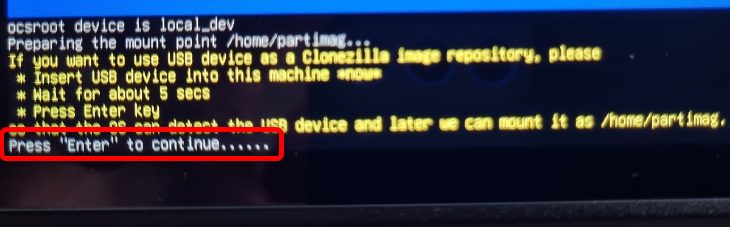
Since you already have the external storage connected, press “Enter” to continue.
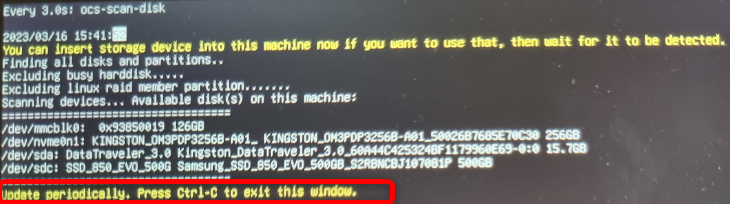
The next screen lists your storage devices; press Ctrl+C on your keyboard to skip it.
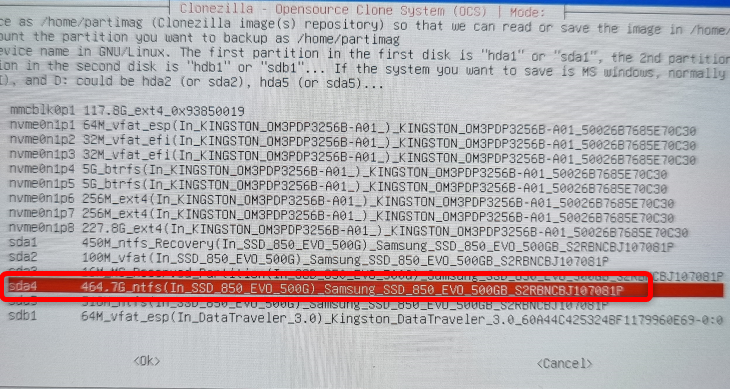
You should select your external storage drive in the following dialog window.
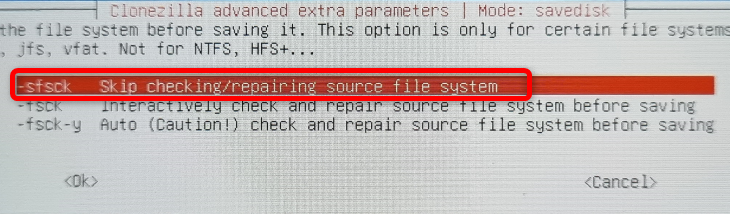
Next, Clonezilla will offer you the option tocheck your storage drive’s file system.
We skipped this since we know theSSD is working correctly.
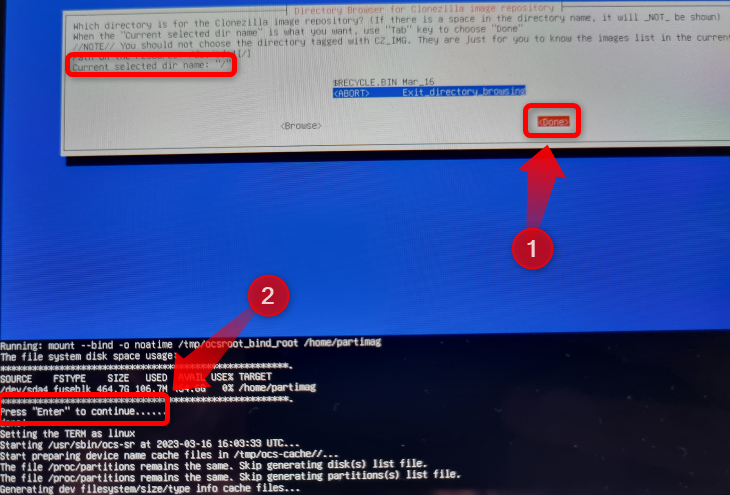
The following screen lets you select Clonezilla’s image repository folder.
The default option uses the root folder of the external storage equipment;we recommend not changing anything here.
The screen that opens after you snag the “Savedisk” option lets you rename the backup image.
you’ve got the option to leave it at default or rename it if you prefer.
If you choose to rename the image note that you cannot use spaces.
Use underscore instead of the “Space” key.
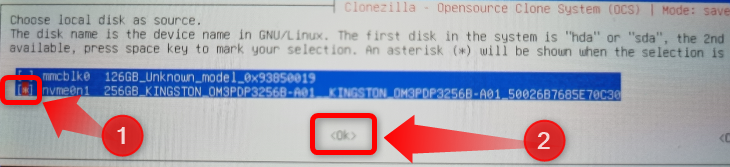
Next, pick the local disk source for the backup.
If you have your SD card slotted, don’t select it by mistake.
You should first choose the SSD with the arrow keys.
Next, press the “Space” key to mark your selection.
Press “Enter” to move to the next option.
The following window lets you choose thecompressionoption.
Pick the first one and move on.
Next, Clonezilla will again ask you to check your external storage drive’s file system.
Unless you have doubts about your drive’s integrity, it’s possible for you to skip the check.
The following window asks whether you want to check the cloned image afterward.
It’ll take about 15-20 minutes for Clonezilla to check the clone image after it finishes creating it.

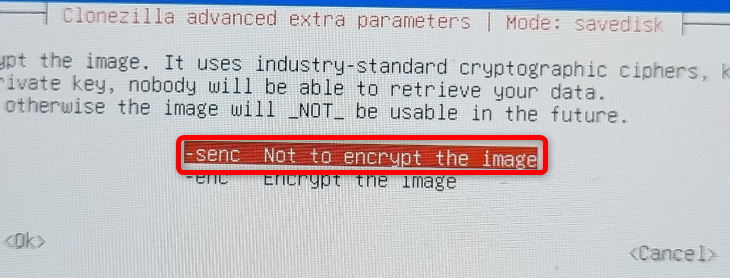
Next, it’s possible for you to pick whether to encrypt the cloned image.
We opted not to encrypt the image, but you canchoose encryption if you’re concerned about security.
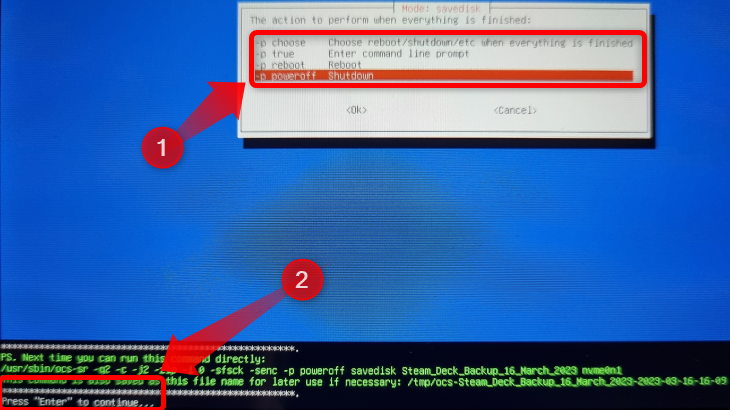
Now, you’re free to select which action Clonezilla will perform after it creates the cloned image.
We selected “Poweroff” but it’s possible for you to pick whichever option you like.
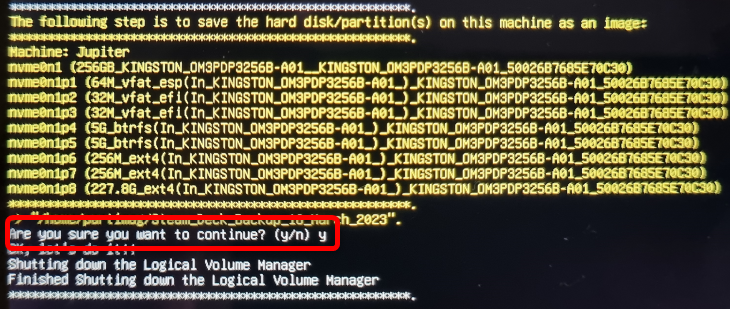
Next, Clonezilla will ask you whether you want to continue with the cloning process.
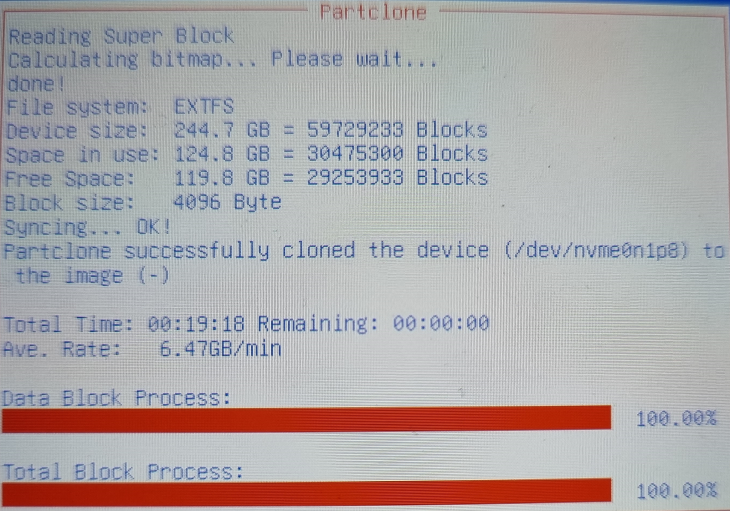
The disk cloning process lasts for about 20 minutes.
You’ll also have to wait another 15-20 minutes if you’ve selected Clonezilla to check the created image.
All in all, it should take you less than one hour to go through the entire procedure.
Otherwise, you’ll have to create a new boot drive.
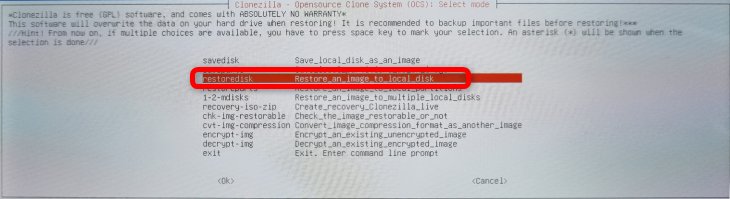
Since we had only one image, we didn’t have much choice.
Next, pick the storage drive you want to restore the image to.
This should be your Steam Deck’s internal SSD.

Then press “Enter” to continue.
The following window asks you whether you want to check the clone image before Clonezilla restores it.
We recommend checking the image, just in case.
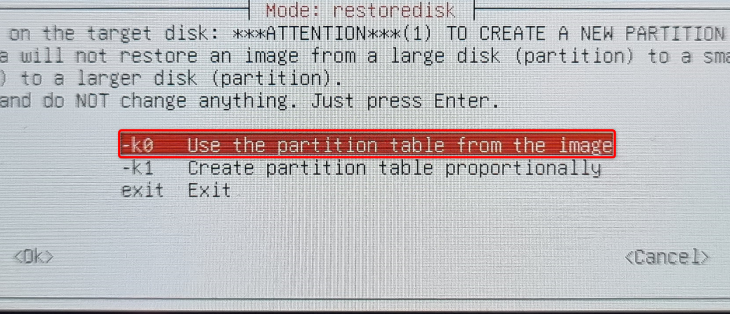
choose the first option, the one that reads “-k0 Use the partition table from the image.”
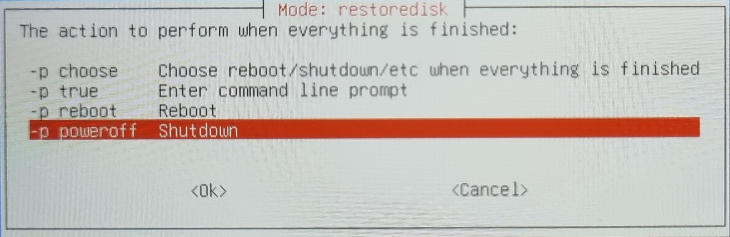
The final window before the restoration procedure starts is selecting the action Clonezilla will perform after restoring the image.
Pick whichever you want and hit “Enter” to continue.

Now, the restoration process will start.
It takes longer than the cloning process since Clonezilla has to unzip the image.
Now you know how to back up your Steam Deck and how to restore the backup image.
Related:How to Optimize Your Steam Deck for a Longer Lasting Battery