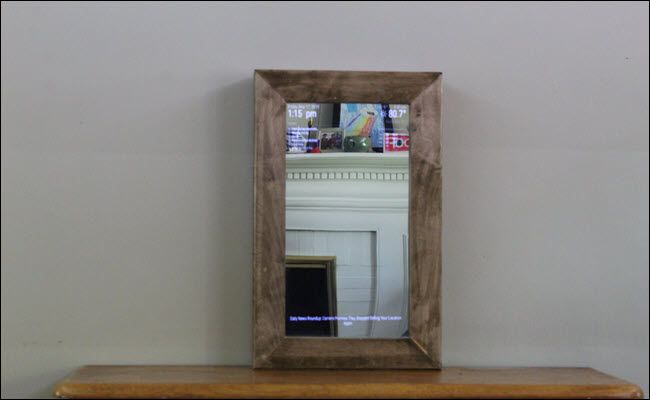
Powered by a Raspberry Pi, you might build your own with some simple tools and hardware.
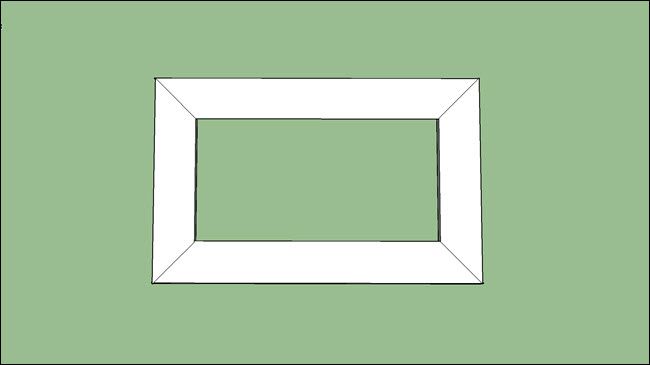
The idea is pretty simple; you’ll build a frame and box.
Michael and other contributors have created an open-sourceMagic Mirrorplatform you’ve got the option to install.
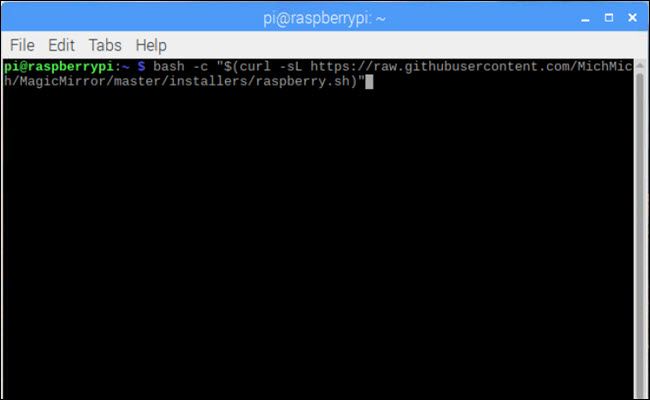
Installing the software is easy—it requires just one line of code.
The longest parts are passive, like waiting for glue and stain to dry.
You’ll spend about three to five hours actively working on the frame and installing the software.
Josh Hendrickson / How-To Geek
And we’ll show you exactly how.
If you bought every item in the following list, you’d spend around $700.
But because we had everything on hand except the glass and wood, we only spent $140.

And remember, you don’t have to buy the tools.
If you have a friend who owns some, ask if it’s possible for you to borrow them.
Then you’ll add a simple box to hold the mirror, monitor, Raspberry Pi, and cabling.
When completed, the structure might resemble a very shallow medicine cabinet.
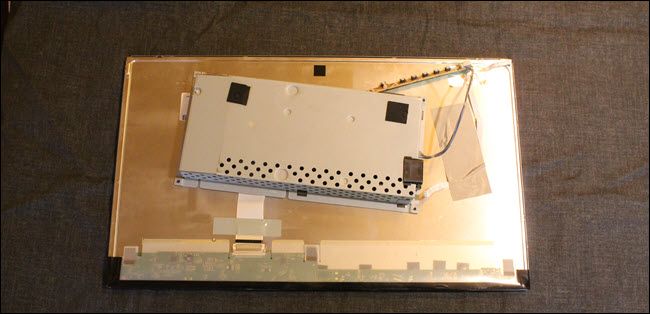
Dissasembling the Monitor
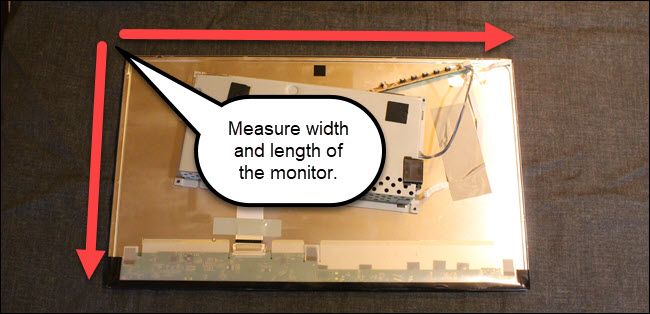
The first step to building your frame starts with your monitor.
If you plan to remove the frame from your monitor, you’ll want to do that now.
Josh Hendrickson / How-To Geek
Every monitor is different, so we can’t give exact instructions here.
Write those down, and double the numbers.
That final number is the total length of wood you will need.
Josh Hendrickson / How-To Geek
Doubling means 23 inches and 48 inches of wood respectively.
Now measure up from the flat surface to determine how thick your monitor is.
The wood you purchase needs to be at least that wide, preferably a little wider.
Josh Hendrickson / How-To Geek
The box calls for a similar length to the frame so you could double the amount once again.
Two boards measured 36 inches long, and the other two were 48 inches long.
The extra length means plenty of room for mistakes.
Josh Hendrickson / How-To Geek
Before working with any power tools, sanding, or applying stain or polyurethane, you should wear protection.
That includes safety glasses and a dust mask or vapor filter.
If you’re using power tools, just use ear protection like earplugs.
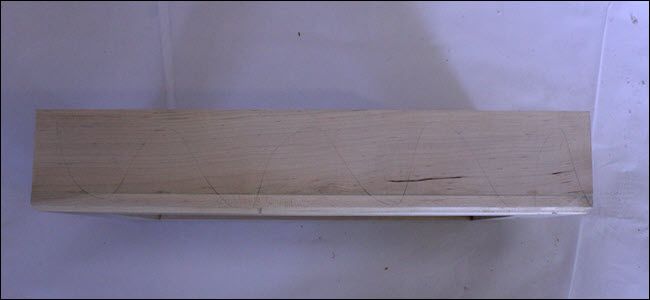
Your next step is to cut miter angles into your wood.
In this case, miter angles are just 45-degree angles.
Two 45-degree angle boards pushed up to one another make a 90-degree corner.
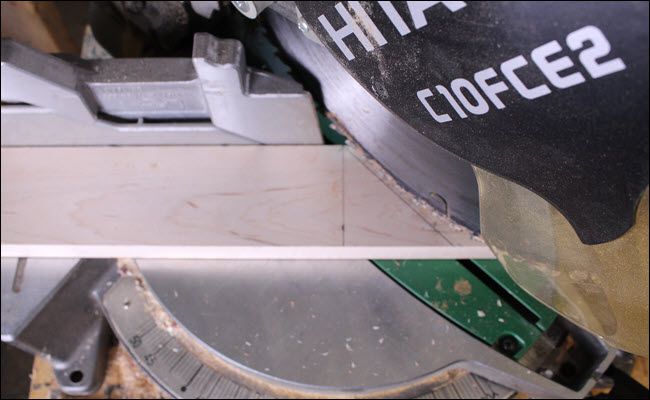
And four 90-degree corners will make a square, or in this case a rectangle.
So we highly recommend using a miter saw (which this guide will cover).
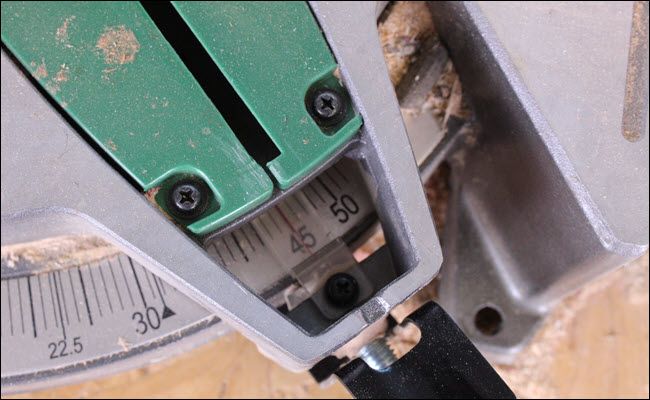
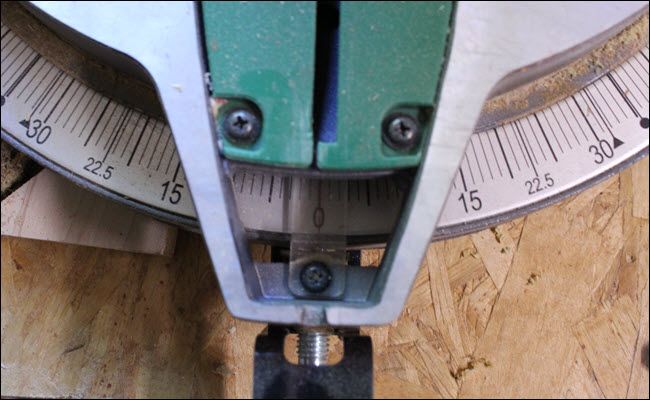
To start, set your miter saw to 45-degrees.
Tip:Most miter saws have hard stops at 45-degrees; you should feel it click into place.
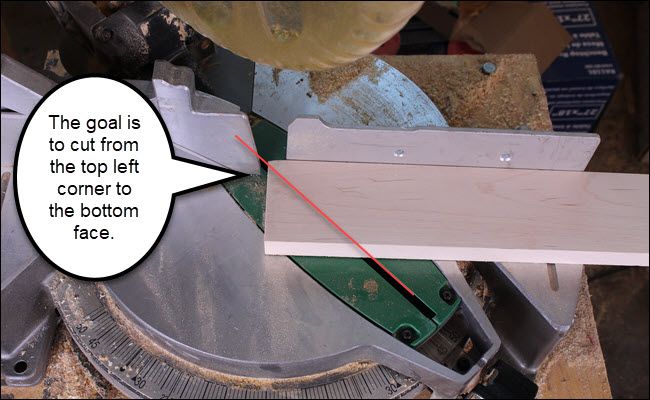
The next cut requires the opposite 45-degree angle to facilitate both corners running the same direction.
Rather than move your saw back and forth, flip the board over then slide it down.
Josh Hendrickson / How-To Geek
That means the shorter side.
That mark is the angle and length for your cut.
Slide your board down to make your next cut.
Josh Hendrickson / How-To Geek
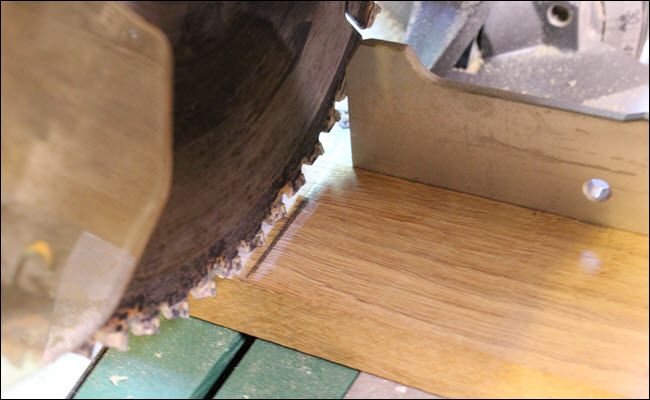
It’s essential that you do not make a run at cut exactly on the line you drew.
You’ll repeat this process to get the rest of the frame boards.
Flip the board, measure the length, cut, and repeat.
Josh Hendrickson / How-To Geek
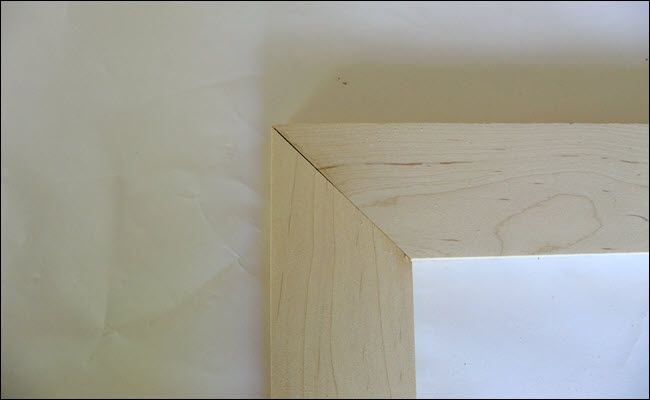
Now you should have four pieces of angled wood that fit into a frame shape.
If you find some of your cuts were off by a little, you may need to trim.
You may be wondering why we’re not using nails or screws.
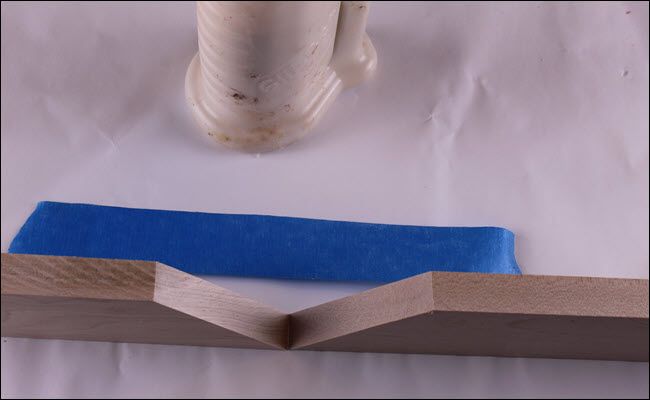
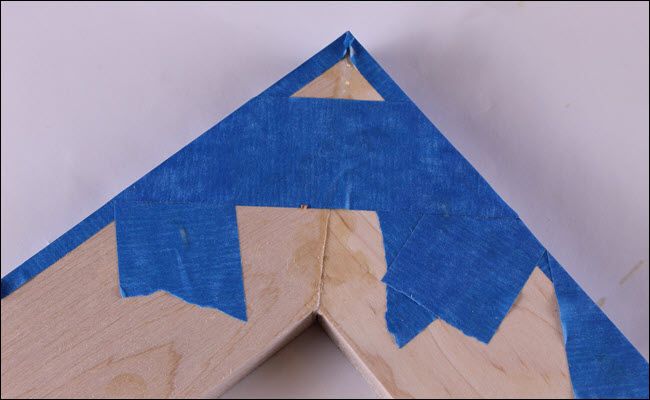
If you don’t have corner clamps, we have a tape trick that will do the job.
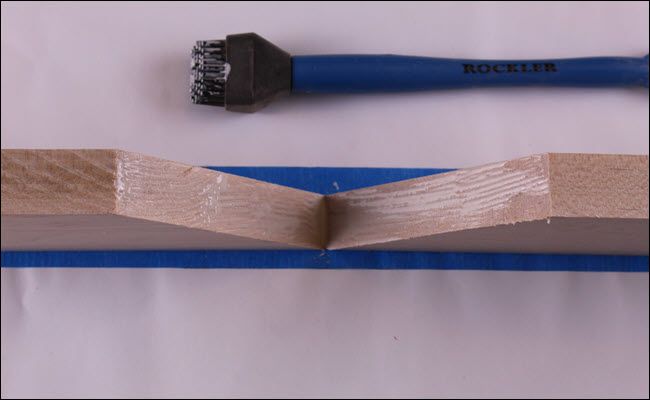
Now apply a thin bead of glue to one of the angled pieces.
Then use either your finger or brush to spread it to touch the entire face of that angle.
Josh Hendrickson / How-To Geek
Then apply the glue to the other angled face.
Then place the boards on the piece of tape, be sure to keep the corners touching.
Fold the two pieces together, ensuring the tape stays as tight as possible.
Then flatten and flaps of tape hanging over.
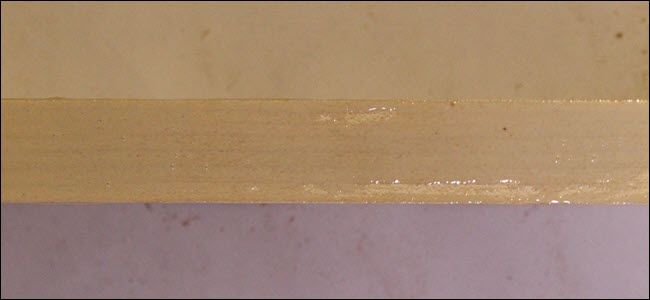
Tip:Glue seeping out as seen here is a good sign that you’ve applied enough glue.
Repeat the process with the other boards, and then join them together.
Josh Hendrickson / How-To Geek
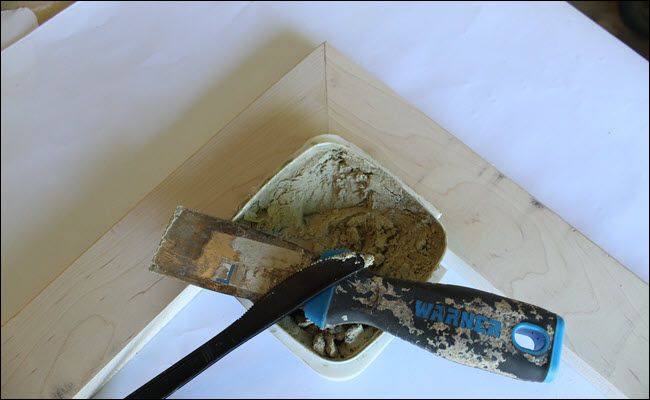
After the glue is dried, remove the tape and check your corners.
If you see any gaps, that’s fine; you might fill them with wood filler.
Wood filler is just what it sounds like.
It’s composed of wood pieces, glue, plastics, and other contents.
The goal with wood filler is to overfill the hole.
Don’t worry about any wood filler spread around the gap, that will be removed by sanding later.

Tip:Wood filler should have a yogurt sludge-like consistency.
Again, read the package of your wood filler.
Usually, you’ll need to wait an hour to sand and a day to stain.
Josh Hendrickson / How-To Geek
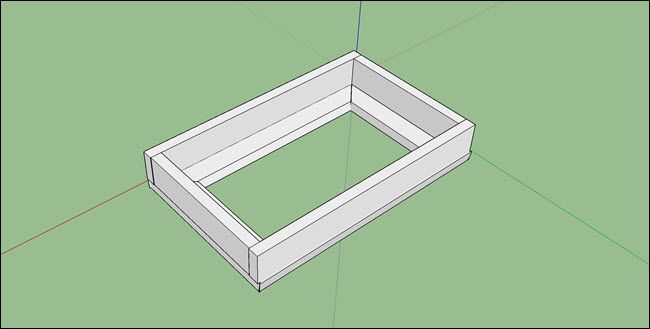
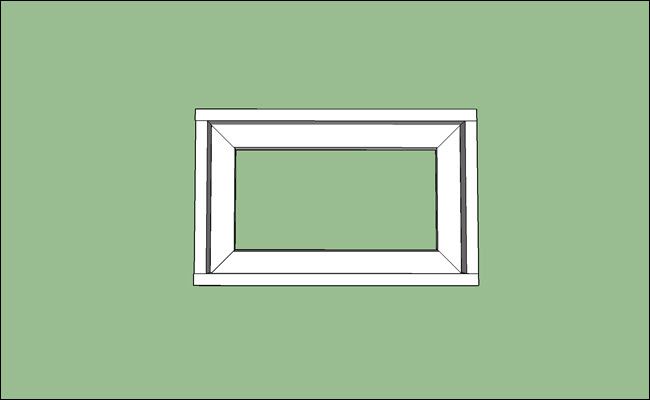
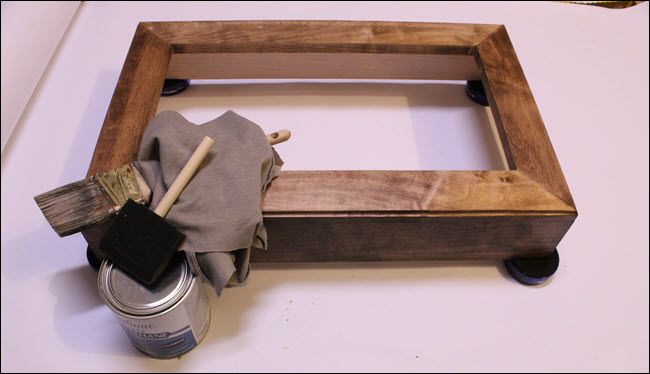
Congratulations, you’ve built a frame.
Now it’s time to build a box.
The good news is, this is much easier than cutting the wood and putting together the frame.
Josh Hendrickson / How-To Geek
Measure your frame at the edge from end to end.
For this cut, you’ll set your miter saw to “0” to make a straight cut.
In the above picture, the cut piece will be to the right.

Josh Hendrickson / How-To Geek
Then measure the gaps between your two boards to determine the length for your final two pieces.
Again, draw lines and cut just off those lines and trim as necessary.
Now you’ll glue the boards together.
Josh Hendrickson / How-To Geek
Apply glue to both ends of both shorter pieces, wait five minutes, and apply again.
Then squeeze the longer boards into position.
make a run at verify they are flush (all the edges line up).
Josh Hendrickson / How-To Geek
Just like above, wood glue has a slow drying time, so you better maintain constant pressure.
If you have F-Clamps, you could now use three to four to apply pressure to the boards.
If you don’t, bungee cords will do the trick.

Josh Hendrickson / How-To Geek
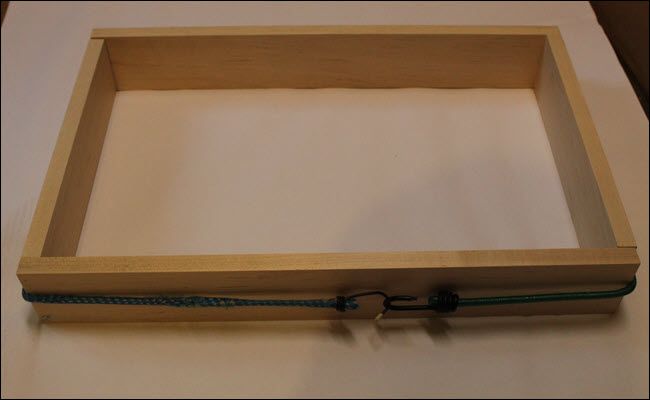
Very carefully wrap bungee cords around the rectangle, attempt to keep the corners at 90-degree angles.
Then attach the bungee hooks:
You’ll want to use strong, tight bungee cords.
And depending on the strength, you may want to use more than one set.
Josh Hendrickson / How-To Geek
The above bungee cords are brand new and fit tightly around the box, so one was enough.
But you might add more for good measure.
Wait for the glue to dry (as per your glue directions) then remove the cords.
Again, check that all edges are flush and that your rectangle box is flat.
If the edge of a board drifted up or down, you could sand it flat.
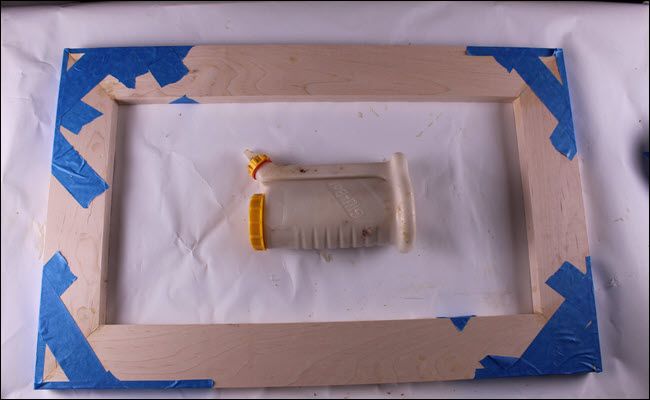
Gluing the Box to the Frame
Gluing the box to the frame is relatively straight forward.
Take a look at your frame and determine which side you think looks better.
Place that side down on a flat surface (preferably covered in paper).
Then place your onto the frame, glue side down.
To add pressure, the easiest thing to do is use heavy objects.
make a run at aim for even spacing to provide pressure all around the box.
Again, wait for at least the minimum time your glue specifies.

After letting that dry, it’s time for sanding.
Sanding your wood removes splinters, dings, and other blemishes the building process created.
If you skip this step, stain and paint will only highlight the imperfections.
If you’re new to sanding, the process is pretty straight forward.
When the lines are gone, you’ve probably sanded enough.
Start with the 80 grit sandpaper, then move to the 120, then the 220.
If you’re painting or you want a deeper stain color, skip the 220 grit paper.
After sanding, run your hands along the wood.
You should feel a noticeable difference where you’ve sanded.
attempt to find any areas you missed and sand as needed.
Don’t forget to sand the inside border of your frame, where your monitor will show.
you might skip sanding any section that won’t be visible.
Just paint your frame as usual.
Tip:Skip the brush, use an old pair of socks or t-shirt to apply your stain.
Have two sets, one for staining and one for wiping.

Before staining, wipe off all the sawdust you created by sanding your frame.
You don’t want sawdust to get in the stain.
To stain your frame, doublecheck the directions of your stain for drying times.
Usually, you’ll see a wipe off time and a restain time, take note of those.
Start by opening the can and stirring the contents.
Dip the material into the stain and let it absorb thoroughly.
Then wipe onto your frame.
You don’t need to push excessively hard, but take a stab at work it into the wood.
When you’re staining the vertical services, make a run at get a smooth line and avoid drips.
Stain any part of your frame that will be visible, including the inside border where the monitor goes.
This step is crucial if you don’t wipe the excess the stain will dry in an uneven mess.
Before moving to the next step, wait until the stain is completely dry.
All you need is an old t-shirt.
Other polyurethanes may call for a brush instead.
Again, kick off the can and stir the contents.
Then load up your t-shirt or brush.
attempt to apply in long even strokes to avoid runny lines.
Tip:If you bought a “crystal-clear” poly, it will look milky white as you apply.
When it dries, it will turn clear.
Check the directions on your can.
It will list a dry time and a minimum number of layers.
After each drying period lightly sand with the 220 grit sandpaper.
Do not use power tools for this step; you’ll sand through the polyurethane and the stain.
The goal here is to flatten any bumps in the poly layer, not remove it entirely.
Drilled holes will give you a flush against the wall profile.
But hooks won’t require a drill to attach.
Congratulations; you’ve built all the necessary frame components for your smart mirror.
Now it’s time to move to the hardware.
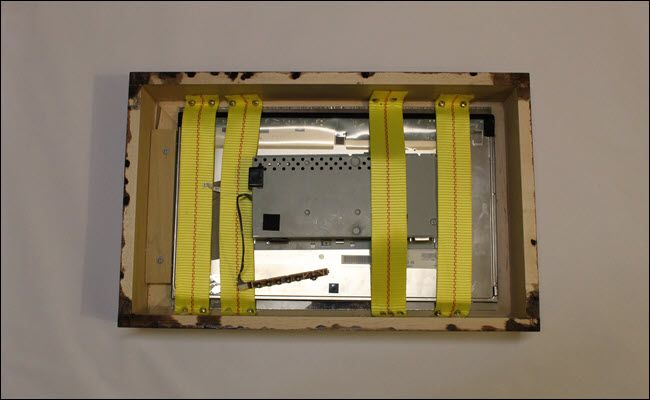
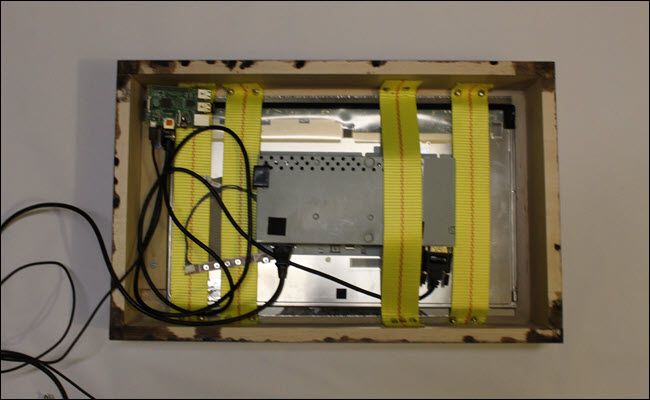
You likely have gaps between the monitor and mirror and edges of the frame.
One option is to screw shims into place as seen at the left of the above photo.
Instead, use a nylon strap.
Screw one side in and draw tight to the other side to measure.
Cut a length off a little longer than is needed.
When the monitor and glass are secure, add the Raspberry Pi and power cords.
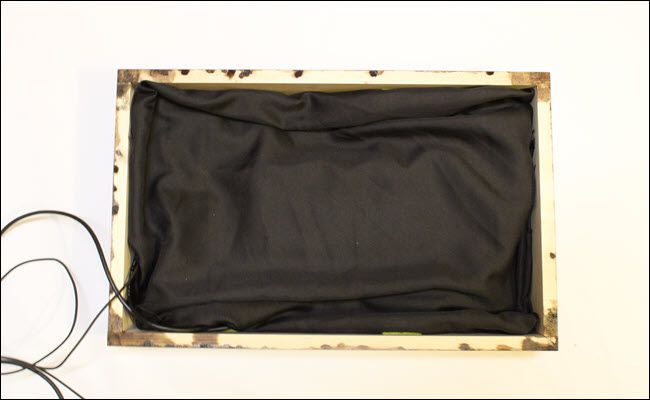
Adding a black cloth over the monitor and glass will also enhance the mirror effect.
Your hardware is complete.
Now it’s time to set up your Raspberry Pi and roll out the Magic Mirror software.
The easiest thing to do is get acopy of NOOBSto roll out the latest version of Raspbian.
First, you should ensure your Raspberry Pi is up to date.
fire off the following commands:
sudo apt-get upgrade
And provide the root password when prompted.
Alternatively, you could usesuand skip all thesudoentries.
punch in Y and hit enter.
If you don’t suspend the screensaver, it will interfere with the interface.
key in Y and hit enter.
After that, the software will finish installing and start up on its own.
Let’s take care of that.
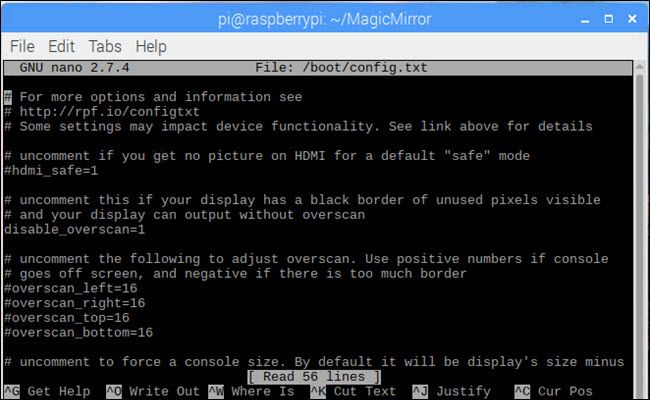
In terminal pop in the following command and then press Enter:
The Config.txt file will open in terminal.
jot down Y to confirm you want to save and then hit Enter to confirm the config.txt file name.
you’re free to press Ctrl+M to minimize the magic mirror interface and initiate the terminal.
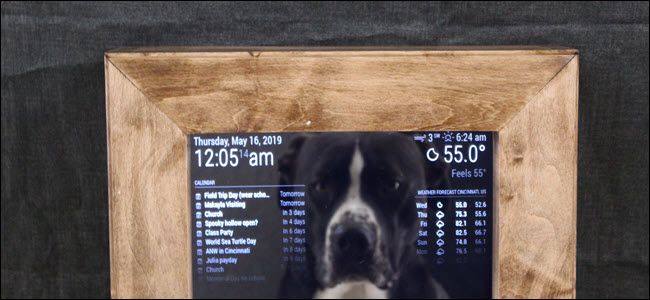
Updating Time, Calendar, Weather, and News
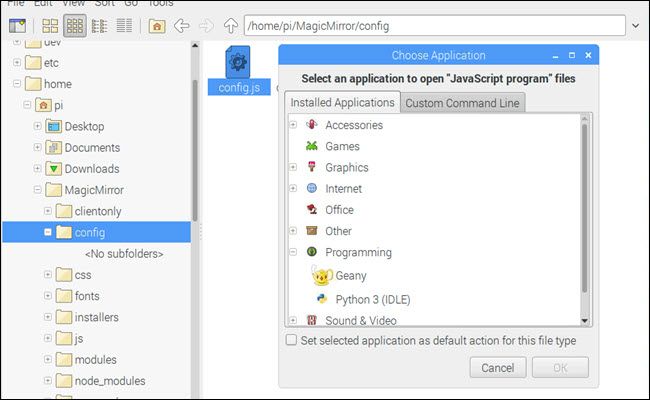
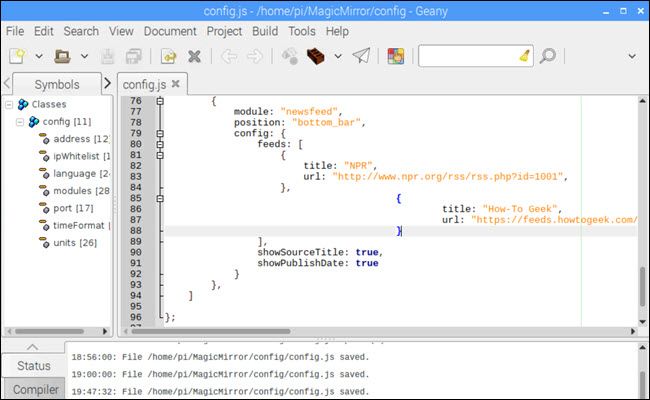
Now we’ll configure the Magic Mirror interface.
Expand the programming category and chose Geany from the list.
It pulls from modules to add features, and you configure preferences of those features here.
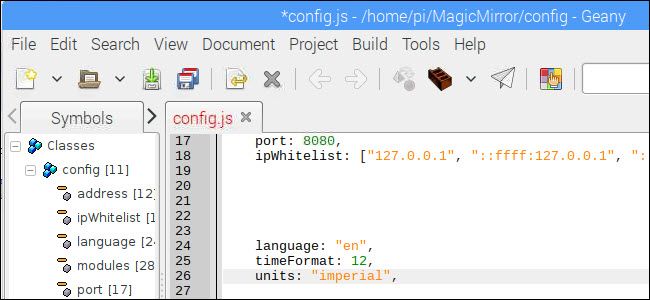
The Magic Mirror software comes with default modules for time, weather, the calendar, and compliments.
You should have:
timeFormat: 12,
units: “imperial”,
Save the file.
The change should take effect immediately.
initiate the config.js section again and scroll to theModule: calendarsection.
Then paste in your iCal link (be sure to keep the quotes).
To add weather, you will need OpenWeatherMap API keys.
Go to theOpenWeatherMapsite and sign up for a free account.
Then browse to theirAPI section.
Generate a key and copy it.
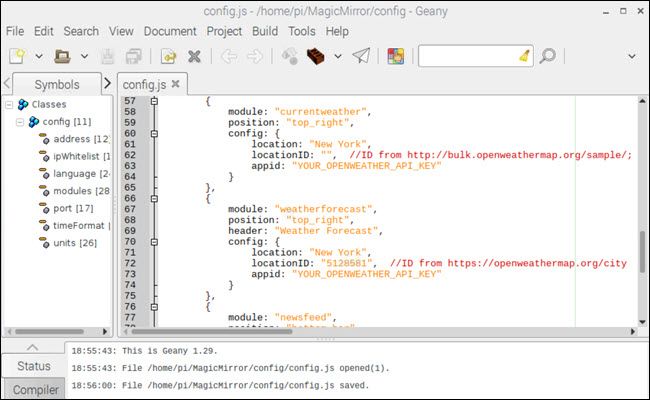
Go back to config.js and scroll to the weather and weather forecast modules.
Paste your copied API key into “Your_OPENWEATHER_API_KEY” (be sure to leave the quotes).
Open a net web client and head to theOpenWeatherMap city search page.
Search for your city and hit the result.
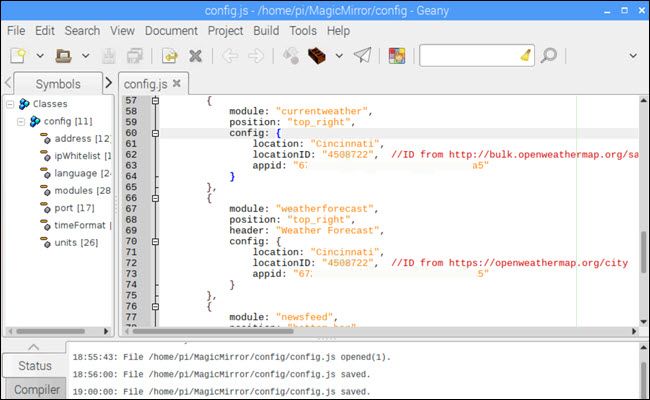
The web client link will include a number at the end.
Finally, rename the location from “New York” to the name of your city.
For How-To Geek, that’s:
Rename the title to the appropriate website.
you’ve got the option to customize it even further if you like.
For example, you might remove modules like the compliments oradd new modulesfrom theMagic Mirror community.
