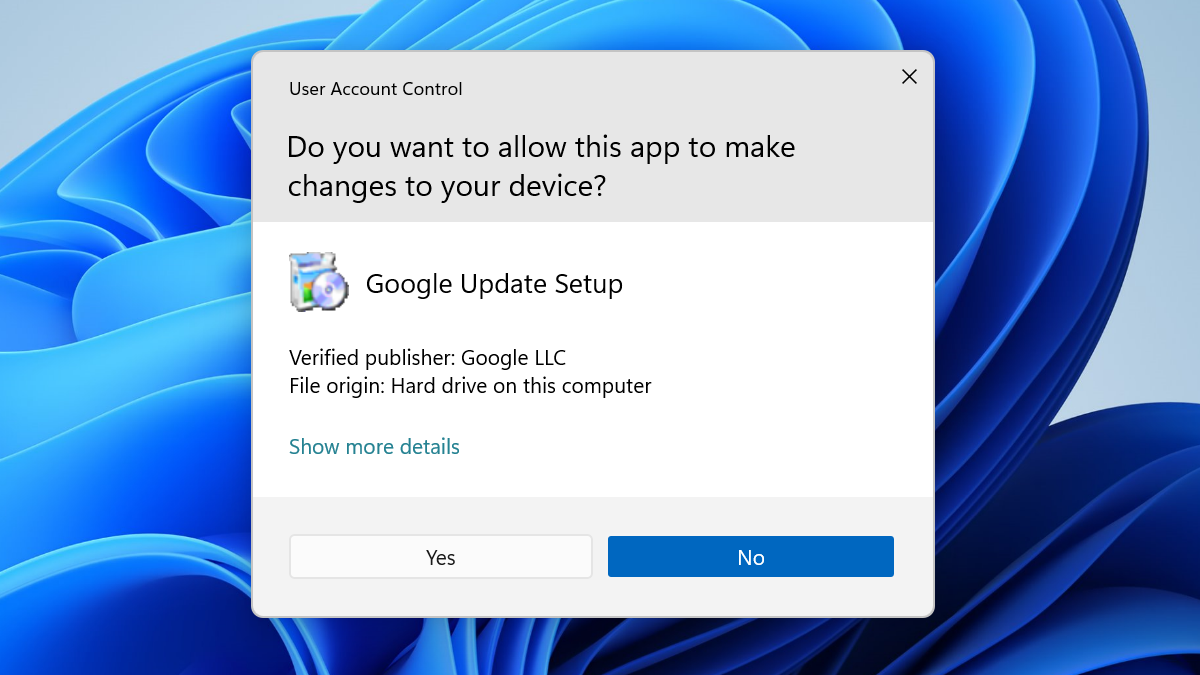
User Account Control is an important Windows security feature.
If a running system wants full access to your system, it has to ask with a UAC prompt.
If you disable UAC, all running applications can gain Administrator access without asking first.
Here’s how you disable UAC on any version of Windows.
What Is UAC?
It is one additional barrier between your system and potentially malicious applications.
It’s included on Windows Server, too.
UAC options are found in the classic Control Panel, even on Windows 10 and Windows 11.
Disabling UAC can leave your rig more vulnerable to malicious software.
We recommend against disabling UAC unless you have a specific need, like troubleshooting a software issue.
If you do disable UAC temporarily, we recommend re-enabling it as soon as possible.
How to Disable UAC on Windows 10
First, bring up the UAC options window.
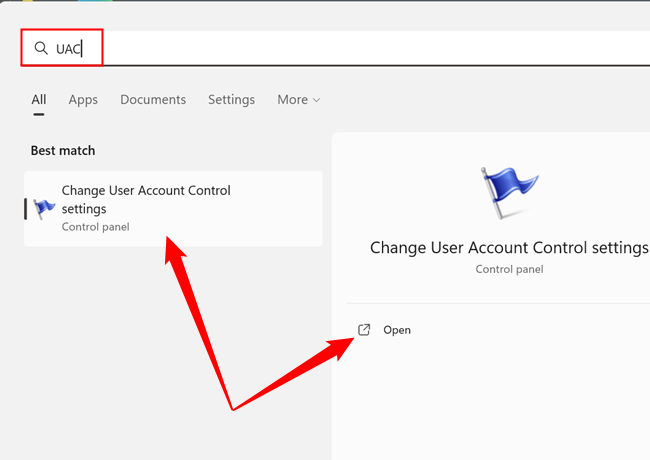
pop in “UAC” or “User Account Control” into the search box in the Start menu.
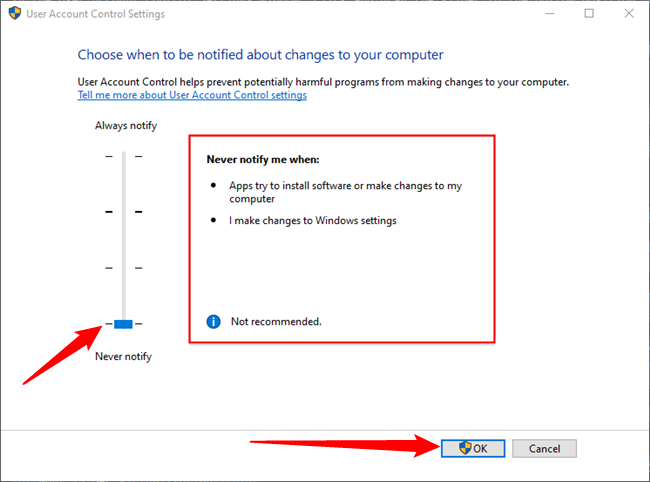
Click “OK” to keep your choice.
You will have to agree to one final UAC prompt to confirm the change.
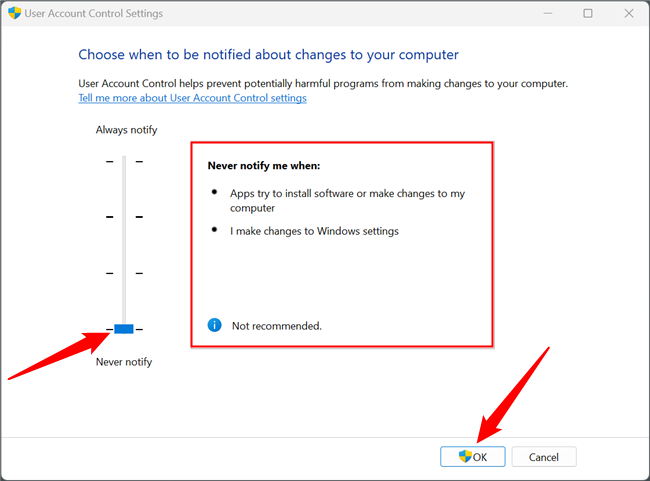
It will take effect immediately after you do.
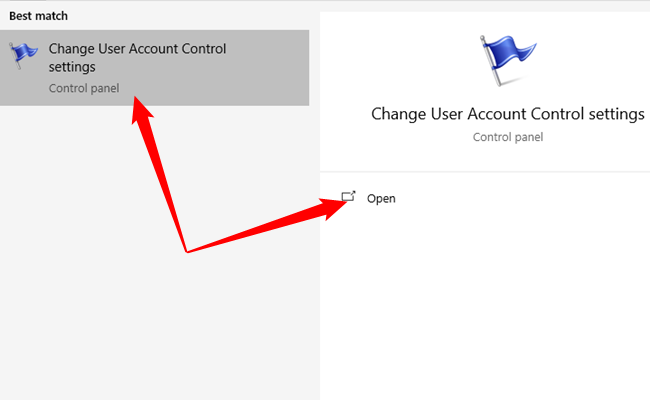
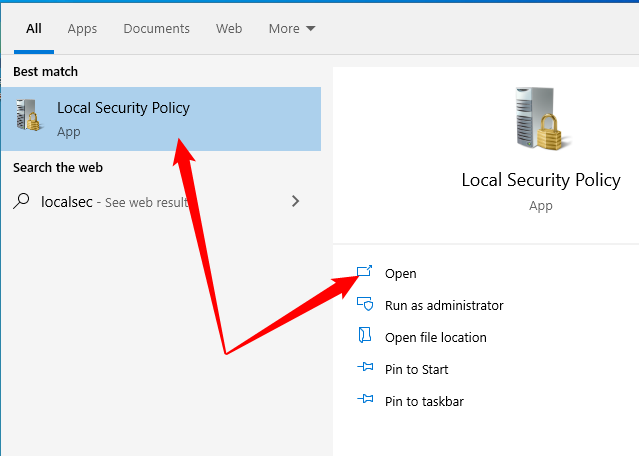
First, search for “UAC” in the Start Menu.
Select “Change User Account Control” from the search results, or click “Open.”
Any activity that would normally trigger UAC will instead be automatically given the go-ahead.
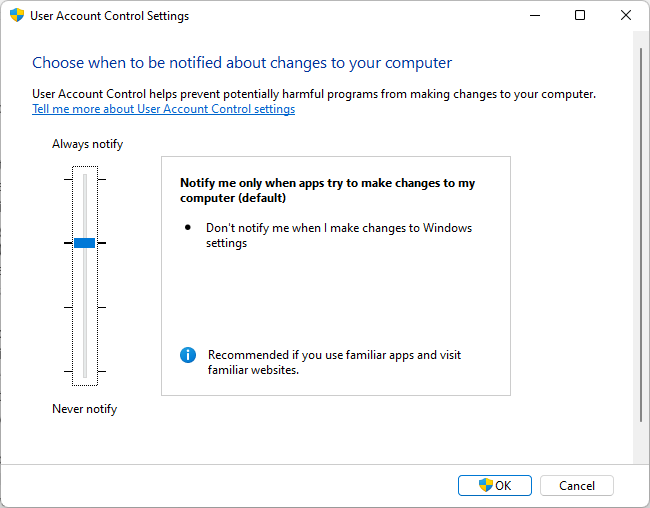
What Do the UAC Options Mean?
The UAC slider gives you four separate options for choosing User Account Control behavior on Windows.
No, you should not disable UAC on your system if you don’t need to.
We recommend leaving it enabled.
Disabling UAC makes it easier for malicious applications to make changes to your system without your knowledge.
Again, we strongly recommend against disabling UAC unless you have a particularly good reason to do so.
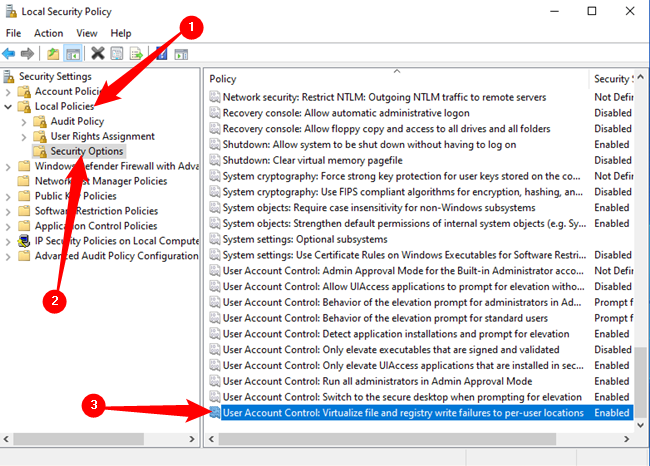
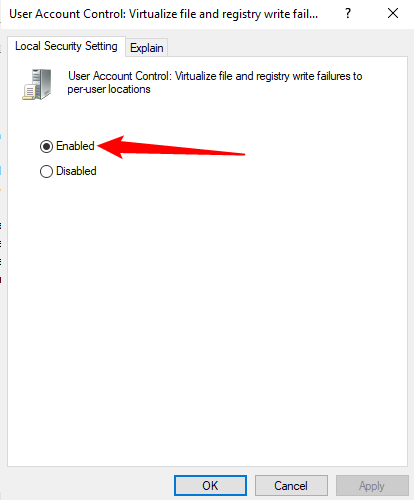
What Is UAC Virtualization?
Here is a concrete example of where you might encounter it.
Most modern games write their save files to some location in the User folder.
Typical locations include AppData, the Documents folder, or the My Games folder.
However, older games were not all designed that way.
However, it is useful if you already have a Pro version installed.
Ensure that UAC Virtualization is set to “Enabled,” then click “Apply.”
Of course, UAC is only one part of running a secure Windows installation.
