It can even breathe new life into a PC plagued by crashes or manufacturer bloatware.
The clean install methods below should cover most, if not all, possible starting points.
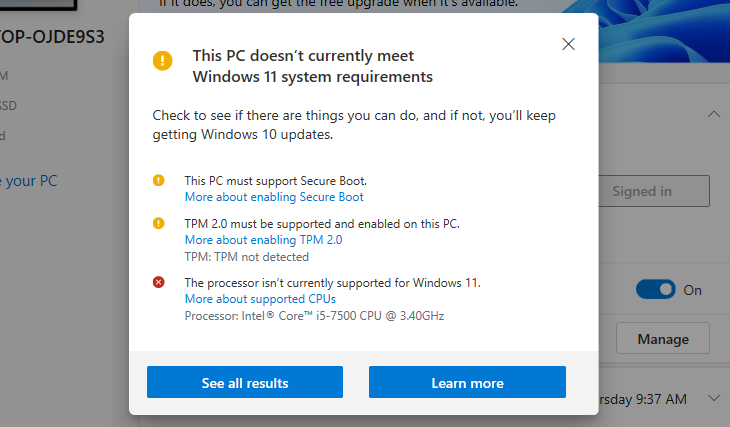
This has resulted in many older computers being blocked from accessing the update.
Hannah Stryker / How-To Geek
If not, it’s possible for you to download it from thePC Health Checkpage.
And that obviously includes before a clean install of Windows 11.
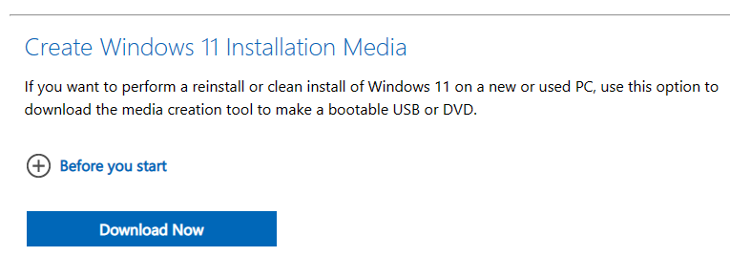
Here we’ll be using the Media Creation Tool.
Download the tool from theMicrosoft website.You’ll find it under the “Create Windows 11 Installation Media” heading.
After downloading, go to your downloads folder and double-smack the “mediacreationtool.exe” file to open it.
Accept the license agreement when prompted, assuming you agree to the terms.
Choose the language and Windows edition you want to use.
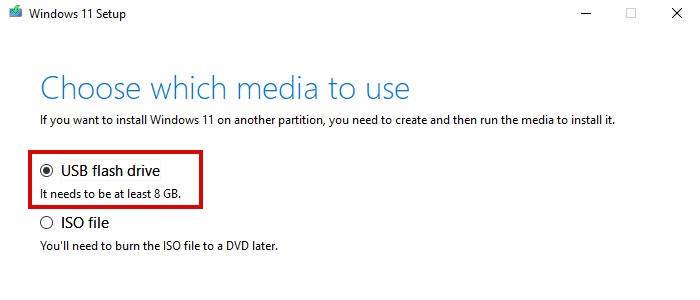
On the media choice screen, choose “USB Flash Drive.”
Select your flash drive from the list and click “Next.”
Wait for the tool to download Windows 11 and finish the setup of the bootable media.
You canaccess the BIOSby pressing a specific key during boot, commonly F1, F2, or F10.
Check your PC or motherboard manufacturer’s website if none of those work.
Select “Removable Devices” in the list and move it to the top position.
This will make your PC attempt to boot from the USB drive before the hard drive.
Save the changes and exit.
Press any key when prompted, and your box will boot into the Windows 11 setup tool.
Remember to reverse this change to BIOS when the clean install of Windows 11 is complete.
If you don’t, your PC will try toboot from any USB drive insertedwhen it starts up.
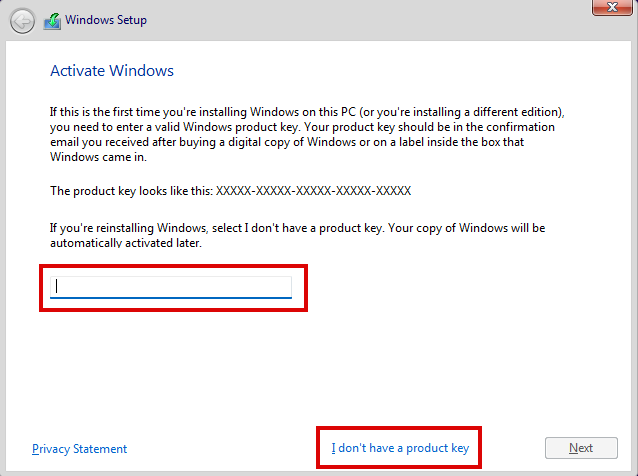
Click “Next” and then click “Install Now.”
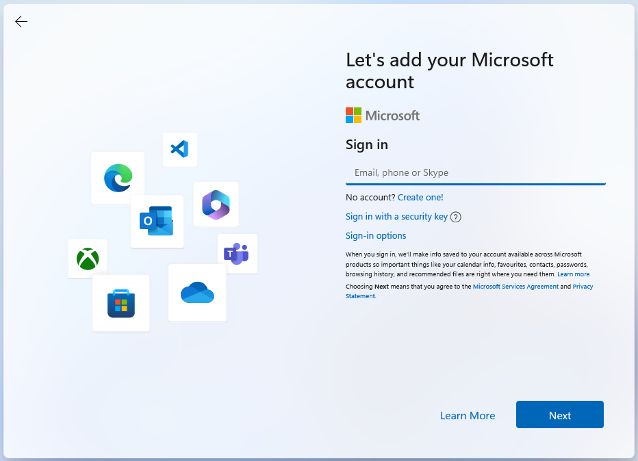
Reactivation will be taken care of automatically once the installation is complete.
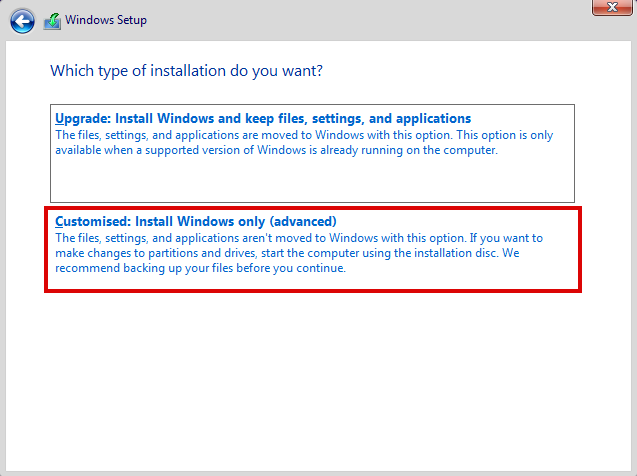
Click Next and accept the license agreement.
On the next screen choose the “Custom: Install Windows only (advanced)” option.
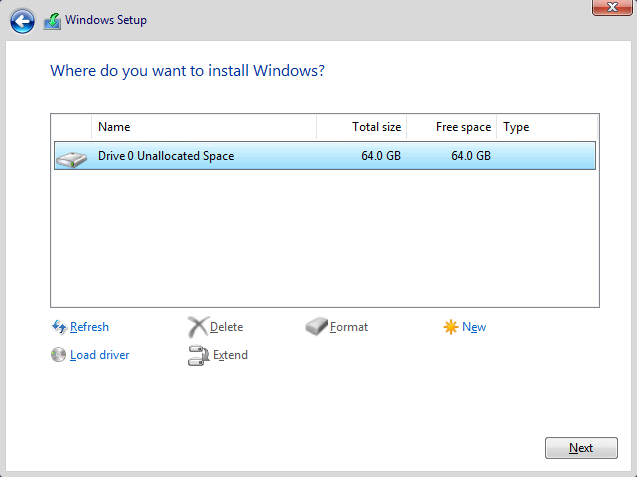
Finally, choose where you want Windows 11 to be installed.
Windows files are most commonly installed in Drive 0 Unallocated Space.
If your hard drive containsmultiple partitions, you will see them all listed here.
Delete any you no longer need before choosing the installation location.
The installation will now begin.
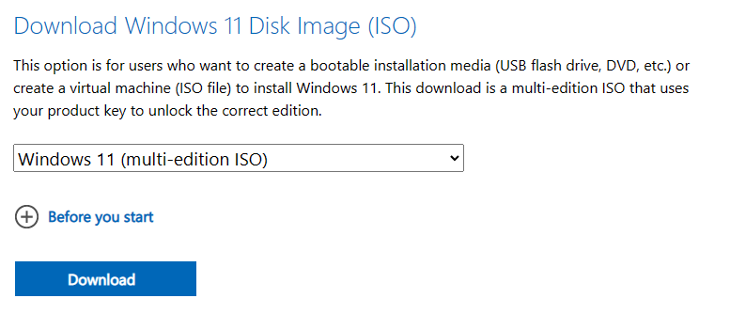
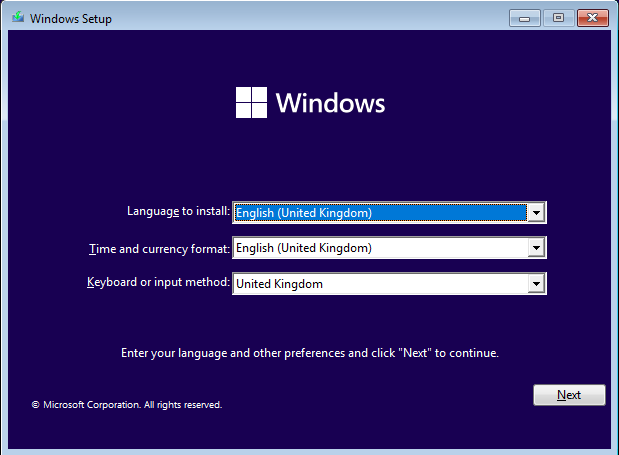
Select your desired language and click “Confirm.”
nudge the “64-bit Download” button to begin downloading the ISO file.
Although the ISO filesize varies between versions, it will be at least 4 to 5GB.
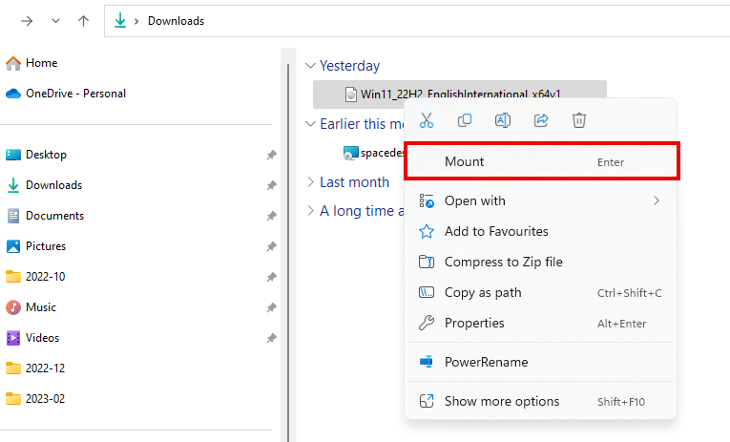
Right-press the file and select “Mount” from the context menu.
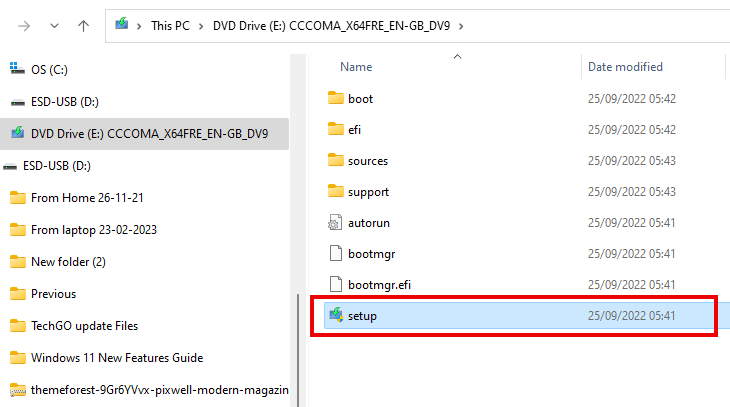
pick the virtual drive and then double-click “Setup.exe” to begin the process.
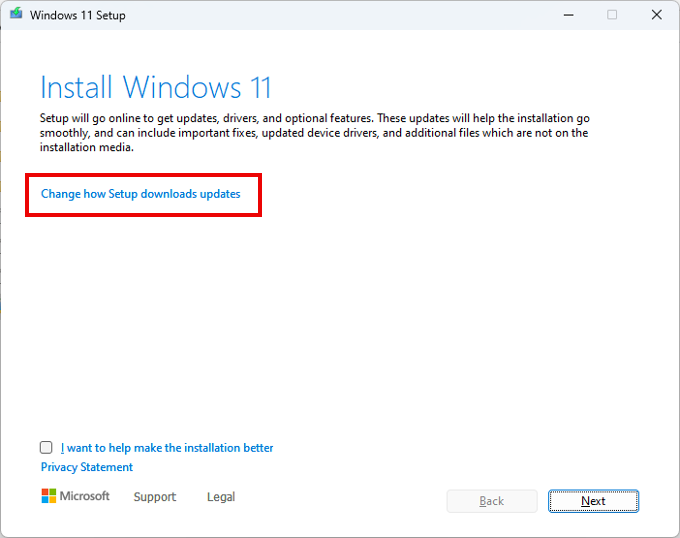
By default, Windows 11 setup will go online to get updates, drivers, and some optional features.
This can help the reinstall go more smoothly, but it will take longer.
With that done, click “Next” and then “Install.”
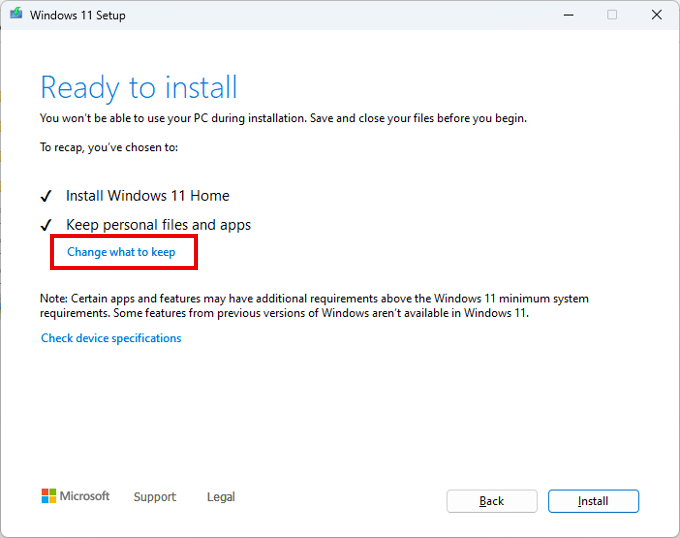
When the system files have been installed, you’ll see the Out-of-the-box Experience.
Click through the various options screens, selecting the Windows 11 preferences you want.
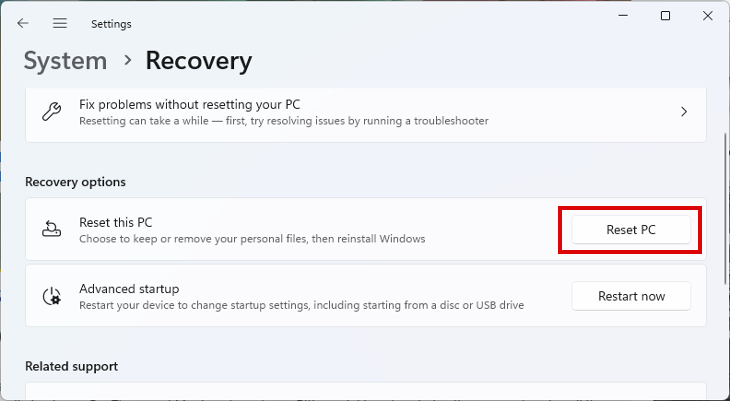
However, it is simpler than other solutions since all you need is the parameters menu.
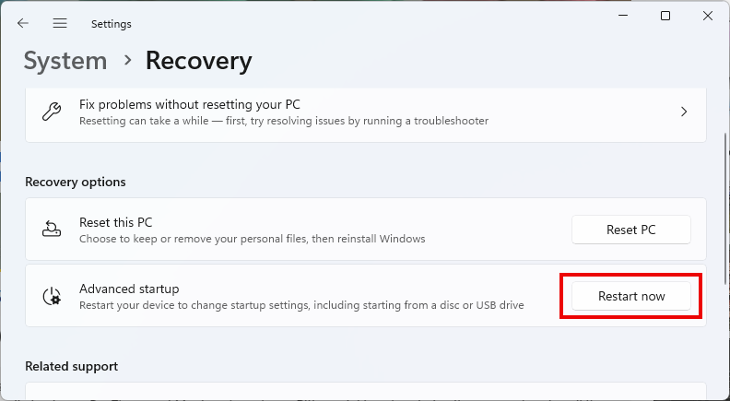
Navigate to prefs > System > Recovery, and look for the Recovery Options section.
tap the “Reset PC” button to begin the reinstall process.
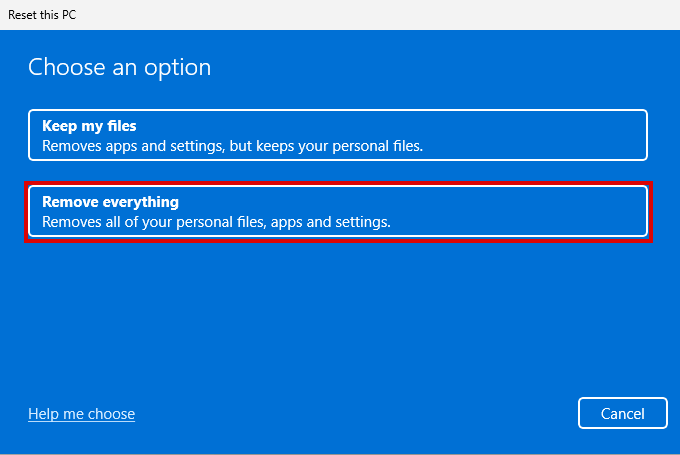
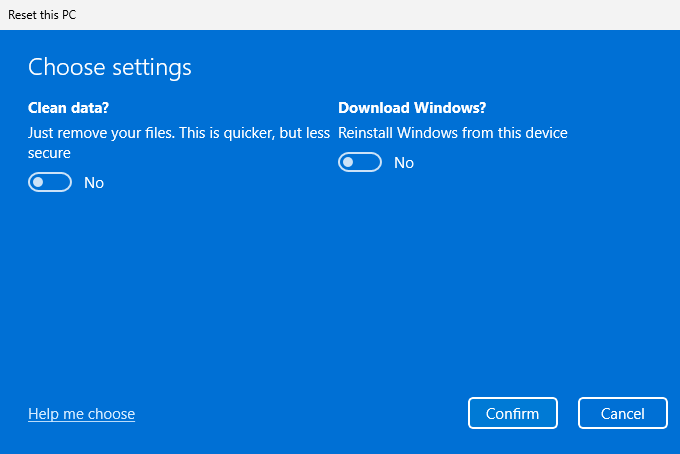
This will delete any files, installed apps, and previously changed prefs.
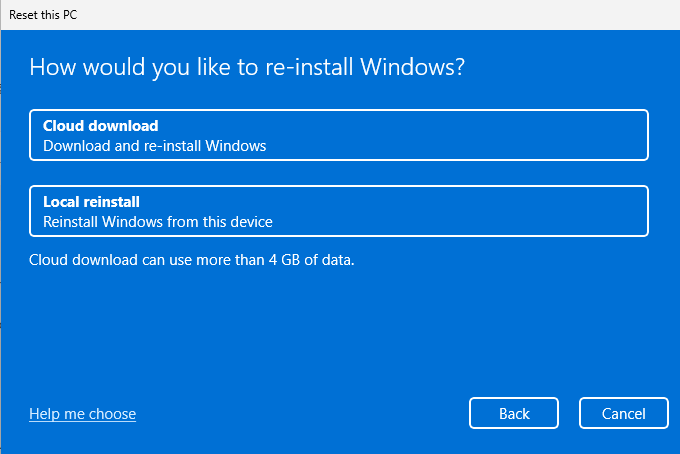
There are two options for reinstalling Windows 11 here.

A Local Reinstall reuses the original Windows 11 installation files already on your gear.
The Cloud Download will get the required installation files from the Microsoft servers.
There are pros and cons to choosing each method.
Should You Use Local Reinstall?
Local Reinstall can be the most convenient choice, particularly if you have a slow Internet connection.
The local reinstall might not even be possible if the existing files are corrupted in some way.
Should You Use Cloud Download?
Cloud Download is often the better choice if you have a good Internet connection.
It helps to ensure a clean installation is performed.
The installation files can be around 4GB, which is worth knowing if you have a metered connection.
The downside of choosing the Cloud options is that additional Microsoft software can be included.
Below this is a link to Change controls.

Click this and change the parameters as required.
you could now click “Confirm” and wait for the reset process to complete.
One of those options is a reset and clean install of the OS.
The easiest way to pull up the menu is through parameters > Recovery.
Under the Recovery Options heading, nudge the “Restart Now” button next to Advanced Startup.
Your PC should restart directly into the WinRE menu.
Shut down the PC and press the power button.
As soon as you hear the POST beep, press the power button again to turn the PC off.
Repeat this three times.

After the third restart, your setup should boot into WinRE.
grab the “Troubleshoot” option and then “Reset This PC.”
You then have two options: “Keep My Files” or “Remove Everything.”
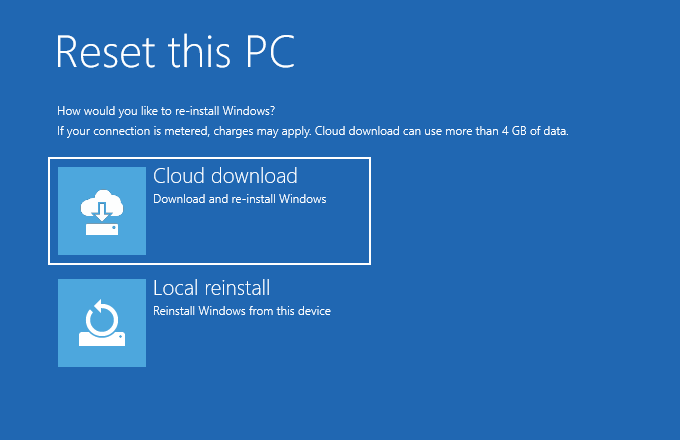
As this is a clean install, choose the second option.
You’ll then be required to choose the location of the installation file.
If you have a fairly fast Internet connection, it can be better to choose Cloud Download.
That is particularly true if you are performing a clean install to fix problems with Windows 11 system files.
You won’t see this step if your setup only has a single hard drive.
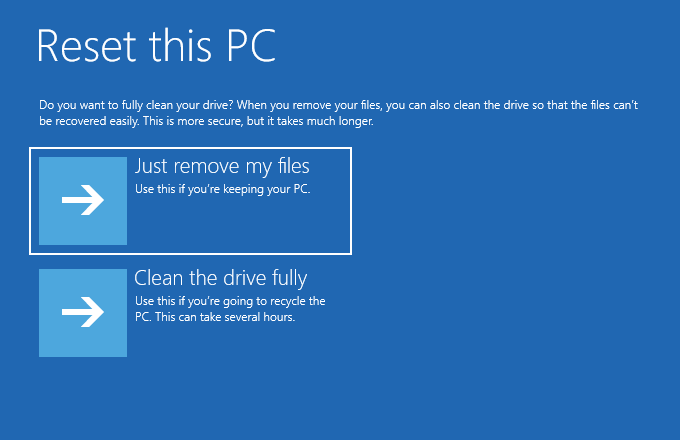
The penultimate step is to decide if you want to “Fully Clean the Drive.”
If not, choosing “Just Remove my Files” will suffice.
Finally, smack the “Reset” button and wait for the installation to complete.
Be patient, it can take a while.
Learnthe best Windows 11 features, or how tomake the most of the Windows 11 taskbar.
Check outour favorite alternatives for Windows' built-in appstoo.
