Quick Links
Valve’s SteamOS is a living-room gaming operating system based on desktop Linux.
Before doing this, ensure you have back ups.
You do this at your own risk – you could run into problems.
Ye Olde SteamOSe’s developer, directhex, has done this tweaking work for us and packaged it up.
As SteamOS is freely redistributable, this is entirely legal.
Burn the ISO image file to a DVDandboot your box from the disc.
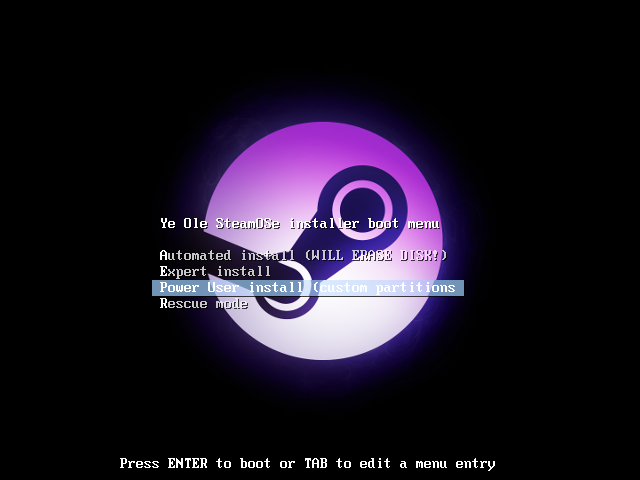
When you boot from the disc, you’ll see the boot menu.
This is a customized version of Valve’s SteamOS boot menu.
Very Important: You must snag the Power User install option to set up a dual-boot system.
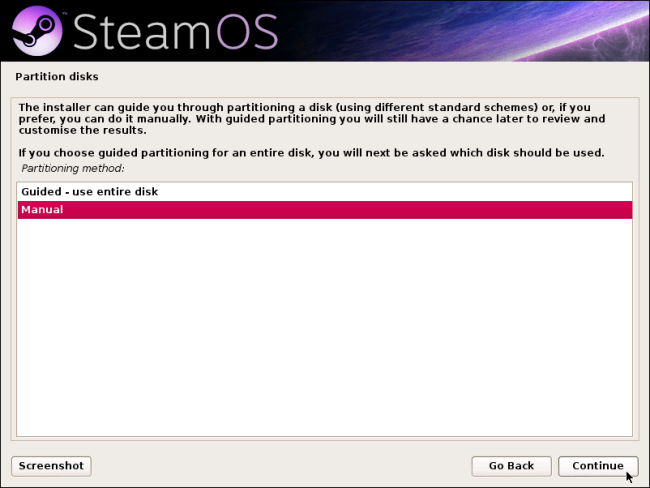
opt for Manual option and click Continue to start partitioning your disk.
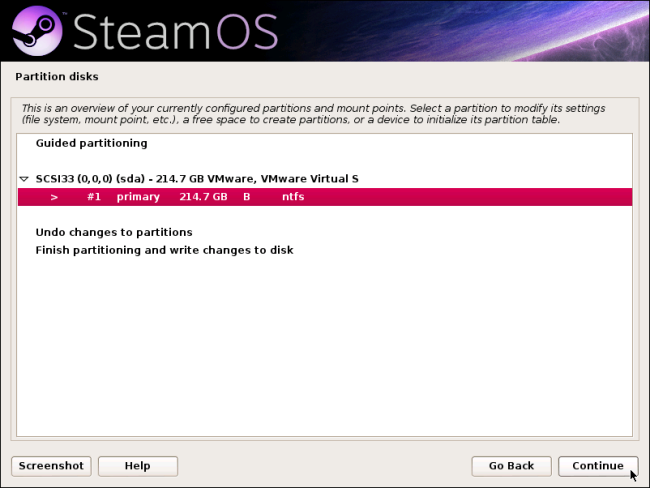
Select your Windows NTFS partition and click Continue to resize it, which will make space for SteamOS.
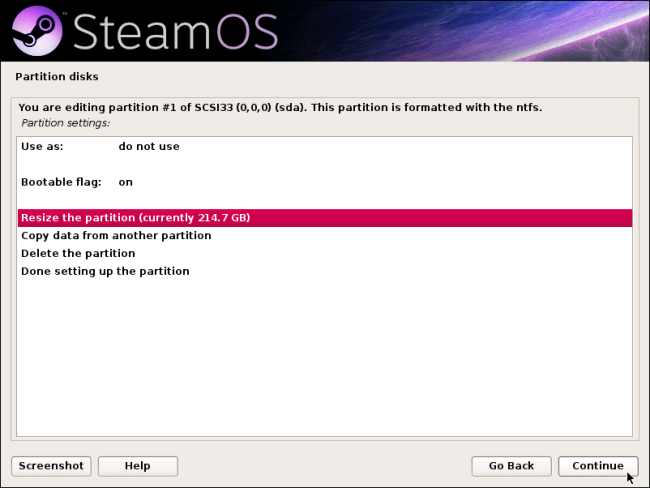
choose the Resize the partition option and click Continue.
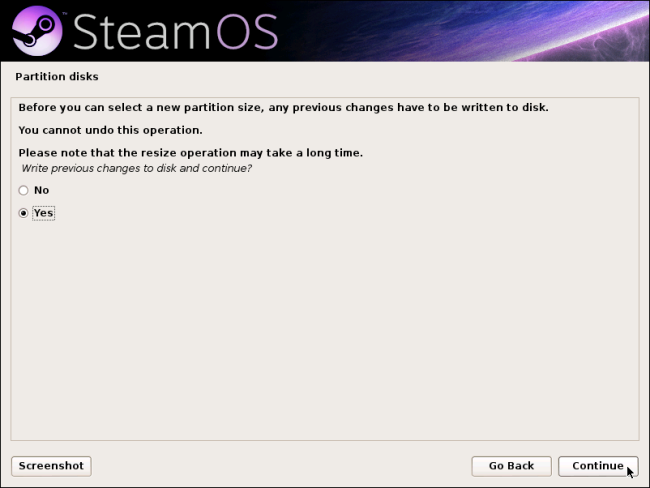
You’ll be asked whether you want to write any previous changes you made to disk.
Enter a smaller size for your Windows partition to shrink it and free up space for your SteamOS system.
Be sure to leave enough space for Windows, but also provide enough space to Steam OS.
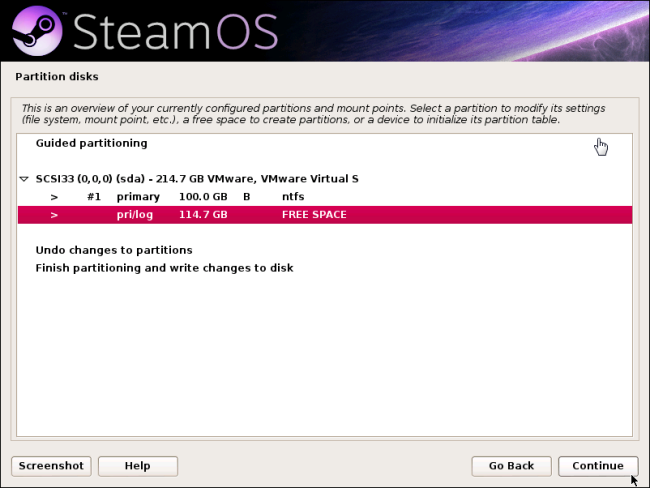
pick the “FREE SPACE” you created and continue.
We’ll now create several different partitions for SteamOS.
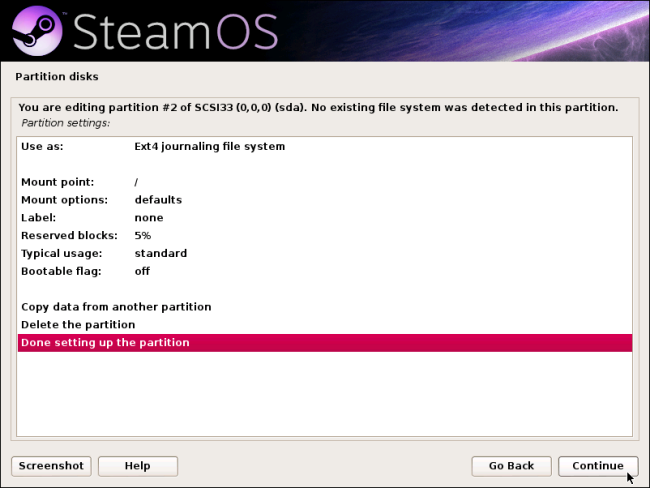
First, we’ll create a partition for the SteamOS base system.
choose the Create a new partition option and enter a partition size.
We recommend making this a Primary partition and place it at the Beginning of your free space when asked.
Ensure the partition is set to “Use as: Ext4” and “Mount point: /”.
![steamos-resize-windows-partition[4]](https://static1.howtogeekimages.com/wordpress/wp-content/uploads/2014/01/steamos-resize-windows-partition4.png)
These options should be automatically selected.
snag the Done setting up the partition option and click Continue when you’re done.
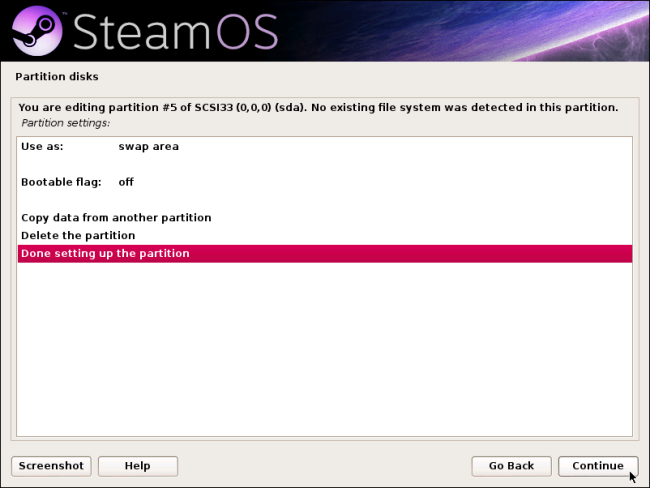
Second, we’ll create a swap partition.
This is basically the same thing asthe pagefile on Windows.
go for the free space again, click Continue, and enter a partition size.
Valve uses 10 GB for this, but directhex says you only need a gigabyte or two.
We recommend making this a Logical partition and placing it at the Beginning of the free space when asked.
opt for Use as: option and set it to Swap area.
When you’re done, select Done setting up the partition and click Continue.
Third, we’ll create a recovery partition for SteamOS’s recovery feature.
choose the free space again and create another partition in the same way as above.
Ensure the partition is set to “Use as: Ext4.”
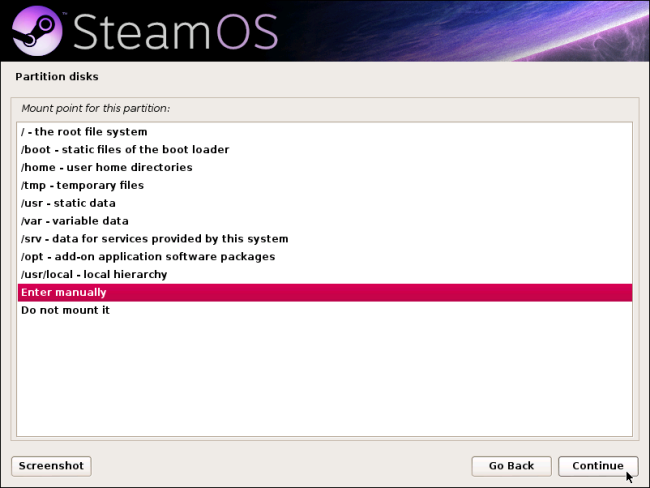
opt for Mount point option and click Continue to set up a mount point.
Click Enter manually and click Continue to enter a custom mount point.
Enter /boot/recovery as the partition’s mount point.
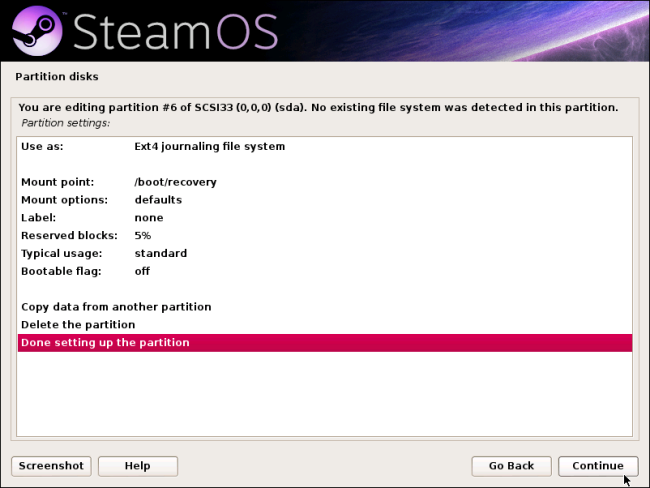
Select Done setting up the partition and click Continue again when you’re done.
Fourth, and last, we’ll create the partition where SteamOS installs games.
You should make this as large as possible, as you’ll need the most space here.
![create-steamos-home-partition-for-games[4]](https://static1.howtogeekimages.com/wordpress/wp-content/uploads/2014/01/create-steamos-home-partition-for-games4.png)
grab the free space again and click Create a new partition.
Set the partition to “Use as: Ext4” and “Mount point: /home”.
The installer should choose these options automatically.
When you’re done, continue.
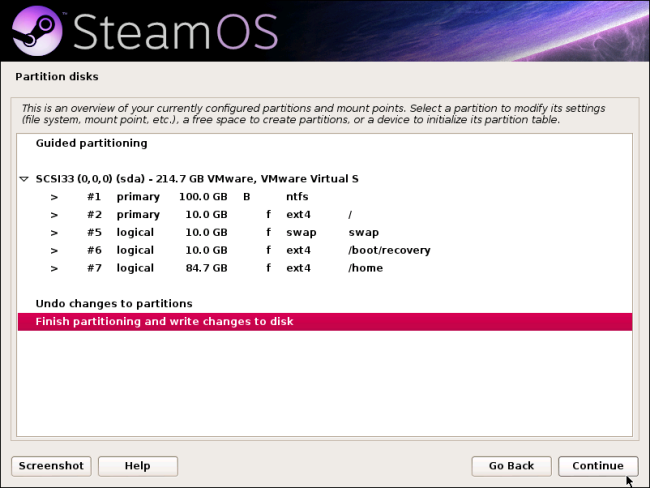
Your SteamOS partitions should now resemble the ones in the screenshot below.
Select Finish partitioning and write changes to disk when you’re done.
After confirming the changes, the rest of the installation process should happen automatically.
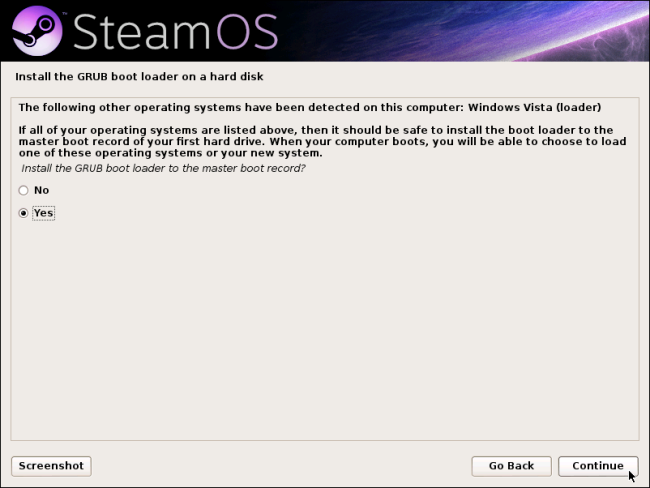
The installer will ask you about setting up a dual-boot setup with the GRUB boot loader.
Click Yes and allow it to continue.
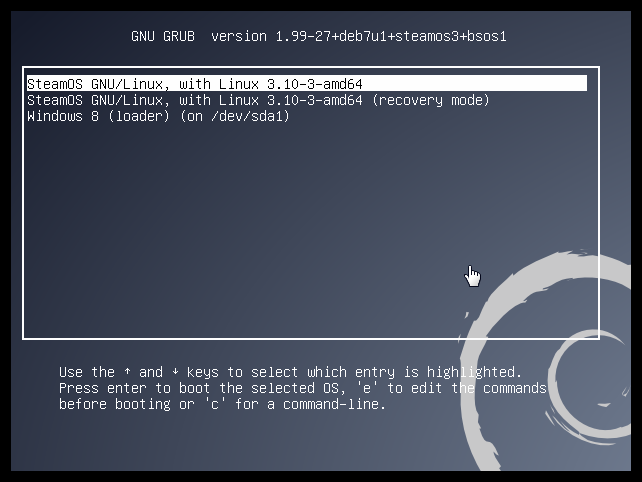
After installing SteamOS, you’ll see a boot menu each time you boot your machine.
This will allow you to choose whether you want to boot into SteamOS or Windows.
Use the arrow keys and Enter to select an operating system.
Post-Install Setup
You’re not actually finished the setup process yet.
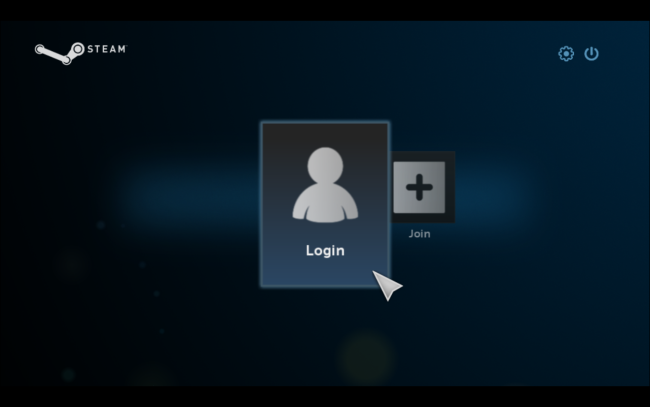
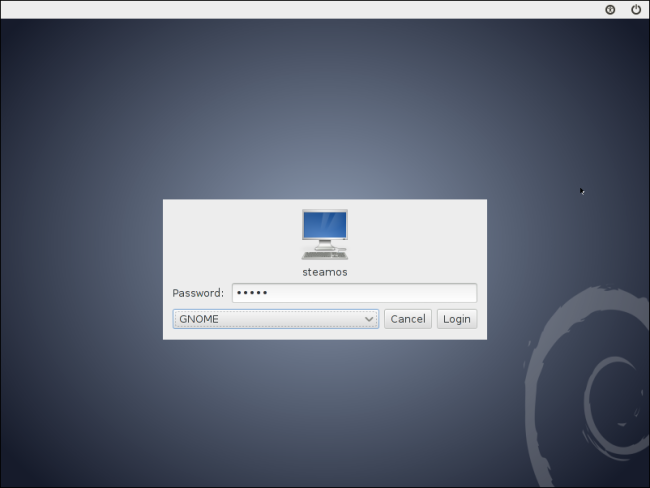
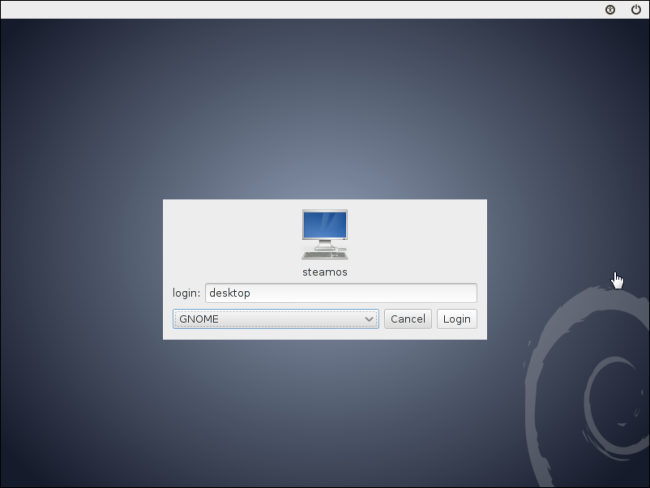
After booting into SteamOS the first time, you’ll see a login screen.
Log into the system with the account name “steamos” and the password “steam”.
snag the GNOME session.
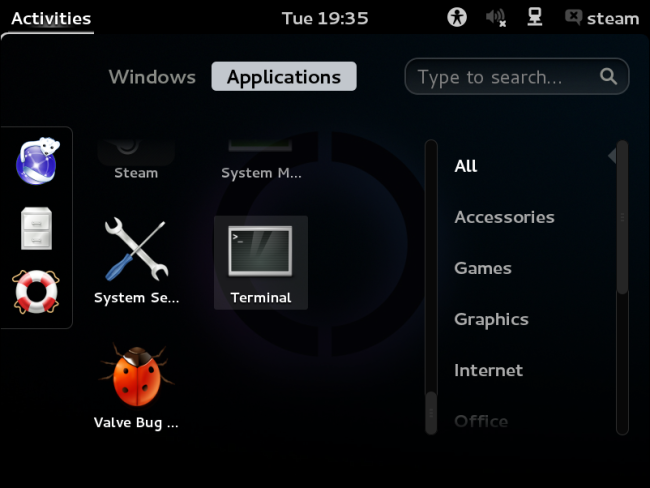
On the SteamOS desktop, smack the Activities option, select Applications, and open a Terminal window.
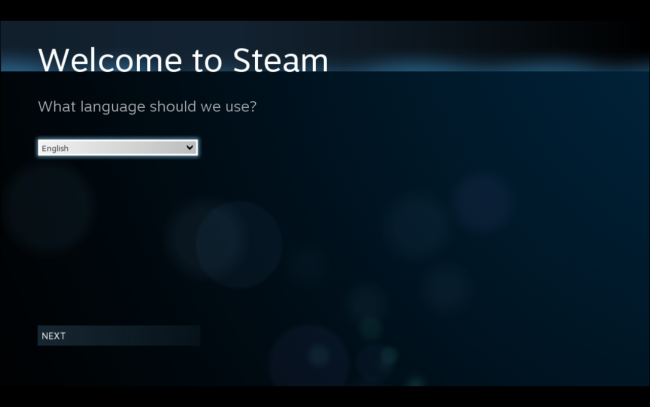
throw in “steam” into the terminal and press Enter to run Steam.
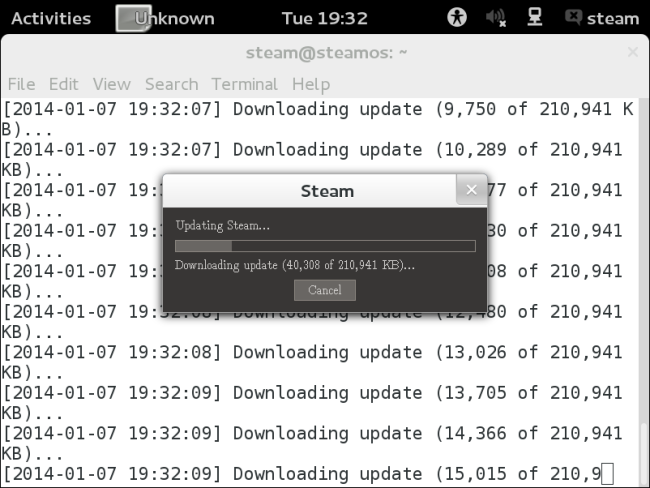
Accept the EULA and allow Steam to set up the system.
You don’t actually need to sign into Steam yet.
you’re able to end the window when you’re asked to sign into your Steam account.
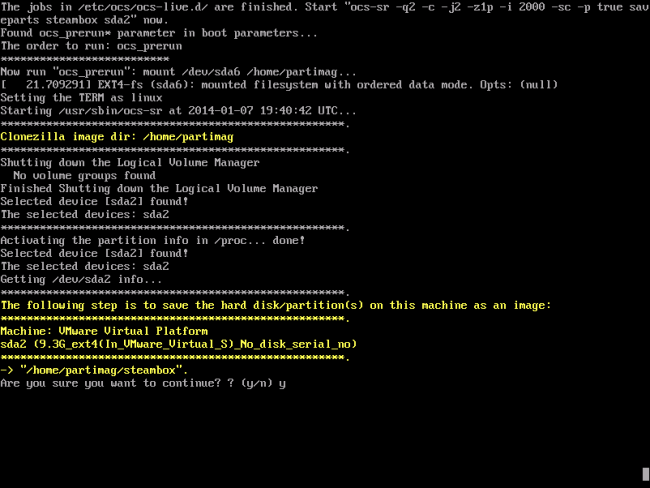
Open a Terminal window in the same way as before.
This is just a very beta experience.)
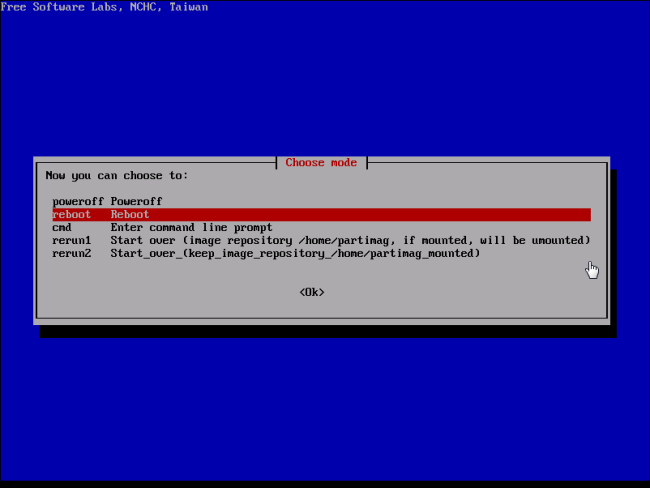
pop in “y” and continue to create the recovery partition.
it’s possible for you to now reboot into SteamOS.
Using SteamOS
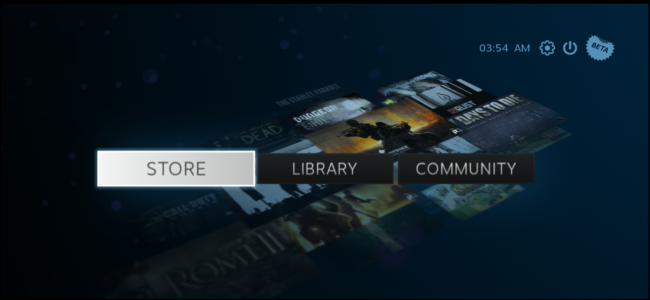
SteamOS should now be working normally.
It will boot up in a more polished way with a progress bar.
access with your Steam account to use SteamOS.
All your games that support Linux will be available to download and play.
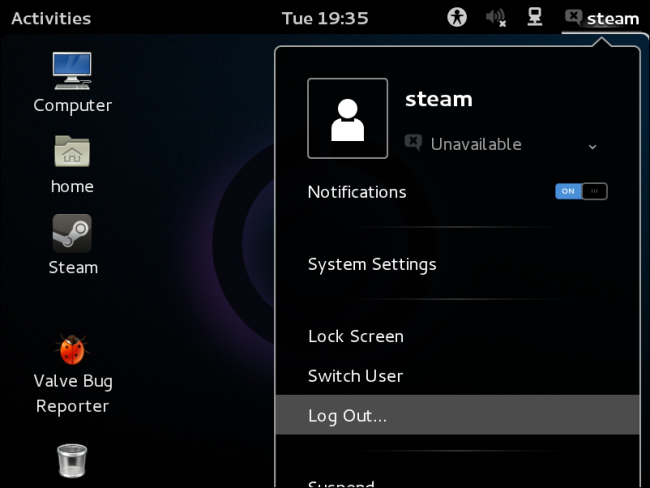
you’ve got the option to then grab the Exit option and choose Return to Desktop.
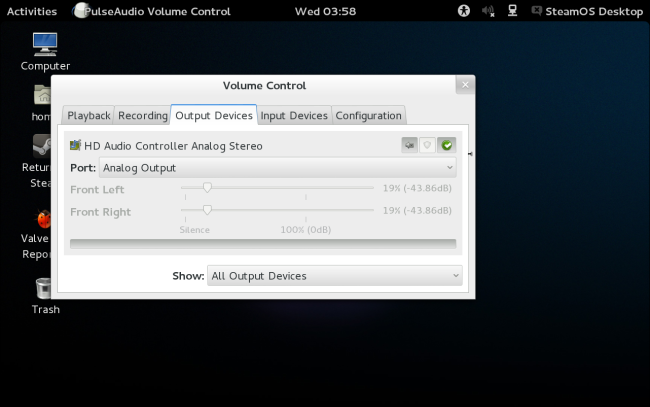
SteamOS doesn’t yet provide good official support for a variety of sound cards.
The volume control integrated into the GNOME desktop won’t work with Ye Olde SteamOSe at this time.
Your SteamOS system should now automatically update from the official SteamOS repositories, just like an official Steambox.
Over time, this process will become much simpler.
Thanks to directhex for creating the Ye Olde SteamOSe respin and doing all this work!