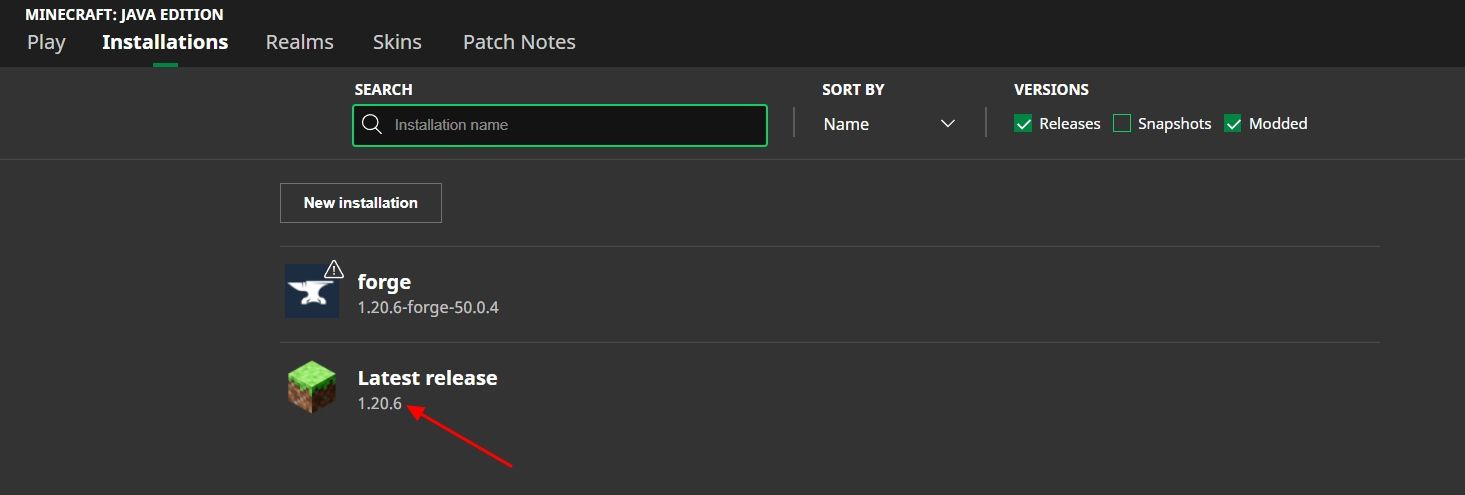
All of the mods you’re using should be the same as the version ofMinecraftyou’re using.
In this case, you’ll need to manually update the outdated mod to its latest version.
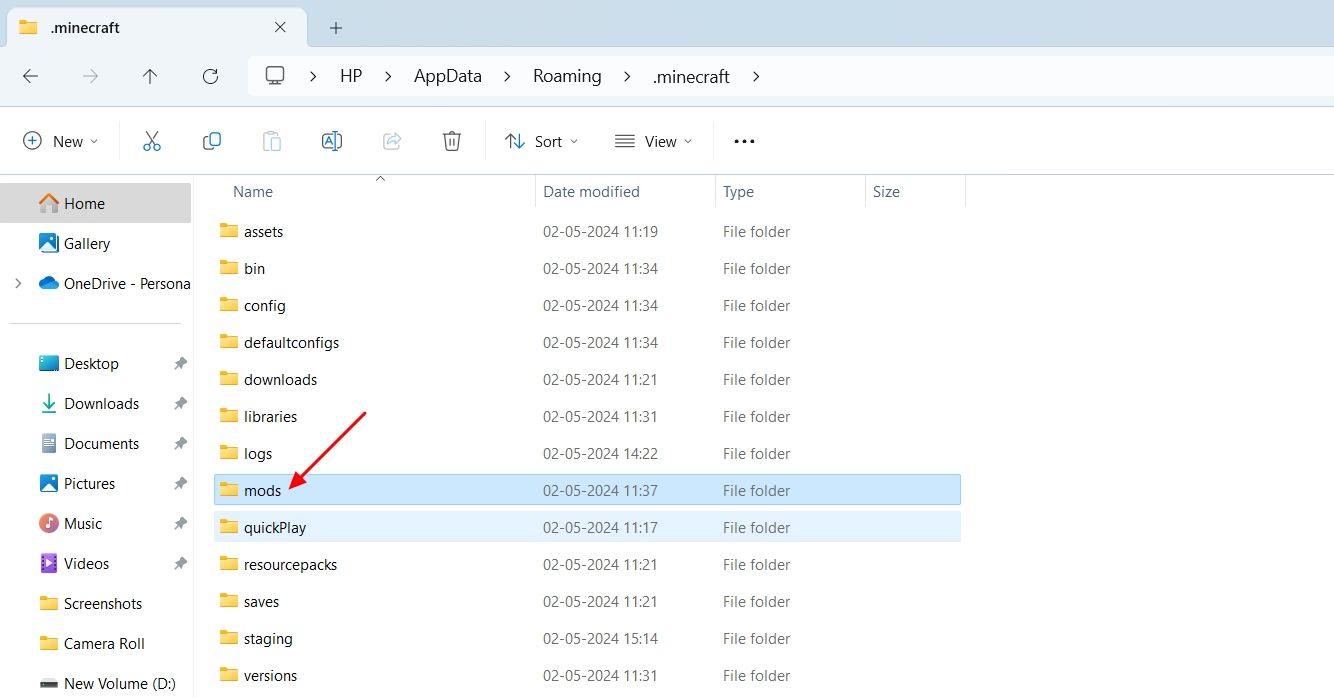
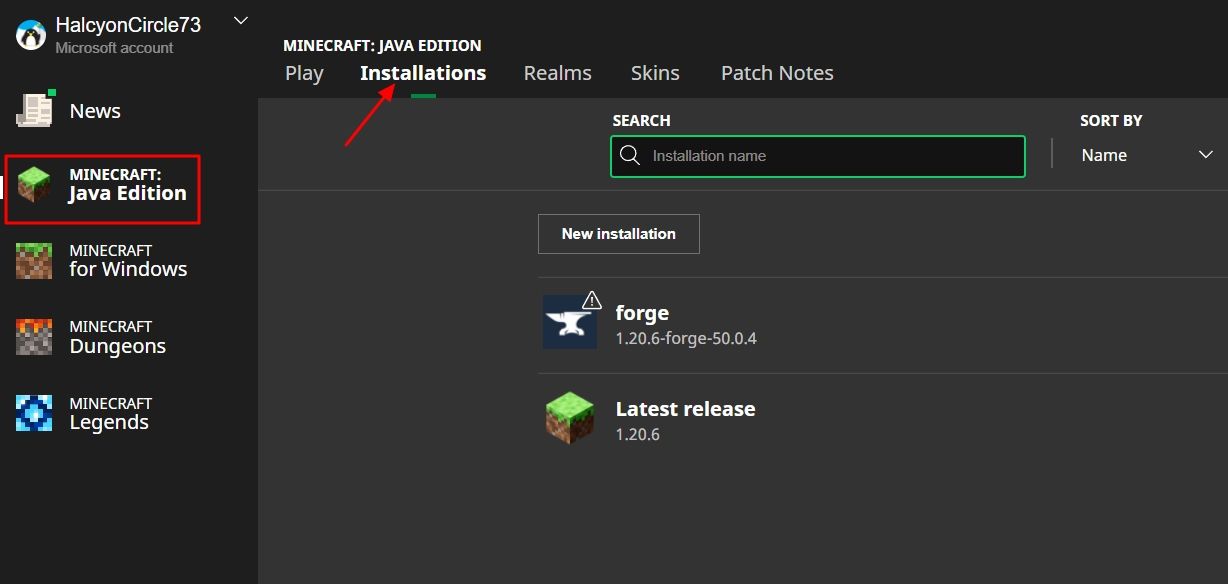
To do this, you’ll first need to check theMinecraftversion installed on your machine.
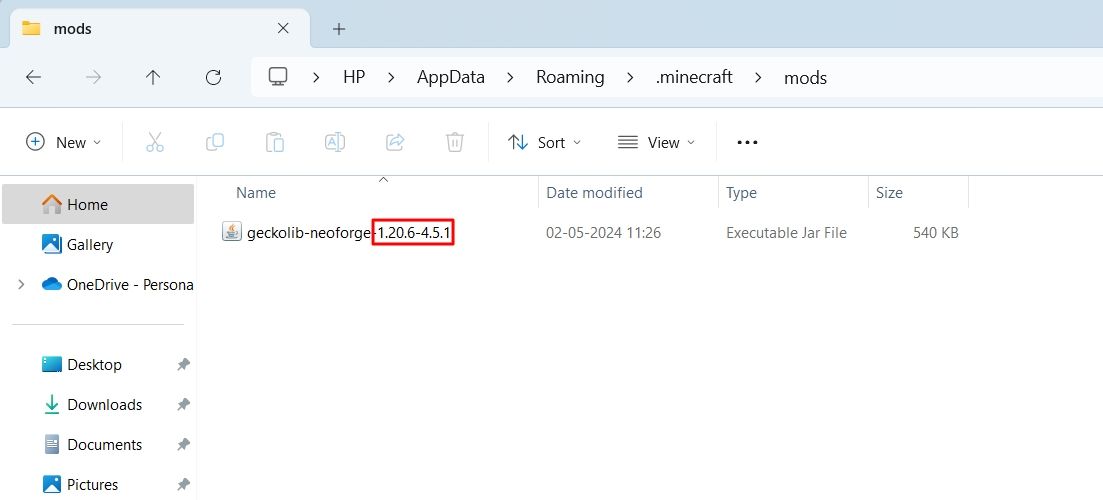
In the mods folder, go through the names of all the mods and check the version number.
You’ll need to replace that mod with its latest version to fix the problem.
For this, take note of the name of that mod, and then visit theCurseForge website.
punch in the name of that mod and hit the search icon.
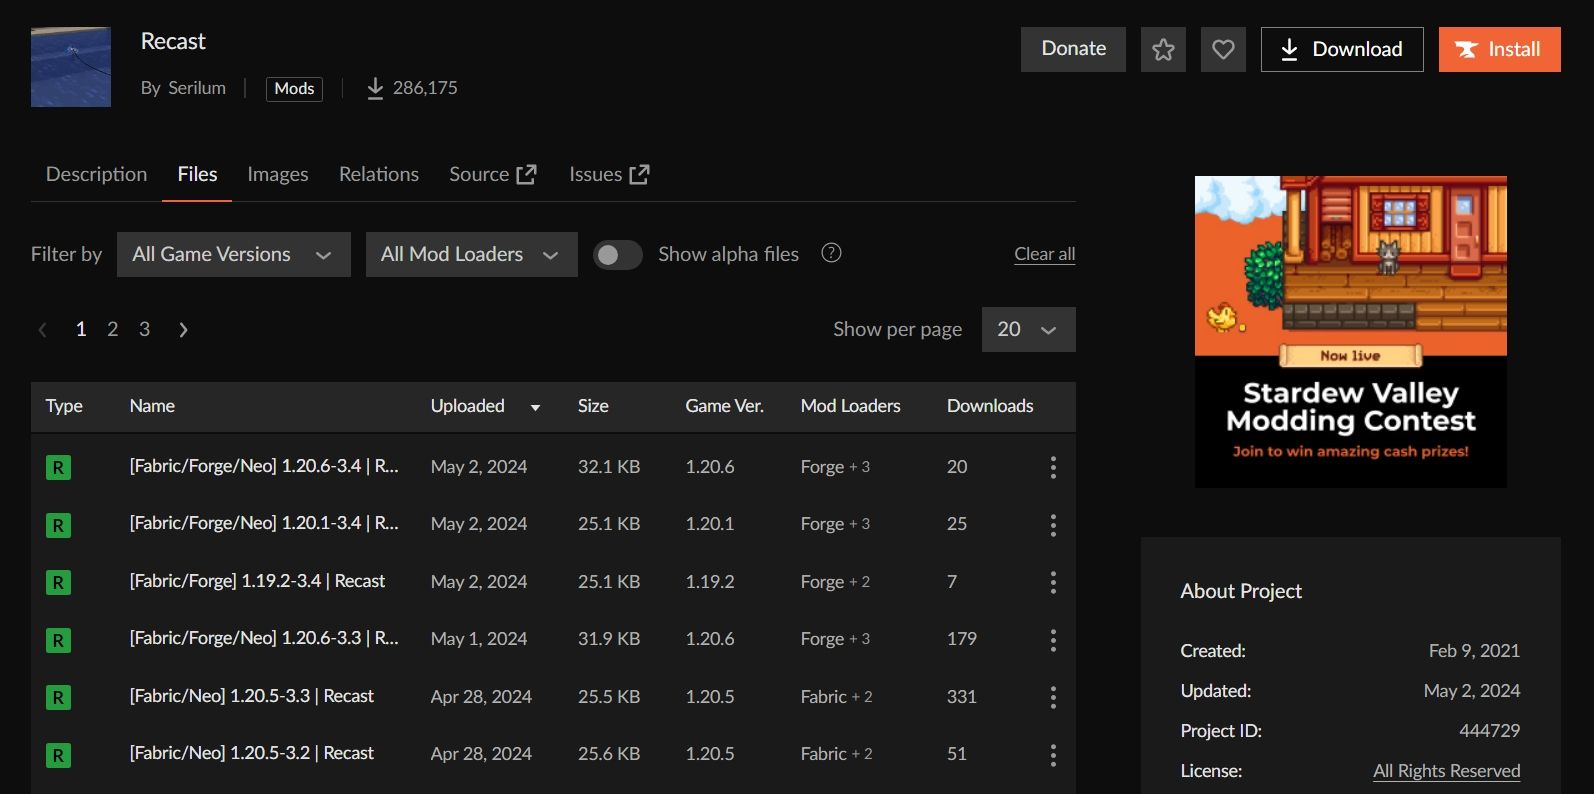
Choose the relevant mod from the result that appears.
Switch to the “Files” tab.
You’ll see different versions of that mod.
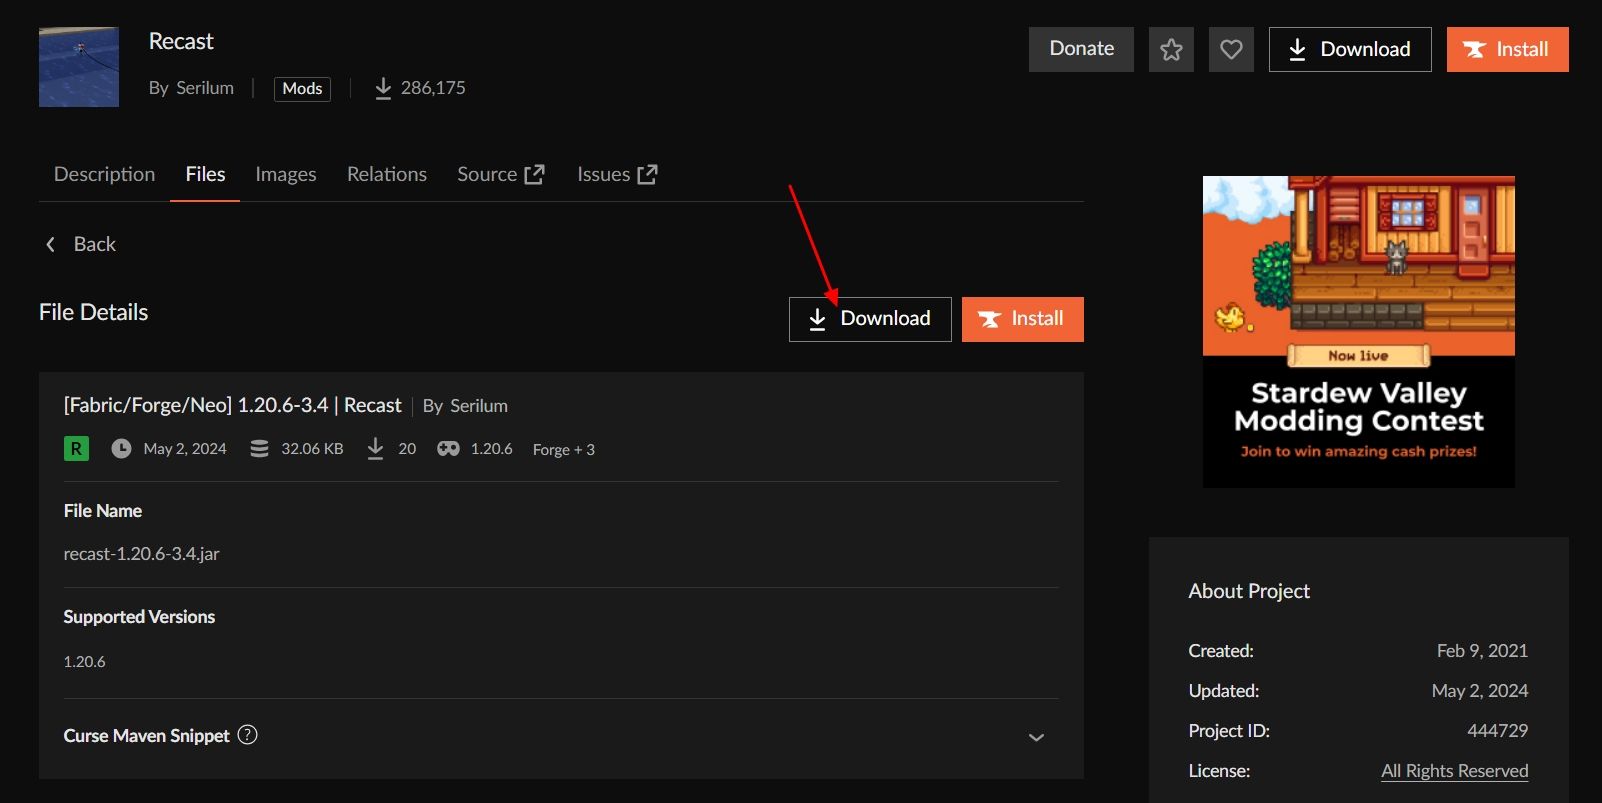
it’s crucial that you press that version which corresponds with the version ofMinecraftyou’re using.
hit the “Download” button.
Then, cycle your gear and try launchingMinecraftagain.
In this case, the problem might be with a particular mod’s files.
That mod might be conflicting withMinecraftand causing the issue.
You’ll have toupdate your graphics driverto fix the problem.
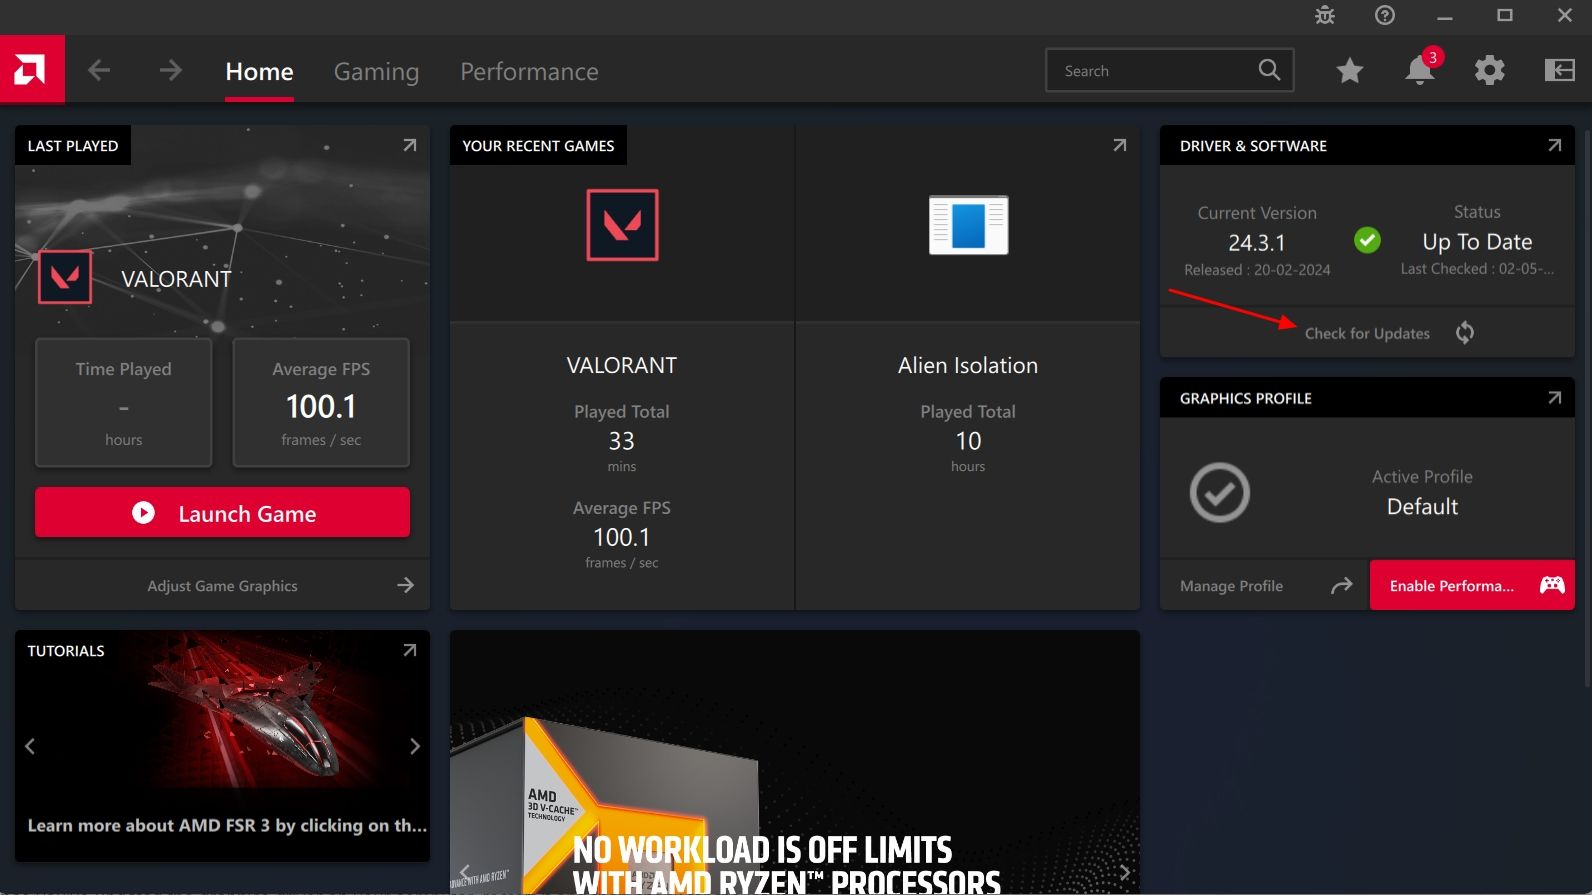
If your machine features an AMD graphics driver, download and install theAMD Software Adrenaline Edition.
After that, smack the “Check for Updates” button in the Home tab.
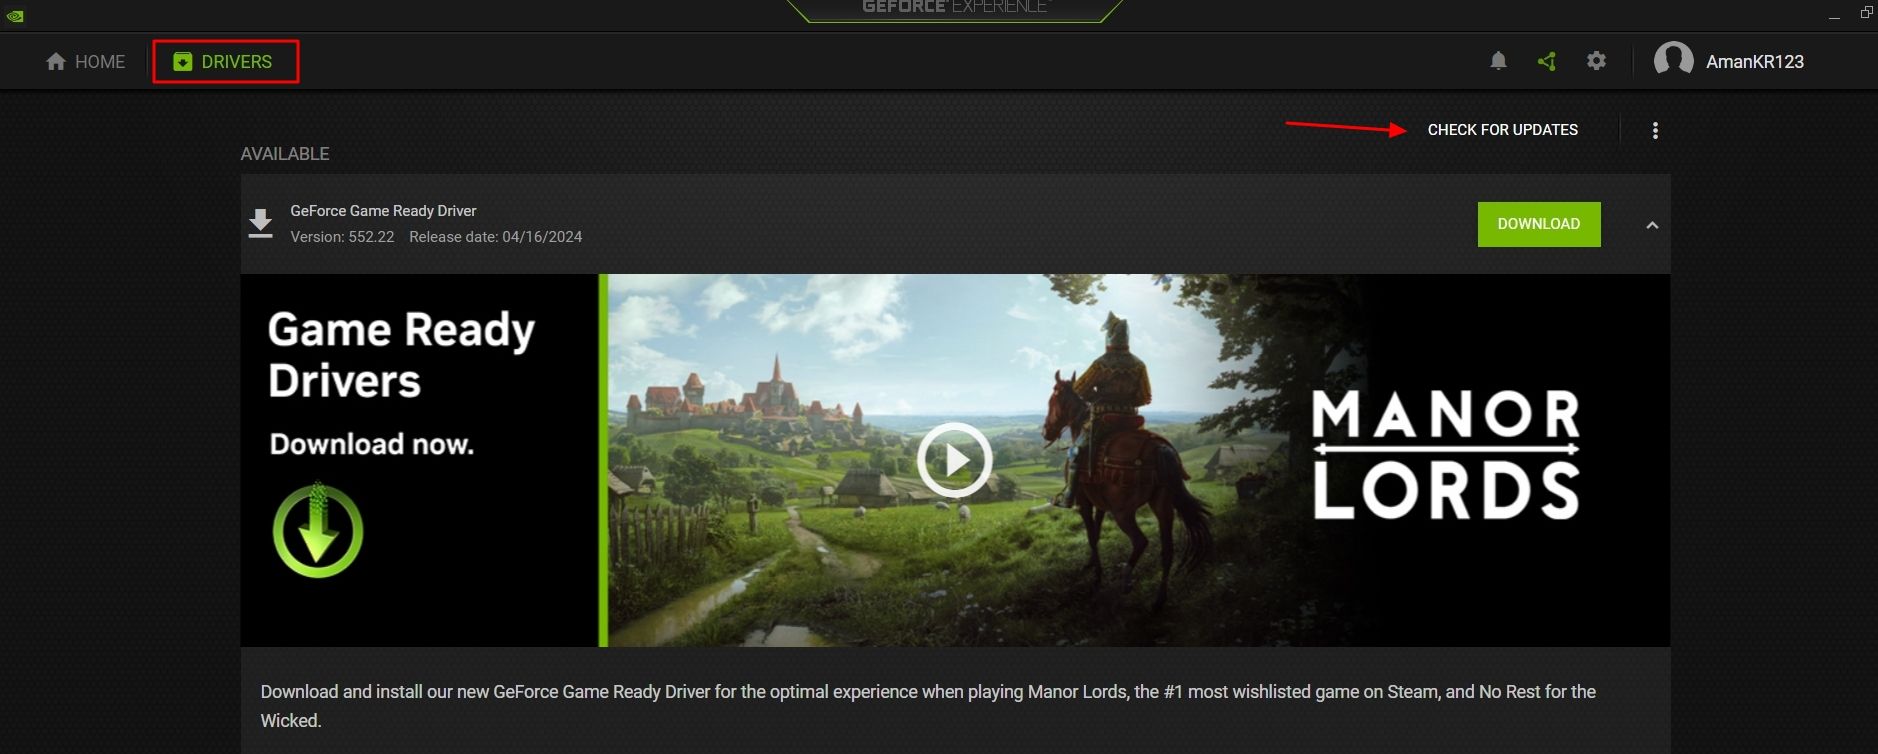
If your gear has an NVIDIA graphics driver, download and install theGeForce Experience apporthe newer NVIDIA app.
Switch to the “Drivers” tab and smack the “Check for Update” button.
The program will go online to check forupdates to your NVIDIA graphics driver.
If it finds any, you will be given the option to download it.
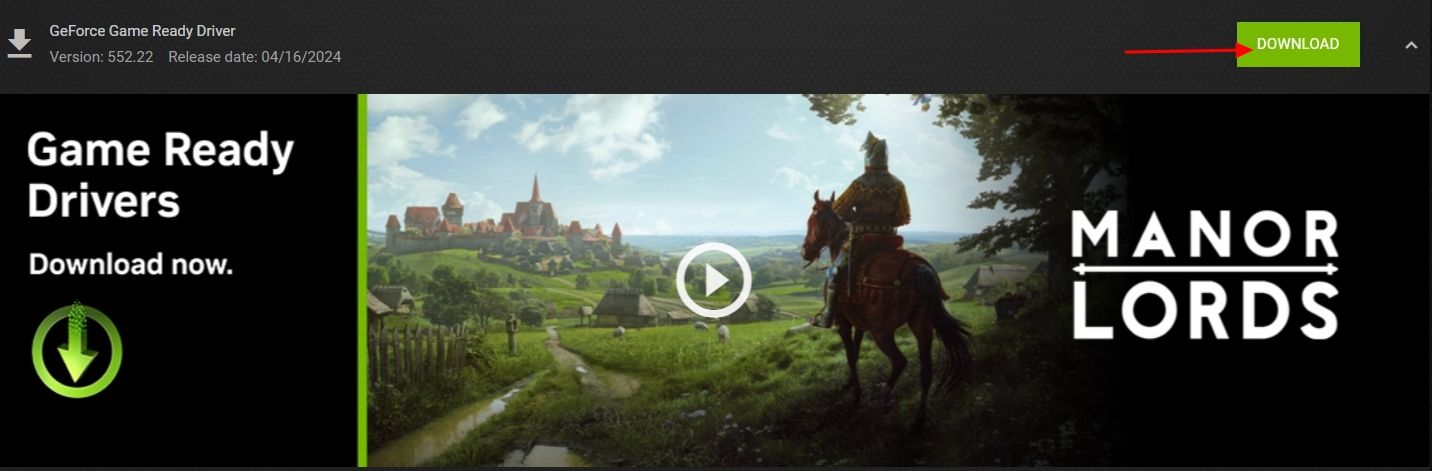
hit the “Download” button next to the Game Ready Driver.
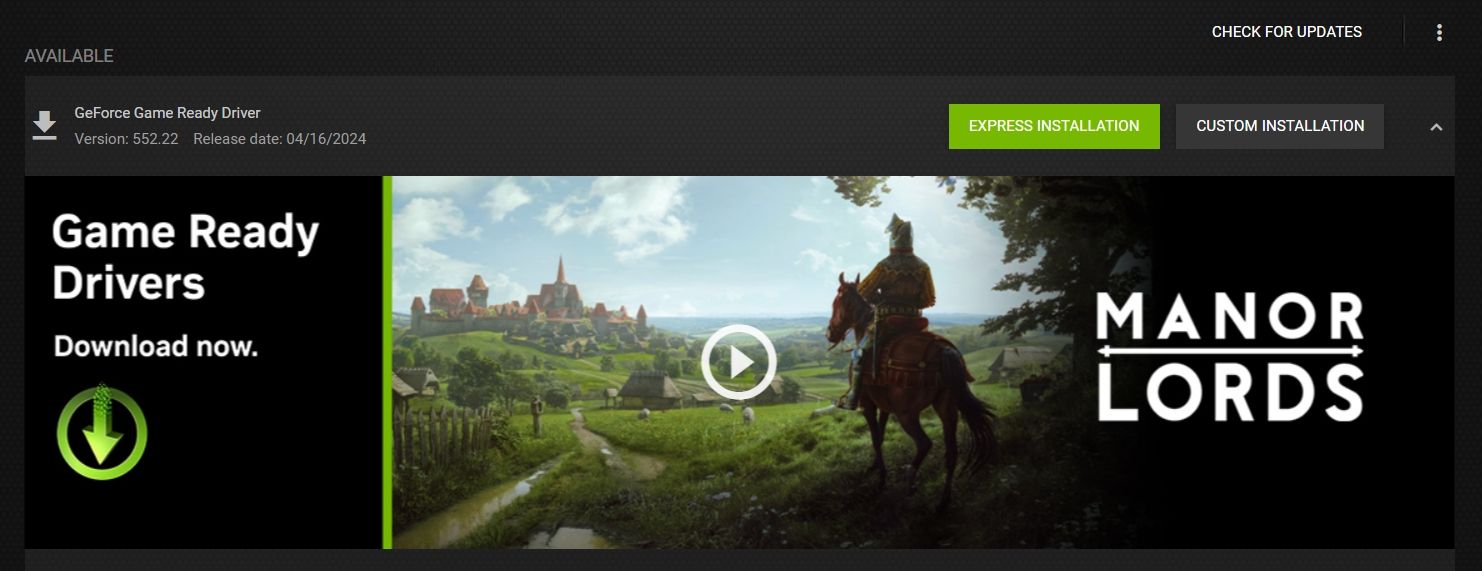
The downloaded file will be in an executable format, which you might install like any other Windows software.
Once you’ve updated the graphics driver on your setup, restart it and launchMinecraftto check for the issue.
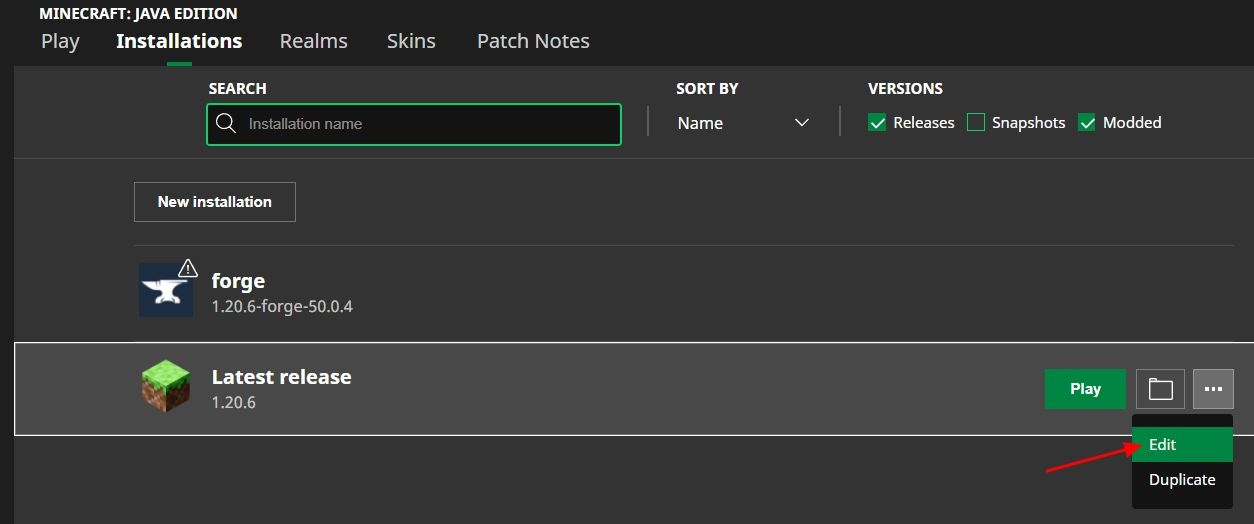
To do this, right-click theMinecraftlauncher shortcut and choose “Properties.”
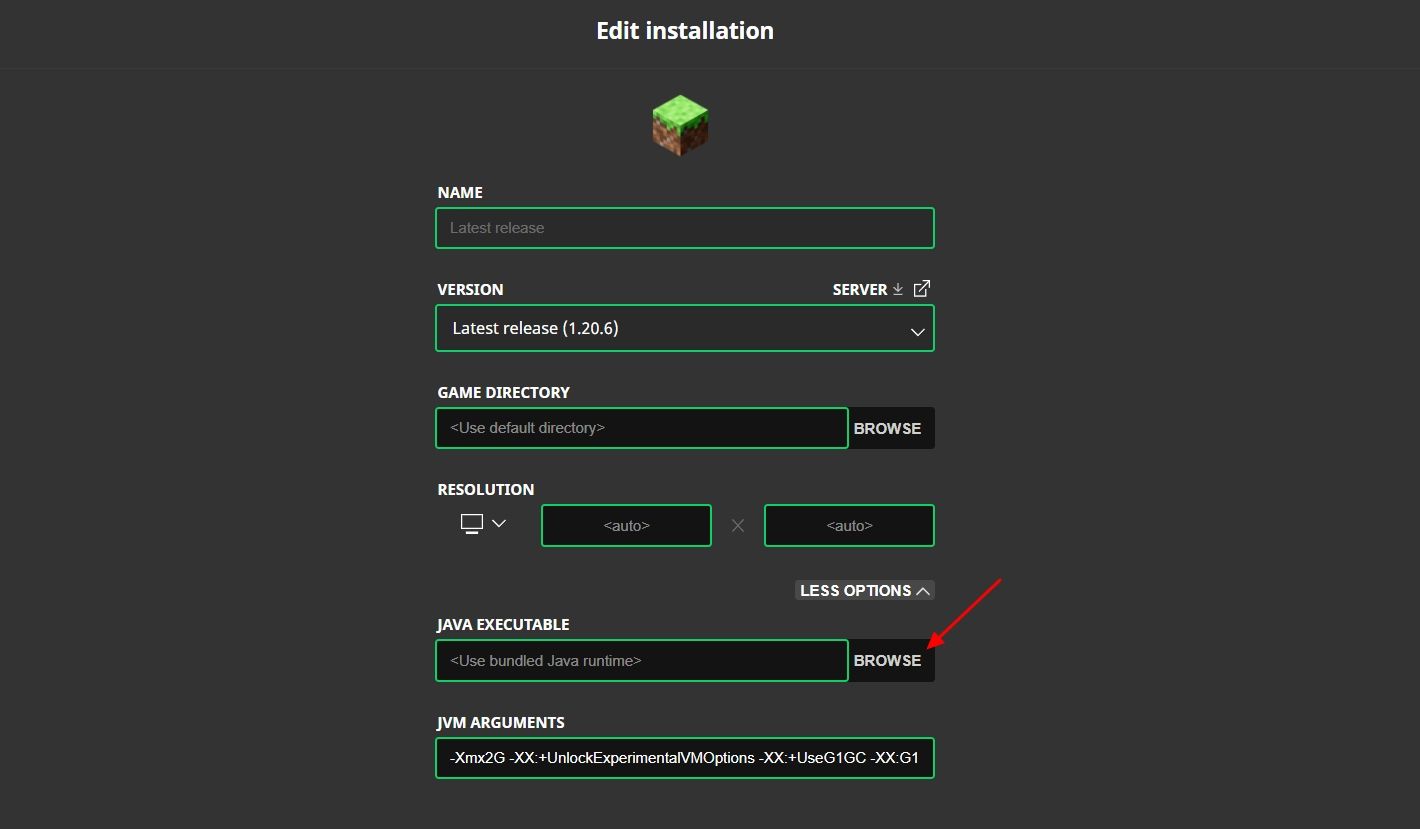
it’s possible for you to prevent this from occurring by manually selecting the JRE in the launcher.
hit the three dots next to the “Latest release” entry and choose “Edit.”
Click “More Options.”
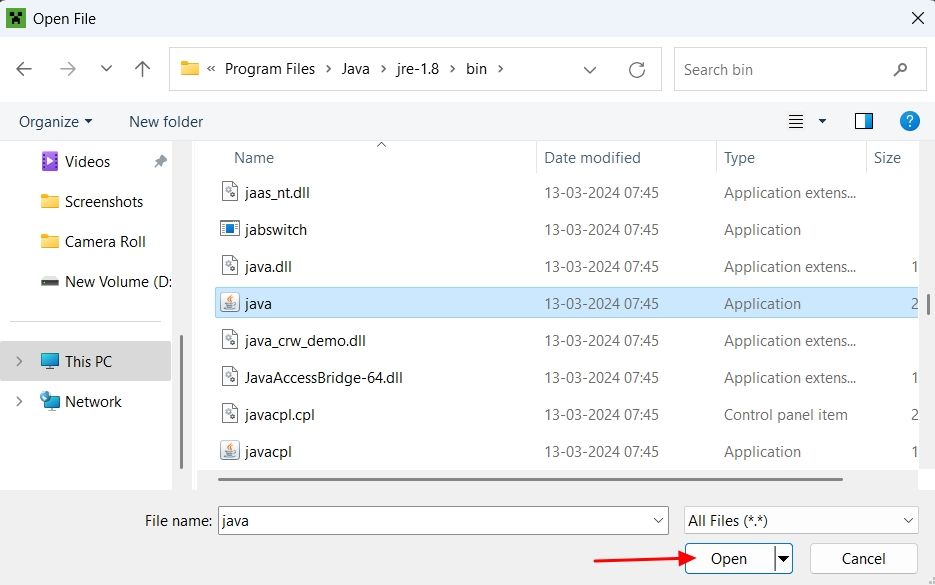
Then, smack the “Browse” option.
Then, click “Open.”
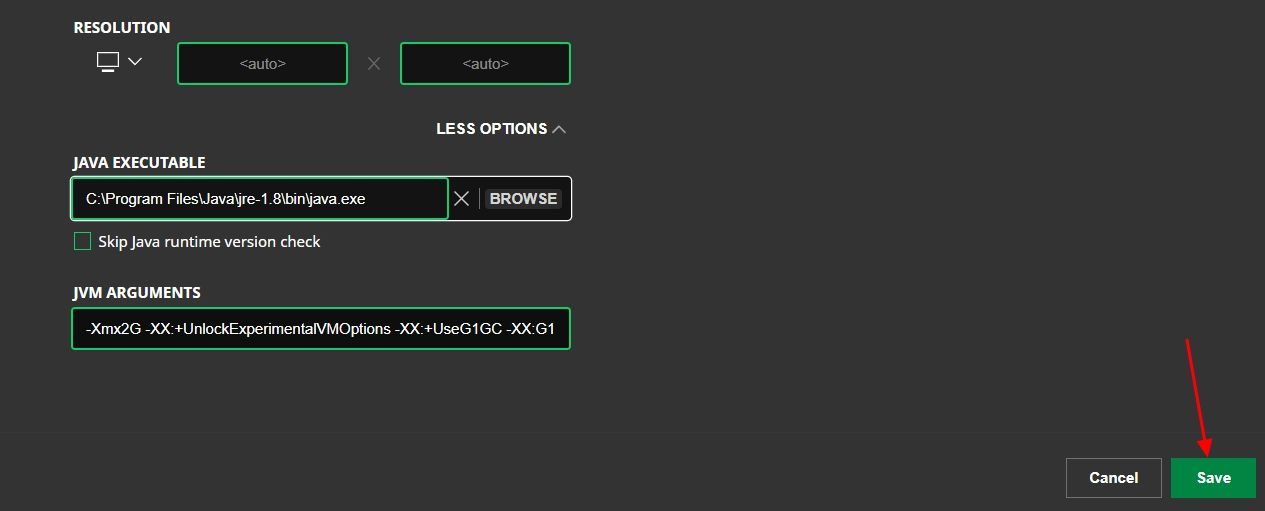
poke the “Save” button.
Now, restart the game and check for the issue again.

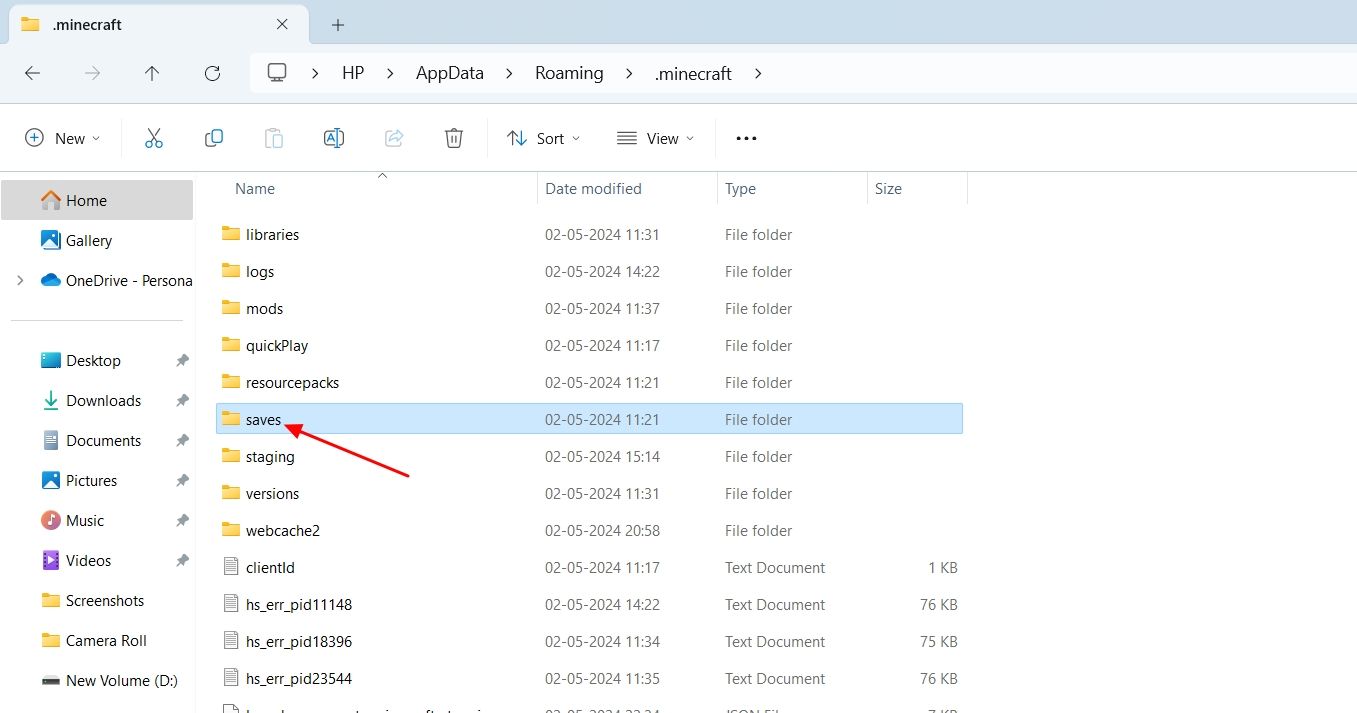
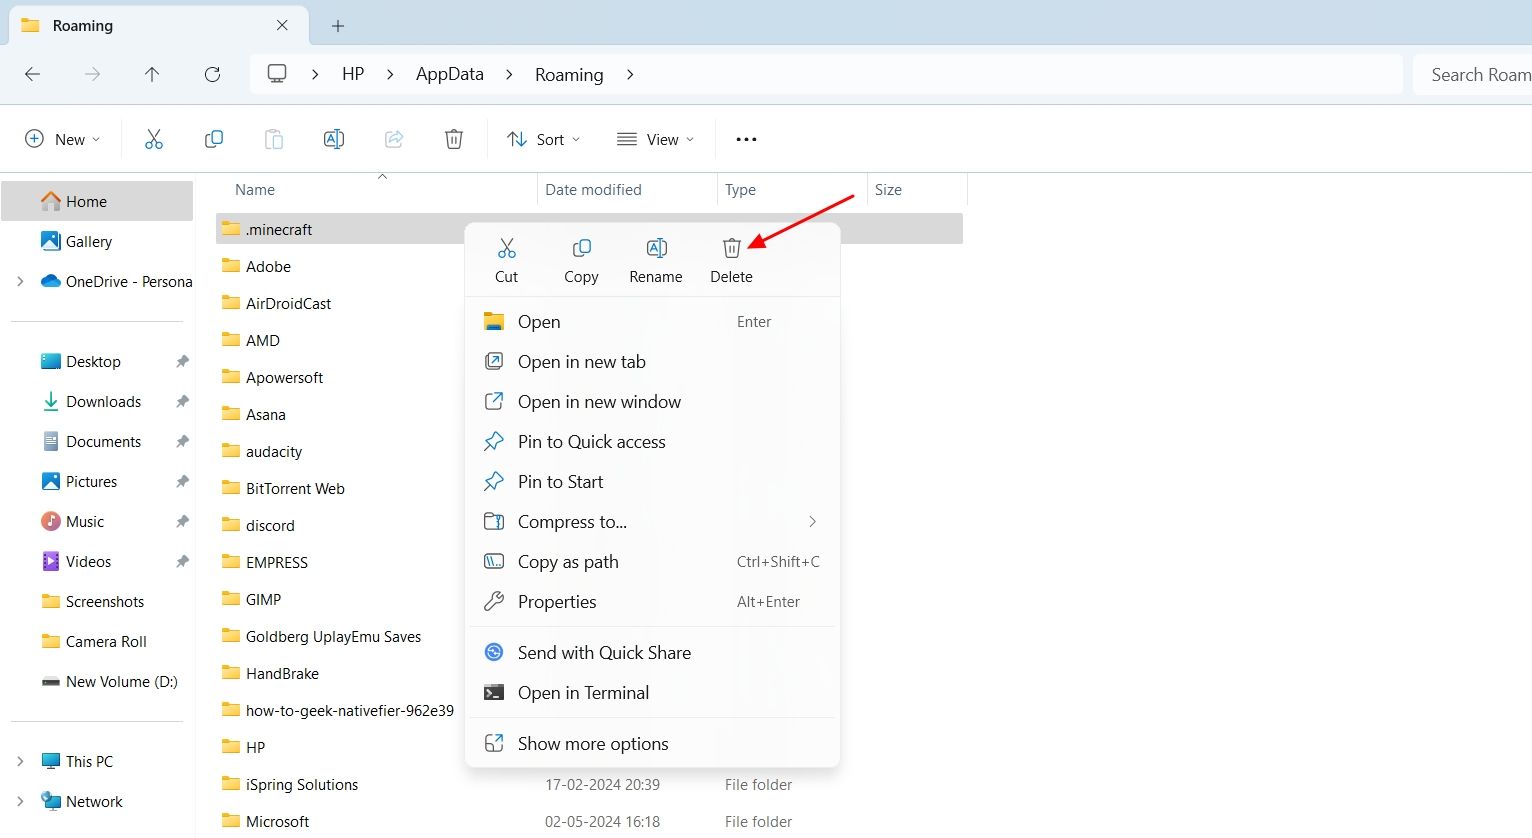
Then, kick off the “.Minecraft” folder.
Copy the “Save” folder and paste it somewhere safe on your setup.
After that, return to the “Roaming” folder, and delete the “.Minecraft” folder.
This willuninstall Minecraft from your setup.
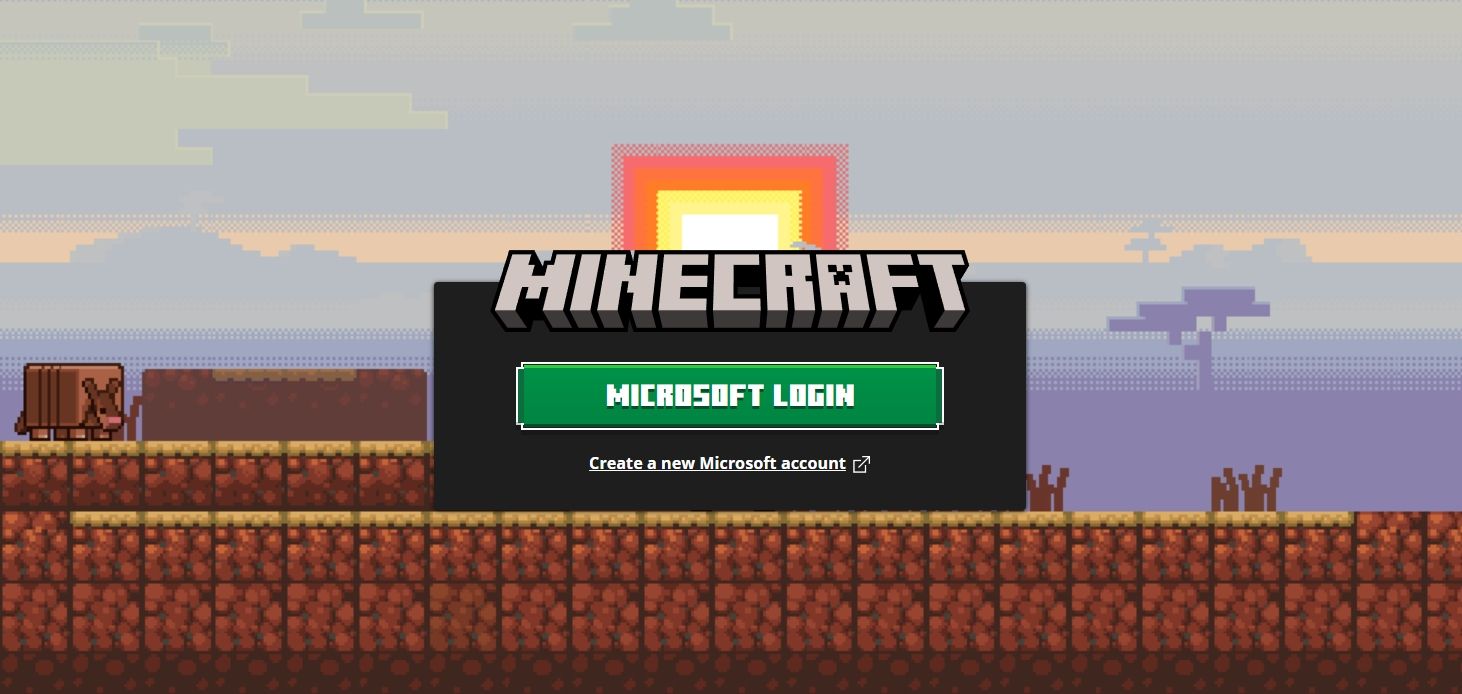
After that, reboot your machine and open theMinecraftlauncher.
Then, enter with yourMicrosoft accountand follow the instructions to drop in the game on your rig.
But if you had followed the above methods correctly, this issue should have been fixed by now.