Lets go through them all.
Drift in one game but not another points to the game being to blame.
If your thumbstick is still drifting, its time for a visit to Desktop Mode.
Marcus Mears III / How-To Geek
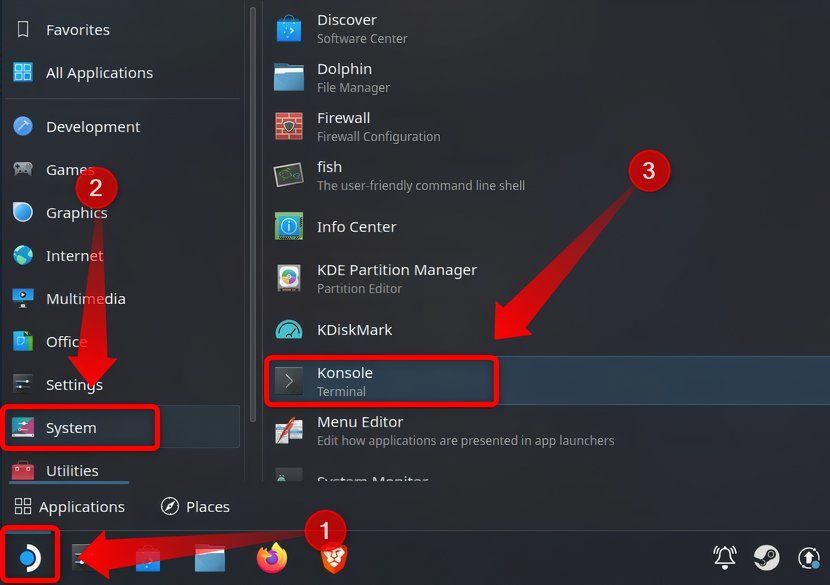
To go to Desktop Mode, press the Steam button then select Power > Switch to Desktop.
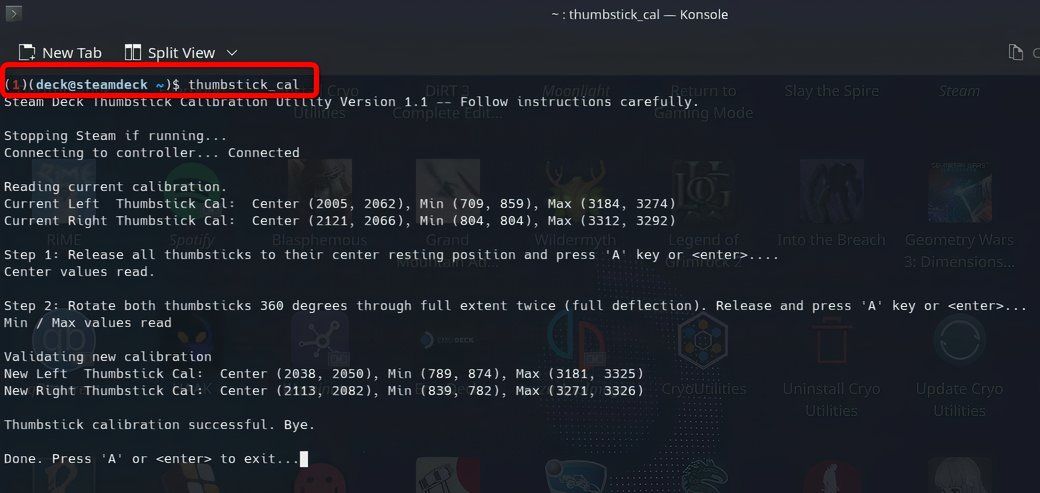
Now follow instructions to complete the calibration process.
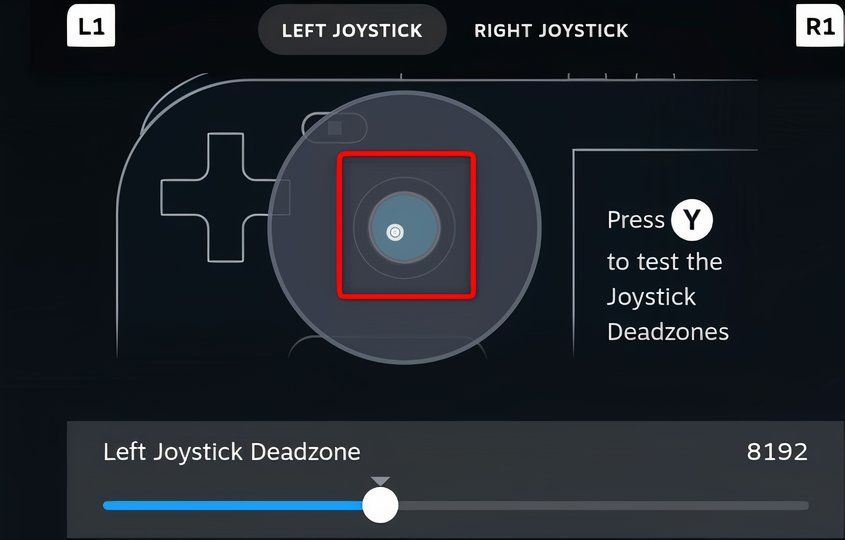
Firstly, let go of both sticks and press the A button.
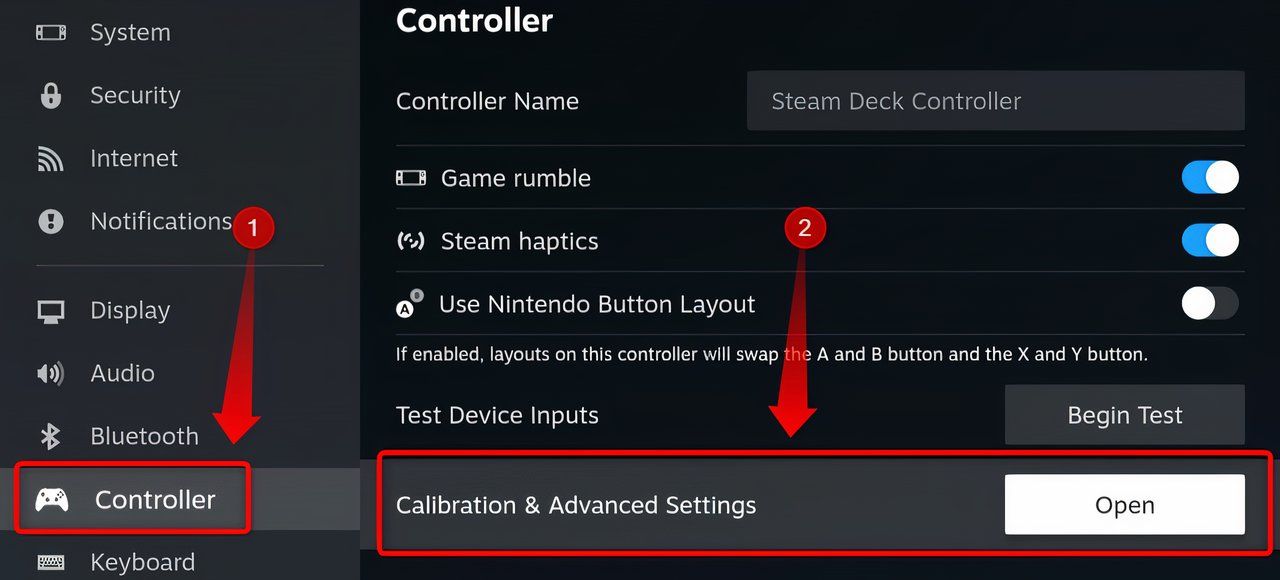
Now you’ve got the option to return to Game Mode and test the affected stick.
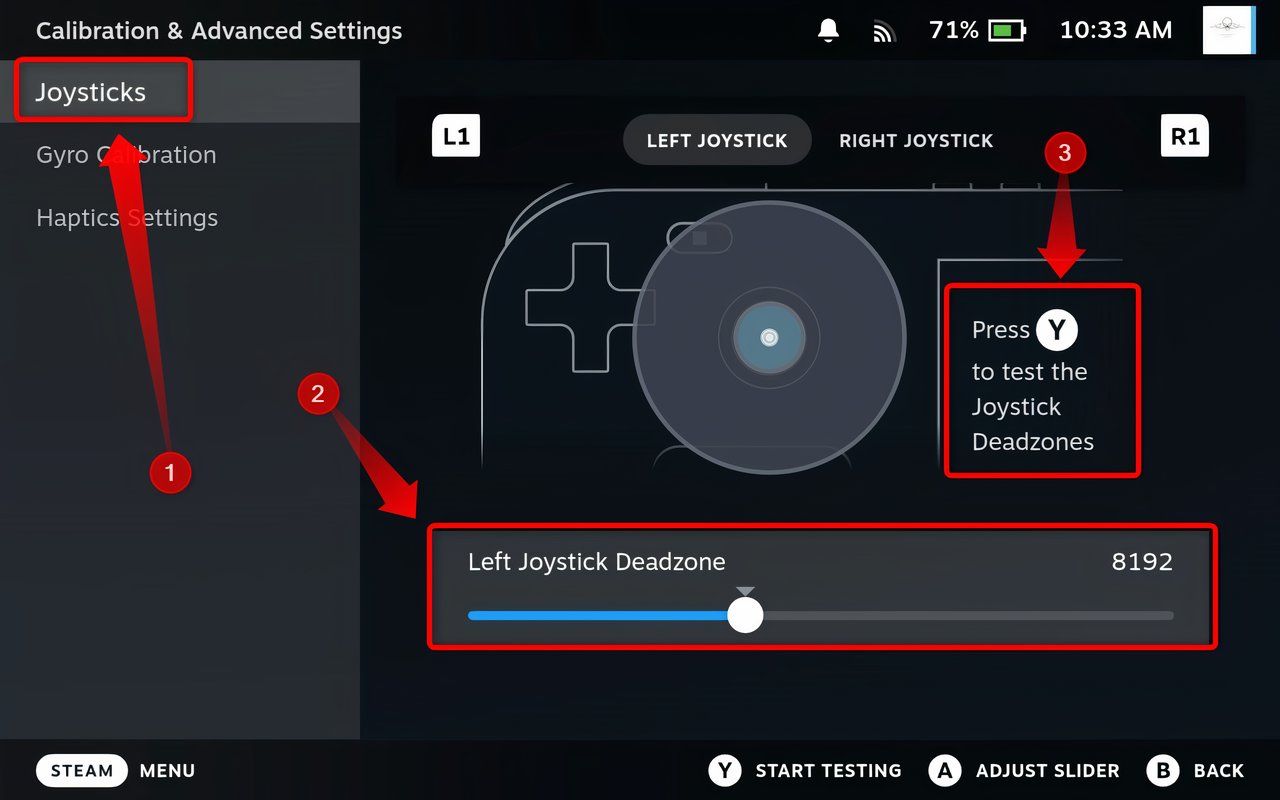
Then kick off the Calibration & Advanced options menu.
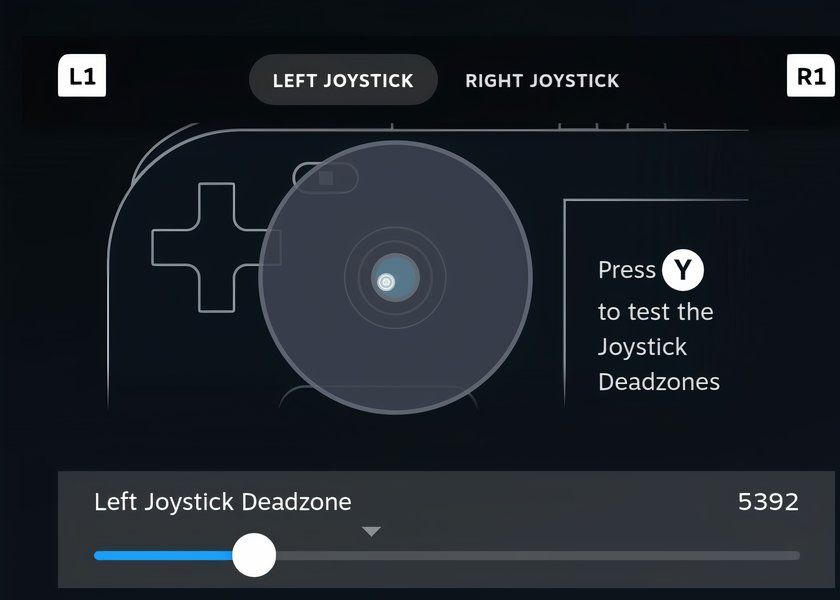
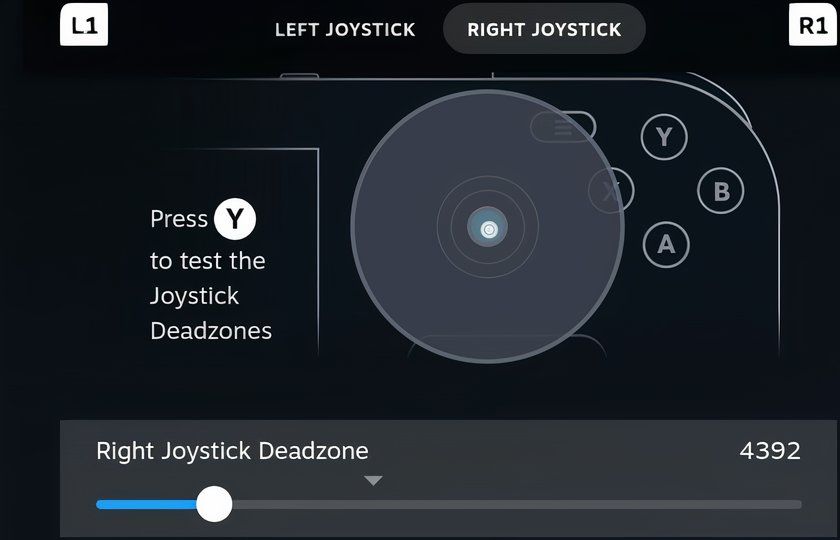
opt for Left Joystick Deadzone option and press the Y button to test its deadzone.
If your right stick is drifting, choose the Right Joystick option instead, with the R1 button.
In fact, I can drop the deadzone to about 5400 and still be fine.
The max value is set at 18000.
Before I cover that, let me cover another potential issue.
If you notice this, a can of compressed air could be a solution to the issue.
Things felt slightly gritty when moving the stick around.
I fixed the issue after a couple of rotations, so try this if you face a similar issue.
If you dont have a can of compressed air lying around, you might try using a toothpick.
Just follow the guides until you remove the joystick module.
If the sticks still drifting around, its time to replace it.
The iFixit store sells Steam Deckleftandrightthumbstick replacement modules.
Alternatively, you’re free to get apair of Hall Effect joysticks from GuliKit.
Hall Effect joysticks use magnets instead of contacts whichmakes them far less susceptible to stick drift.
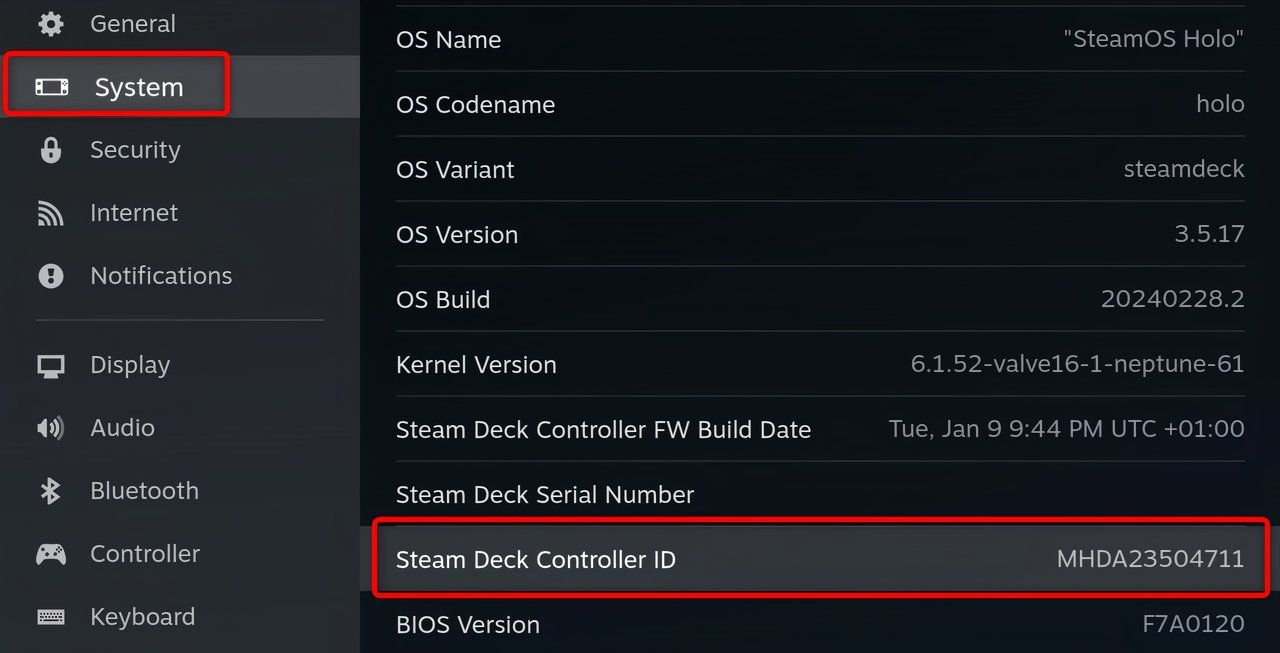
Do this by pressing the Steam button > controls > System.
Once in the System menu, scroll down until you locate the Steam Deck Controller ID tab.
Once there, check the first four letters of the ID.
If the letters read MEDA youve got a throw in A module.
If the letters read MHDA, like in my case, youve got a punch in B module.
While youre replacing the thumbstick, you could also replace your Steam Decks SSD.
