Summary
Need to format a disk on Ubuntu but not sure how to proceed?
Disk formatting can seem difficult, especially because it’s about your hard disk and not just software.
Here are two easy methods, either of which will format your disk quickly and safely.
Hannah Stryker / How-To Geek
For demonstration purposes, I’m using Ubuntu 22.04.
But you’re able to follow this guide for newer or older versions of Ubuntu as well.
Read This Before Formatting a Disk
Disk formatting is a risky process.
It involves deleting all data from a disk or its partitions.
The next thing you must confirm is which disk you’d like to format.
If you accidentally format the wrong disk, it may even mess up your whole system.
Which Method Should You Use?
Before implementing any of the methods, you should know which one will be the best for you.
Both the Disks and GParted apps have graphical interfaces.
So, in both methods, you don’t need to write any commands to format a disk.
If that’s not an issue, use GParted.
Otherwise, Disks will also do the trick.
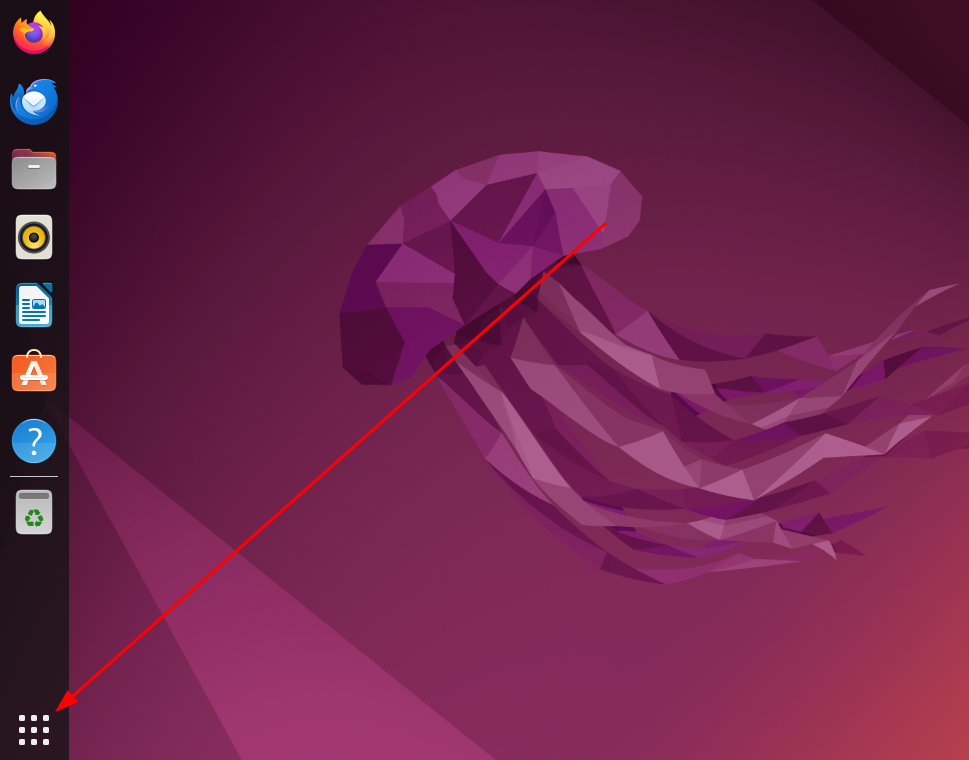
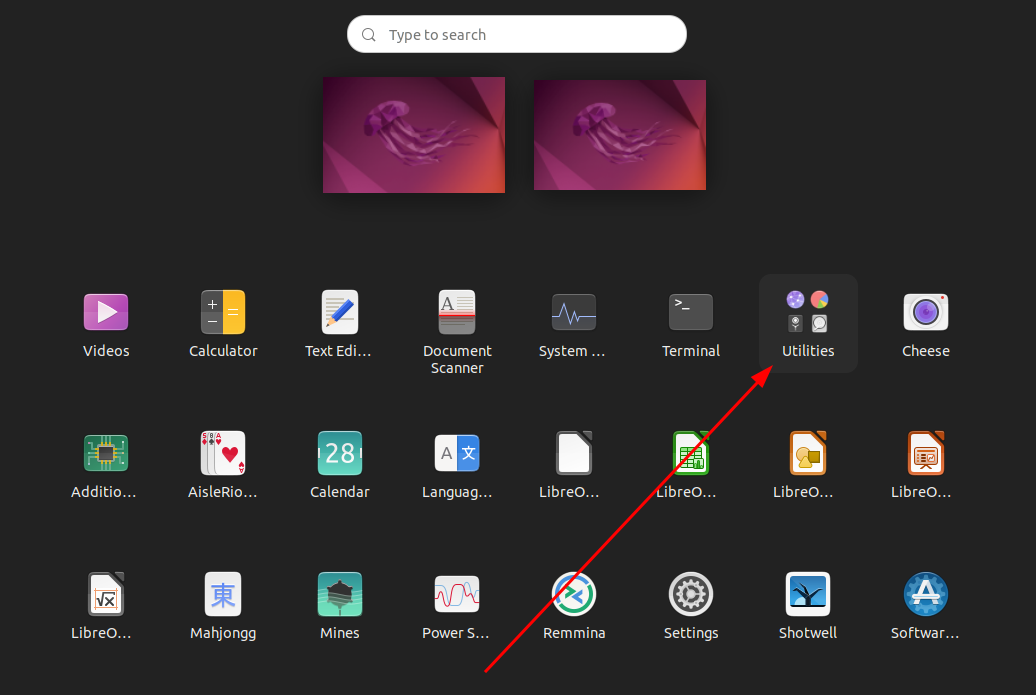
In the applications grid, poke the “Utilities” app group.
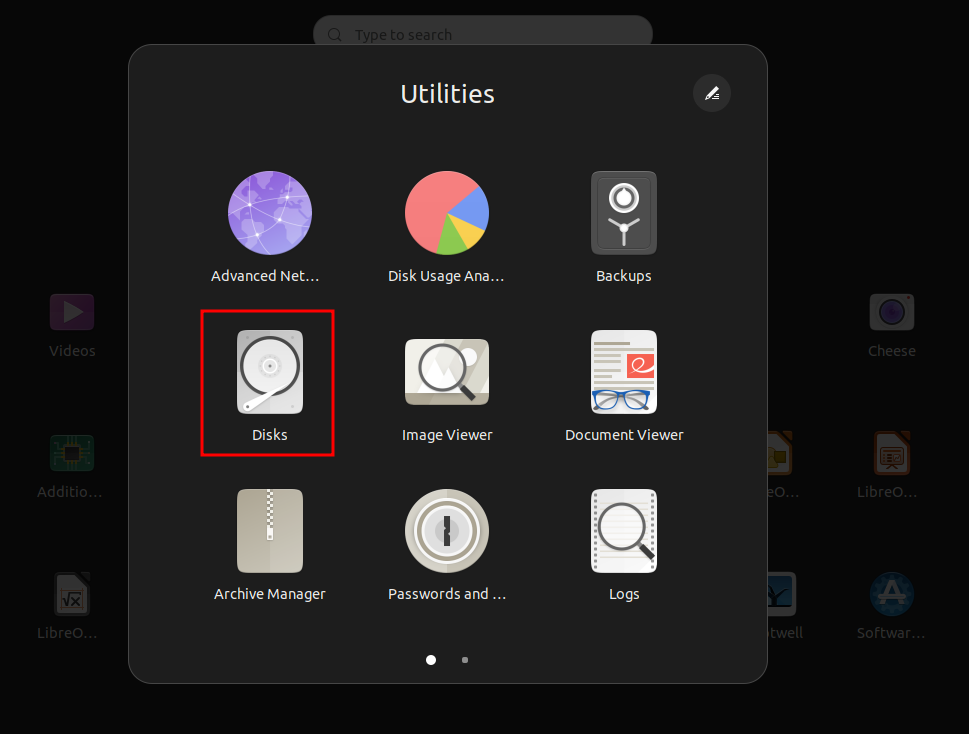
It should display all the utility software on your system.
From there, click “Disks” to launch it.
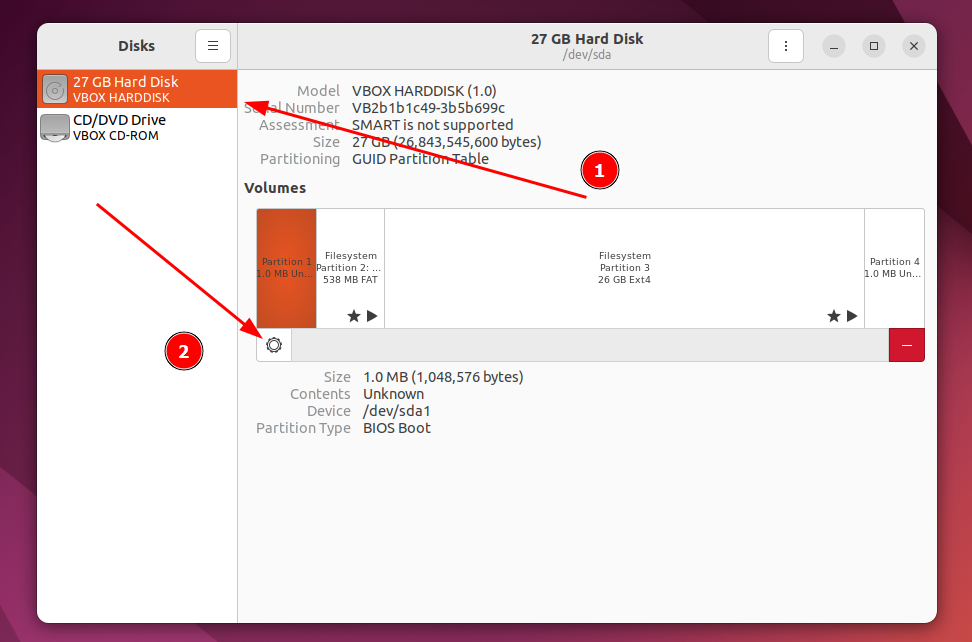
snag the disk that you want to format.
Ideally, you’re supposed to have multiple disks from which you will format one or more.
In my case, since I’m on a virtual machine, there’s only one disk.
After selecting the disk, hit the parameters icon.
That should open a context menu.
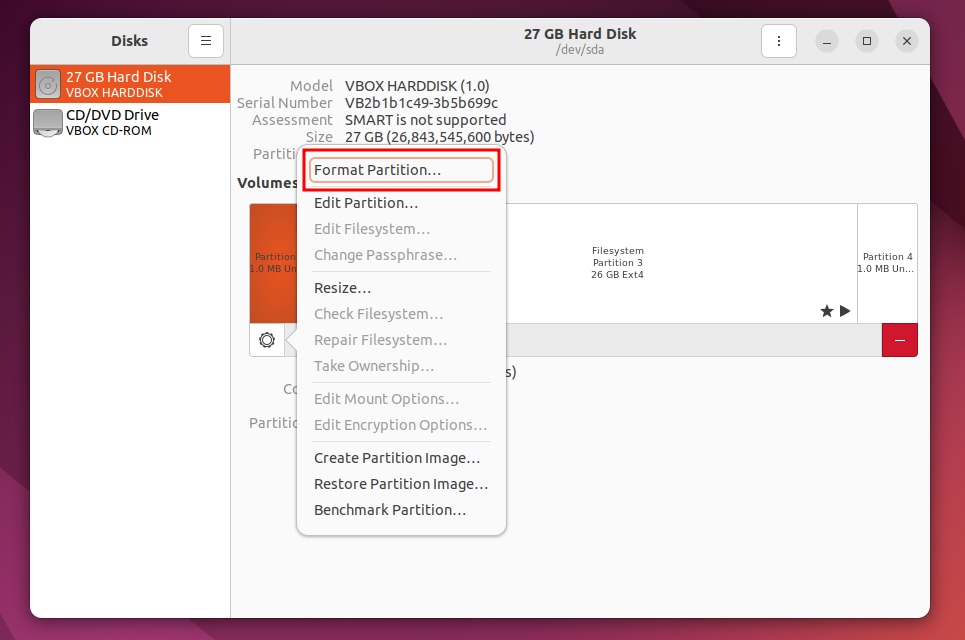
smack the “Format Partition” button to continue.
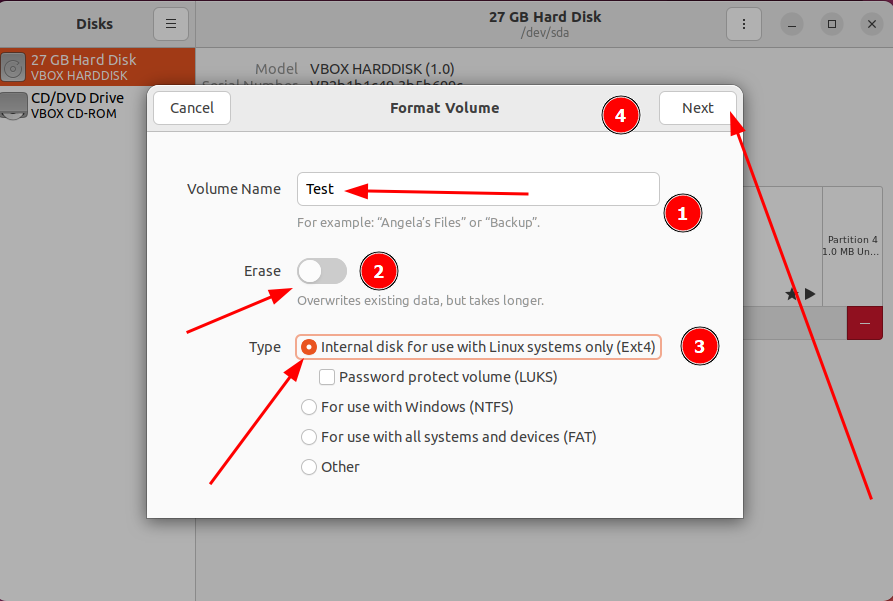
You should see a new menu about the selected volume.
There are many options here.
Let’s go through them one by one.
Once you’re done with the parameters, click “Next”.
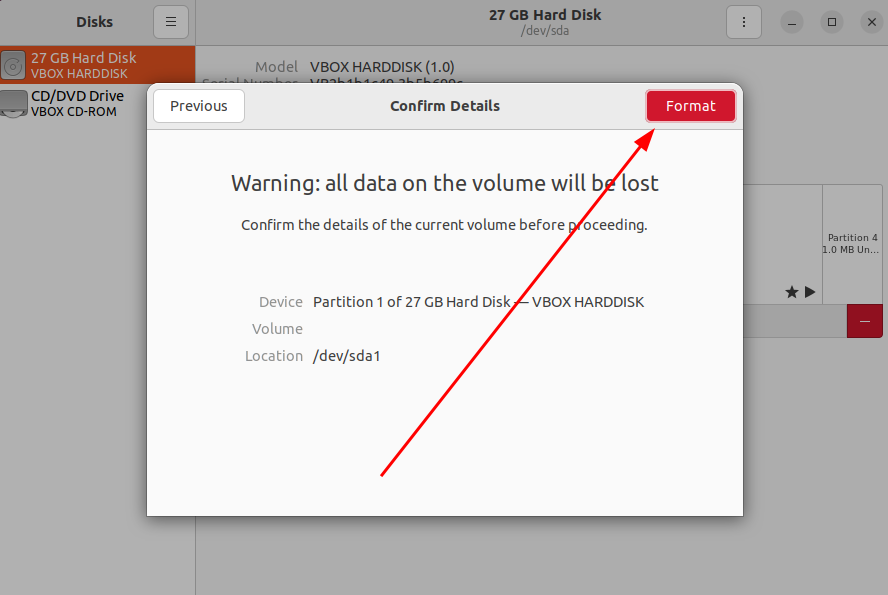
A new window with confirmation details will appear.
you could double-check the details here just to be sure.
If all looks good, click “Format” to begin the formatting.
On the other hand, hit the “Previous” button to navigate to the previous window.
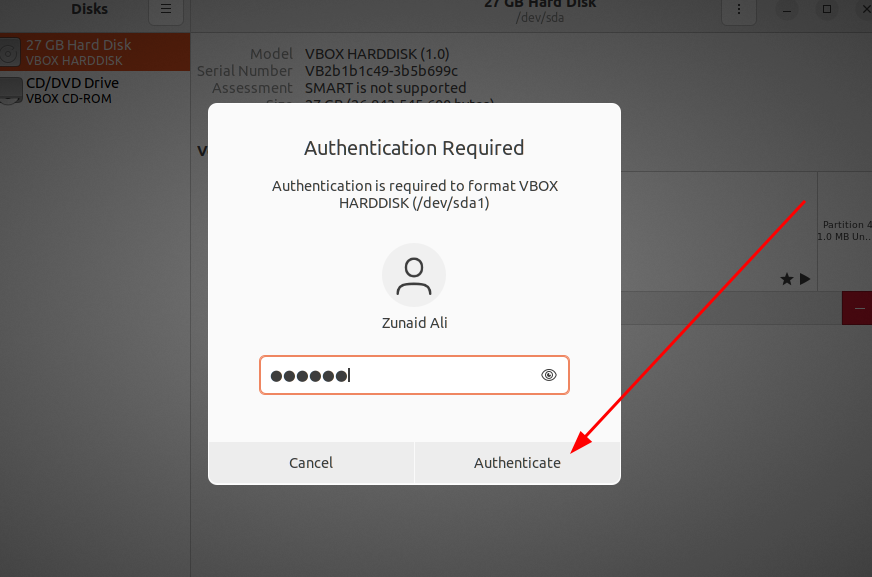
You’ll be asked to authenticate the action.
type your password and click “Authenticate.”
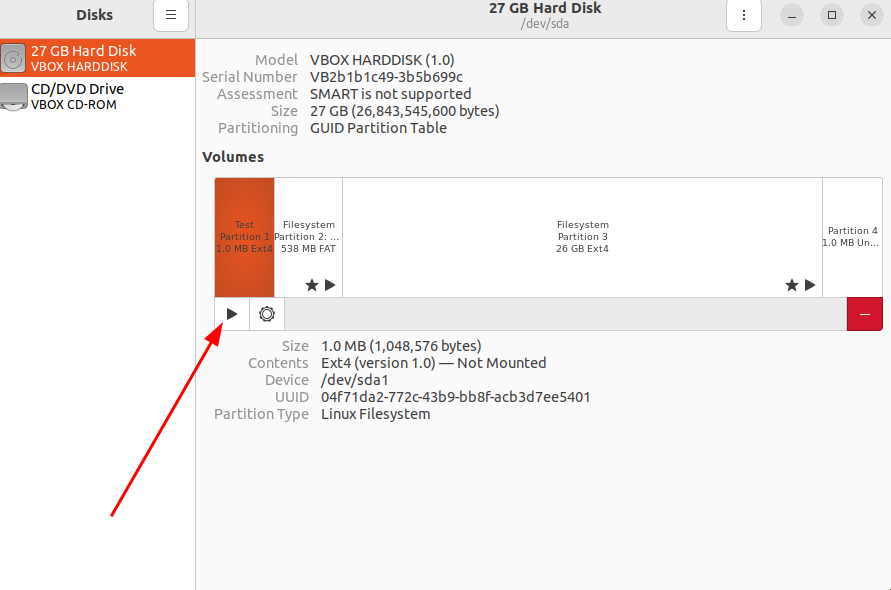
After that, you will be brought back to the initial Disks window.
This time, you will notice a triangle-shaped play button beside the tweaks button.
Click it to mount the partition.
And that successfully formatted your desired disk.
There is only one catch.
It didn’t create a partition table by default.
you could do that using GParted, which I’ll show you now.
Method 2: Formatting a Disk on Ubuntu Using GParted
GPartedis a graphical partition editing system.
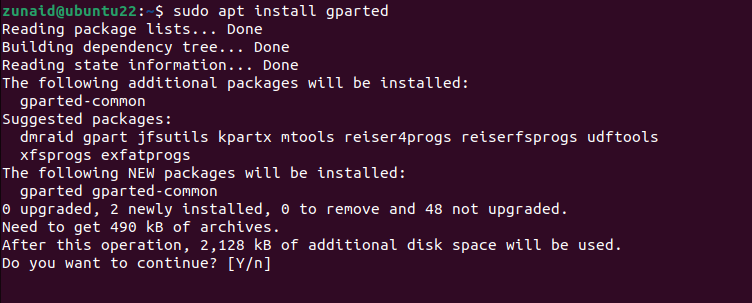
Since it’s not installed by default on your system, you should probably install it first.
Once you do that, the program should open.
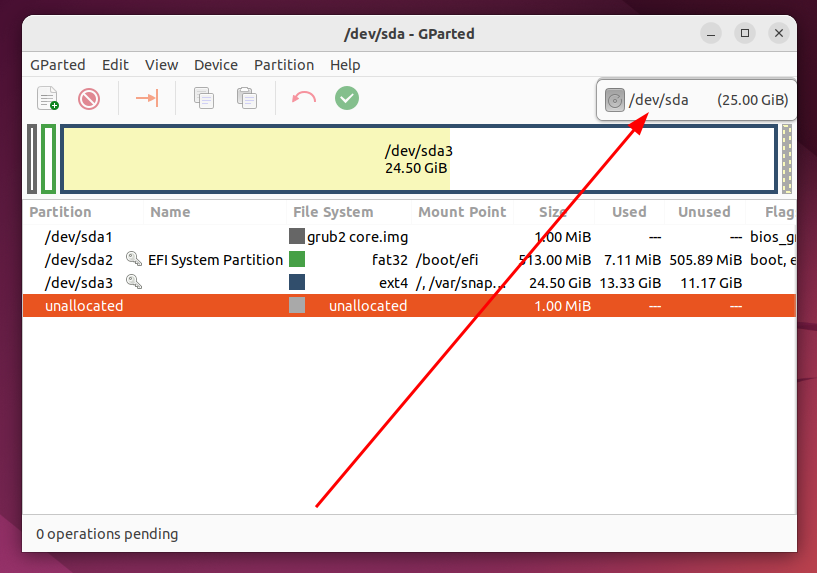
The first thing you must do is opt for disk you want to format.
you could do that from the dropdown menu in the top-right corner of the software.
poke the drop-down menu and select a disk.
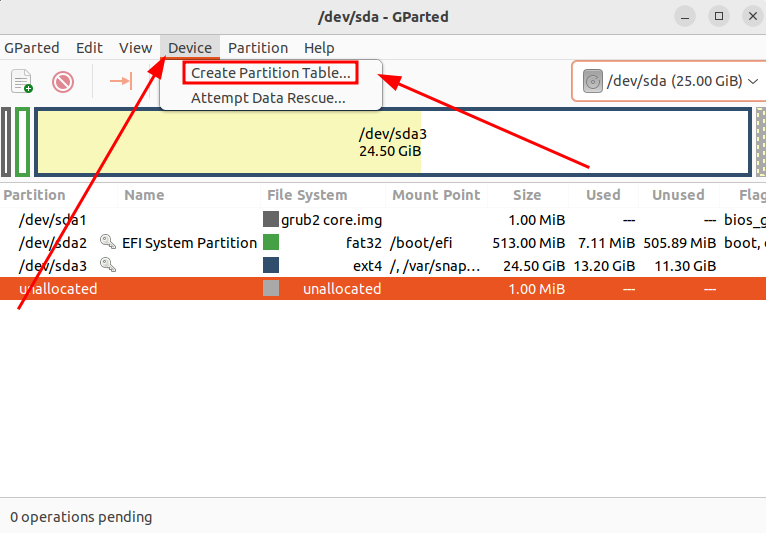
For that, click “unit” from the top menu bar.
Then, go for the “Create Partition Table” button.
You’ll get a warning about erasing all the data on the disk.
choose the partition table jot down from the dropdown menu.
If you’re unsure, select “gpt” from all the options.
Then, hit “Apply”.
In my case, I already have partition tables created, so I won’t be doing that.
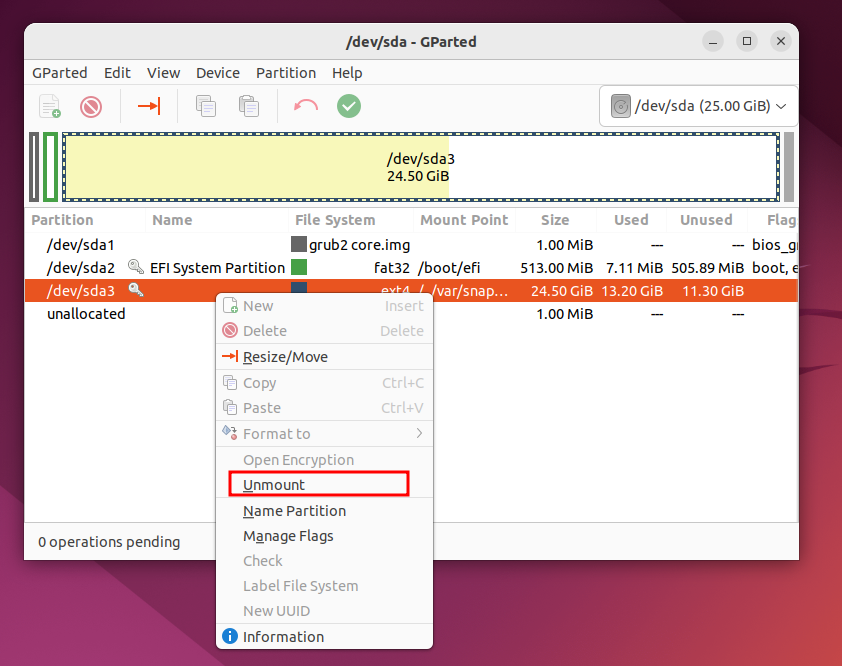
After that, you should probably unmount the partition.
Right-tap on the partition name and click “Unmount”.
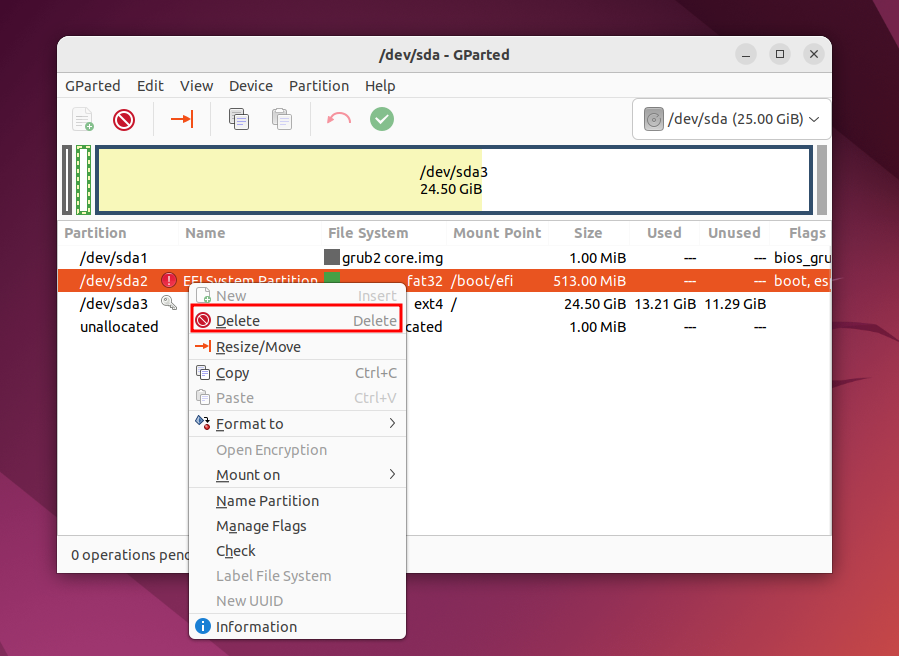
Now it’s possible for you to delete that partition and convert it into unallocated space.
To do that, again right-grab the partition and click “Delete”.
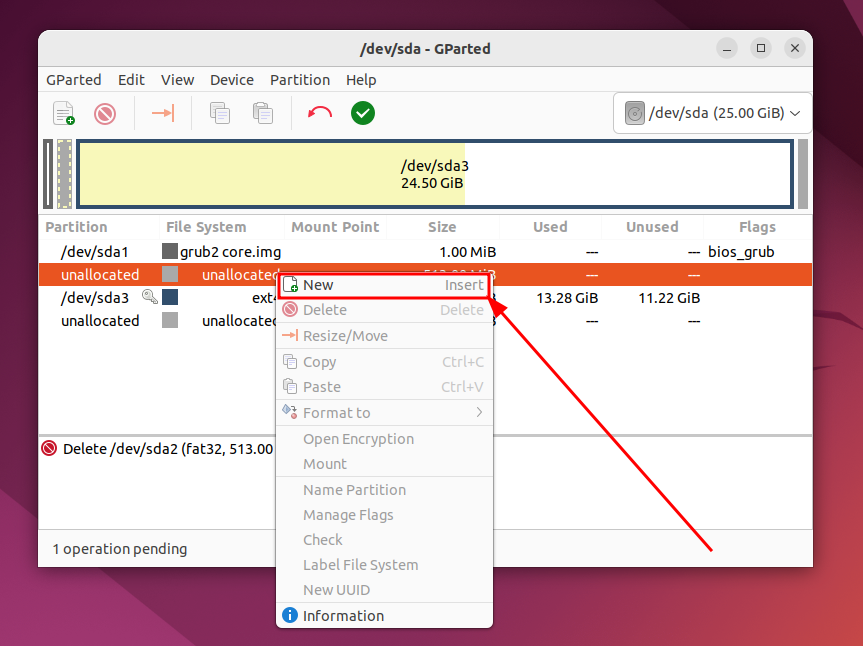
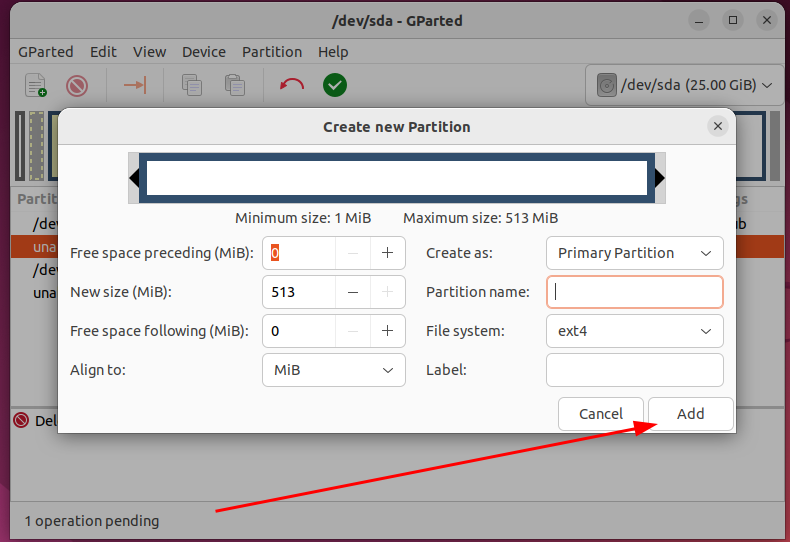
After that, right-press the partition, and this time, click “New”.
You should see a new window containing many options.
I’m keeping the default values here.
You should fill in the fields according to your needs.
Once you’re done, click “Add”.
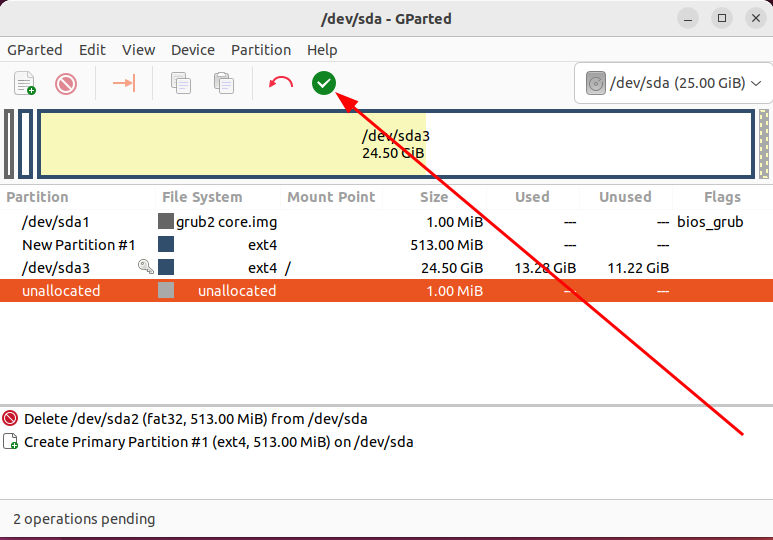
However, you will notice that the operations you just performed are listed at the bottom of the window.
That’s because these operations are waiting for your approval.
To confirm all these changes, press the green tick button from the menu bar.
You will receive a warning about data loss.
If you’re sure about the operations, click “Apply”.
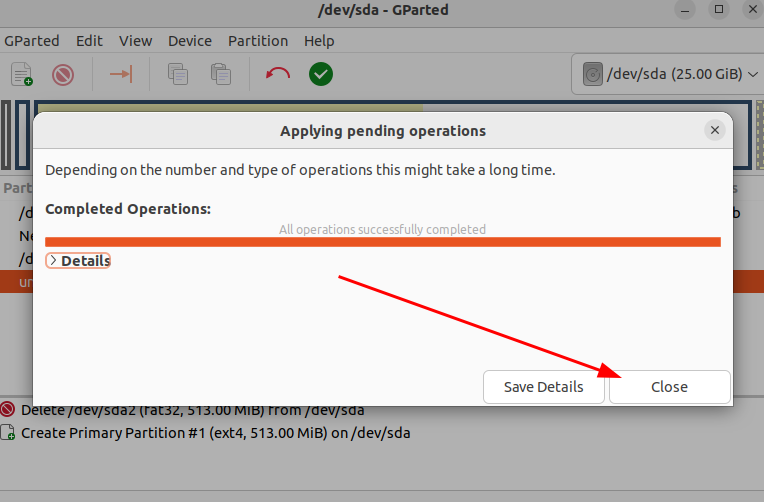
Once the operations are done, you’ll get a message about it.
Hit the “Close” button to exit the window.
And now you will find the formatted disk listed in GParted with the options you specified earlier.
Disk Formatting on Ubuntu Made Easy!
So that wraps up this guide.
I hope you were able to format your targeted disk successfully on Ubuntu.
If you have made a backup, now is the time to restore it to the newly formatted disk.
