You have multiple ways to add these lines to your docs, and well show you how.
Heres how to use both methods.
Once clicked, Docs simply adds a line in your document, job done.
To use it, first open your document on Google Docs.
Then, click to set the text cursor where you want the line to appear.
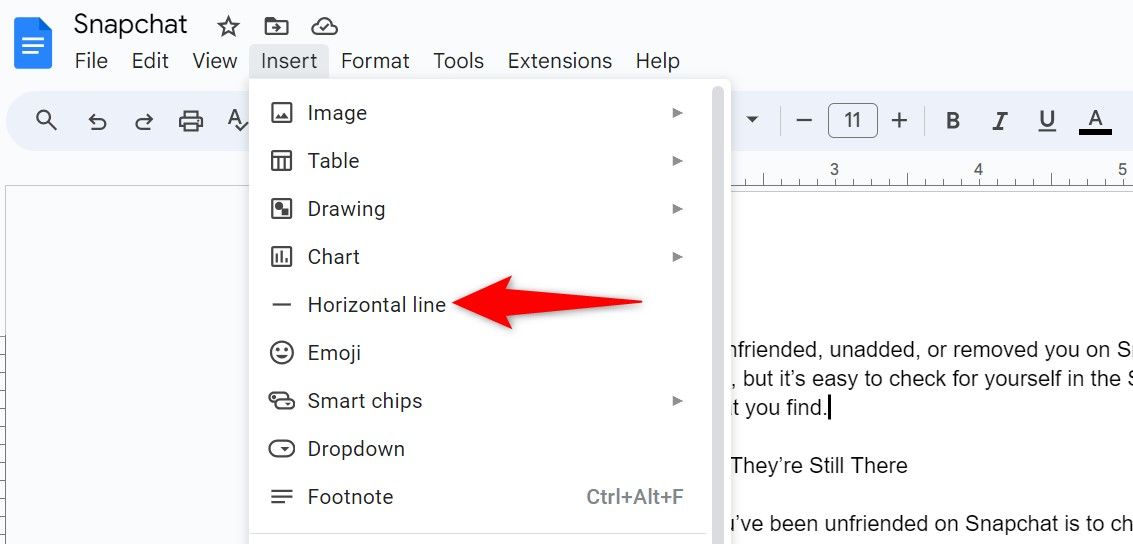
Next, from Google Docs menu bar, select Insert > Horizontal Line.
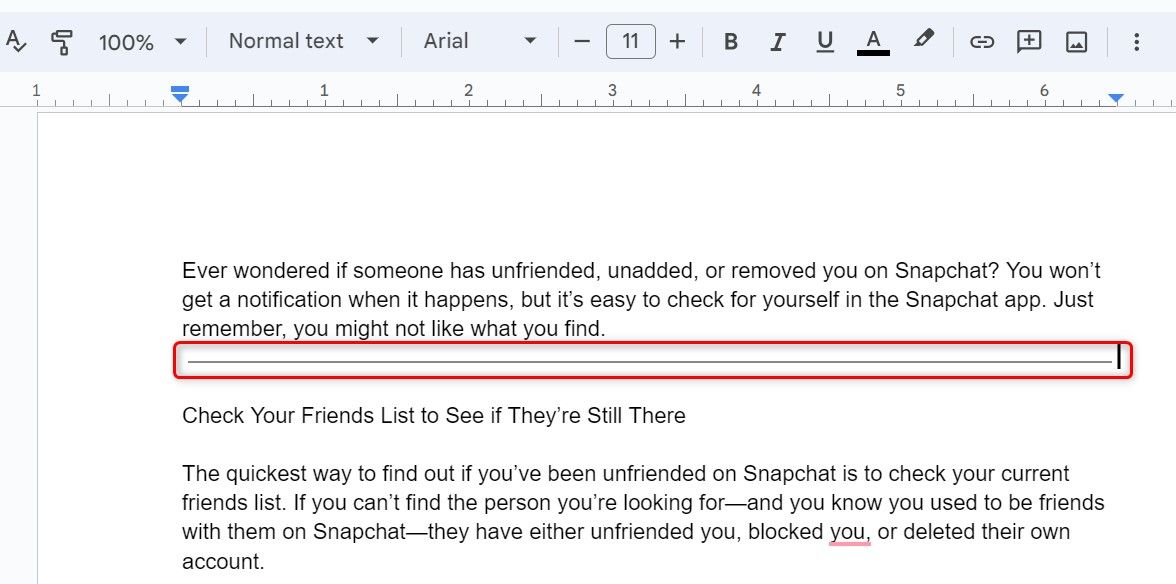
As soon as you click that option, Docs adds a horizontal line.
If youd like to remove the line, double-click it and press the Delete key.
Use Paragraph Styles
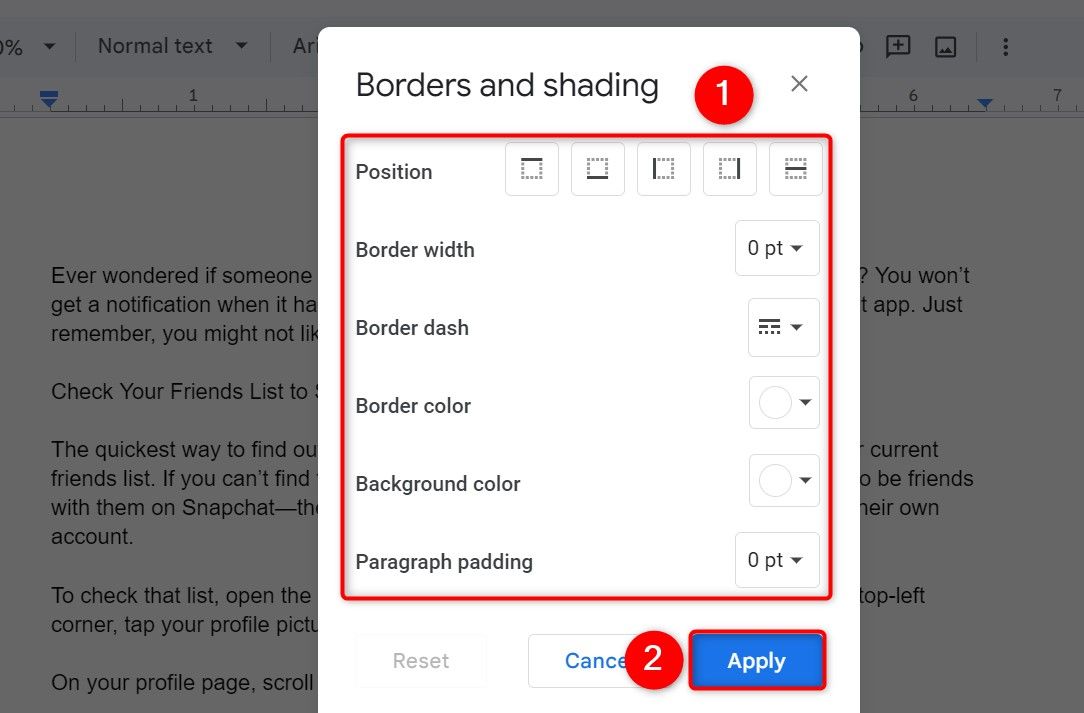
Another way to add a horizontal line in Google Docs is byusing paragraph styles.
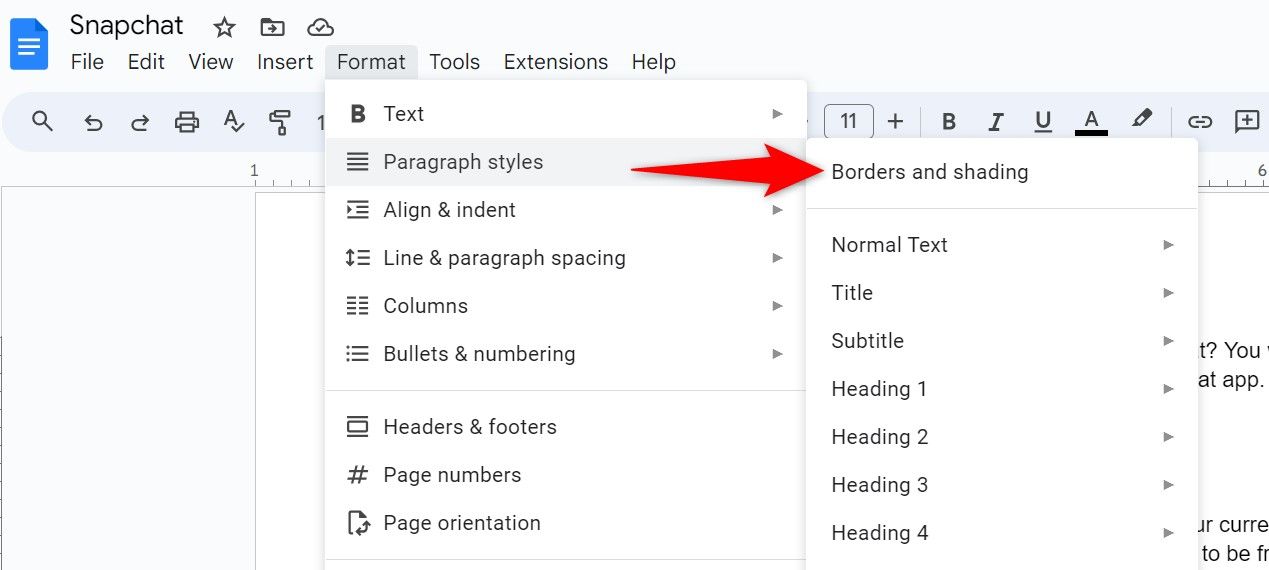
Here, you customize your paragraphs style, making it display a line.
Then, choose “Apply” to add the line to your document.
You now have your customized line in your document.
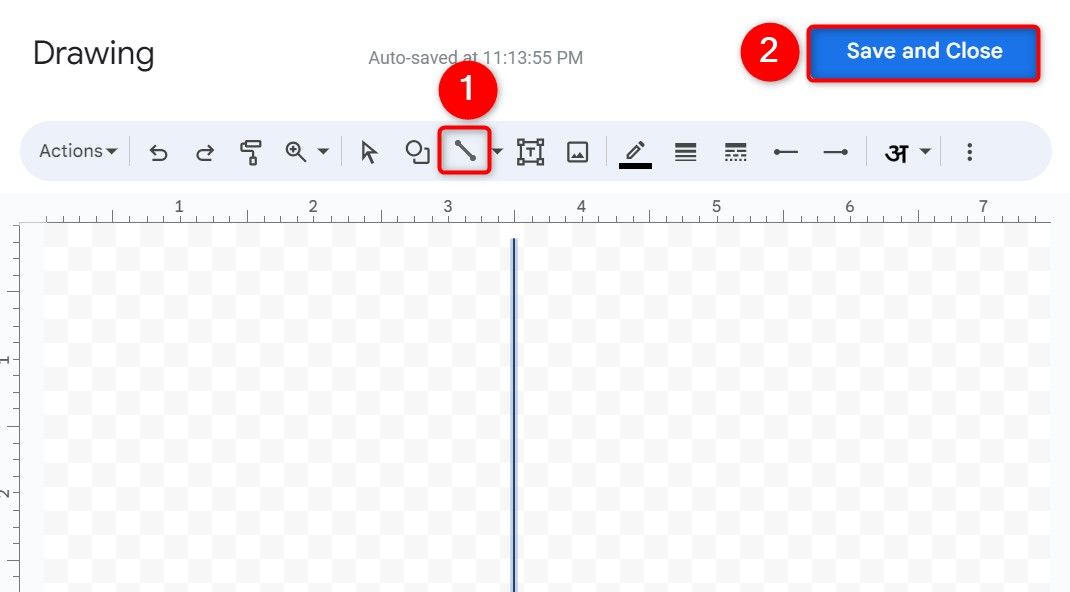
Here, you draw the kind of line you want in your document and then insert that line.
Press and hold down the Shift key on your keyboard and draw a vertical line on the canvas.
Holding down the Shift key ensures your line is straight.

Google Docs adds your drawn line to your document.
you could change the lines position and place it anywhere you want by clicking and dragging it.
Use Columns
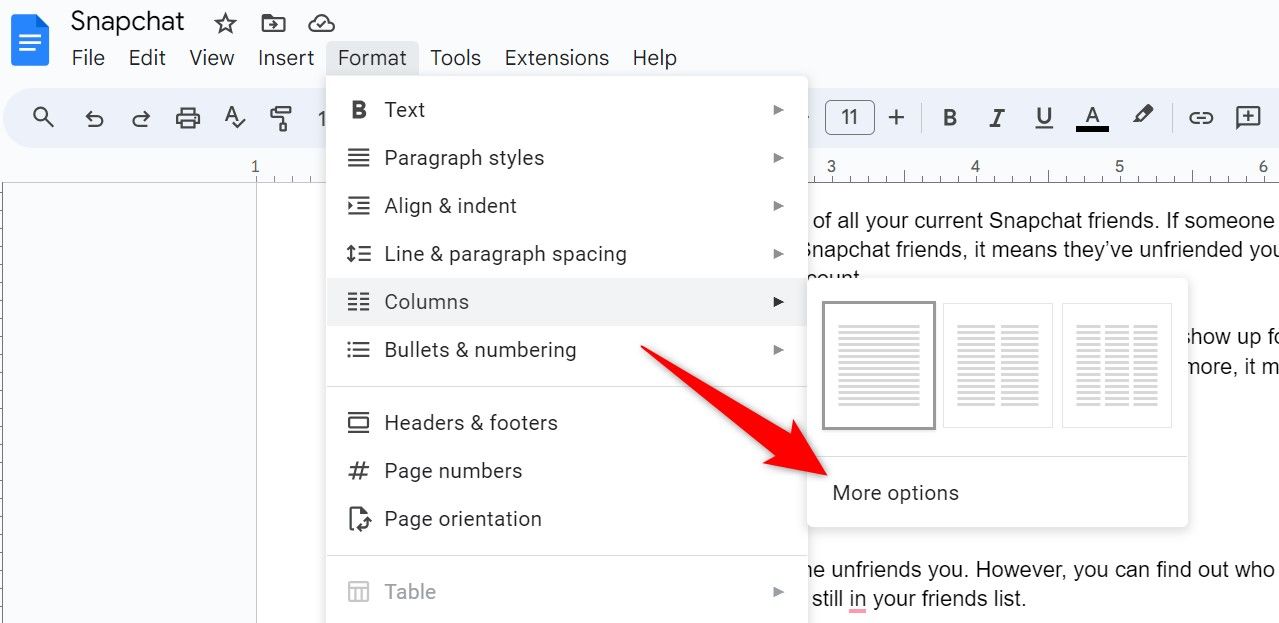
Another way to add a vertical line in Google Docs is touse the columns feature.
Here, you divide your text into multiple columns, with a line separating those columns.
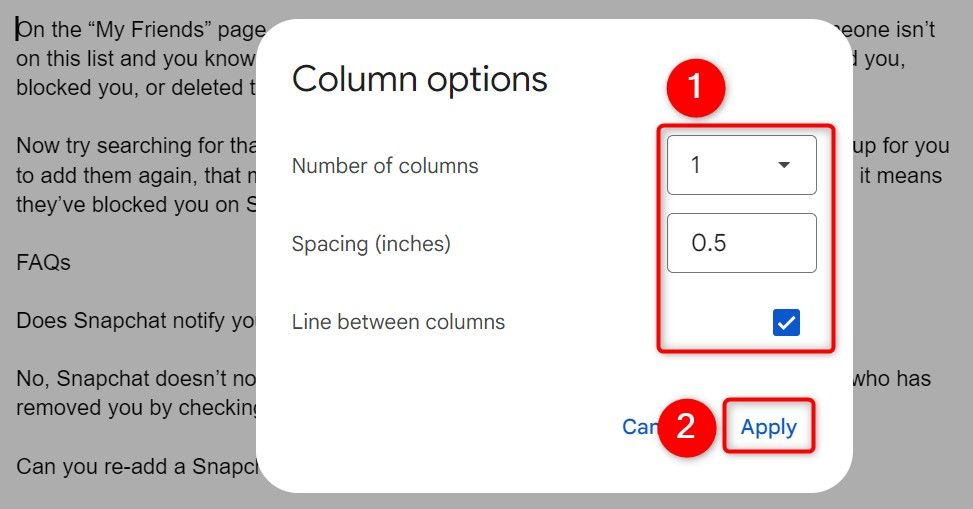
To use that feature, from your Google Docs menu bar, select Format > Columns > More Options.
If you add two columns, it will add one vertical line, and so on.

In the “Spacing (Inches)” field, specify thespacing to have between your columns.
Then, choose “Apply.”
You now have a vertical line in your document, separating your text columns.
And thats how you insert two kinds of lines in your Google Docs documents.