Next, install OpenCore to the USB drive and boot your Mac using the drive.
Has Apple ended support for your Mac?
you might install new versions of macOS anyway by creating your own patched installed.
Here’s how to do it and some things to keep in mind if you go this route.
The patcher we’ve used in this guide is theOpenCore Legacy Patcher.
For older macOS versions (like Mojave and Catalina), patchers provided bydosdude1might be a better choice.
Along the way, you may encounter problems.
Check out the OpenCoreTroubleshooting documentationand our “Tips for Troubleshooting OpenCore” section below.
Everything on the flash drive will be deleted.
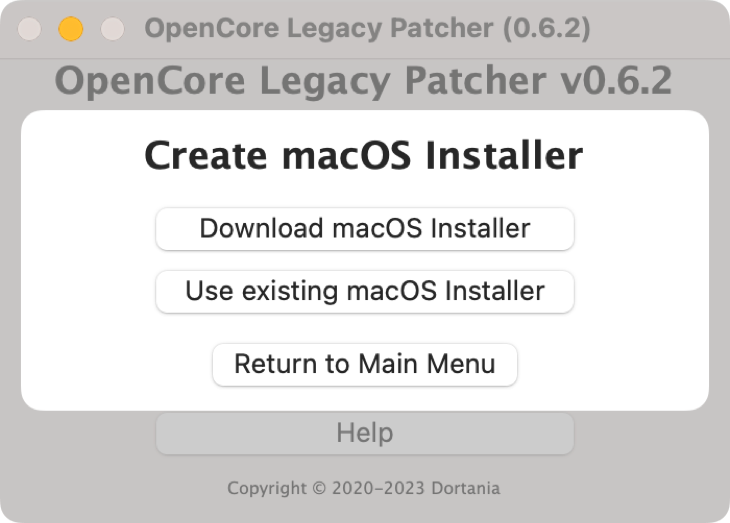
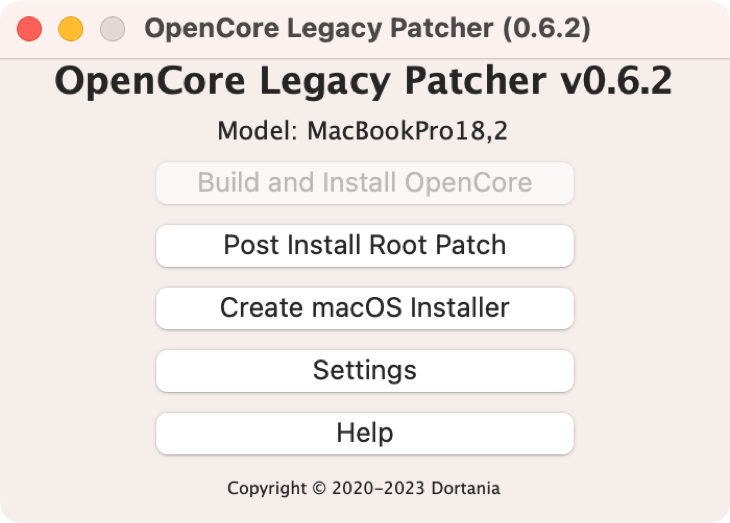
Launch it and select “Create macOS Installer” from the menu.
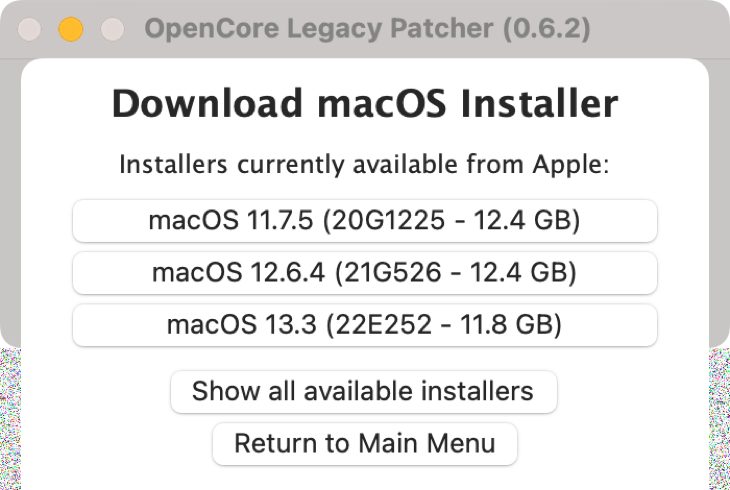
Assuming you don’t have an installer ready to go, select “Download macOS Installer” when prompted.
You’ll see the three most recent releases listed, with the most recent version at the bottom.
These will be fully updated to the latest available release.
To install Monterey on an unsupported Mac, download macOS 12.6.4.
To install Big Sur on an unsupported Mac, download macOS 11.7.5.
For older versions, punch the “Show all available installers” option.
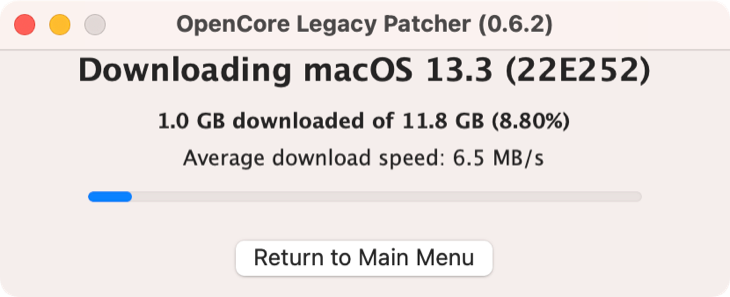
Wait for the download to complete.
If the download process fails, keep trying.
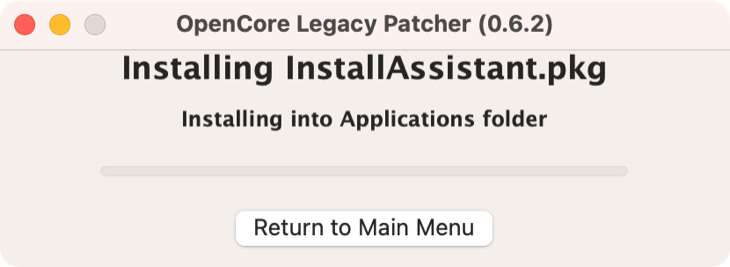
Once the download is complete, the patcher will verify your download.
You’ll then need to grant the patcher permission to copy to your Applications folder.
pick the installer you just downloaded and grant the app access to removable drives if prompted.
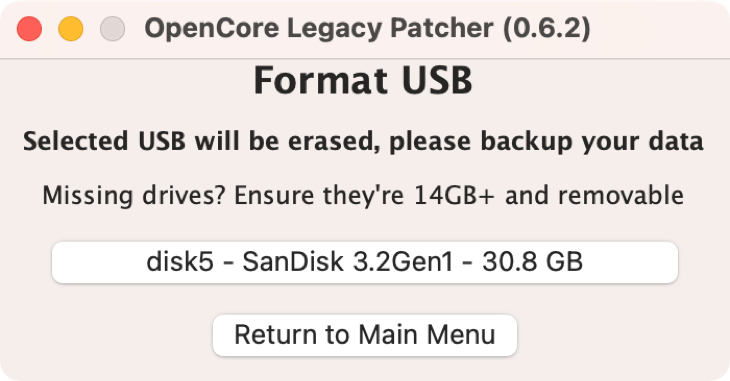
choose the USB drive you want to use as the installer.
The patcher will now create your installation media.
You may notice the installer becomes unresponsive and it may seem like nothing is happening.
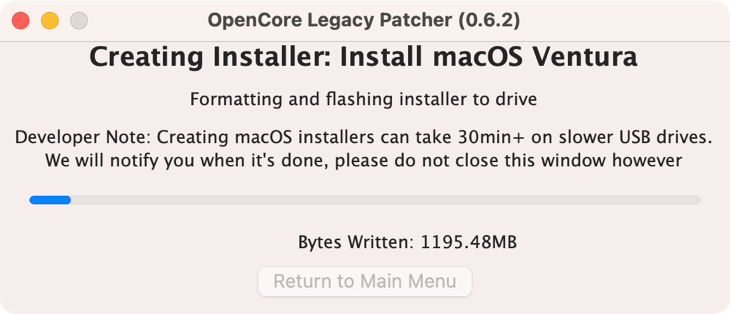
Be patient; this is normal.
Before long you’ll see data being written to the drive.
Eventually, the process will complete and the patcher will hopefully report that everything went to plan.
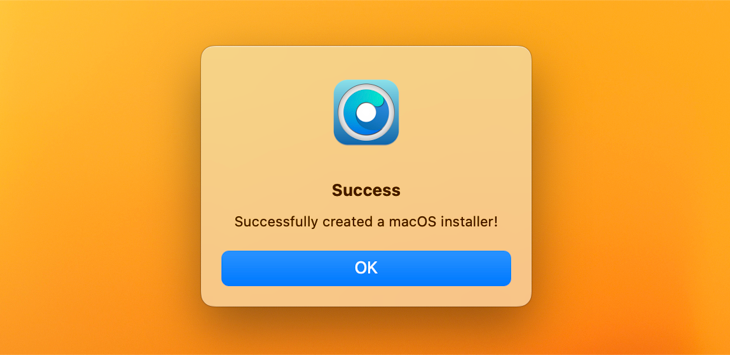
Don’t eject or remove your drive yet, we’re not done.
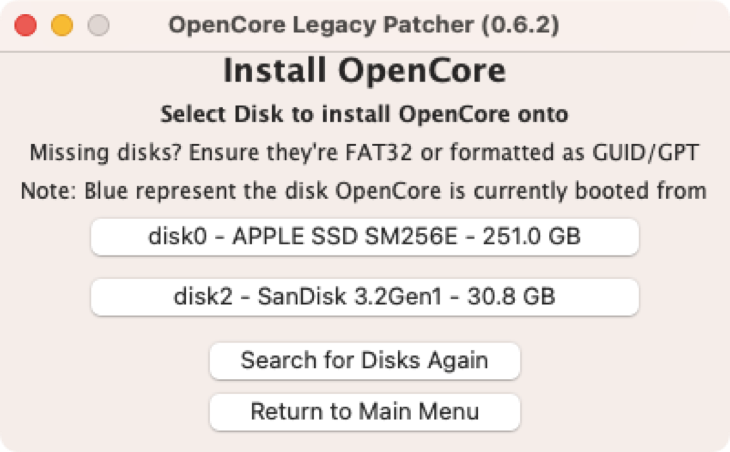
From the main OpenCore Legacy Patcher menu, select “controls” to see a list of options.
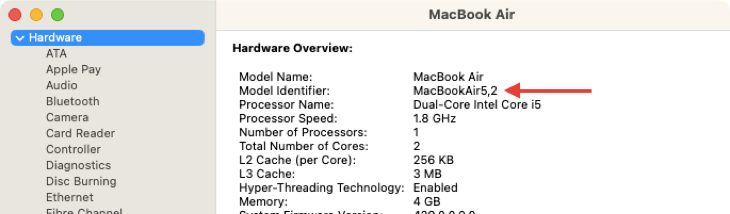
From the drop-down box, pick the Mac onto which you want to install your chosen version of macOS.
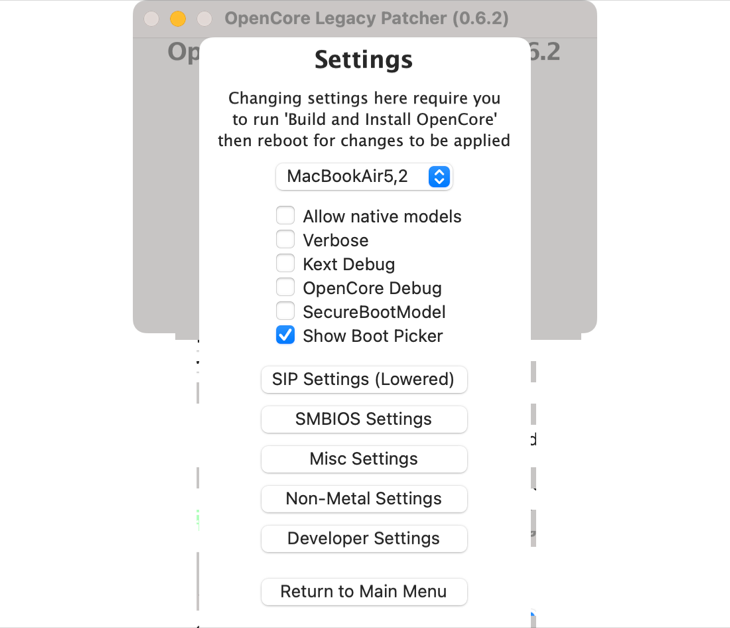
This is the model you want to select in the OpenCore Legacy Patcher.
Click “Return to Main Menu” then select “Build and Install Open Core” and wait.
OpenCore Legacy Patcher will build a version of OpenCore that’s tailored to the Mac you chose in parameters.
The patched version of OpenCore will be applied to your USB installation media.
verify toback up your Mac using Time Machinebefore proceeding.
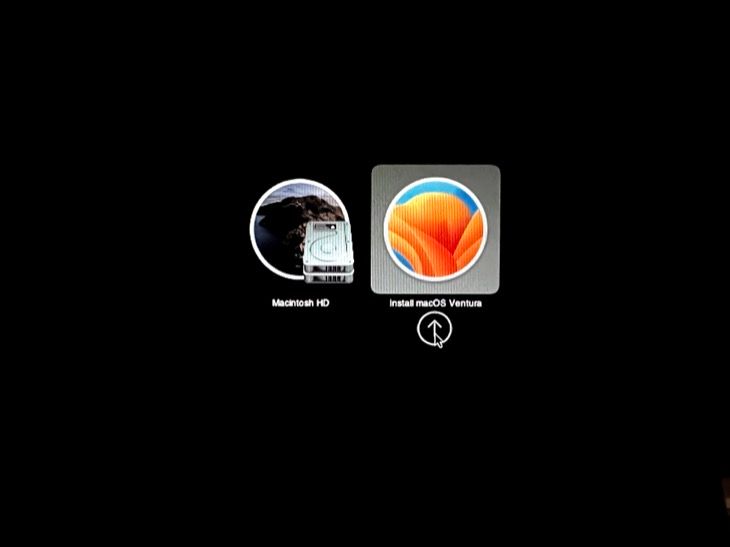
Shut down the machine you want to use to install macOS, then insert the USB drive you created.
Power on the machine while holding the Option button on your keyboard.
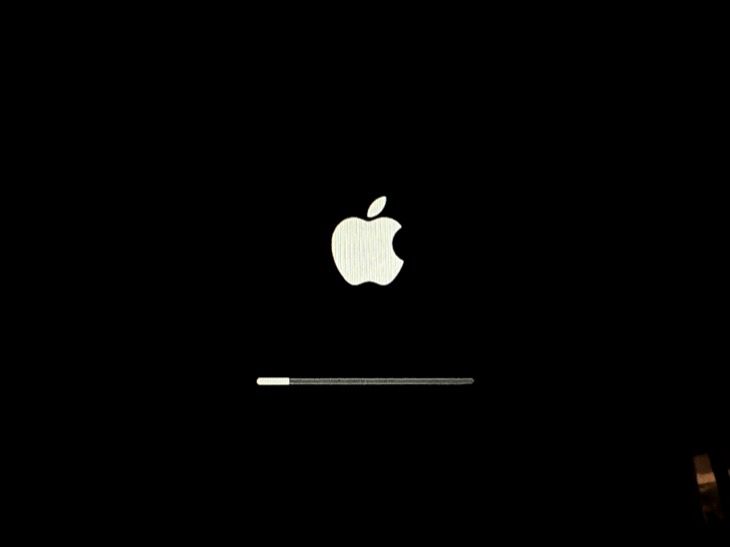
Wait for the installer to initialize.
You should see the Apple logo and a progress bar.
It can take a few minutes for the installation environment to load from your USB drive.
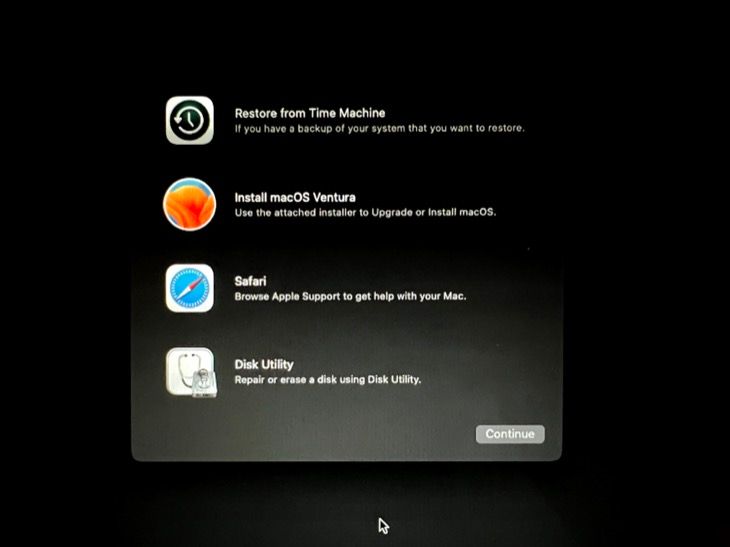
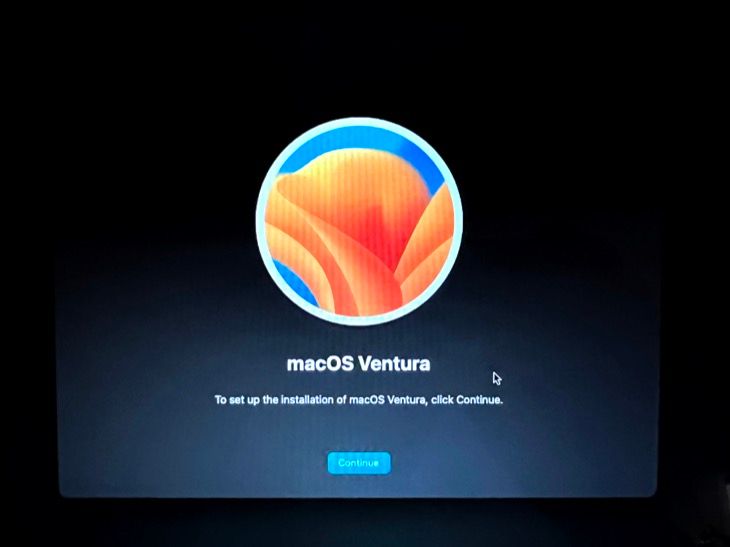
Now follow the installeras you would normally.
Your Mac will restart multiple times during this process.
Repeat this step as necessary.
Head to Apple > About This Mac and take a look at that brand new version number.
Finishing Up Post-Installation
There are just a few things left to do.
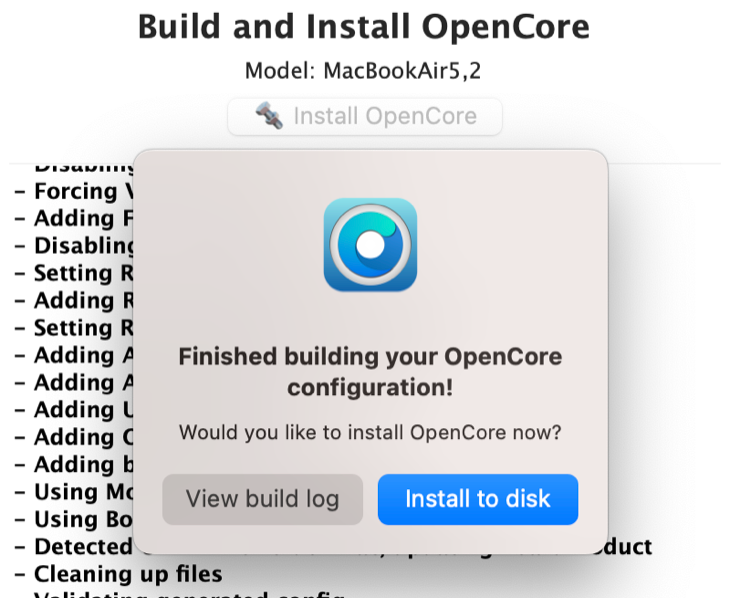
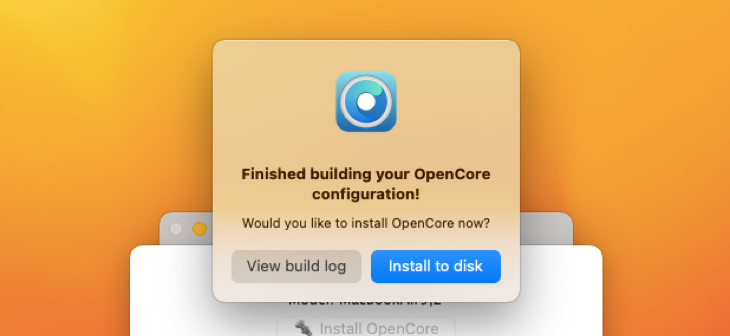
Hit “OK” to start.
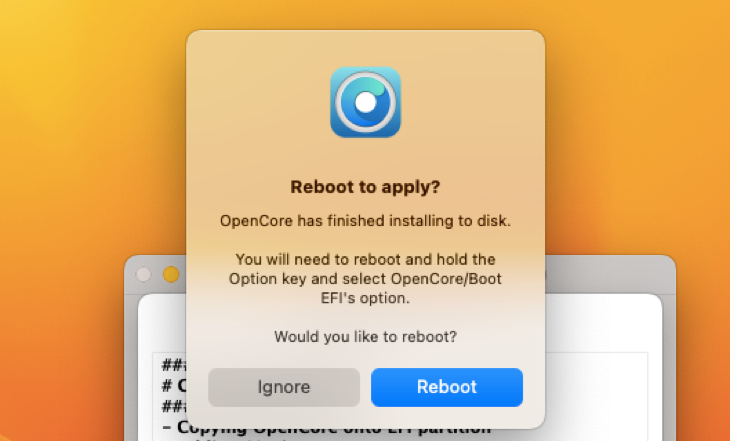
Wait for the builder to complete, then select “Install to Disk” when it appears.
Finally, you’ll be asked to restart and apply the changes.
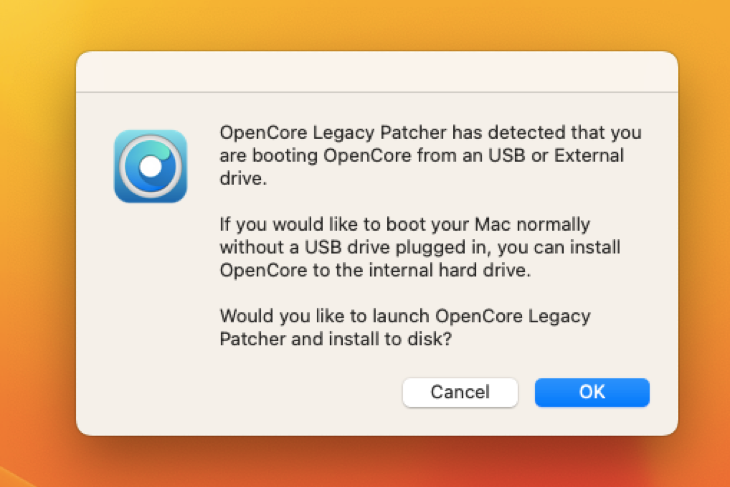
Your Mac will display the boot picker each time you start up.
Use the “Build and Install OpenCore” option to install OpenCore to your main macOS installation.
Let the patcher check for and install any required post-installation patches you might need.
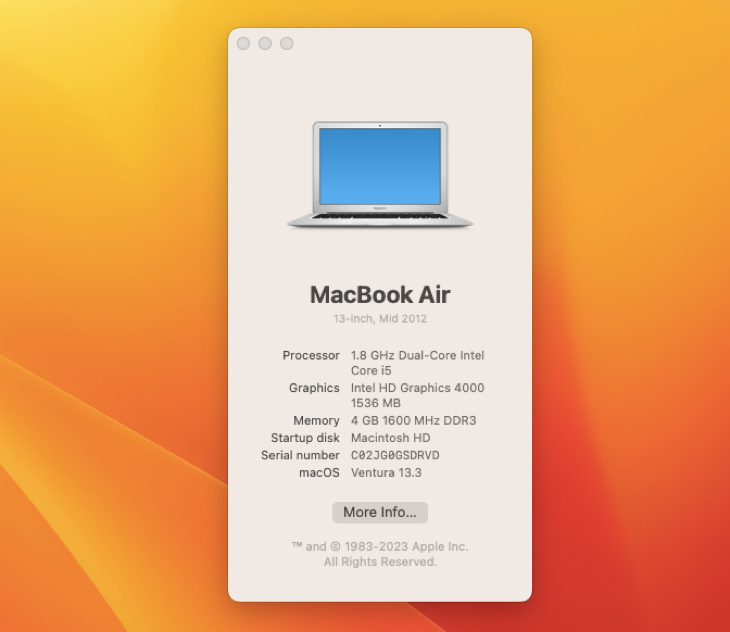
Our installation of Ventura on a mid-2012 MacBook Air went relatively smoothly once we got the installer running.
We installed OpenCore to the USB drive (with the same configuration), and everything seemed to work.
Verbose mode may give an error alert that indicates what the problem is.
Lastly, you might always try a different version of macOS than the one you’re trying to install.
If Ventura isn’t working, why not give Monterey or Big Sur a shot?
Should You Install an Unsupported Version of macOS?
We’ve not noticed any major drawbacks to installing macOS Ventura on a mid-2012 MacBook Air.
The system performs as well as can be expected for 11-year-old entry-level hardware.
There are a few drawbacks, depending on your machine.
That leaves you more open to attack than a standard Mac.
Performance might be worse than you expect, especially if your Mac is very old.
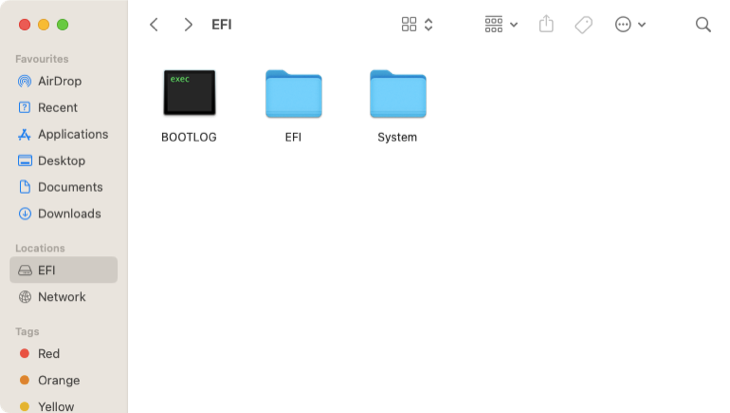
you might also delete the “System” folder from the root EFI volume.
You may need to completely delete your (unsupported) macOS installationusing Disk Utility via the Mac recovery partitiontoo.
If ever there wasa right time to buy a new Macit’s when support for your model ends.
Check outour top rated MacBooksandbest desktop Mac modelsfor some hardware recommendations.