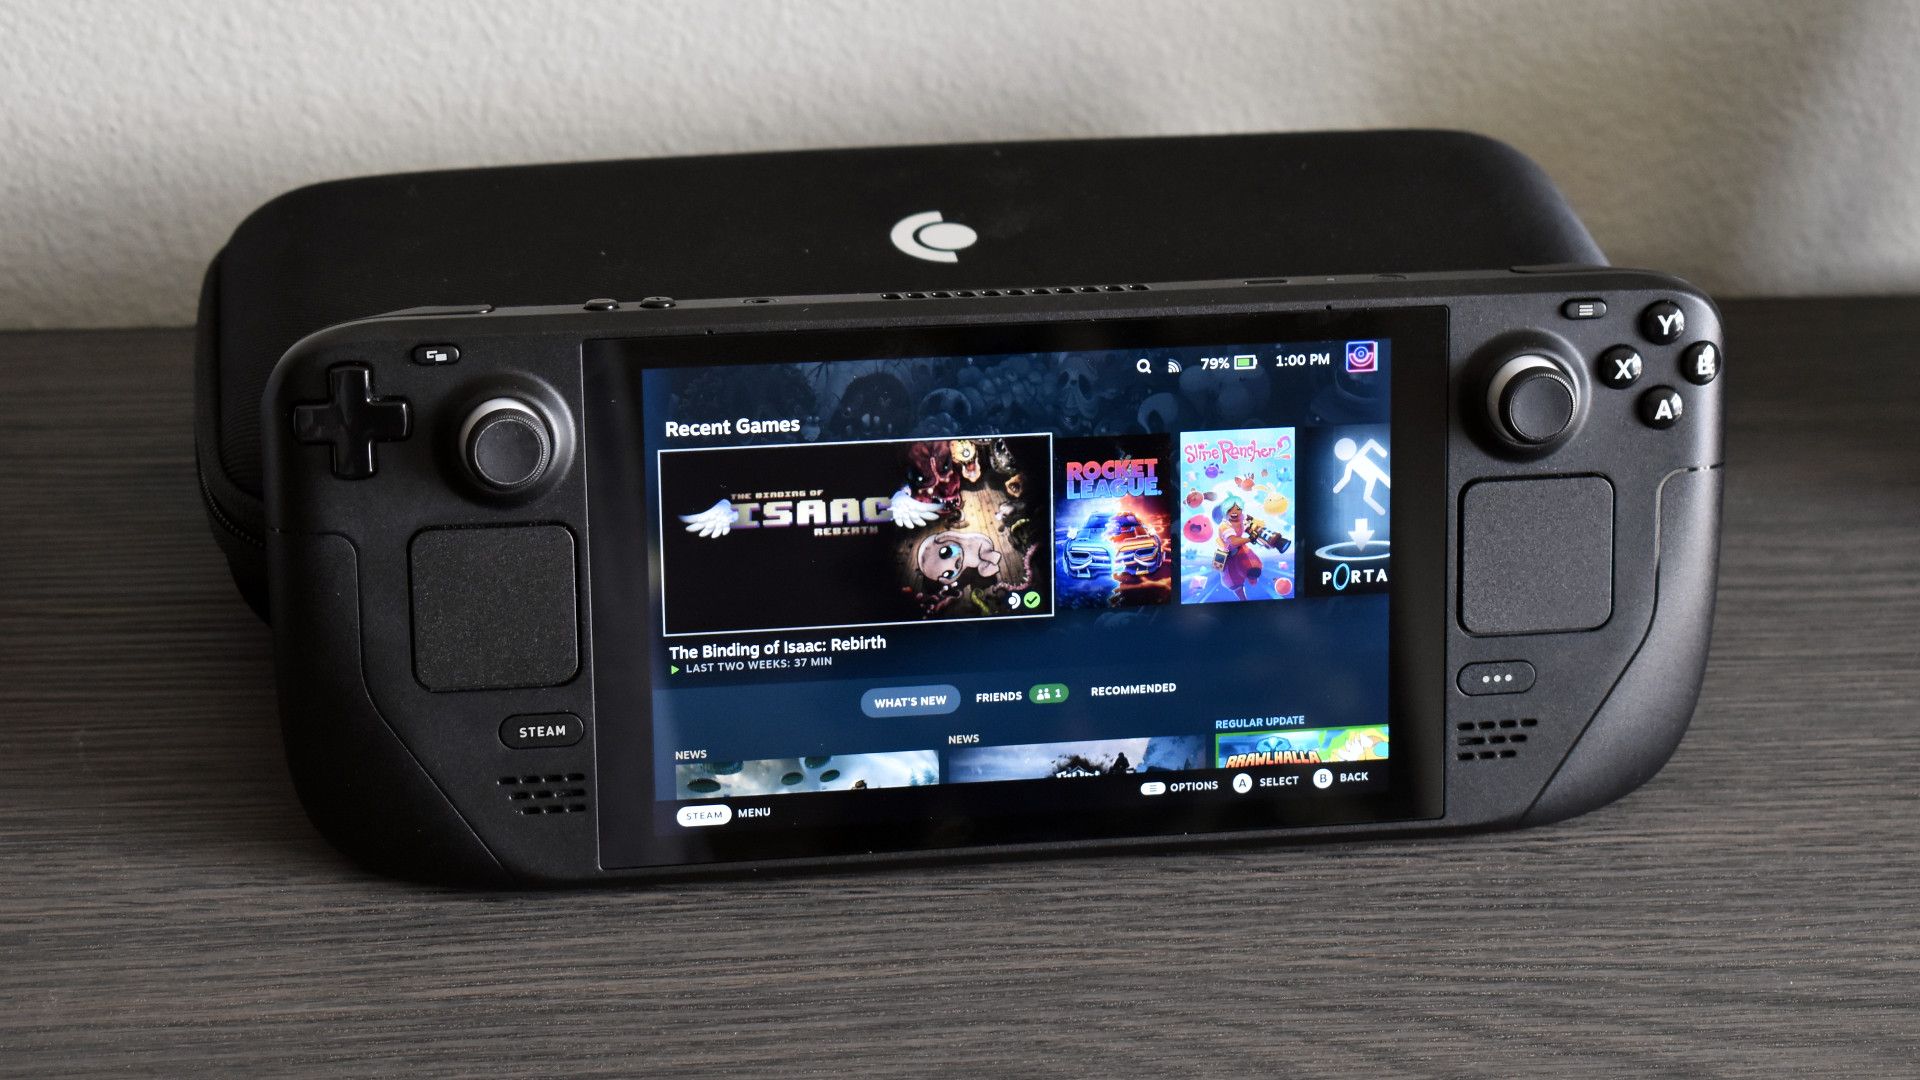
Windows on Steam Deck: What Are Your Options?
You aren’t limited to only one way of running Windows on your Steam Deck.
Related:What Happened To DCPromo in Windows Server 2012?
Marcus Mears III / How-To Geek
Finally, you could dual-boot Windows and SteamOS on the Deck’s internal drive.
While SteamOS technicallysupports dual boot with Windows, the procedure for making that happen is rather complex and long-winded.
We recommend using the SD card method if you want to taste the flavor of Windows on Steam Deck.
We’ll guide you through both of those methods in this guide.
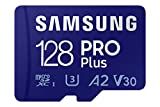
Regarding the microSD card, we recommend using at least a 64GB UHS-I card that supportsA2/U3speeds.
A solid pick is the128GB SAMSUNG PRO Plus, a UHS-I microSD card that supports A2/U3 speeds.
It sports a competitive price and is also available in 256GB and 512GB sizes.
If you’re looking for a 64GB option check out theSanDisk 64GB Extreme microSDXC, another quality choice.
The dock should have at least a couple of USB-A ports and an HDMI port.
An app to unzip Windows drivers is required as well; we recommenddownloading 7-Zip.
Related:Does Your Steam Deck SD Card Affect Game Loading Times?
This is a handy tool for creating bootable USB flash or SD card drives.
Save the Rufus executable and run it.
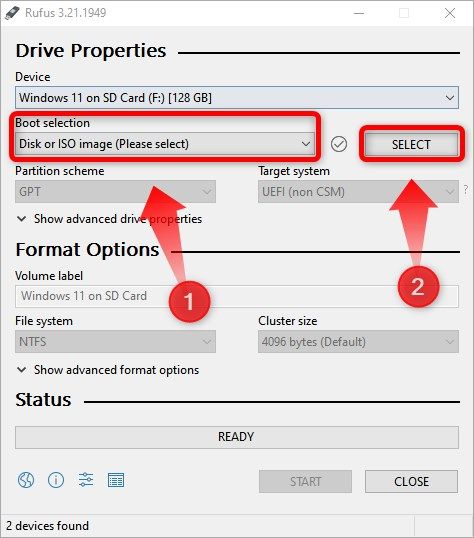
Before opening Rufus, ensure you’ve slotted your microSD card into your card reader.
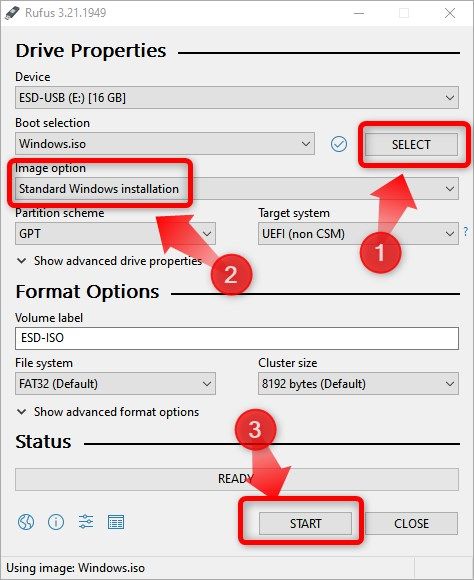
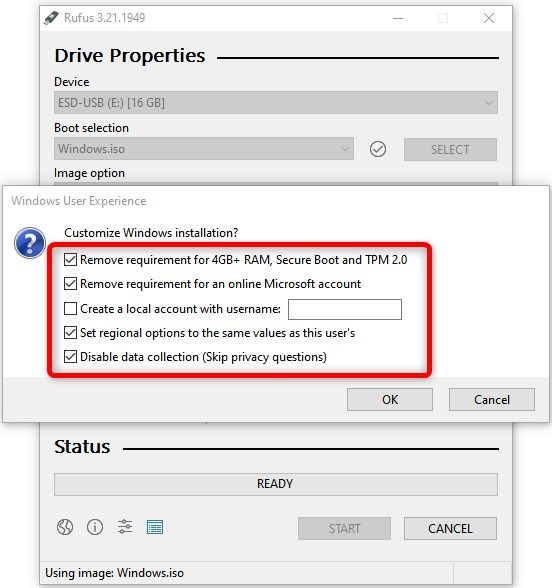
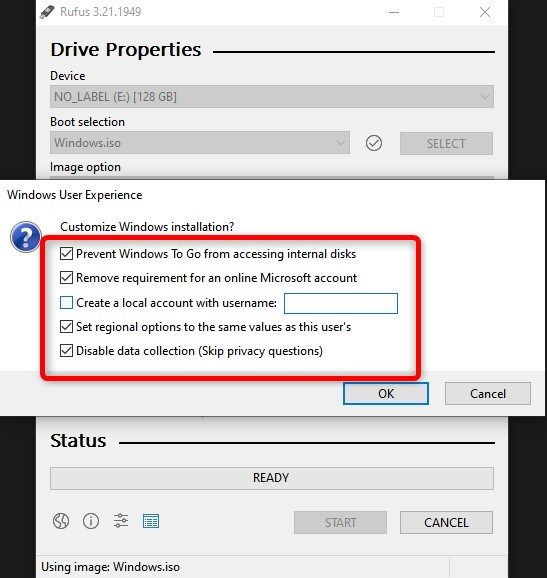
Next, choose the “Windows To Go” option in the “Image Option” selection.
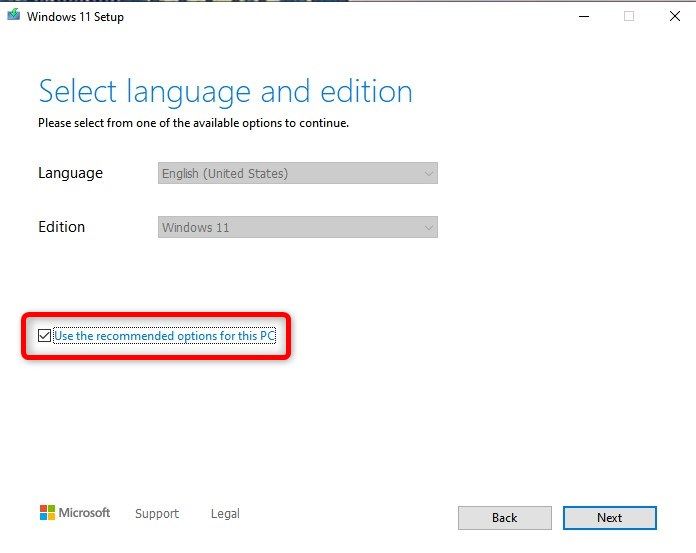
Do not change other options.
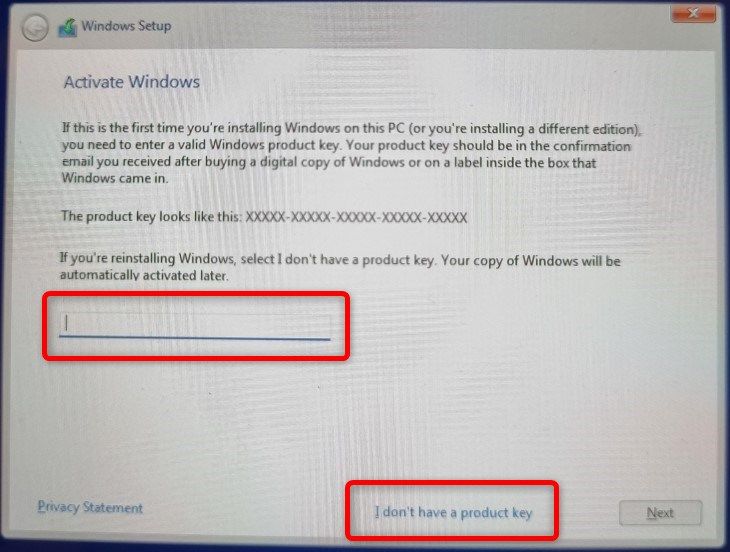
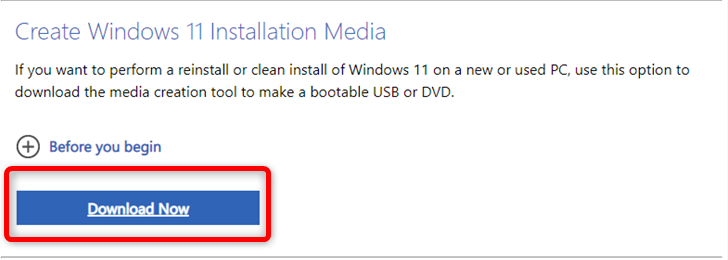
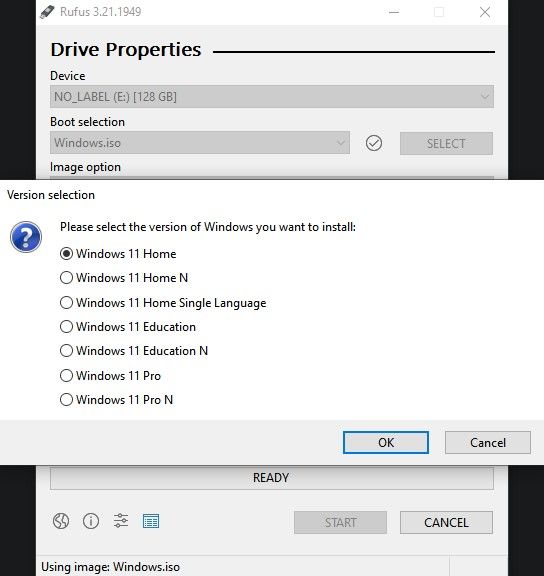
After you snag the version of Windows 11 you want, another dialog window will open.
This can take a while, especially if you use a slower A1/U1 microSD card.
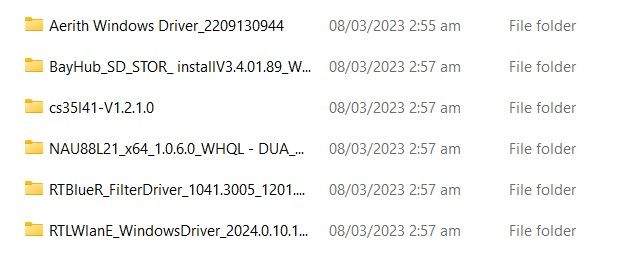
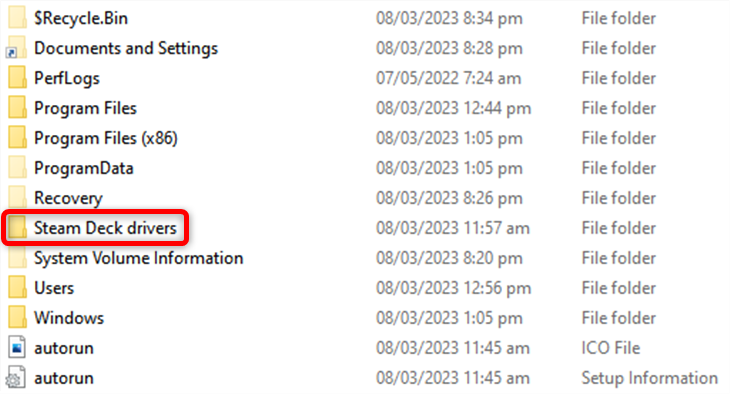
you’re free to download them from Valve’sSteam Deck Windows Resources page.
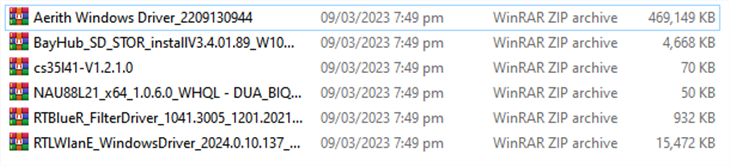
Download all six drivers, including both audio drivers.
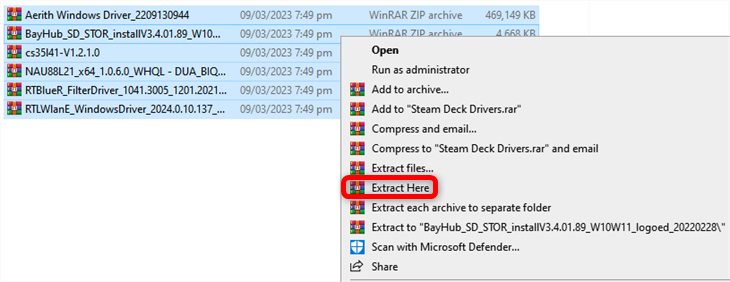
Save them all to a single folder and then extract the six archives into the same folder.
Once you’ve turned your Deck off, place the card inside your Steam Deck’s microSD card slot.
Next, hold the volume down button and then press the power button.
Once you hear the sound playing release both buttons.
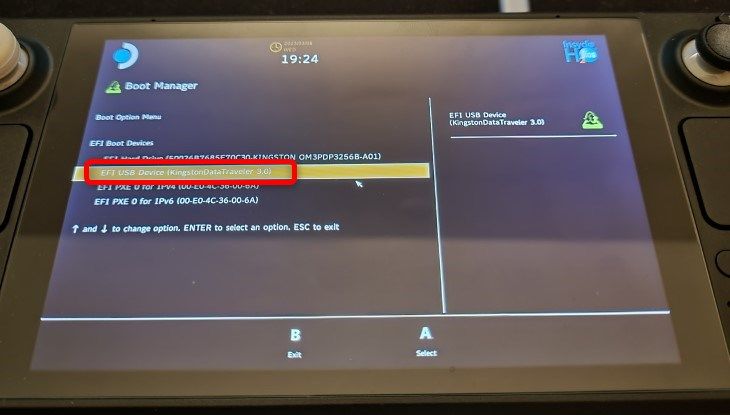
Now you’ve entered the Steam Deck boot selection menu.
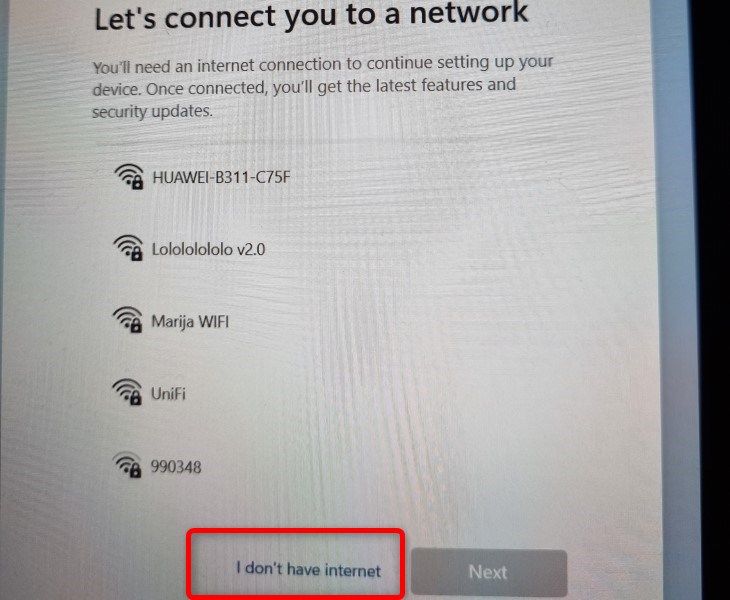
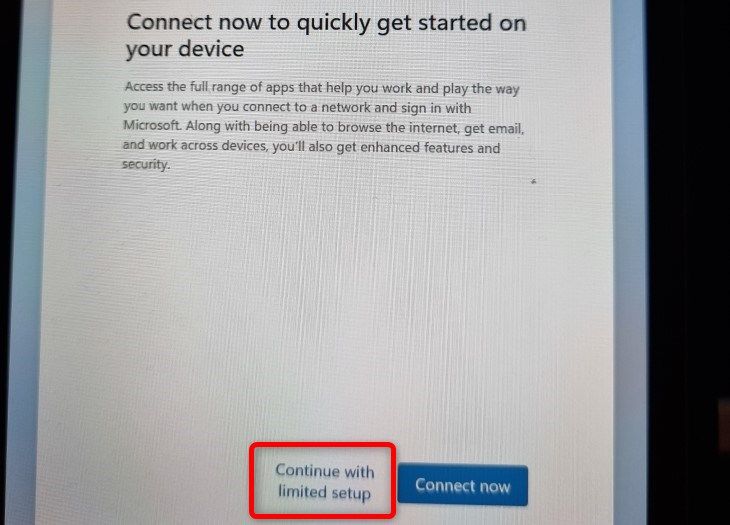
This can take a while; we waited about 15 minutes for the Windows setup to start.
This is why you should skip connecting to Wi-Fi during the initial setup.
Once you boot into Windows for the first time, change the screen orientation back to landscape.
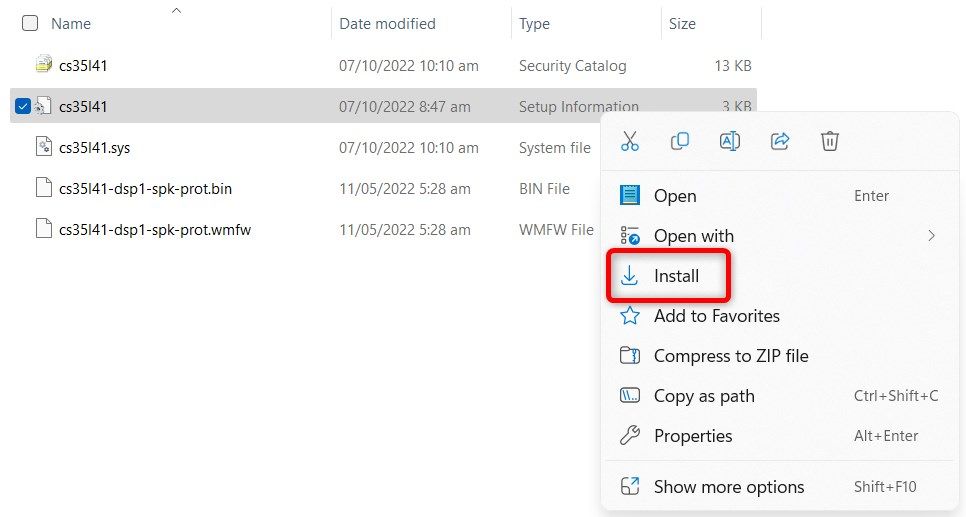
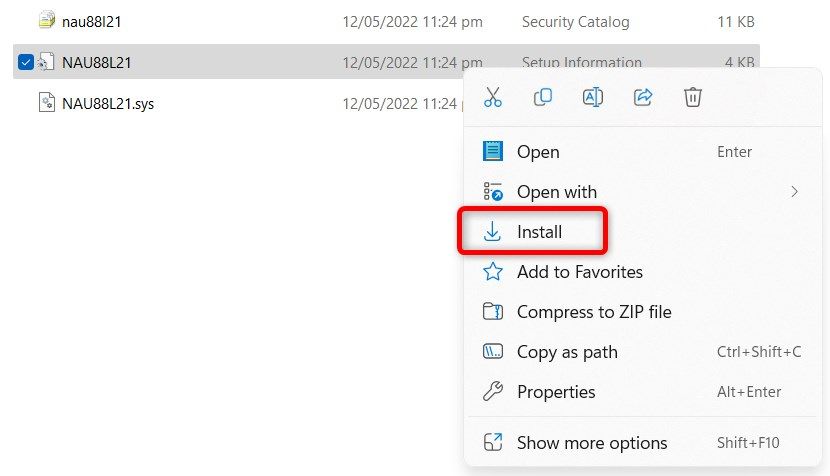
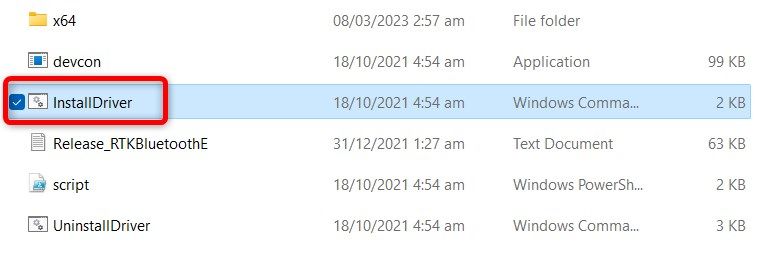
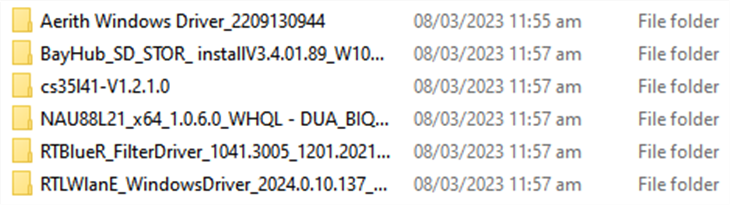
Note that the first folder has a sub-folder you should probably enter to locate the “Setup” executable.
Do not tap on the “Setup” file.
Then wait for the screen and the fan to turn off.
Once the fan stops spinning, hold the volume down button and press the power button.
Your Steam Deck should boot straight into Game Mode.
If you haven’t, check out our full guide tobacking up a Steam Deck.
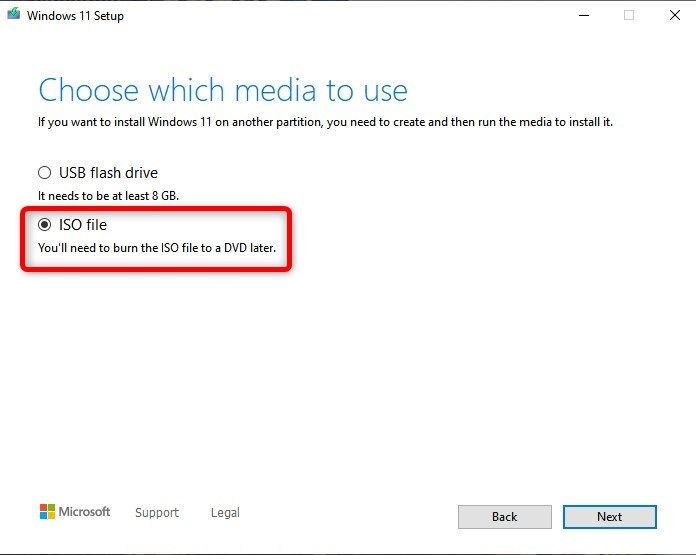
With your ISO ready to go, open Rufus and select your USB drive as the target gadget.
The screen should turn on and show you the “Boot Option Menu” list.
Note that during the installation, the screen will switch to portrait mode.
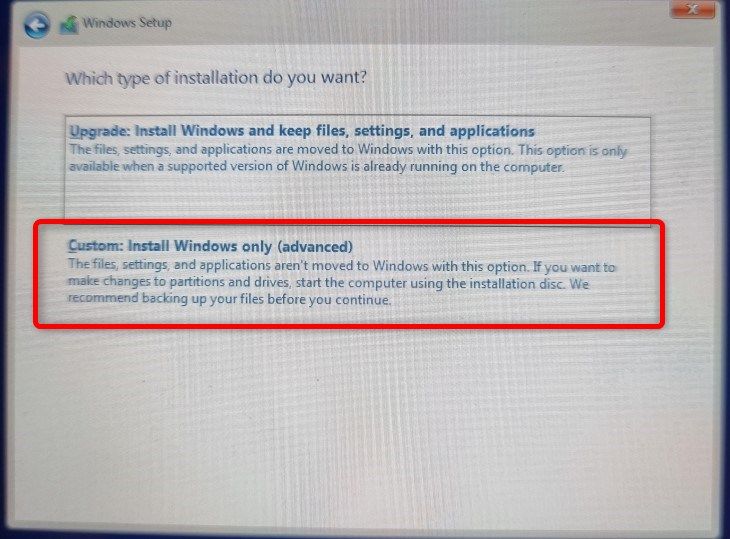
Next, choose the “Custom: Install Windows Only” option in the following window.
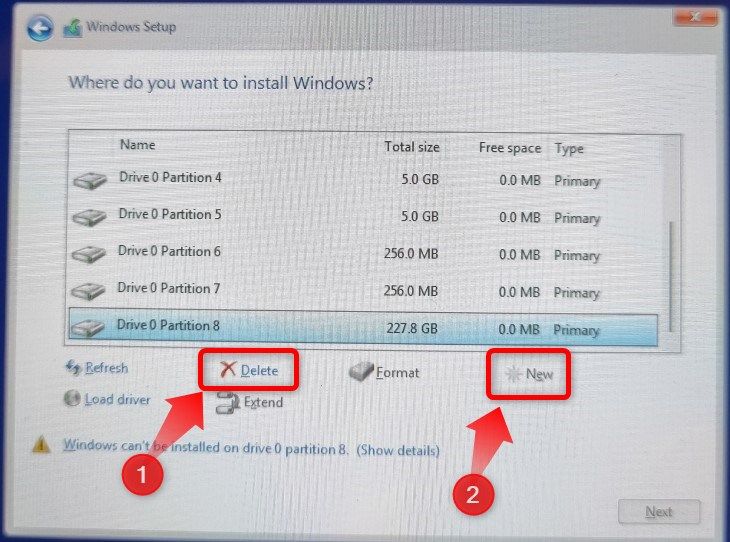
Once you create the new partition, install Windows on it.
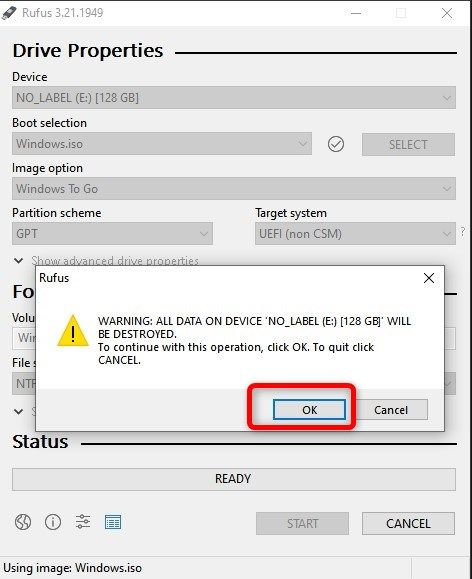
This will delete all data on your Steam Deck drive.
Double-check that your important data is backed up before proceeding.
Once the setup is finished, it’s time to load the Steam Deck Windows drivers.

Jump to theInstalling Necessary Driverssection to read how to do it.
Once you’ve installed your drivers, you’re good to go!