Quick Links
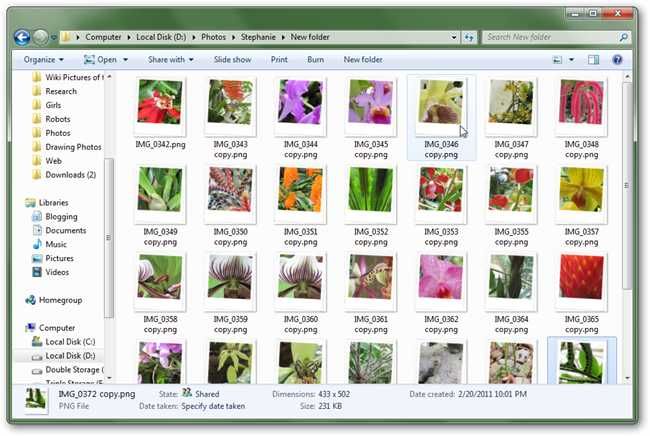
Have a huge folder of images needing tweaks?
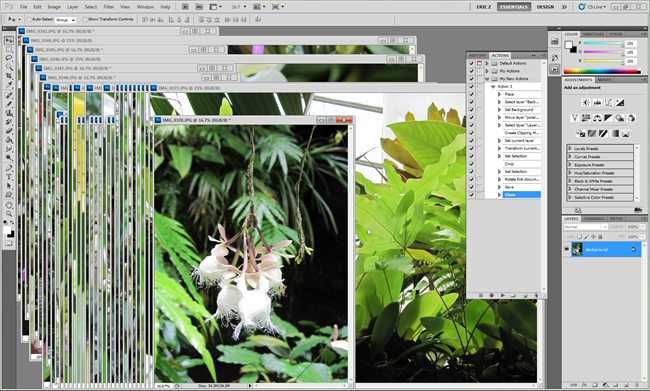
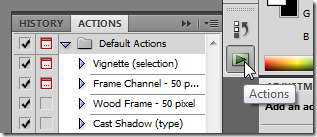
Photoshop actions are a way of recording the tools, menus, and keys pressed while using the program.
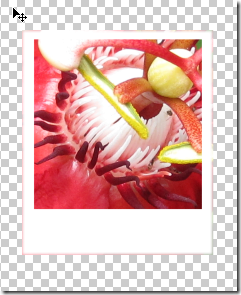
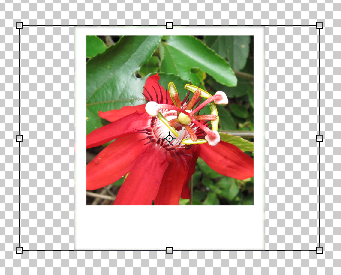
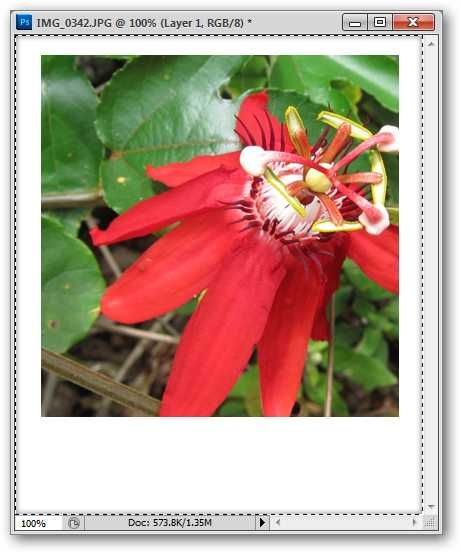
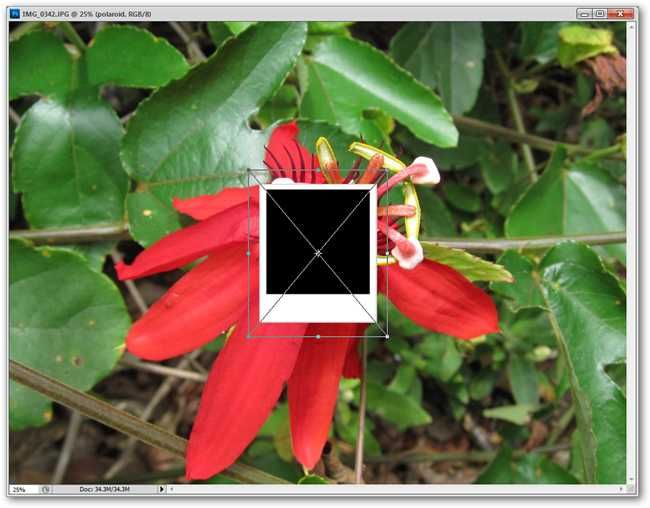
The image illustrated above is a template for a polaroid-style picture frame.
opt for
in the Actions Panel, pictured in the previous illustration on the left.
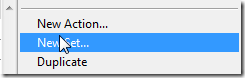
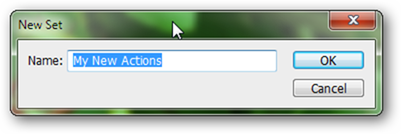
Choose to create a “New Set” to get to begin creating your own custom Actions.
Name your action set whatever you want.
Names are not relevant, you’ll simply want to make it obvious that you have created it.
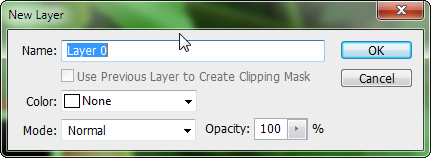
Click OK.
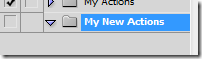
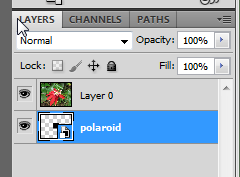
Look back in the layers panel.
You’ll see your new Set of actions has been added to the list.

Click it to highlight it before going on.
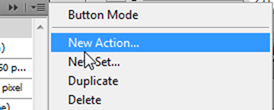
again to create a “New Action” in your new set.
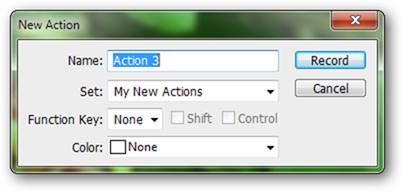
If you care to name your action, go ahead.

The name is for your own usage, so do what suits you best.
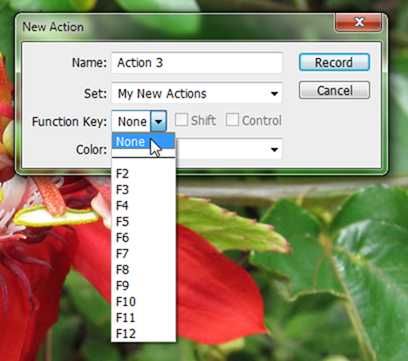
Note that you’ve got the option to simplify your process by creating shortcut keys for your actions.
If you plan to do hundreds of edits with your actions, this might be a good idea.
When you create a new Action, Photoshop automatically begins recording everything you do.
It does not record the time in between steps, but rather only the data from each step.
So take your time when recording and verify you create your actions the way you want them.
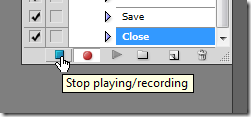
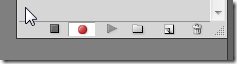
The square button stops recording, and the circle button starts recording again.
With these basics ready, we can take a look at a sample Action.
So begin recording your action when your first photo is already open.
Once your first image is open, tap the record button.
If you’re already recording, continue on.
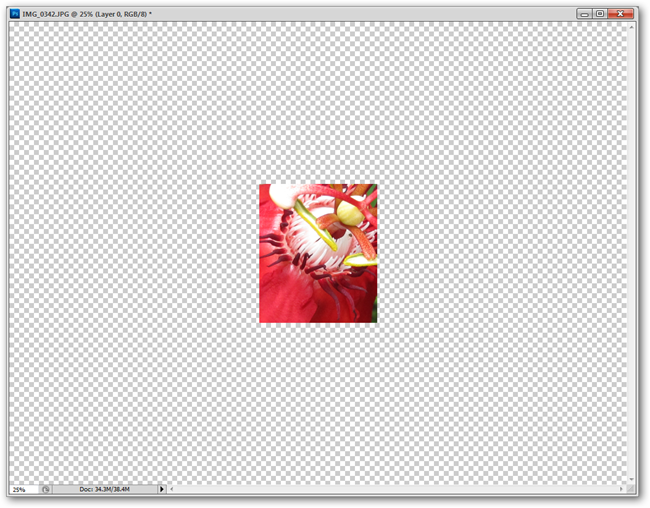
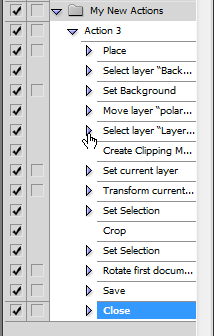
Using the File > Place command to insert the polaroid image can be easier for Actions to deal with.

Photoshop can record with multiple open files, but it often gets confused when you try it.
Keep your recordings as simple as possible to ensure your success.
When the image is placed in, simply press enter to render it.
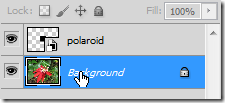
Select your background layer in your layers panel.
Your recording should be following along with no trouble.
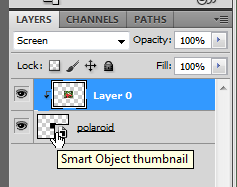
Double click this layer.
Double clicking your background layer will create a new layer from it.
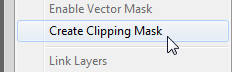
Right click “Layer 0” and select “Create Clipping Mask.”
The JPG image is cropped to the layer below it.
Coincidentally, all actions described here are being recorded perfectly, and are reproducible.
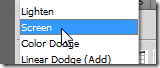
to set your Photograph layer to a “Screen” blending mode.
This will make the image disappear when it runs over the white parts of the polaroid image.

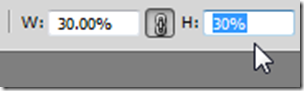
With your image layer (Layer 0) still selected, navigate to Edit > Transform > Scale.
Visit the Width and Height adjustments in the top options panel.
smack the chain icon to link them together, and adjust them numerically.
Depending on your needs, you may need to use more or less than 30%.
Your image will resize to your specifications.
Press enter to render, or hit the check box in the top right of your system.
- punch your bottom layer, or “polaroid” in this case.
This creates a selection of the bottom layer.
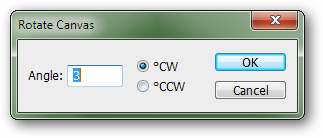
Choosing 3 degrees clockwise , we click OK to render our choice.

Our image is rotated, and this step is recorded.
Photoshop will even record when you secure your files.
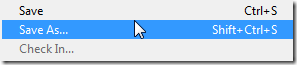
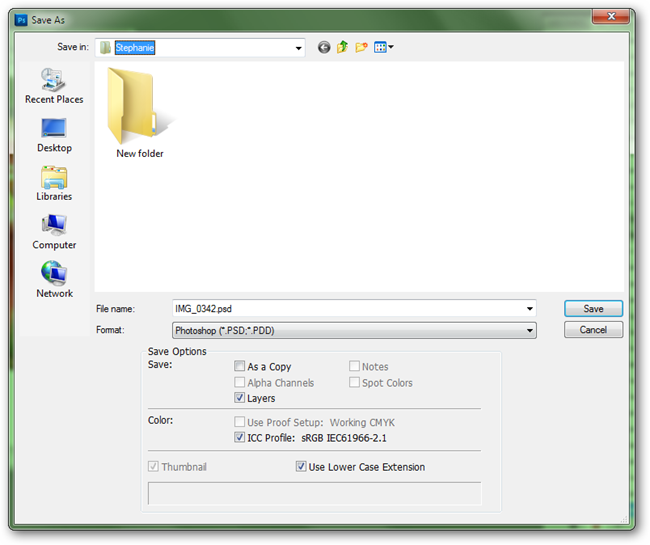
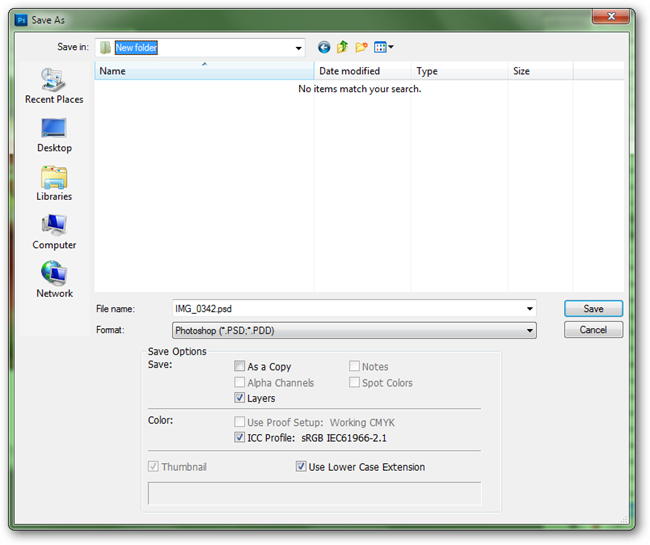
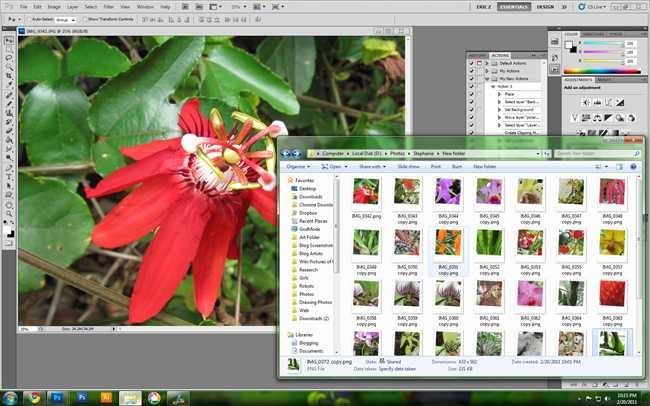
With your recording still going, find File > Save As.

Navigate to any folder you wish, but do not change the filename.
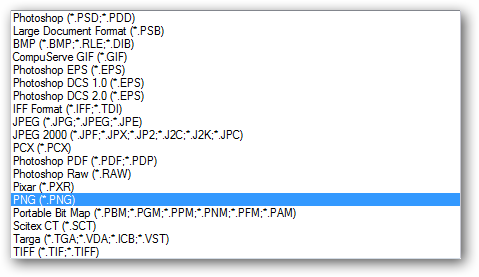
However, you’ve got the option to change your filetype without recording an absolute filename.
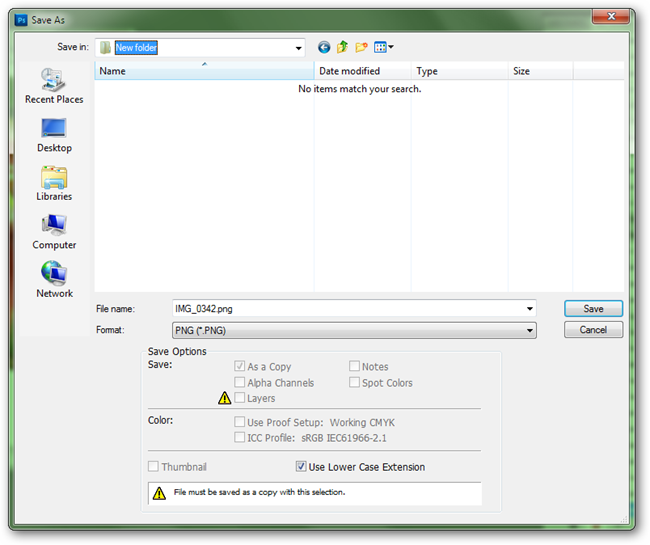
Use the pulldown tab and select a different filetype—in this instance, PNG.
Simply click “Save” to create a new PNG based on your actions.
Photoshop will record the destination and the change in filetype.
(This is very important if you want to edit hundreds of images at once!)

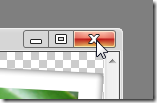
Click File > Close or the red “X” in the corner to close your filetype.
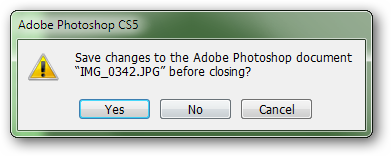
Photoshop can record that as well.
Photoshop will also record your choice of “NO” for subsequent images.
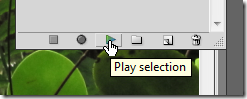
In your Actions panel, hit the stop button to complete your action.
you might always hit the record button to add more steps later, if you want.
This is how your new action looks with its steps expanded.
Curious how to put it into effect?
Read on to see how simple it is to use that recording you just made.
Actions don’t require any programming knowledge, but often can get confused or work in a counter-intuitive way.
Record your action until it is perfect.
If it works once without errors, it’s likely to work again and again!
Find the “Play” button in your Actions Panel.
And in mere moments, a complicated stack of work is done.
Image Credits: All images copyright Stephanie Pragnell and author Eric Z Goodnight, protected underCreative Commons.