Quick Links
Imagine transforming a simple room into a vibrant space with dynamic lighting effects.
Having some experience with soldering and3D printingwill definitely give you a head start.
If you’re new to these areas, don’t worry!
Rigning / Cults 3D
These include three mini base/top plates and one each of the box enclosure top and bottom.
Once downloaded, print all the parts according to your 3D printer’s instructions.
There are also workarounds to3D print stuff without your own printer.
Cherie Tan / How-To Geek
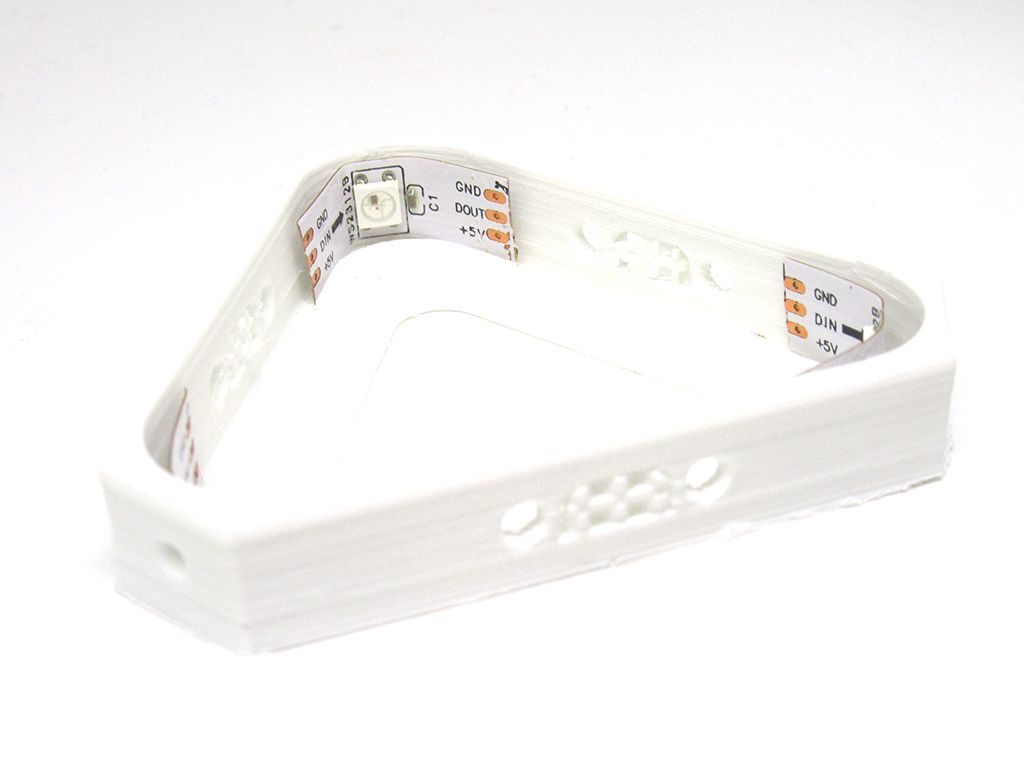
For this project, you’ll need exactly nine individual LEDs.
Be mindful not to cut in between the designated markings, as this can damage the strip.
Many LED strips come with a waterproof coating.

Cherie Tan / How-To Geek
Now comes the fun part: building the LED layout!
Gently bend each LED to fit snugly in the corners of the bottom enclosure.
Take your time here to ensure clean and even distribution of the LEDs.
Cherie Tan / How-To Geek
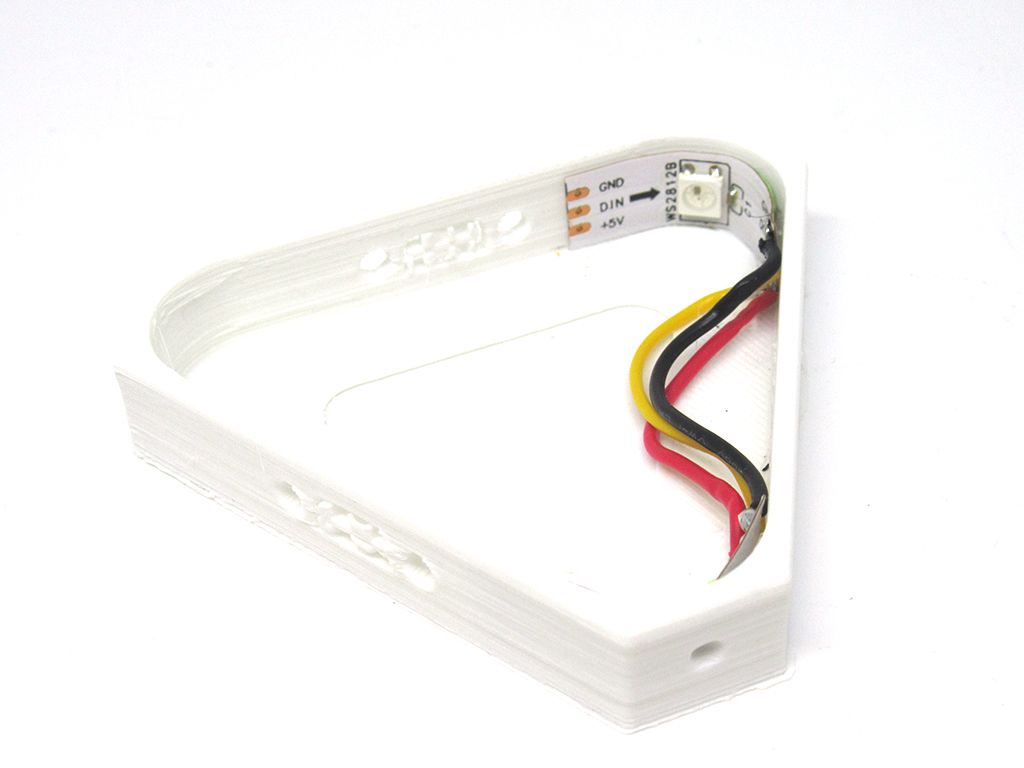
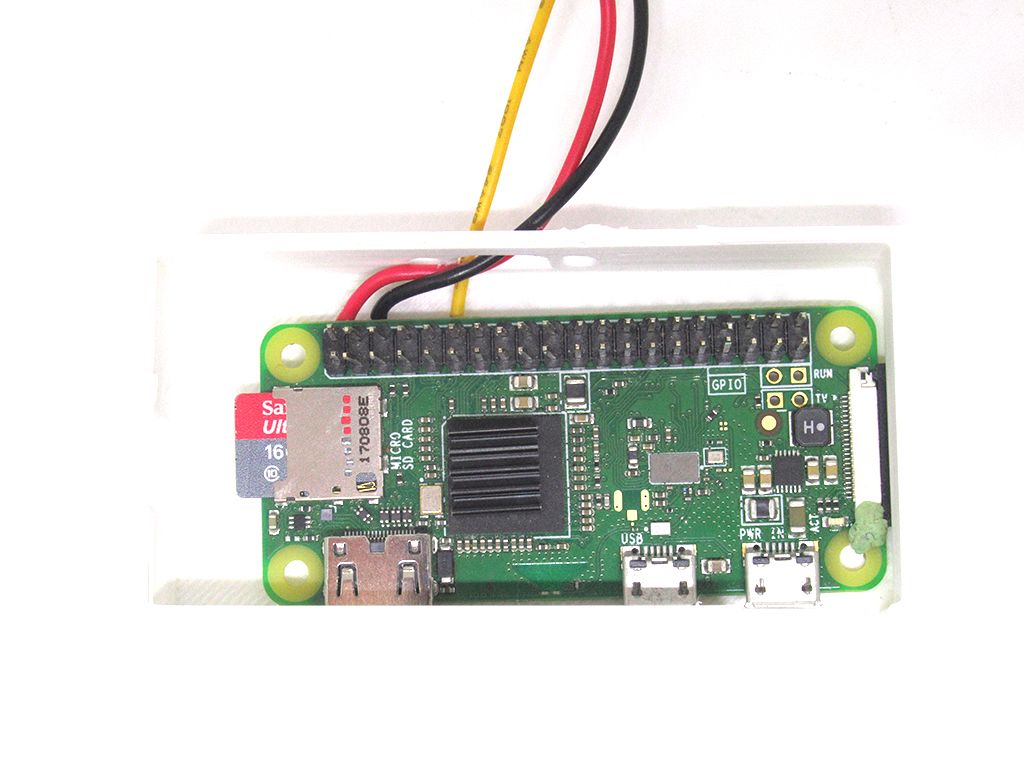
Now comes the time to solder the jumper wires to the Raspberry Pi’s GPIO pins.
Next, loop those three previously unconnected wires through the hole in the next enclosure.
You’ll be soldering these wires to the fourth LED in the next step.
Cherie Tan / How-To Geek
Continue this process for all remaining LEDs and enclosures, ensuring all LEDs are wired in series.
To diffuse the LEDs and create a softer light, we can use plain white printer paper.
Place the paper diffusers inside the enclosures and snap the top components back on.
Cherie Tan / How-To Geek
Now, let’s control those LEDs with some code!
Not sure how to do so?
We’ve got a separate guide onconfiguring your Raspberry Piif you need a refresher.

Open up thenano editorwith the following command:
Then copy and paste the following code into the nano editor.
The code sets up a Raspberry Pi to control NeoPixel LED strips.
It imports necessary modules: time, board, and neopixel.

Cherie Tan / How-To Geek
board.D18
The LED strip must be connected to D10, D12, D18 or D21 to work.
Some LEDs have red and green reversed!
For RGBW LEDs, simply change the ORDER to RGBW or GRBW.
Cherie Tan / How-To Geek
Then initiate the code withsudo python3 file-name.py.
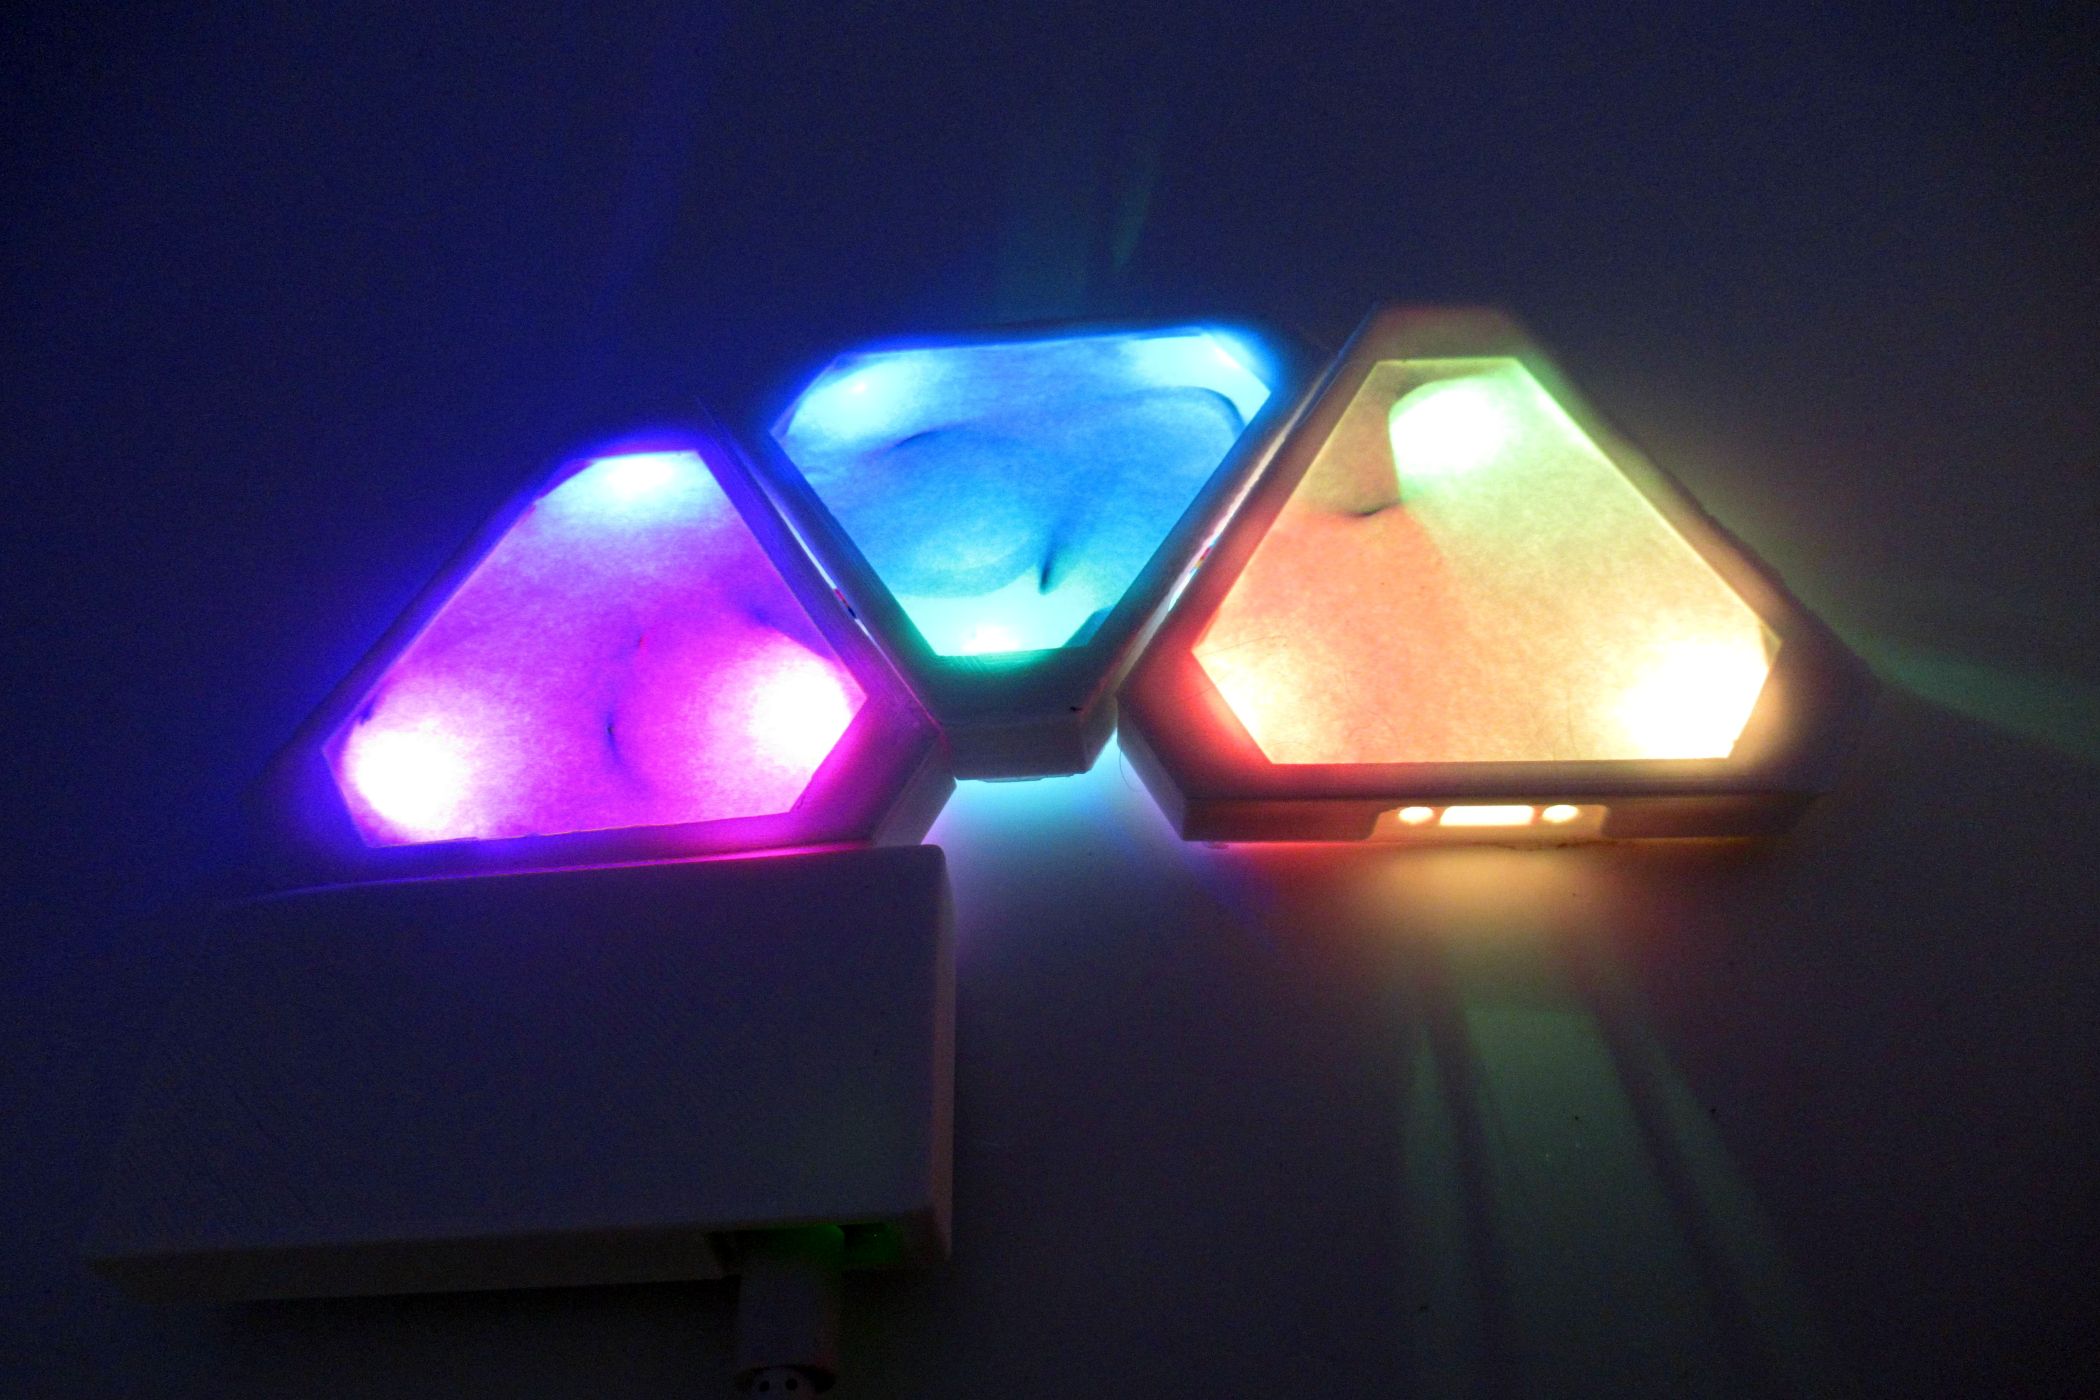
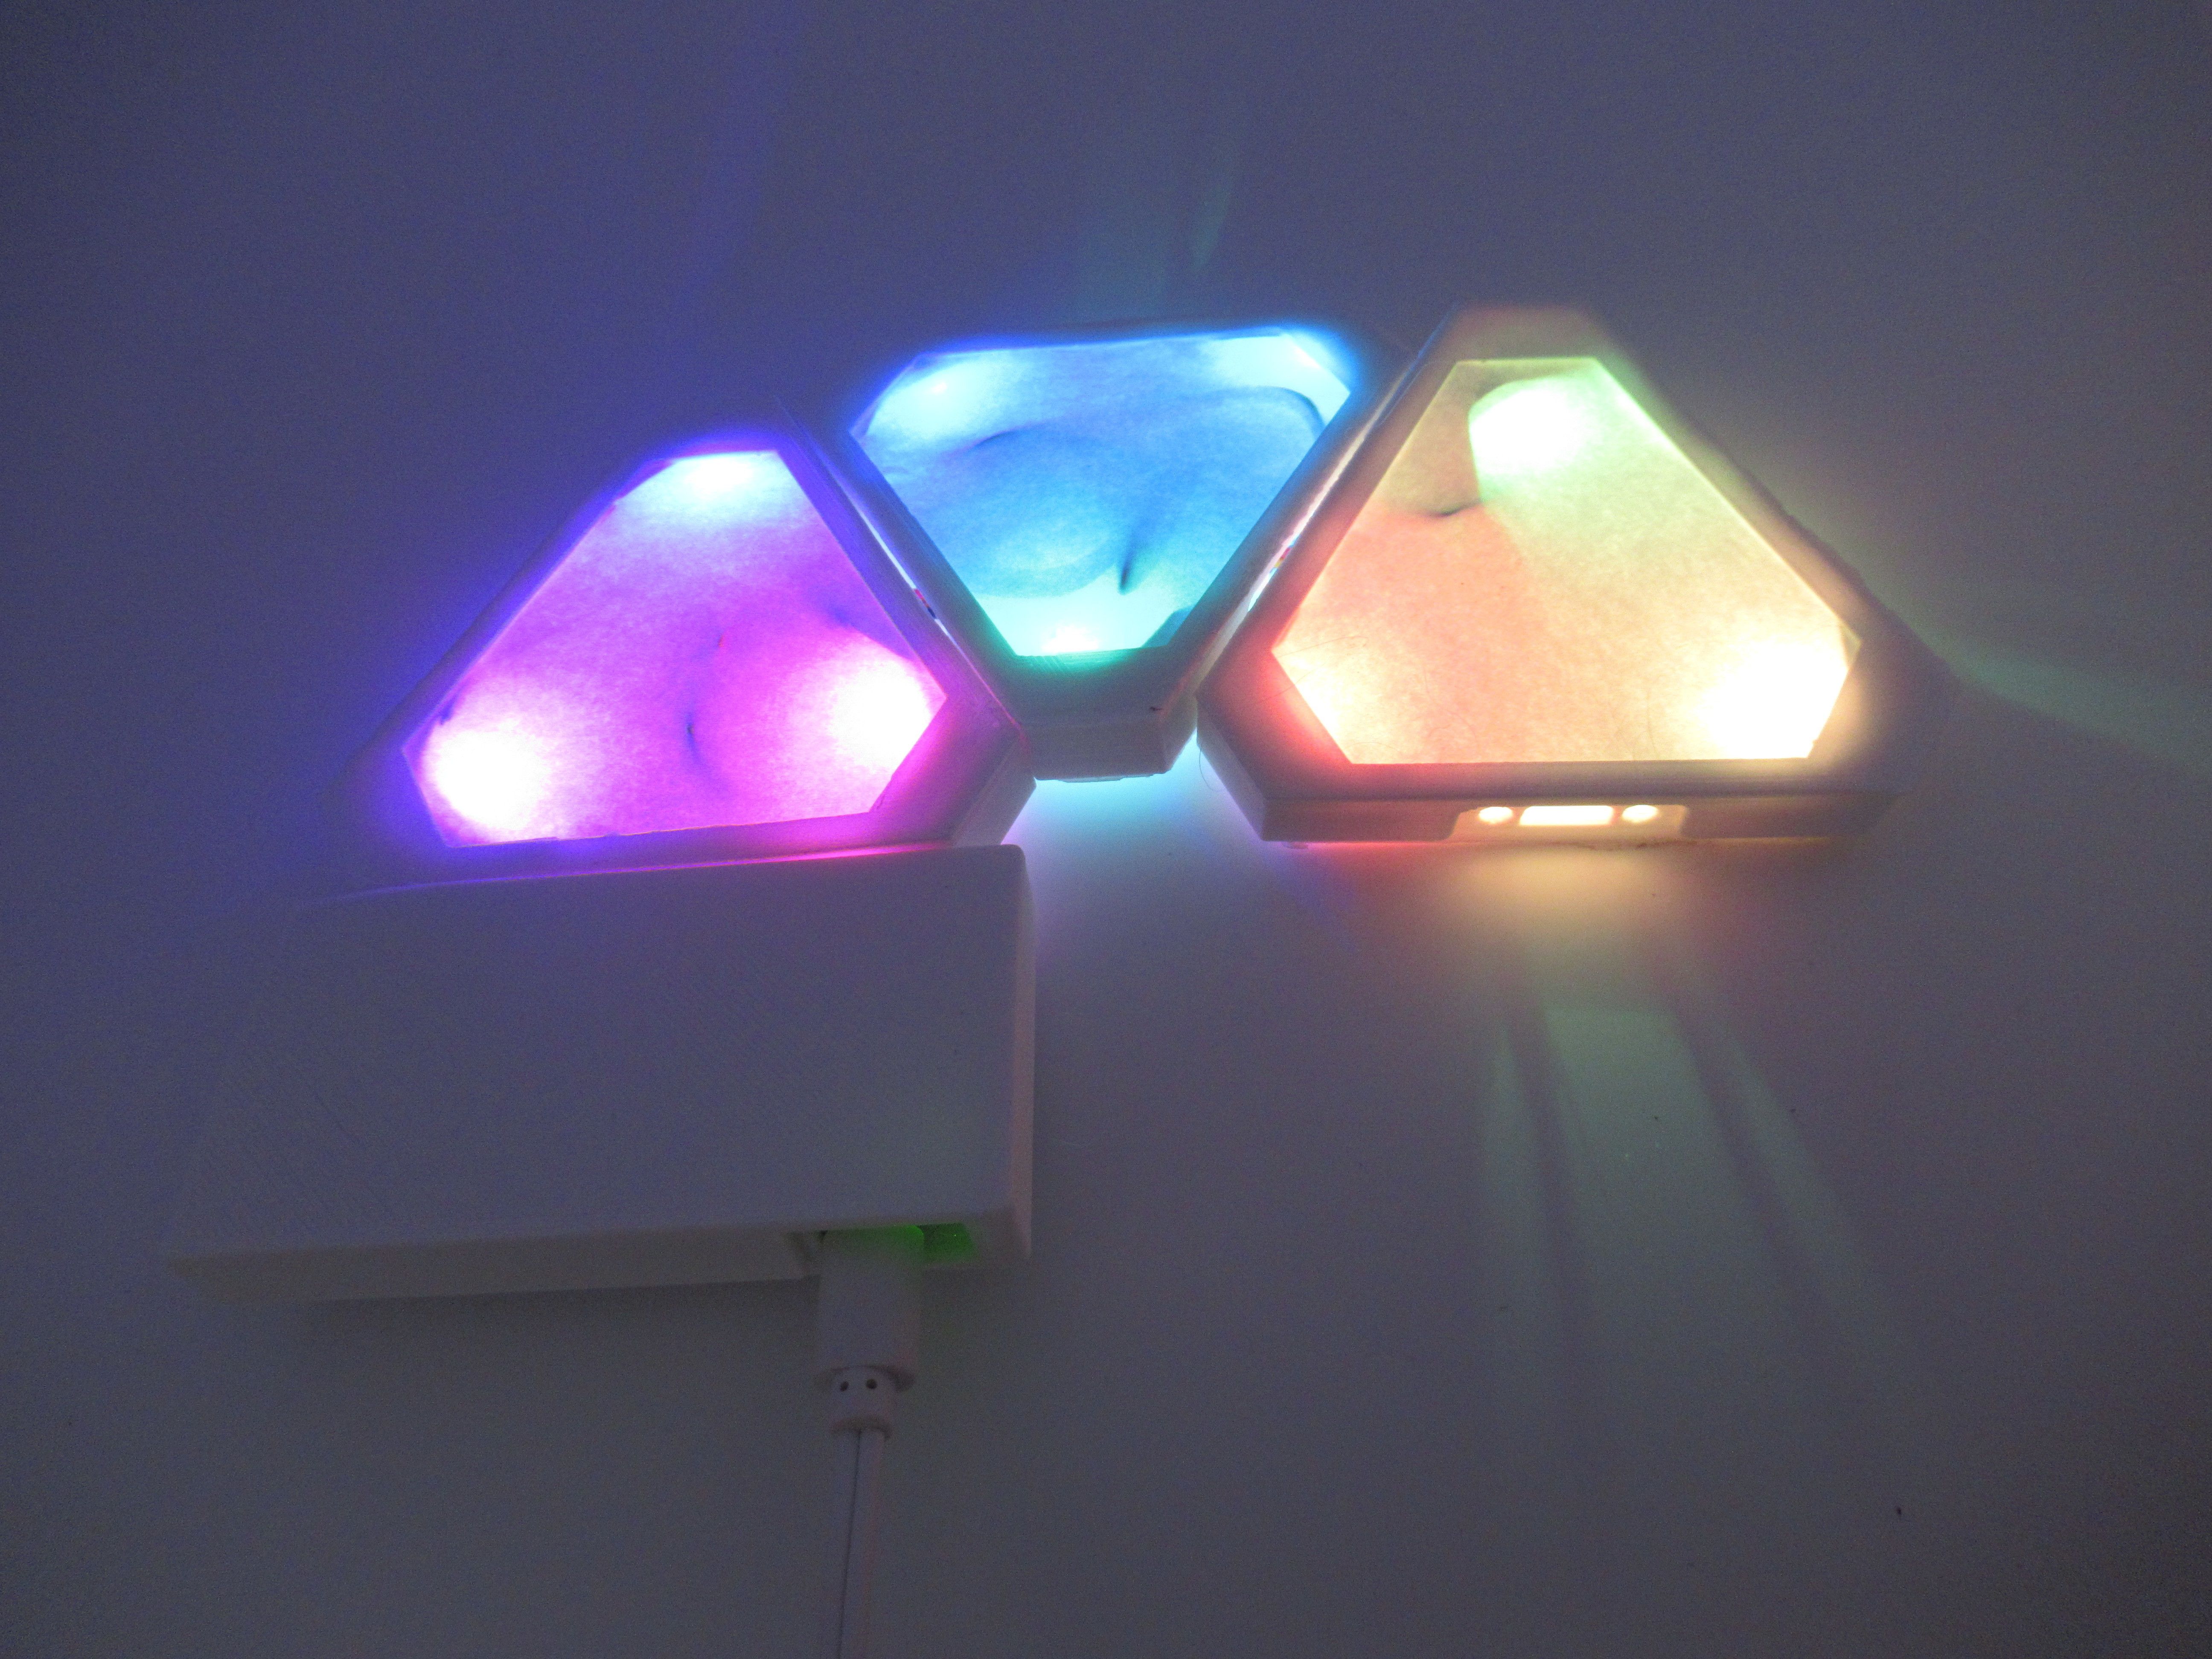
Power on your mini Nanoleaf and watch as the LEDs illuminate.
This might involve individual colors like red, green, and blue, or even a captivating rainbow effect.
Additional Tips and Tricks
This is just the beginning of your mini Nanoleaf’s potential!
