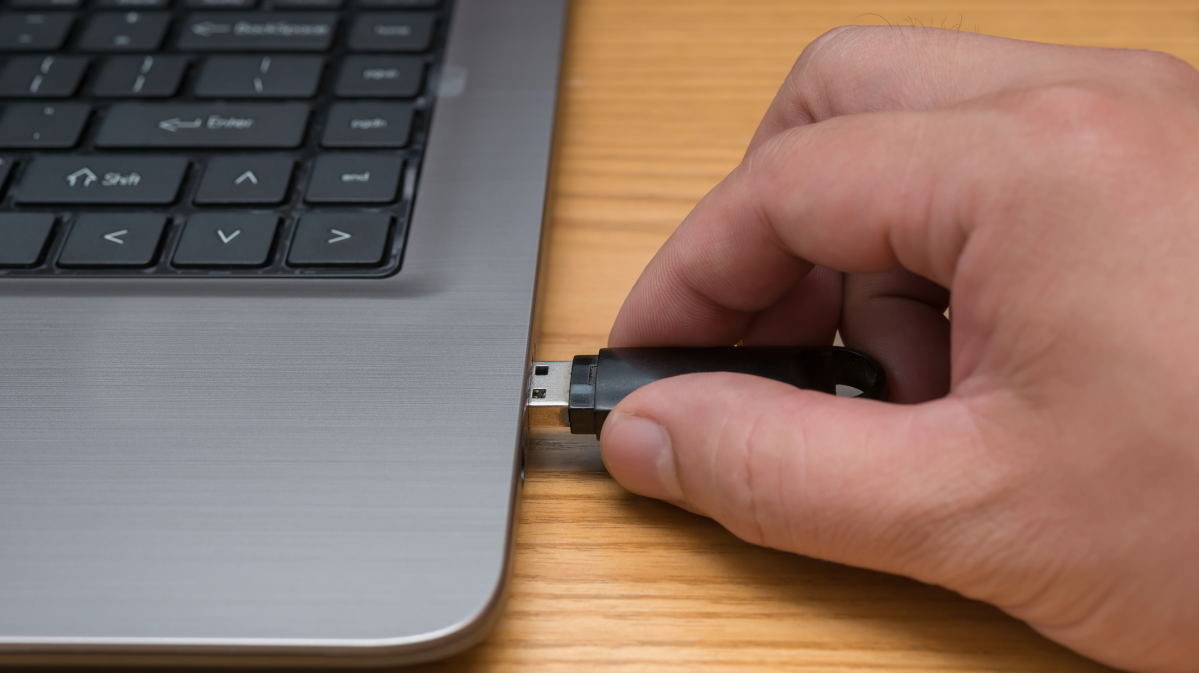
USB memory sticks can be used to steal data from your Linux computer.
Here’s how it works and how you could set it up.
They’re cheap, effective, portable, and easy to use.
Freer / Shutterstock
Gone are the days of having to mount them by hand on the command line.
If other people use your machine you might want to limit what they can do with USB memory sticks.
Perhaps your kids regularly have friends over to play.
Locking down USB access is a sensible precaution to stop them from inadvertently causing issues.
What Is USBGuard?
It’s not just for USB memory sticks.

It’s something like afirewallfor USB connectivity.
The USBGuard daemon runs as soon as it is installed.
double-check you configure USBGuard straight after installing it.

If you don’t, all your USB devices will be blocked when youreboot your setup.
It’s a simple process.
We insert a USB memory stick and see what happens.

We hear an audible alert sound, and a memory stick icon appears in the dock.
Opening the file internet tool shows an entry has been added to the list of locations in the sidebar.
The name displayed is the one given to the unit when it was formatted.
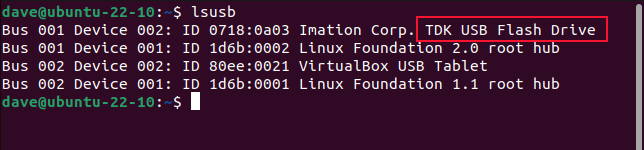
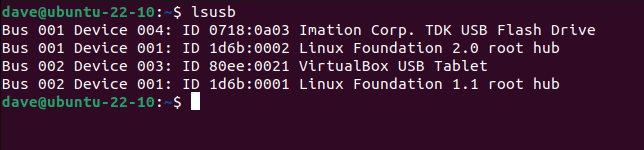
Opening a terminal andusing thelsusbcommandlists the connected USB devices.
The top entry is the memory stick in question, which happens to be a TDK-branded gadget.
On the latestManjaro,Fedora, andUbuntubuilds that we tested, these were already installed.
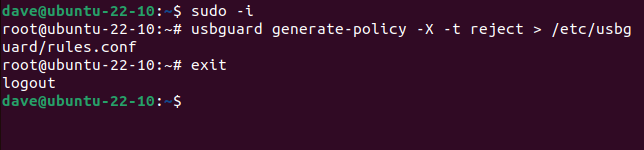
It has a command that creates a rule allowing all currently connected USB devices to continue work unhindered.
That means you might create a baseline configuration for all of your always-required devices.
This set of rules is called a base policy.
USBGuard uses three types of rules.
USBGuard has a neat trick.
It is also a convenient way to capture trusted, intermittent devices.
Just double-check all of your trusted devices are connected to your system when you issue the command.
Related:How to Control sudo Access on Linux
An odd quirk requires you to do this asroot.
Usingsudowith the command doesn’t work.

We need to usesudo -i(login) command toopen a shell as root, then issue the command.
confirm you use theexitcommand to leave the root login session once you’ve finished.
The-X(–no-hashes) option prevents USBGuard from generating hash attributes for each rig.

The-t(target) option sets a default target for all unrecognized USB devices.
In our case we’ve chosen “reject.”
We could also have chosen “block.”

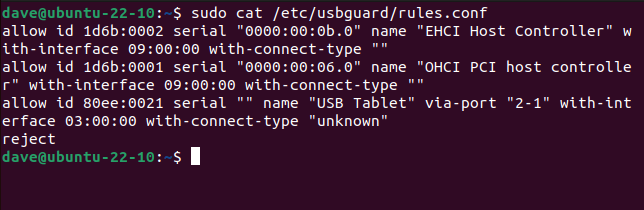
To see our new rules, we can usecat.
On our test computer, this detected three USB devices and created “allow” rules for them.
It added “reject” as the target for all other USB devices.
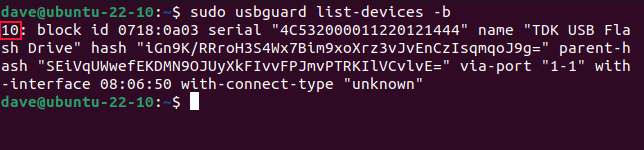
But because we used a “reject” target for unrecognized devices,lsusbcan list its details.
This shows the currently connected, but blocked, USB devices.
To give our equipment temporary access, we’ll use the equipment ID number.

In our example this is “10.”
Our machine is connected and appears in the dock and the file surfing app.
If we ask USBGuard to list the blocked devices, none are listed.
We can make the permission permanent by using the-p(permanent) option.
This creates a rule for us and adds it to our policy.
We can now use this USB equipment as normal.
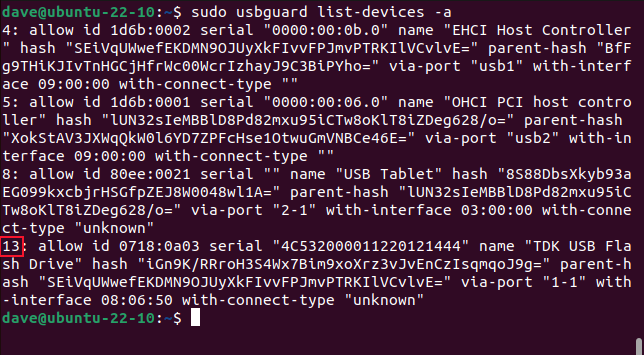
We need to know the gadget ID.
We can find this by listing the allowed devices.
In our case the ID is “13.”
Note that this immediately disconnects the gadget.
Only use this command when you’ve finished using any data on the rig.
It’s your setup, so it’s only fair you get to choose.
Related:How to Mount and Unmount Storage Devices from the Linux Terminal
