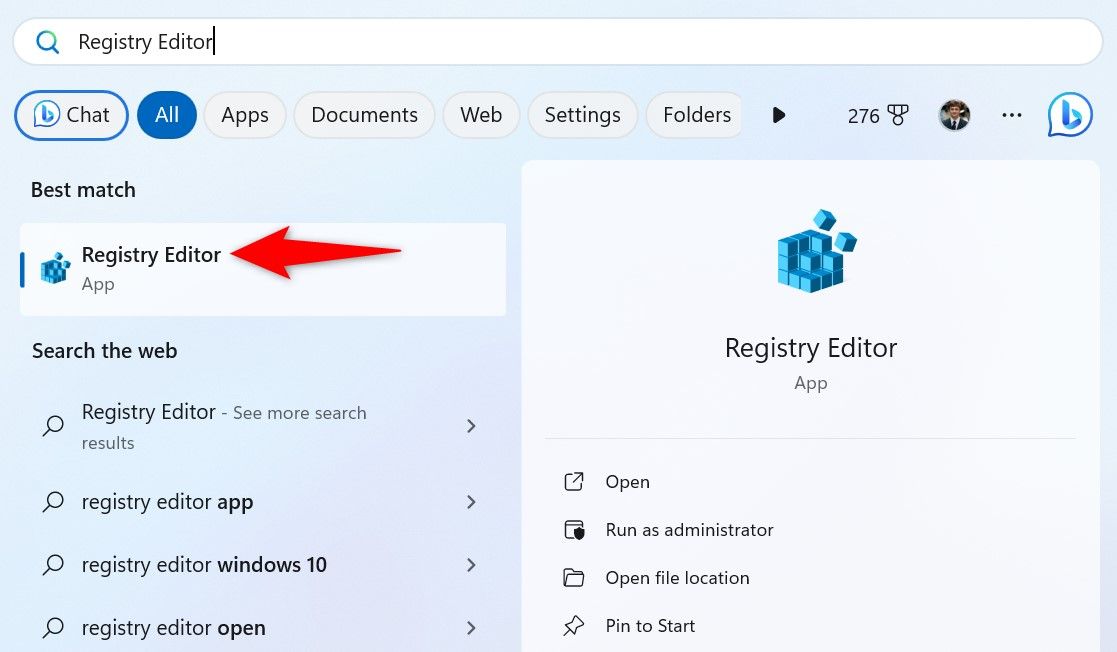
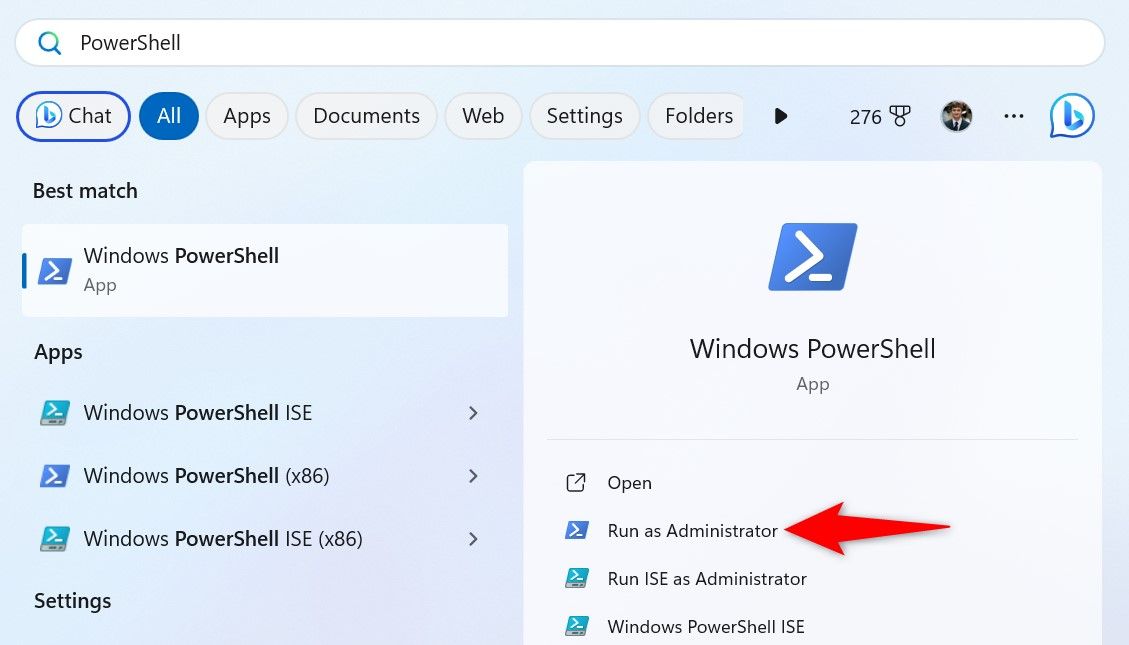
Well show you how to do that using two graphical and one command line method.
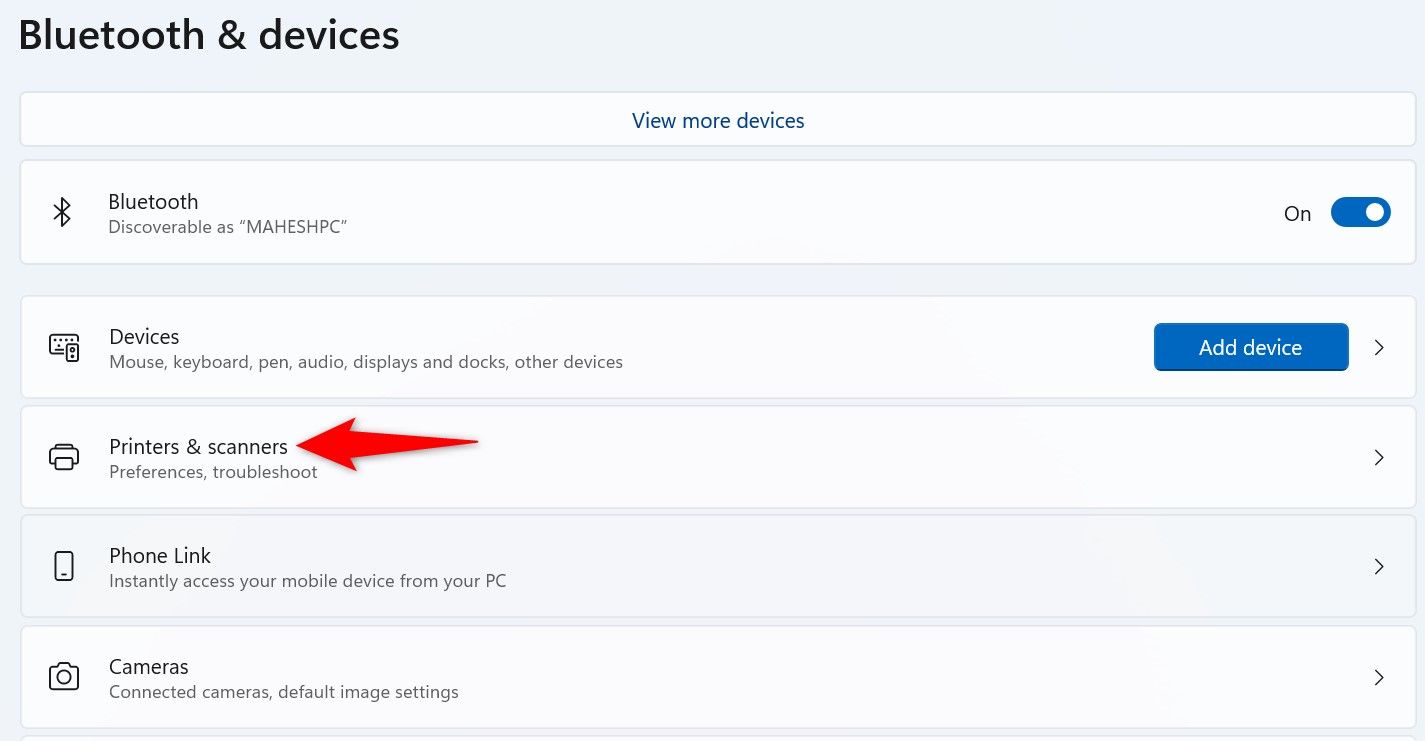
On Windows 10, navigate to options > Devices > Printers & Scanners.
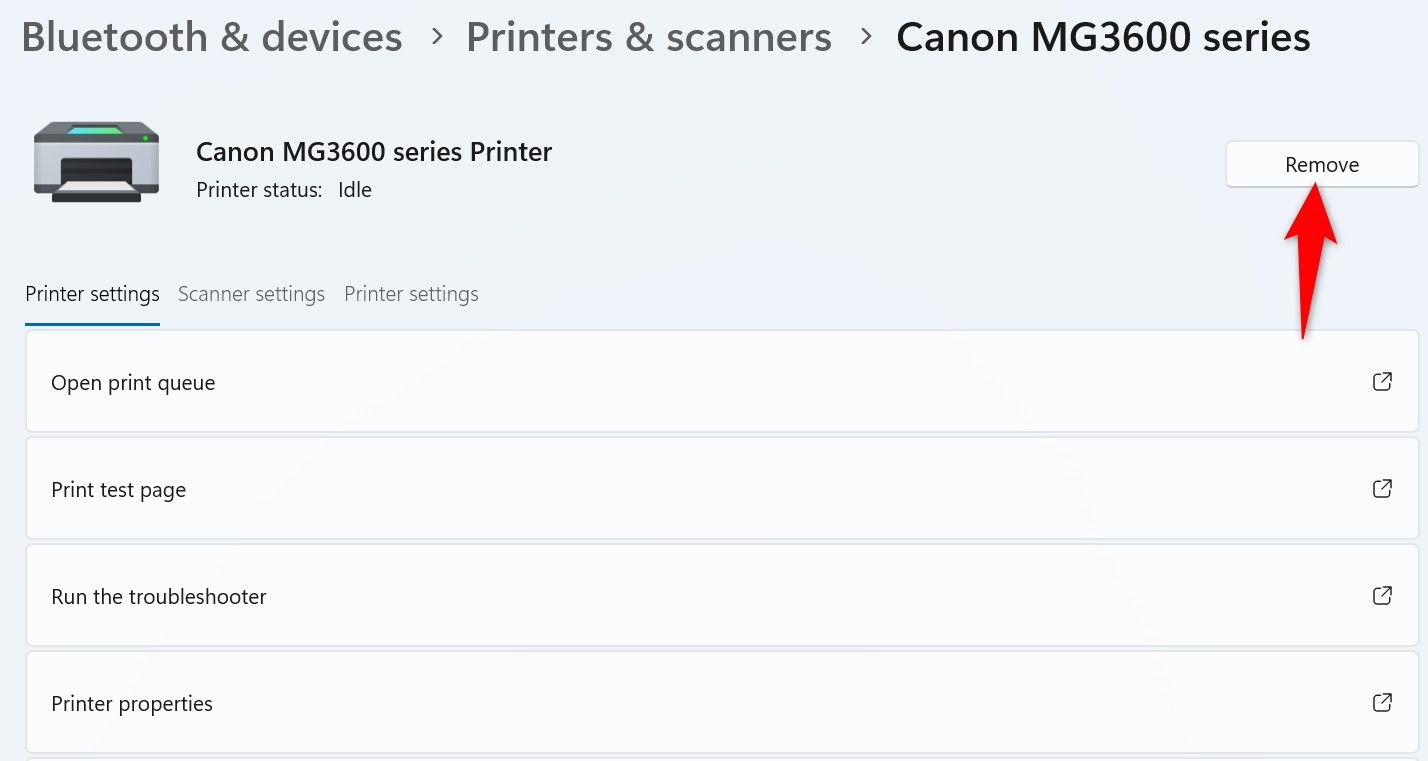
Find and opt for printer to remove.
Jason Fitzpatrick / How-To Geek
On Windows 11, choose “Remove.”
On Windows 10, select “Remove rig” and click “Yes.”
Windows has removed the selected printer.
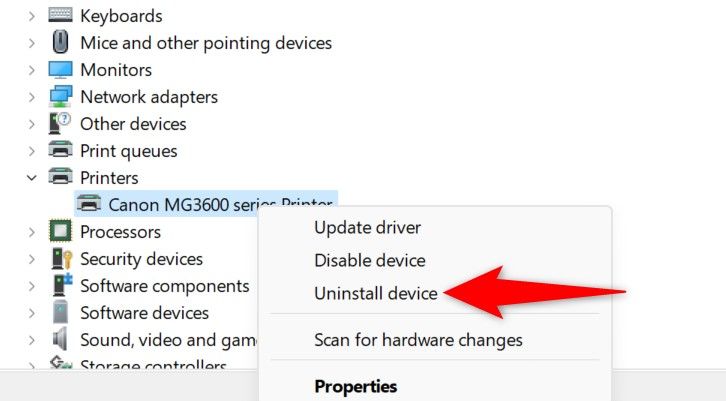
In the same window, expand “Printers” and find your printer.
Once you’ve located it, right-hit the printer’s name and select “Uninstall gadget.”
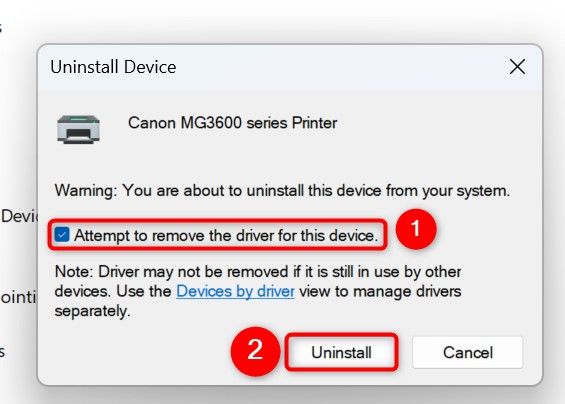
Then, click “Uninstall.”
Wait while unit Manager uninstalls the selected printer.
Then, bring the changes into effect byrestarting your Windows 11orWindows 10PC.
In the User Account Control (UAC) prompt, select “Yes.”
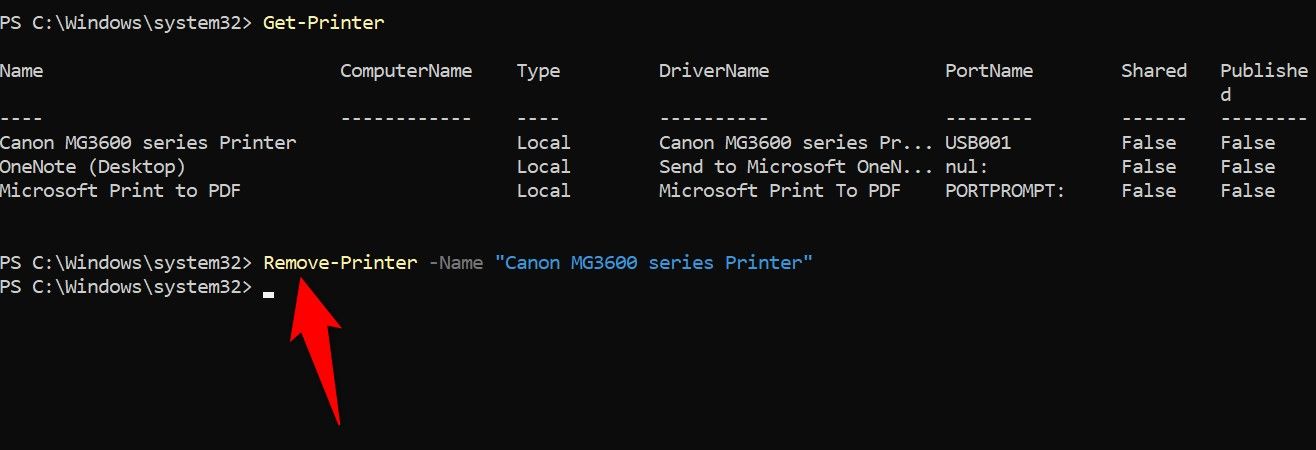
check that the printers name is enclosed in double quotes.
PowerShell has removed the specified printer.
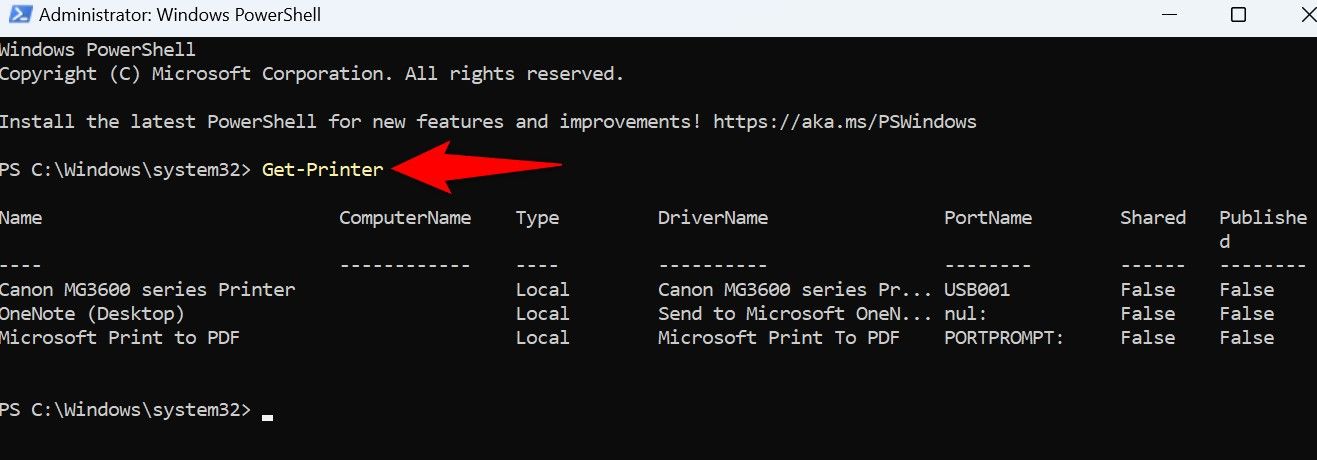
you’re able to runGet-Printeragain to confirm that it has been removed.

If youve gotten rid of your printer for good, you should remove these installed apps as well.
Heres how to do that.
On Windows 11
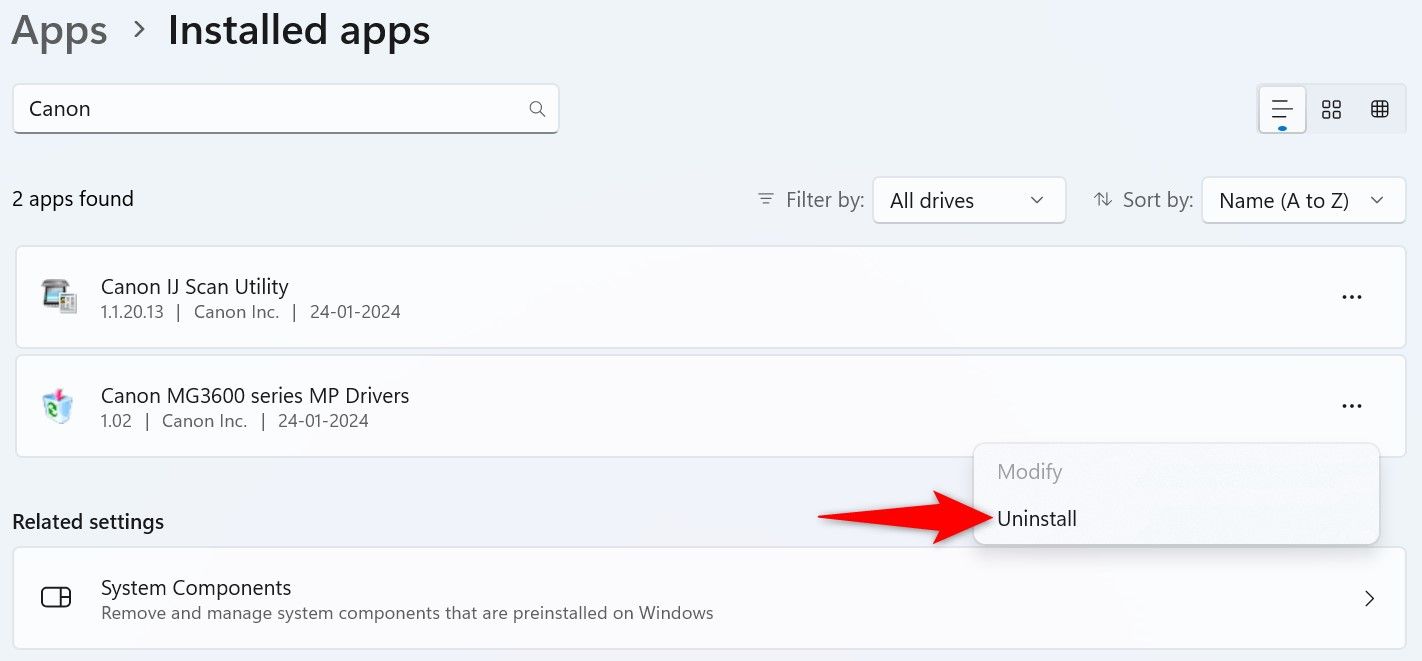
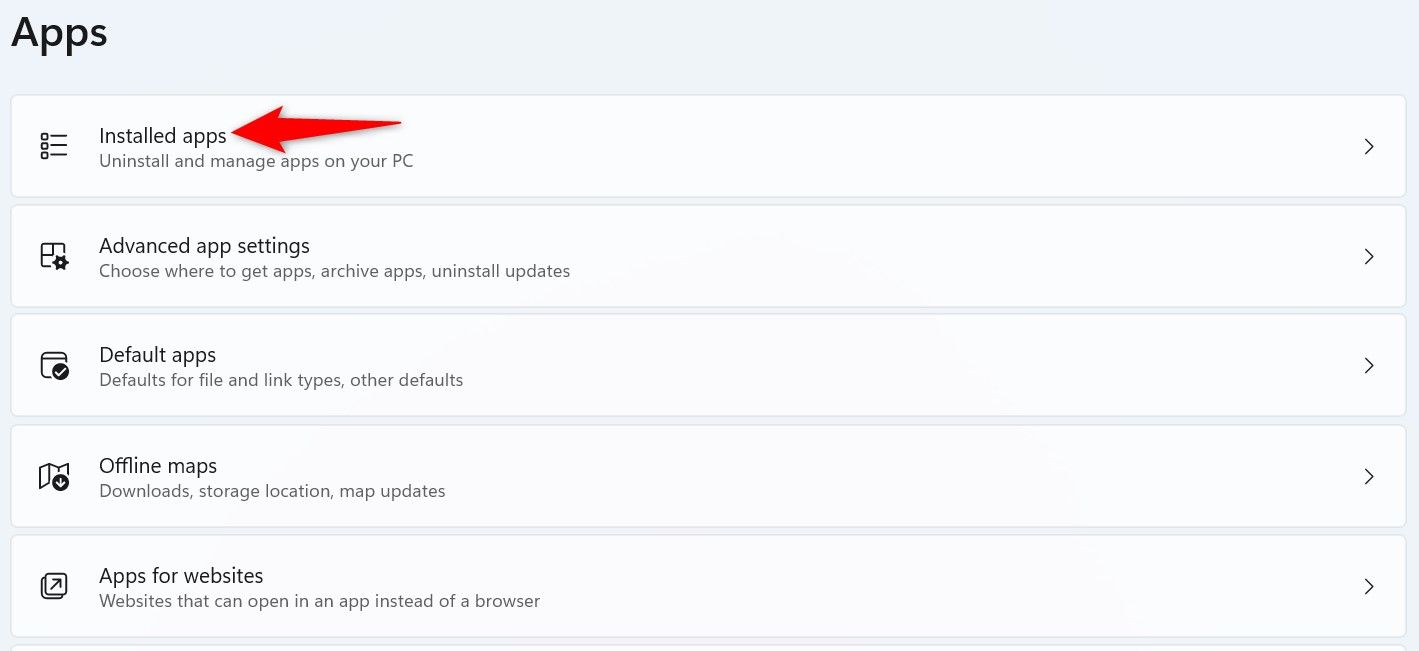
Open controls using Windows+i and navigate to Apps > Installed apps.
Find your printers app on the list.
Next to the app, tap the three dots and choose “Uninstall.”
Select “Uninstall” in the prompt.
On Windows 10
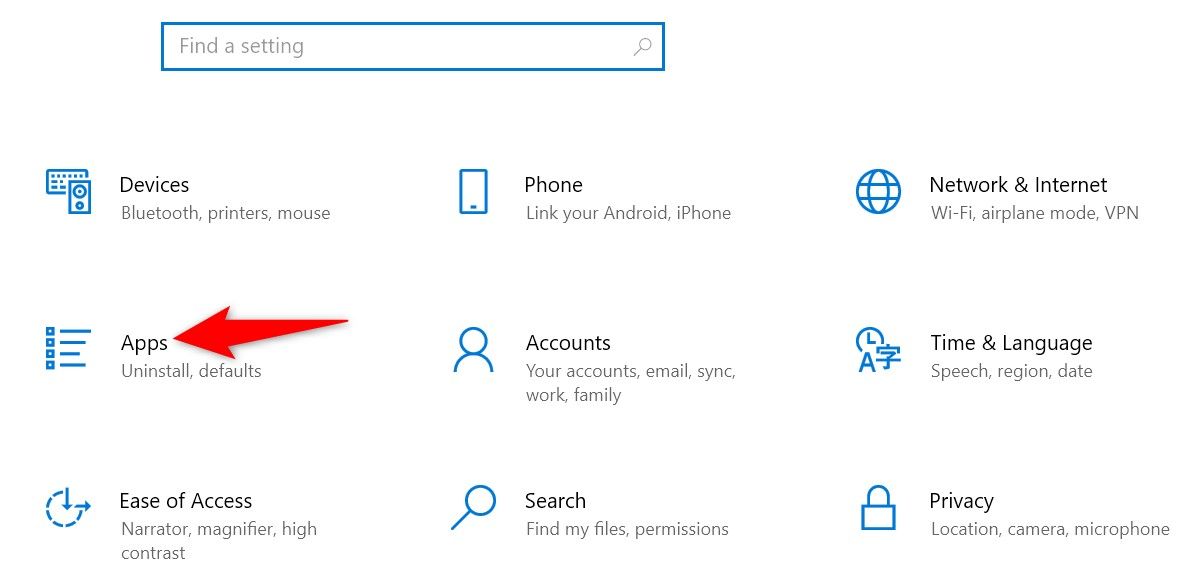
Launch controls using Windows+i and select “Apps.”
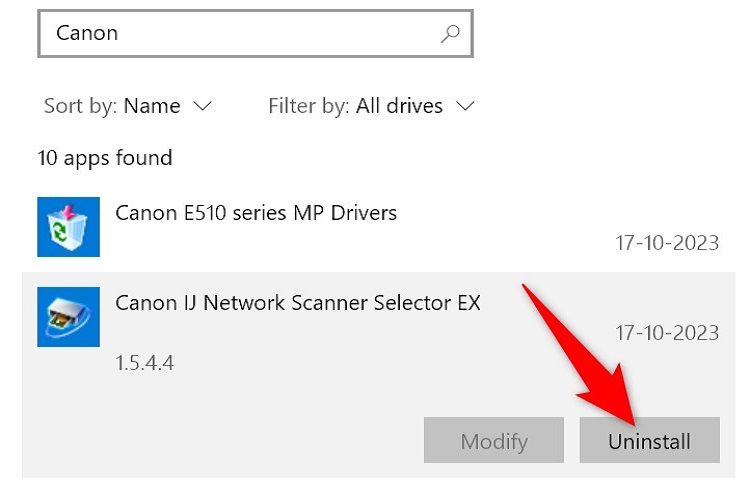
Find and select your printer app on the list.
Choose “Uninstall” and select “Uninstall.”
This ensures all traces of your printer are gone from your PC.
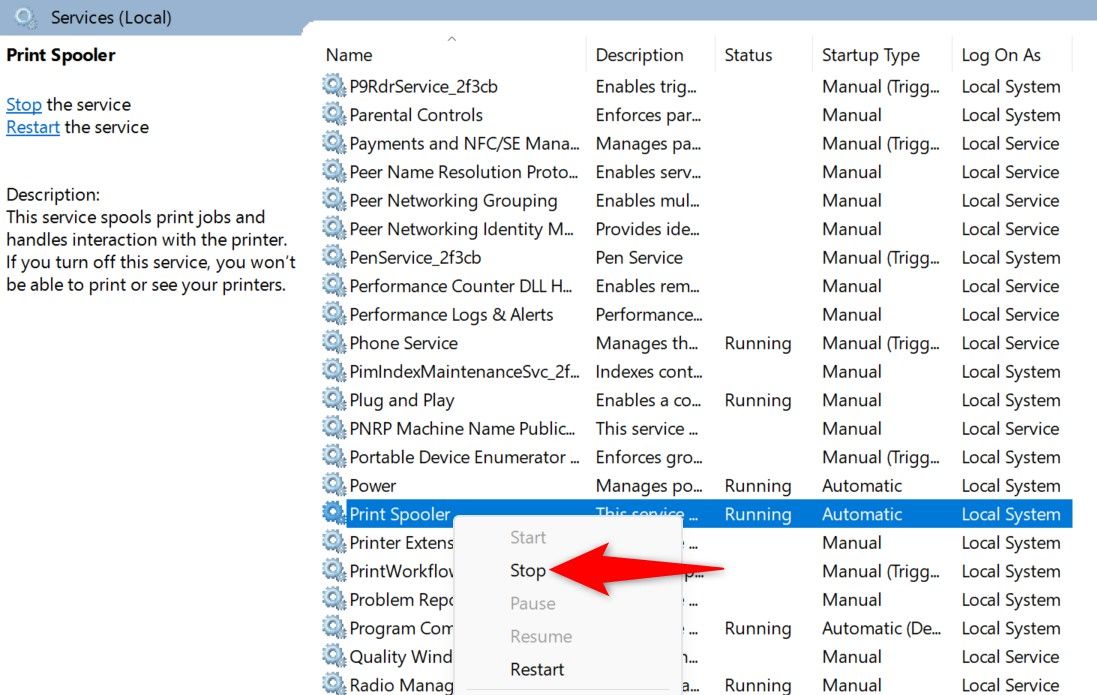
Right-click it and select “Stop.”
Keep the Services window open.
On Windows 11, from the top bar, select View > Show and click “Hidden Items.”
On Windows 10, launch the “View” tab and enable “Hidden Items.”
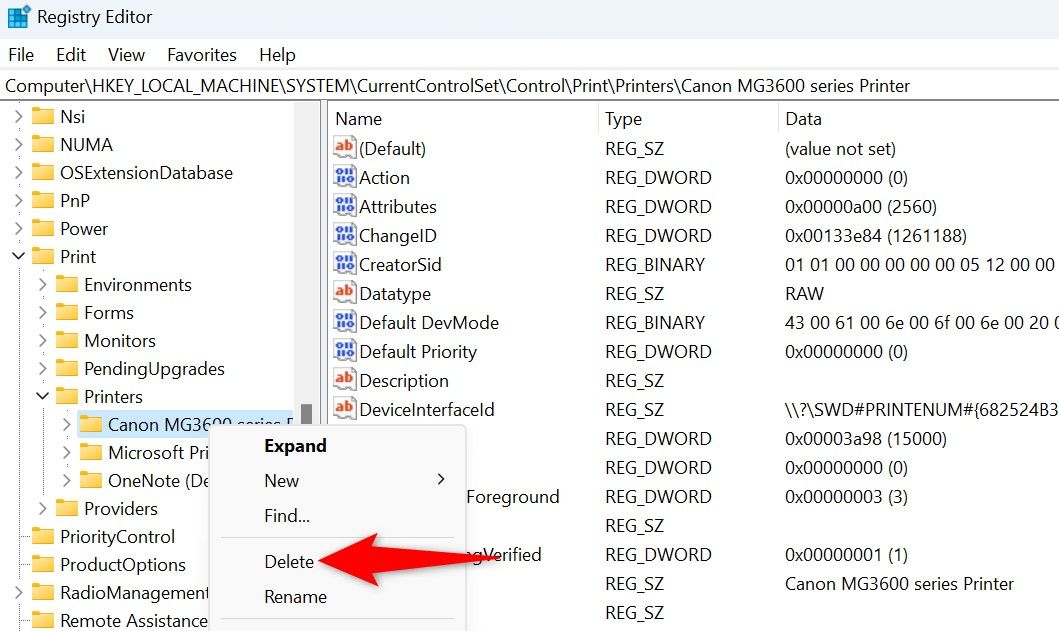
Deleting or modifying the wrong key can cause issues with your PC.
In the User Account Control prompt, select “Yes.”
In the left sidebar, find the folder for your printer.
It should have your printers name.
Right-poke the folder and select “Delete.”