We’ll show you how to do just that.
Why Reset Your Windows 11 Audio options?
The most common reason to reset your audio parameters is to fix your sound playback issues.

Hannah Stryker / How-To Geek
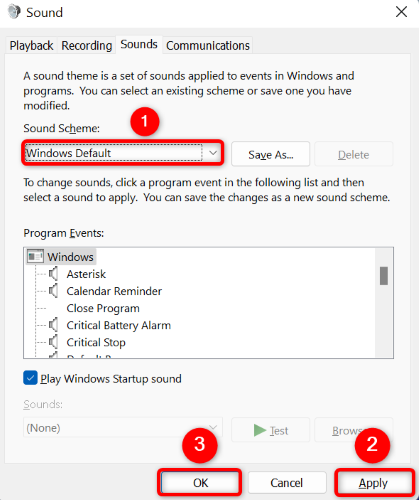
Another reason toreset your settingsis that you do not want to use your custom sound configs anymore.
Regardless of the reason, sound setting resets are easy.
Start by opening tweaks using Windows+i.
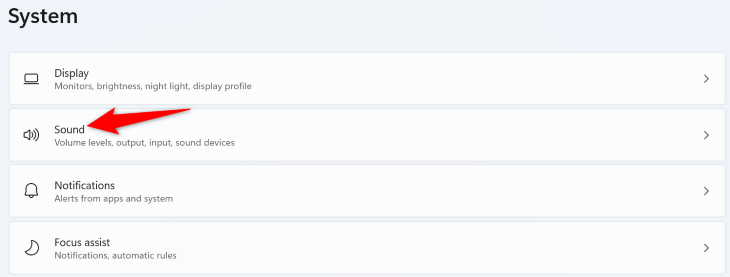
In the left sidebar, select “System.”
On the right pane, choose “Sound.”
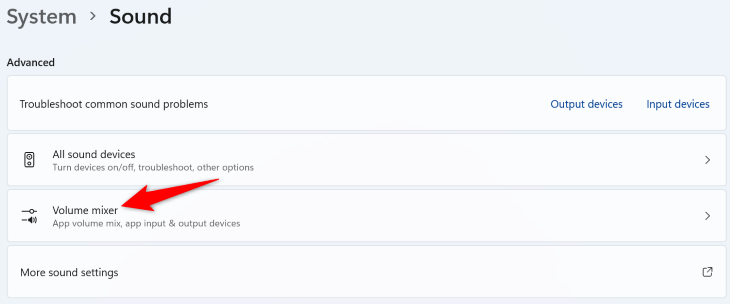
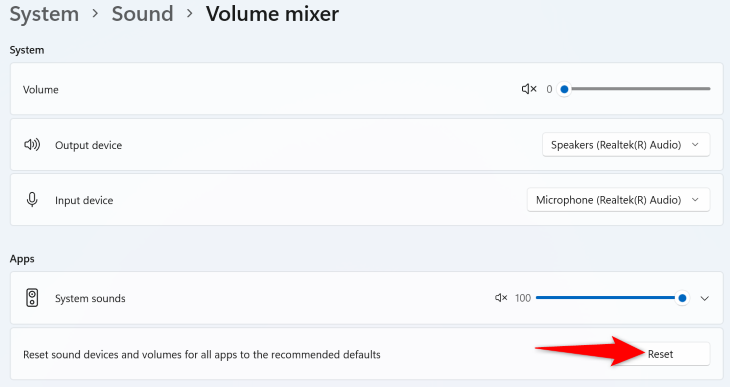
Scroll a bit down and select “Volume Mixer.”
Open tweaks by pressing Windows+i.
Then, head into the System > Sound > More Sound controls menu.
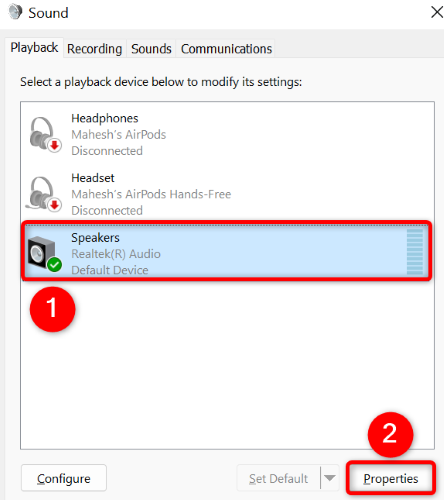
In the open window, select your audio gear and choose “Properties.”
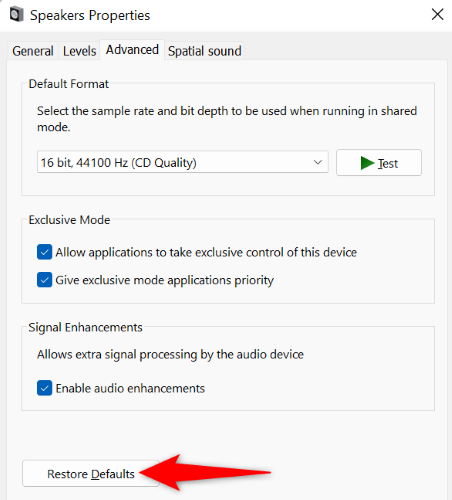
pull up the “Advanced” tab, and at the bottom, click “Restore Defaults.”
And you’ve successfully reset your sound equipment.
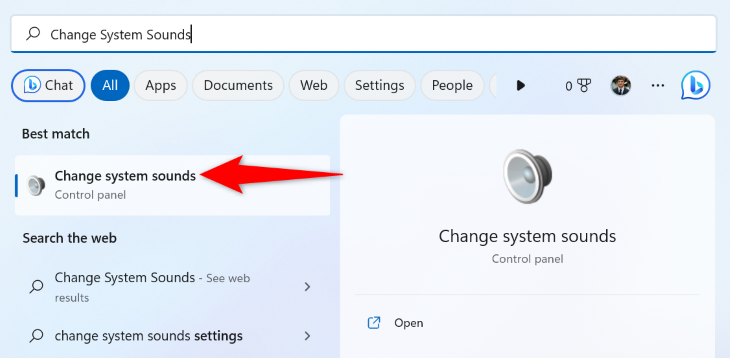
fire up the “Start” menu and find “Change System Sounds.”
go for the item with that name.
Still Having Audio Problems?
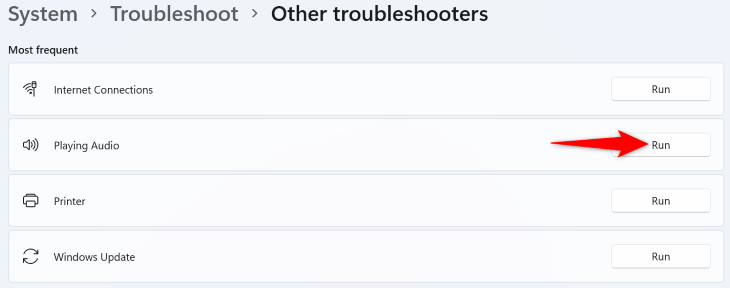
To bring up the troubleshooter, launch Windows 11’s controls app by pressing Windows+i.
Then, in the left sidebar, click “System.”
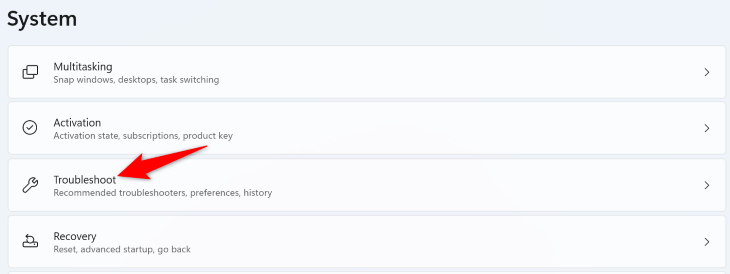
On the right pane, choose “Troubleshoot.”
Select “Other Troubleshooters.”
Next to “Playing Audio,” click “Run.”
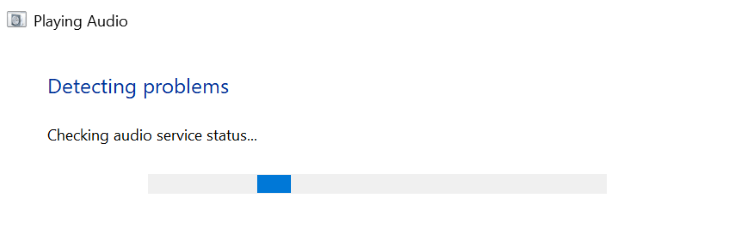
Let the troubleshooter find issues with your PC’s sound and offer appropriate fixes.
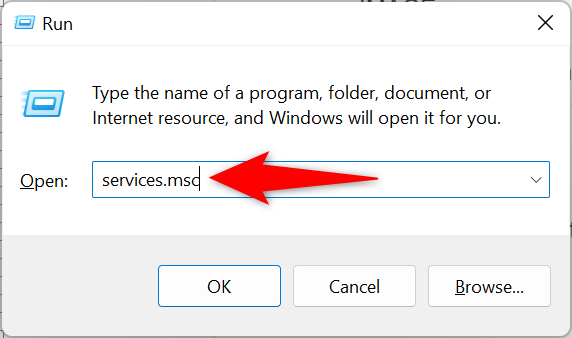
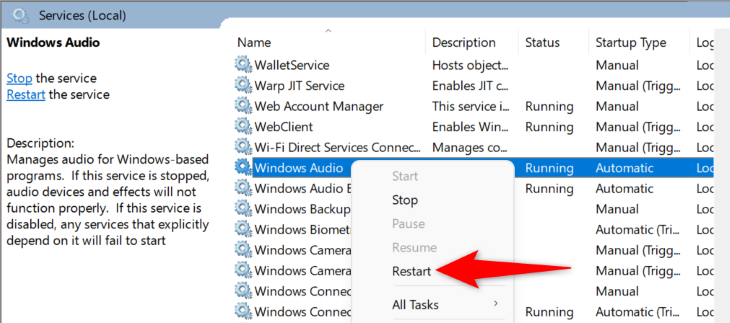
Doing so can fix minor issues with the services, which may be causing your sound problems.
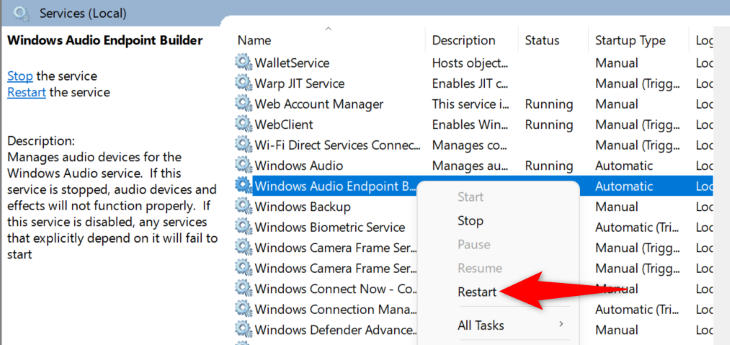
Start the service restart process by opening the “Run” dialog box using Windows+R.
Here, find the item named “Windows Audio,” right-click it, and choose “Restart.”
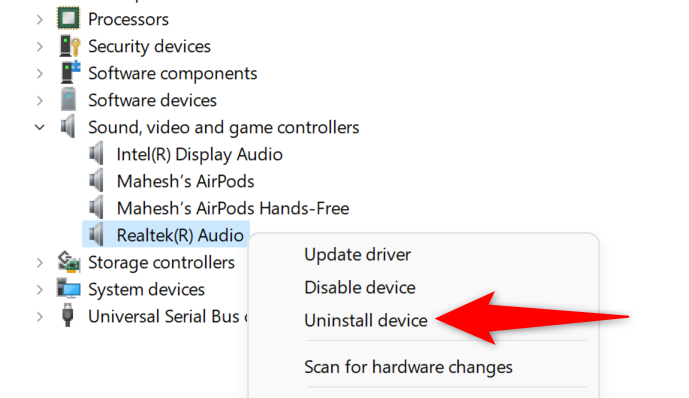
In this case, remove your installed drivers andlet Windows load the latest driversfor you.
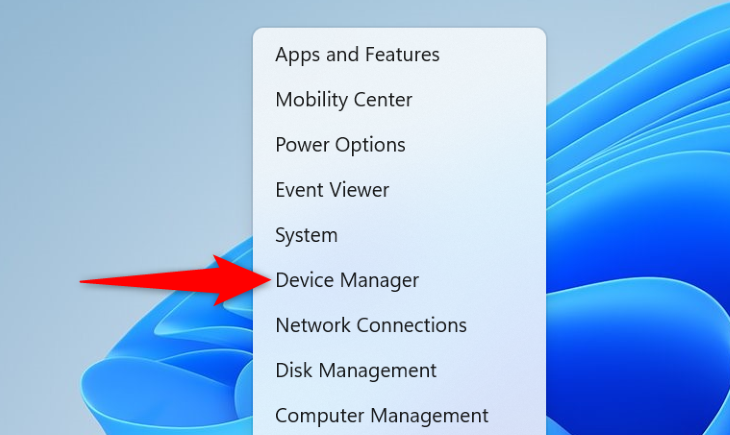
In machine Manager, expand the “Sound, Video and Game Controllers” option.
Find your audio gadget in the expanded menu, right-click it, and choose “Uninstall gadget.”
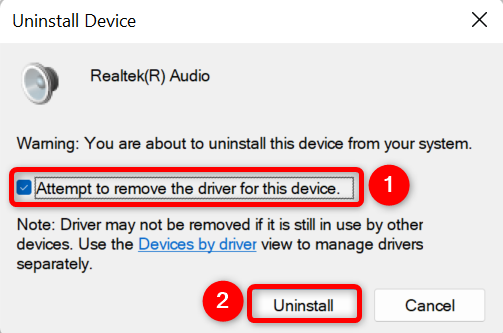
When you’ve uninstalled your audio machine, reboot your PC.

When your PC turns back on, it will automatically load the drivers for your audio unit.
If it’s still under warranty, you should contact your PC manufacturer about a repair or replacement.