you could also edit the video in other ways if you’d like.
If you use Windows, there are a couple of excellent ways to fix this problem.
What’s the Best Program to Rotate Video on Windows?
Hannah Stryker / How-To Geek
DaVinci Resolve is the most capable program on the list.
It is available for free, but it is a program designed for use in a professional environment.
If you plan on editing videos regularly, you should take the time to familiarize yourself with it.
VLC is kind of the Swiss Army Knife of video players.
However, you’re able to never go wrong learning the most versatile program — DaVinci Resolve.
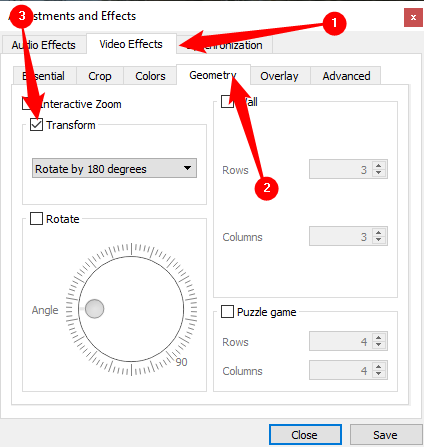
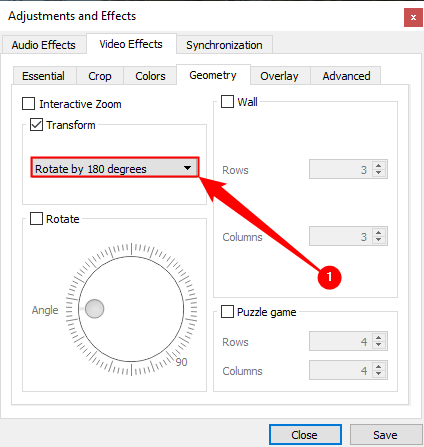
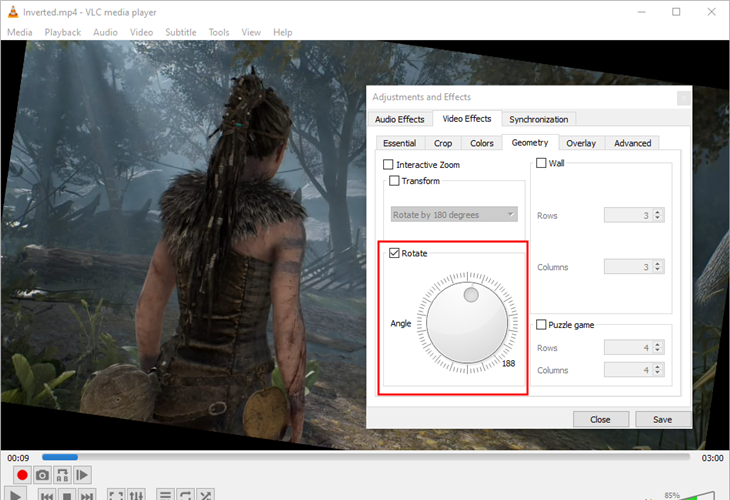
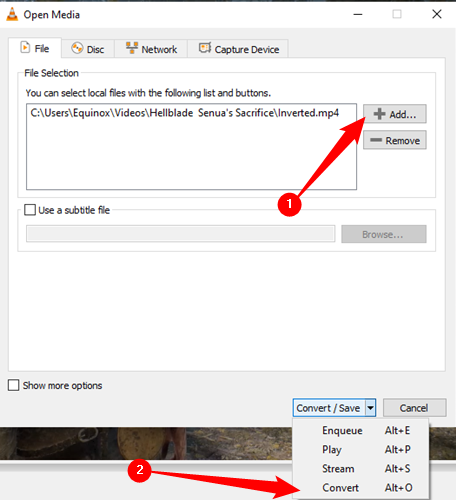
How to Rotate Videos With VLC
First, open your video in VLC.
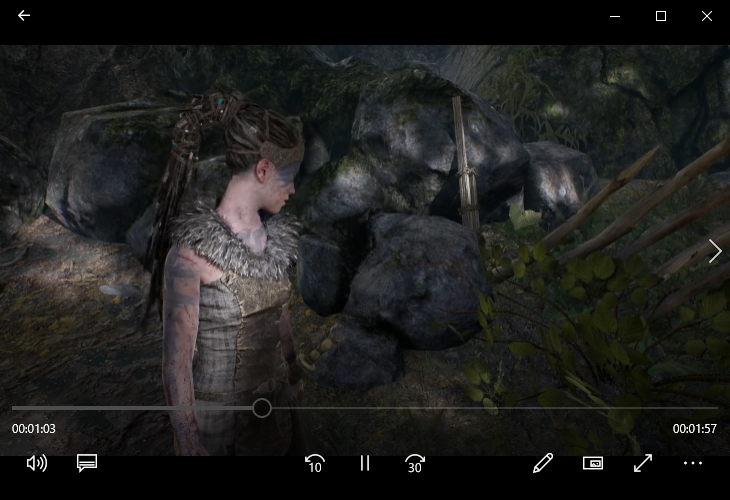
The video should now be correctly oriented.
it’s possible for you to watch it right away if you want.
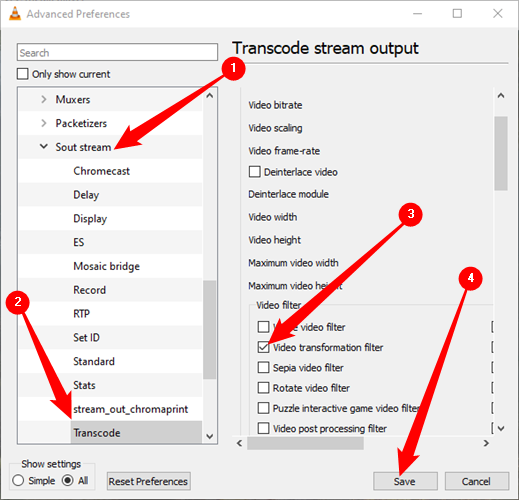
This change isn’t permanent, though.
You’ll need to save this video in its new orientation for that.
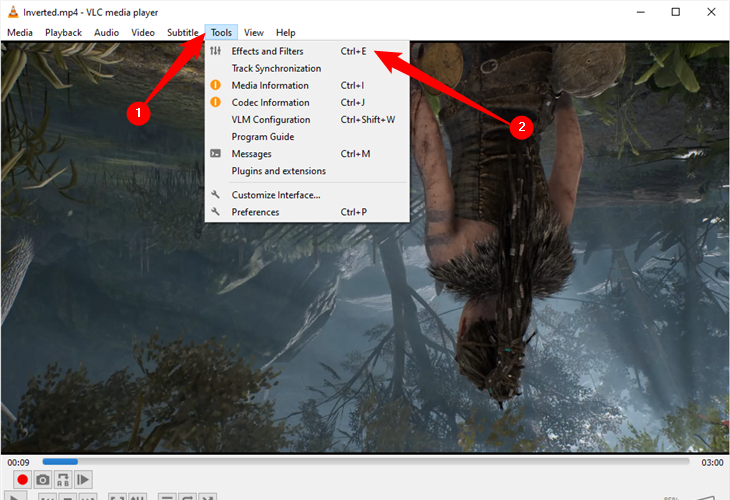
Open VLC’s “Media” menu and select “Convert/Save.”
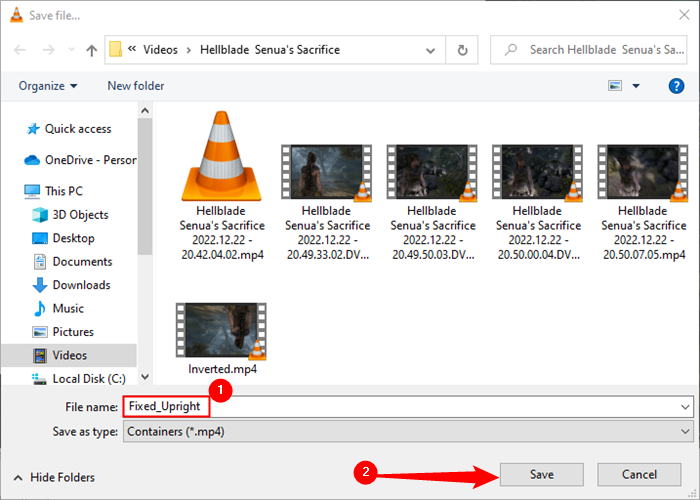
tap the “Browse” button under Destination in the Convert window that appears.
Select a save location, punch in a file name, and then click “Save.”
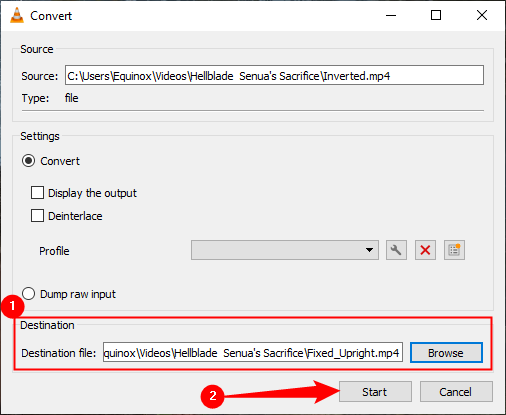
You shouldn’t have to change anything else.
The default conversion profile should work well.
Just go ahead and click “Start” to convert and save the file.
On the Audio Codec tab, select “Keep original audio track.”
If you don’t, the next video you open will be rotated.
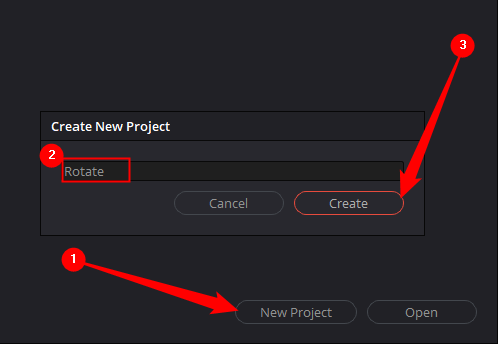
Name the project whatever you’d like — it can be anything; it doesn’t really matter.
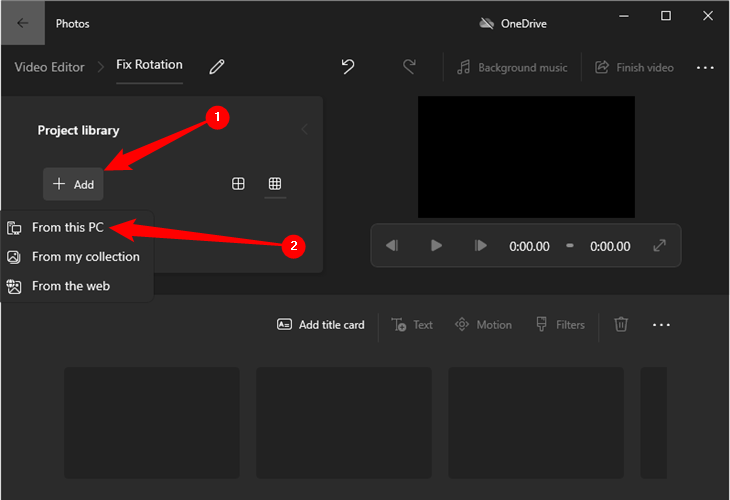
After that, you should probably import the video you want to rotate into your project.
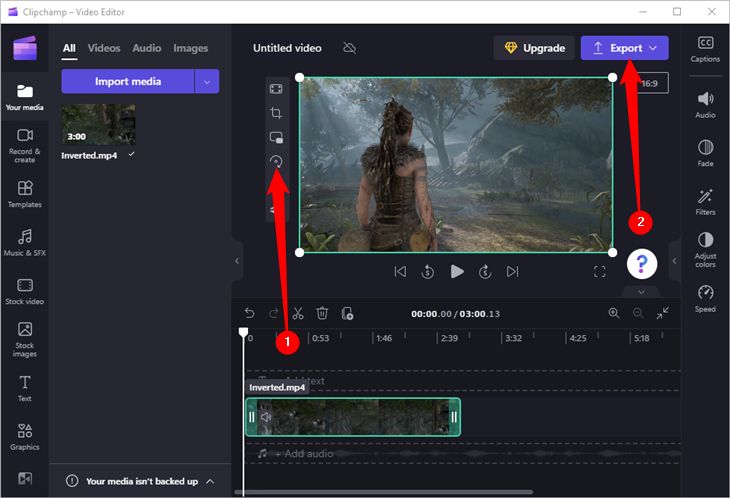
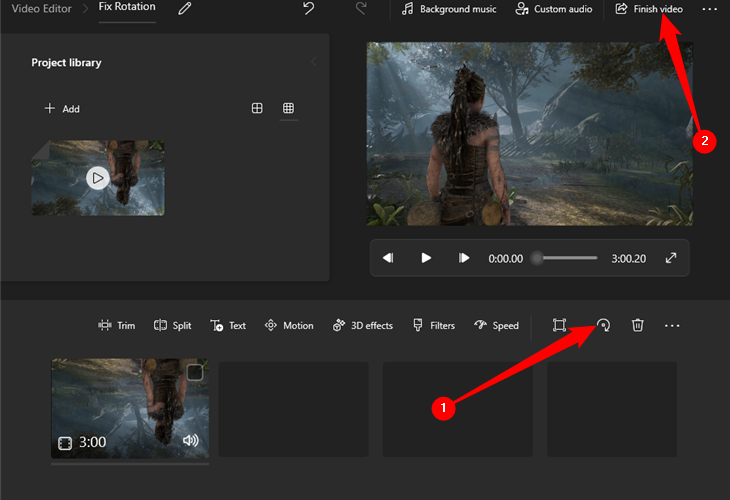
opt for small rotate icon on the toolbar to rotate your video.
The video will rotate 90 degrees per click.
You do other things at this stage as well, like add color filters, text, and more.
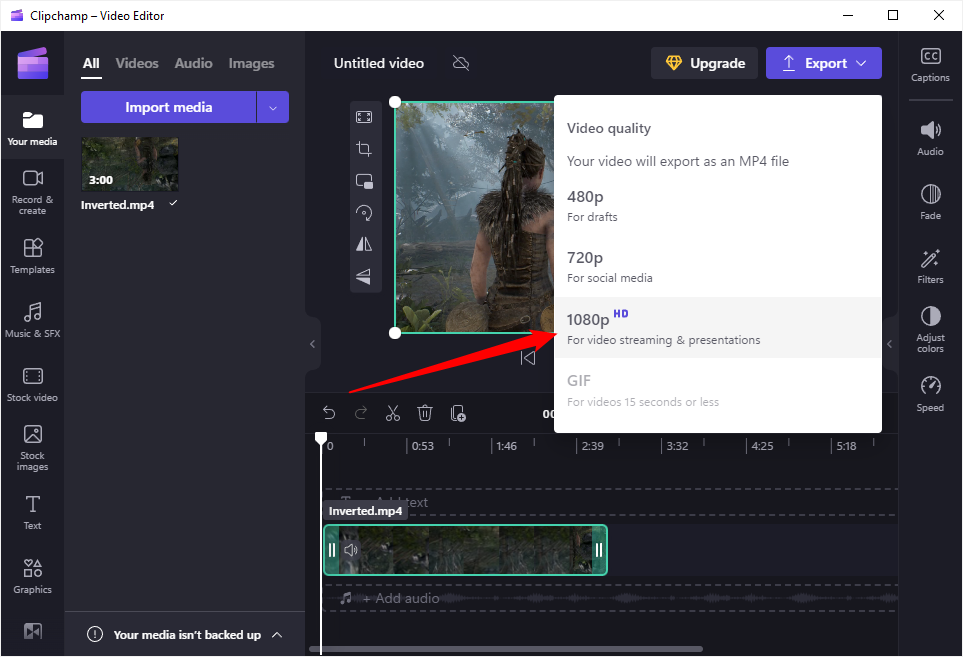
Clipchamp has some pretty serious restrictions unless you pay for a subscription.
you could only export videos up to 1080p.
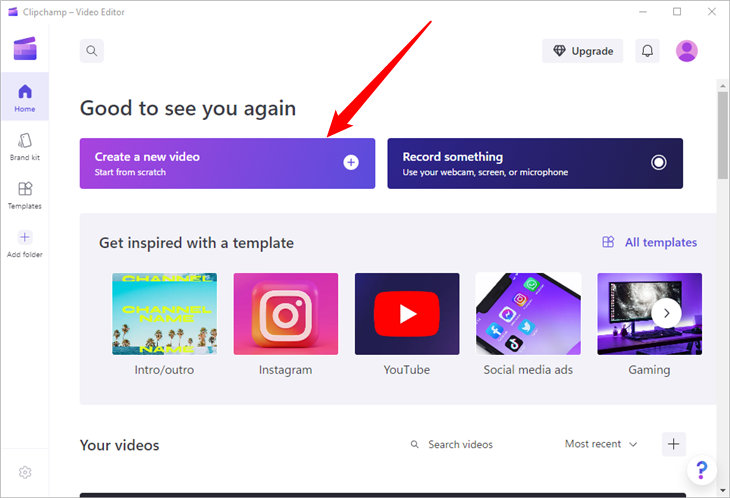
Once Clipchamp has launched, tap the big “Create a New Video” button.
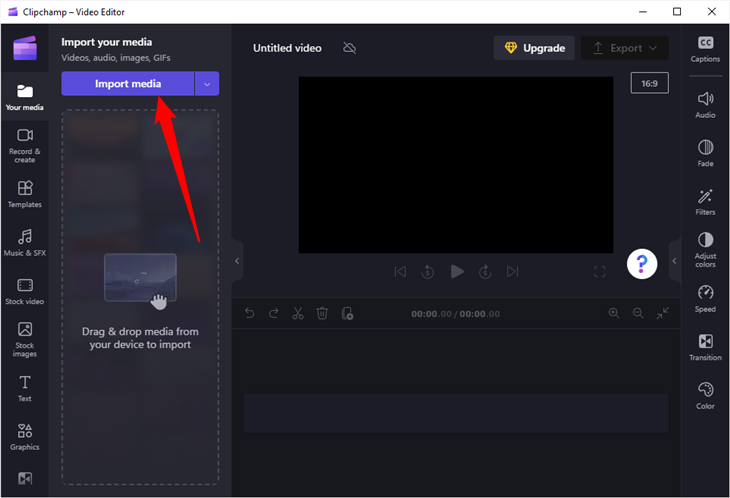
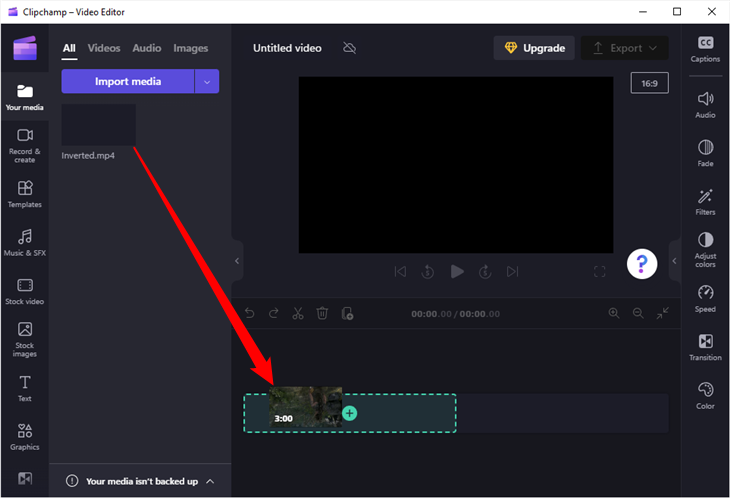
Next, it’s crucial that you import the file you’re going to be editing.
Click “Import Media,” navigate to the video you want to rotate, and open it up.
Pick 1080p unless you know you want a lower resolution.
Keep in mind that DaVinci Resolve is professional software.
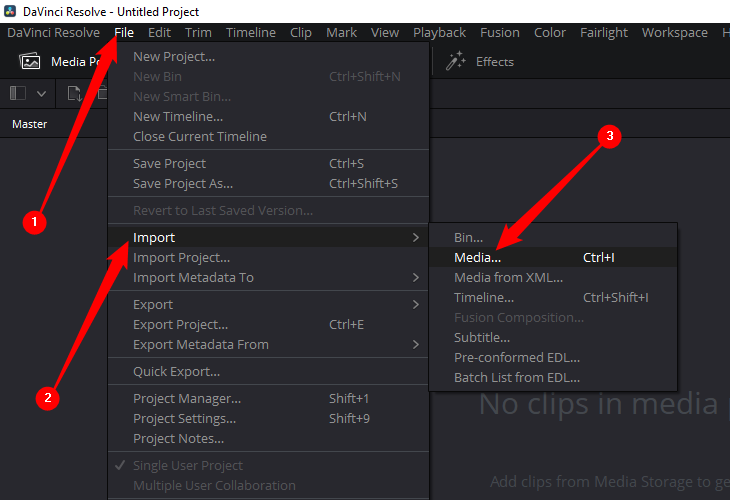
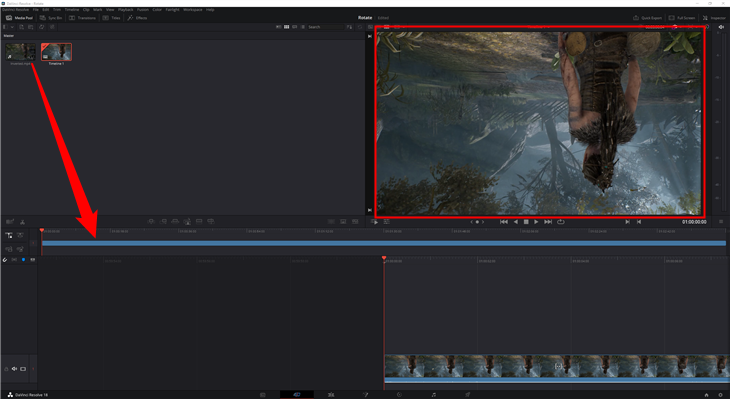
Now you’re gonna wanna import the video to be rotated.
Click File > Import > Media, then pick out your desired video.
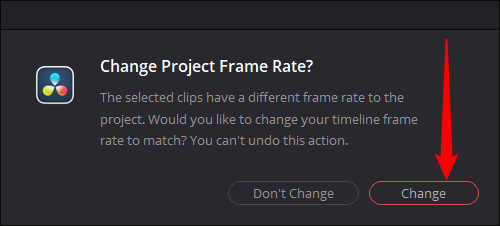
In most cases, you should just click “Change.”
it’s possible for you to always drop the number of frames later if you want, too.
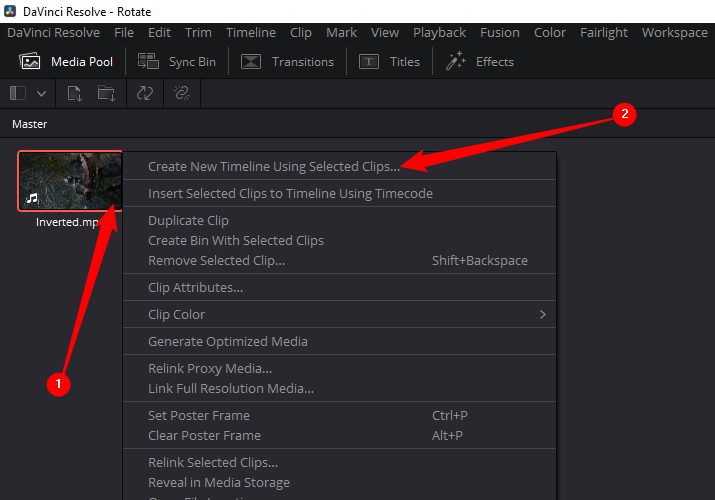
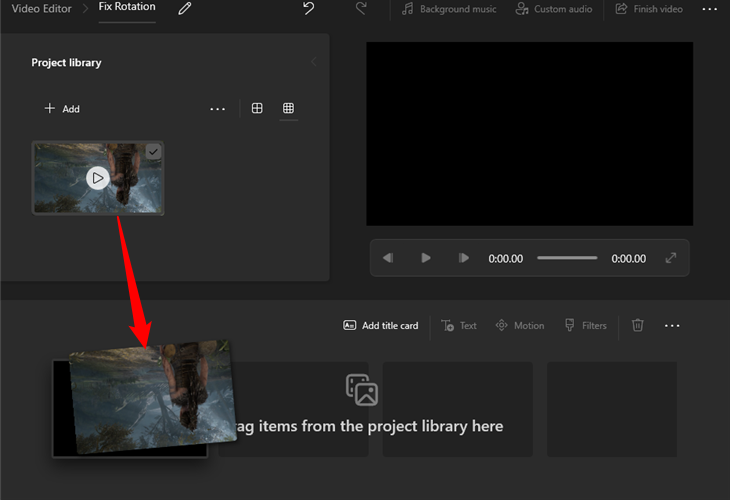
Drag and drop the imported clip anywhere on the lower half of the window.
When you’ve done it correctly, it’ll be pretty evident.
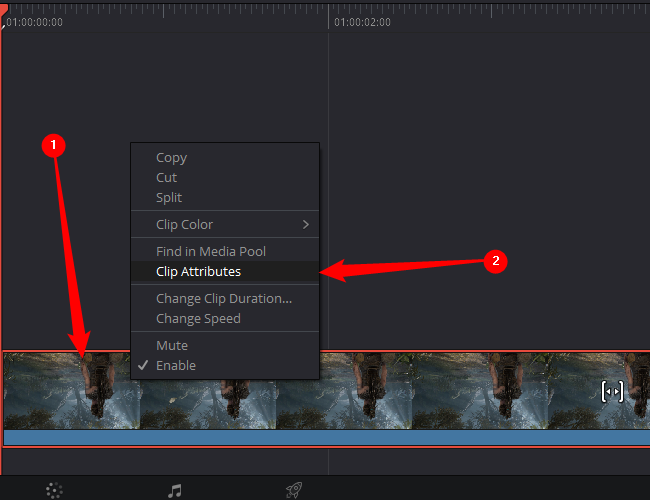
Right-click anywhere on the strip at the bottom and select “Clip Attributes.”
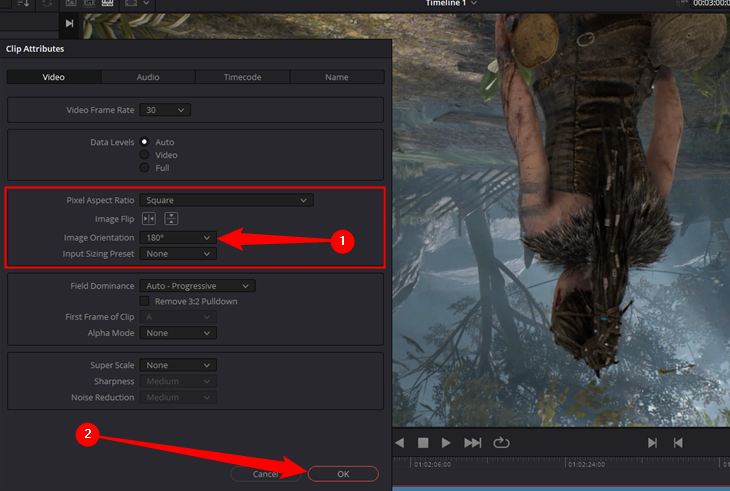
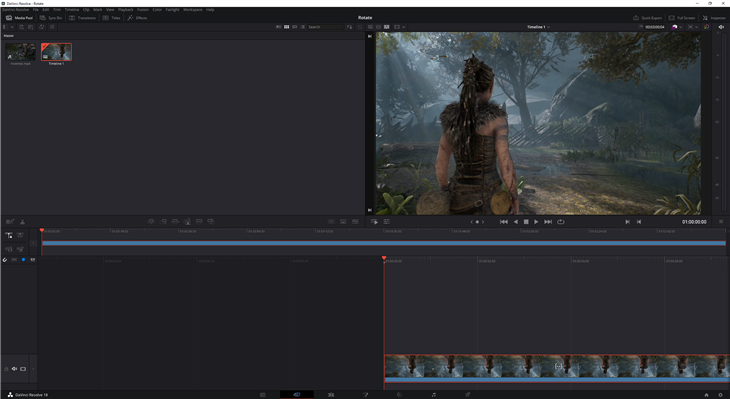
The preview window will display the changes you made.
If you rotated it incorrectly, just right-tap the strip again and pick a different rotation.
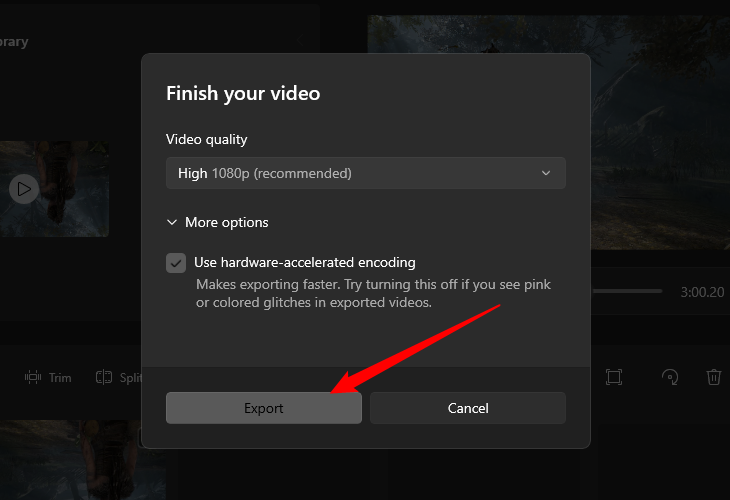
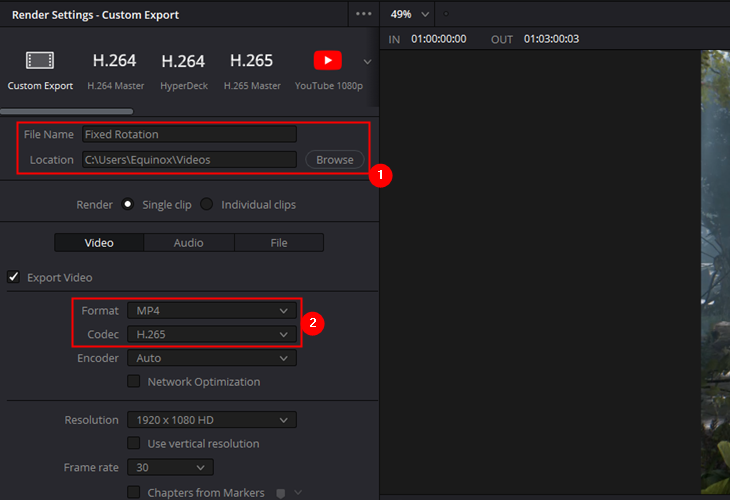
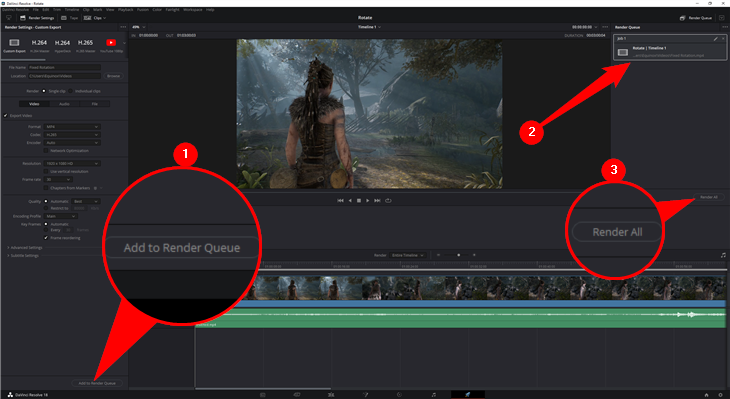
That brings you to the export menu, the final step in the process.
Once you’re in the export menu, pick a file name and a save location first.
Just do whatever is convenient.
After that, select a video format and codec to use.
In general, theMP4 formatis the safest bet, since all modern computers and mobile devices support it natively.
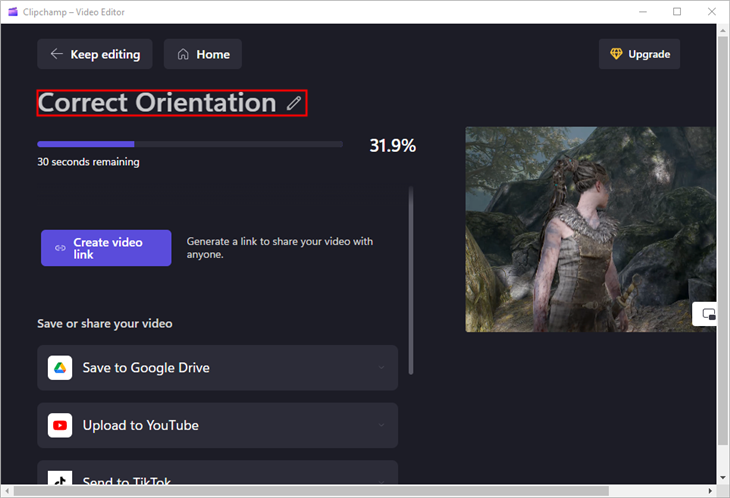
The export process will probably take around a minute on a modern computer.