Heres how to do that in VirtualBox.
Its a fully-functioningtiny PCat a budget price and with a great specification.
This sells for $60 for the 4GB model, and $80 for the 8GB model.
Jason Fitzpatrick / How-To Geek
The Raspberry Pi provides the embedded brain of the project, and runs without human interaction.
People have used the Raspberry Pi as the core computing element for their ownnetworked appliancesand Internet-of-Things devices.
But youre not locked into headless devices.
Most Raspberry Pi models can drive a high-resolution monitor.
Being able to use the Raspberry Pi like this makes developing for the Pi much easier.
The trouble is, software developers need power, and the Raspberry Pi only has so much to offer.
For developments to move at a realistic pace, compilation times need to be short.
Perhaps your tool chain needs more memory than the Raspberry Pi can support.
On top of that, the Raspberry Pi uses an SD card as storage, sodisk-intensive activitiescan be throttled.
One answer is to execute the Raspberry Pi operating system as a virtual machine on other hardware.
Running the Raspberry OS in a virtual machine will give you a good idea of what to expect.
Lets go through the steps required to set up a Raspberry Pi virtual machine inVirtualBox.
The official operating system for the Raspberry Pi called Raspberry Pi OS.
Its based on Debian Linux and you candownload a version for PC and Mac.
Thats the version well use.
Download the Raspberry Pi Desktop operating system and take note of where theISO imageis located on your rig.
Itll probably be in your “Downloads” folder.
StartVirtualBox, and click Machine then New.
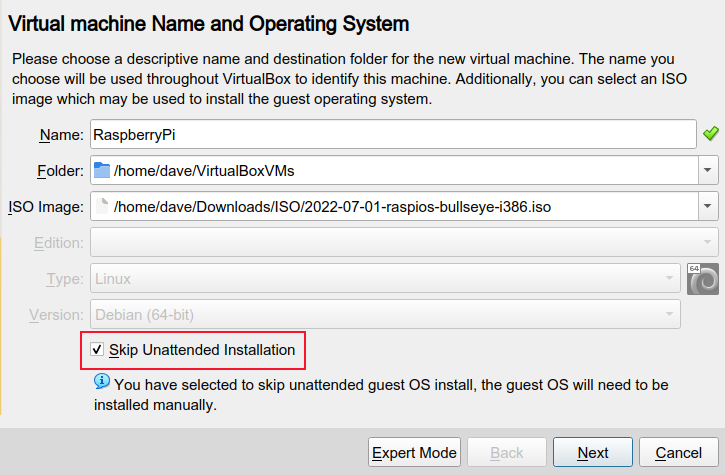
We need to give a name to the virtual machine.
This is just a label that VirtualBox uses to identify the machine, so you could call it anything.
Were going with the straightforward name of RaspberryPi.
In the Folder field, enter the directory you want VirtualBox to store your new virtual machine in.
In the ISO Image field choose the file you downloaded.
The drop-down lets you navigate to the file.
Finally, pick the Skip Unattended Installation checkbox and tap the Next button.
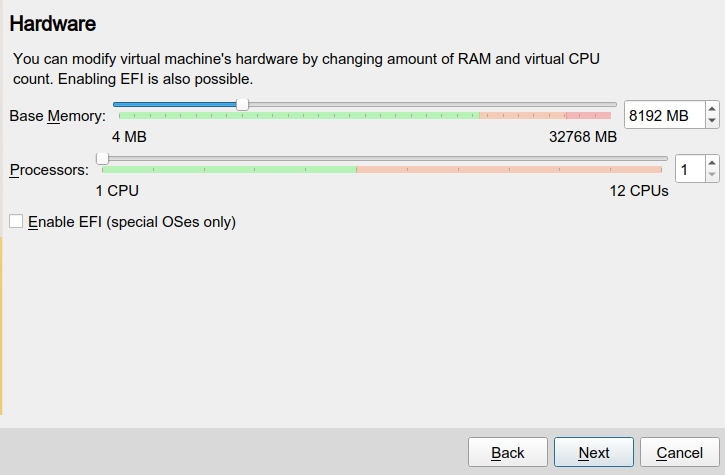
The Hardware page lets us set the RAM and number ofCPU coreswere devoting to this virtual machine.
I selected 8GB of RAM and left the CPU cores at one.
poke the Next button when youre ready to proceed.
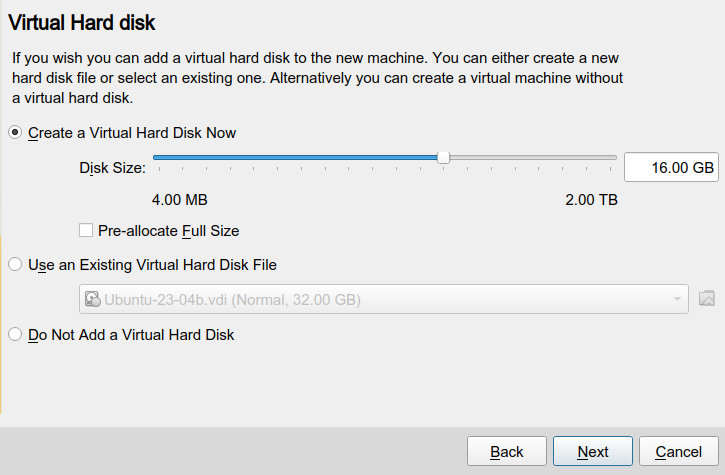
The Virtual Hard Disk page lets you choose the size of the hard drive in our VirtualMachine.
This will replicate the SD card that the Raspberry Pi uses for storage.
I gave it a 16GB hard drive, and ignored the other options.
tap the Next button to move on.
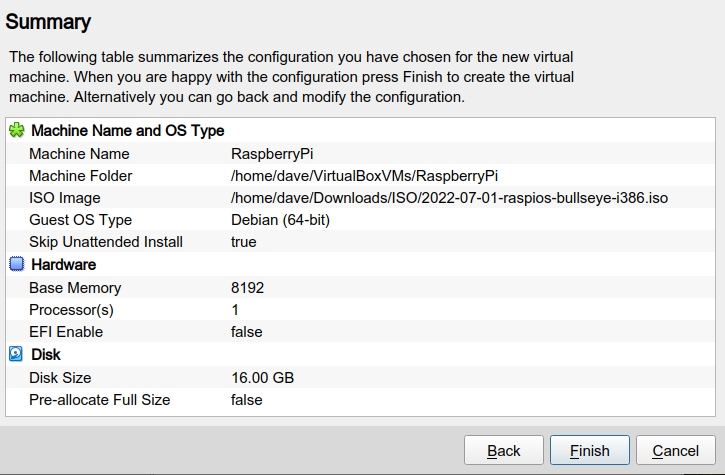
The Summary page shows you a recap of your choices.
nudge the Finish button to create your virtual machine.
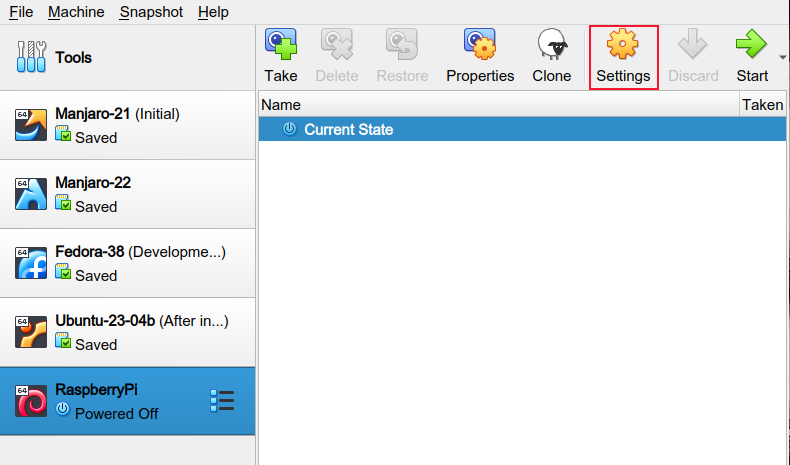
Youll see a new entry in the VirtualBox app, with the name youve just chosen.
In our case, it was Raspberry Pi.
Were going to fine-tune some controls in our machine.
Select your new virtual machine and grab the configs icon.
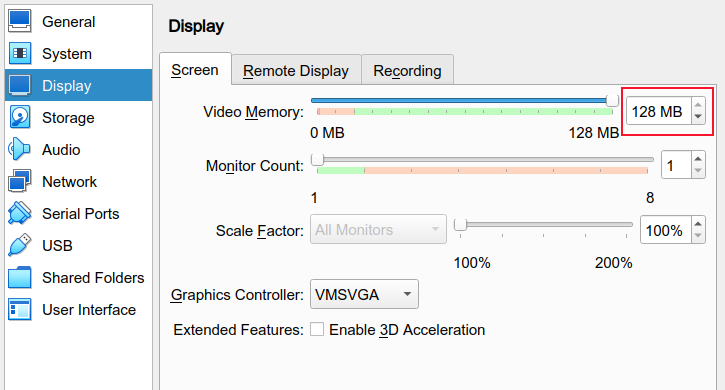
Select Display in the sidebar, and drag the Video Memory slider all the way to the right.
This gives the virtual machine more RAM to use for its virtual graphics card.
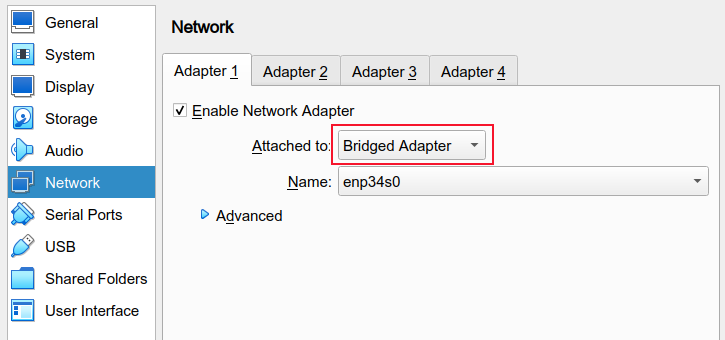
Select web connection in the sidebar and choose Bridged Adapter in the Attached to drop down.
This gives our virtual machine a online grid connection in the same IP range as your actual PC.
poke the OK button at the bottom of the screen.
The controls dialog will close.
Now we can launch our virtual machine by clicking the green arrow icon.
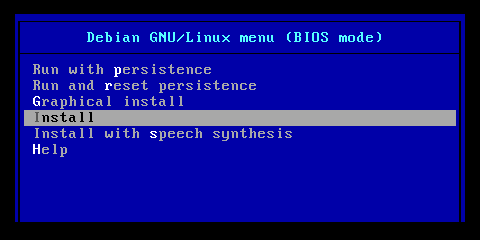
Our virtual machine is launched and the ISO image is booted.
Select Install from the menu and hit Enter.
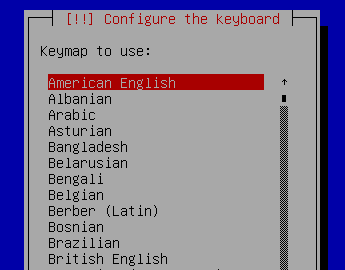
Select your keyboard from the list, and hit Enter.

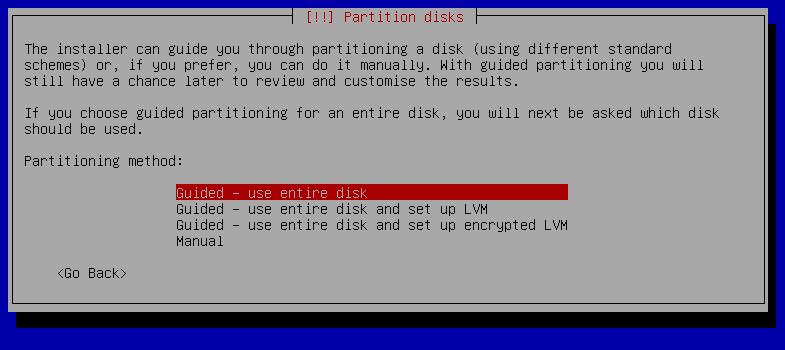
On the Partitioning Disks screen select Guided - use Entire Disk and hit Enter.
Weve only got one hard drive in this virtual machine.
Were warned it will be wiped of all data.
Thats fine, theres nothing on this brand-new virtual drive.
Hit Enter to move on.
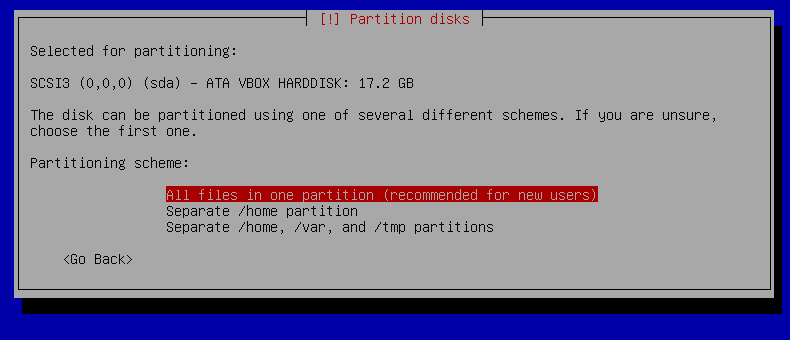
Youre asked for a partitioning scheme.

ensure All files in one partition (recommended for new users) is selected and hit Enter.
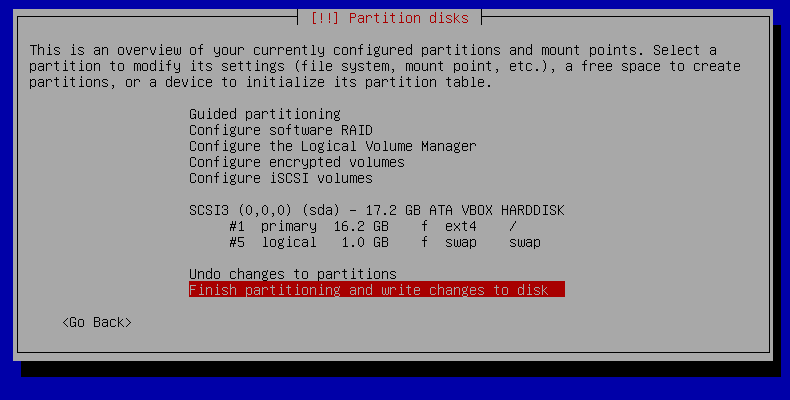
Youll see a summary of the partitioning choices youve made.
Hit Enter to proceed.
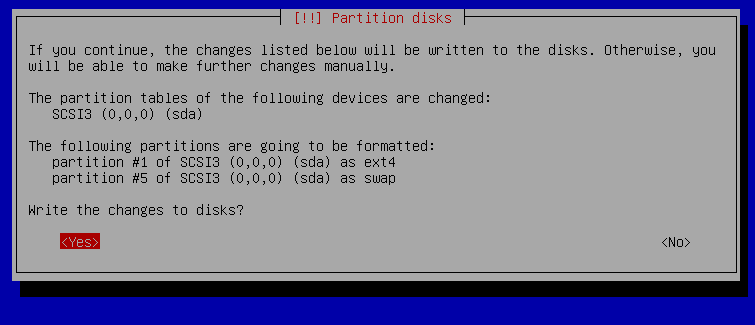
The screen changes to allow you to opt out.
No is selected by default.
Highlight Yes and hit Enter.
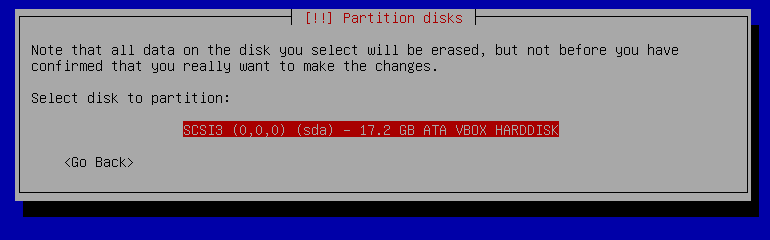
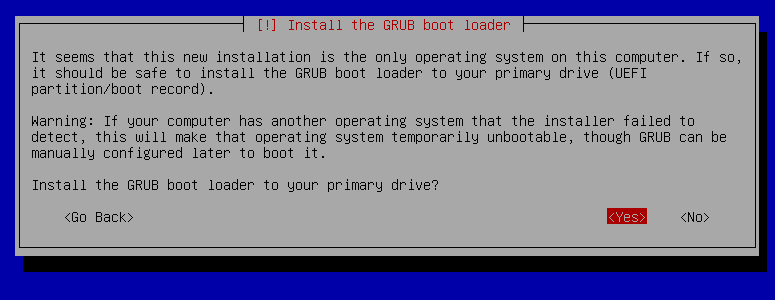
Its the only drive weve got, so you’re able to hit Enter to accept that location.
On the next screen select /dev/sda (ata-VBOX_HARDRISK….) and hit Enter.
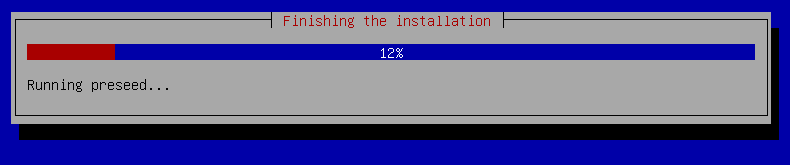
A progress bar will slowly creep along as the installation takes place.
Eventually youll see the Finish the Installation page.
ensure Continue is highlighted and hit Enter.
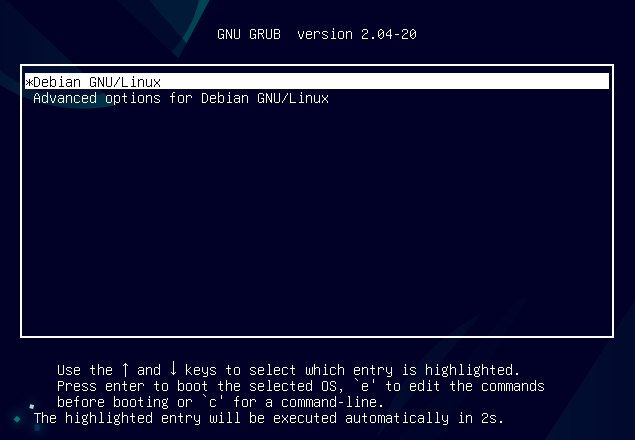
Your virtual machine will reboot.
The first screen youll see is the GRUB menu.
you’ve got the option to either hit Enter or wait for the menu to time out.
This usually takes about 10 seconds.
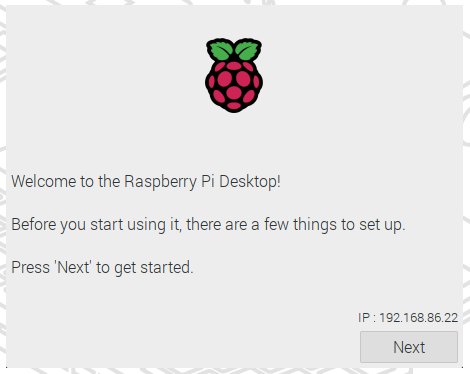
poke the Next button when you see the first setup screen.
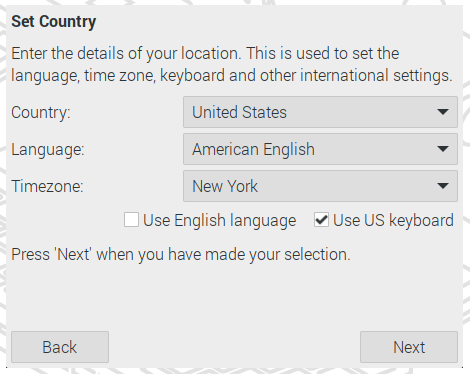
On the Set Country screen use the drop-down menus to select your country, language and timezone prefs.
tap the Next button to proceed.
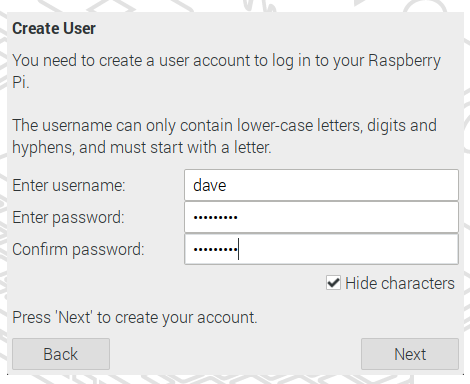
On the Create User screen, enter the name of your user and create a password for them.
poke the Next button to create their user account.
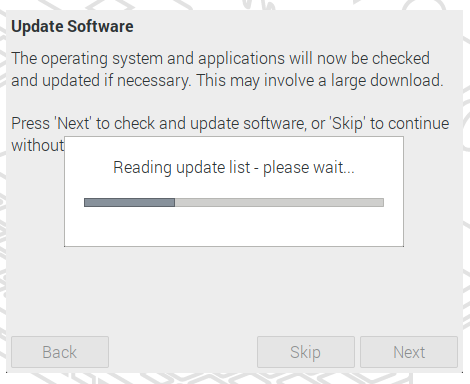
The Update Software screen checks your current install against the software repositories to verify it is up to date.

This takes a little while, but I recommend you bite the bullet and sit through it .
Clicking the Next button performs the update checks.
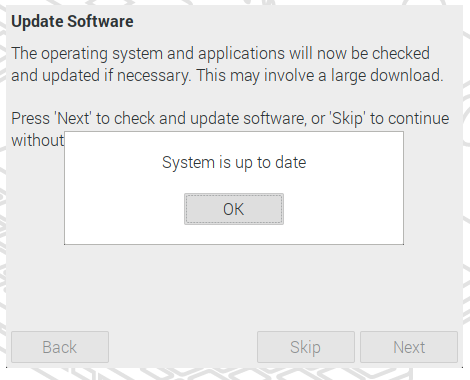
poke the OK button when the updates have completed.
choose the Restart button to apply the changes.
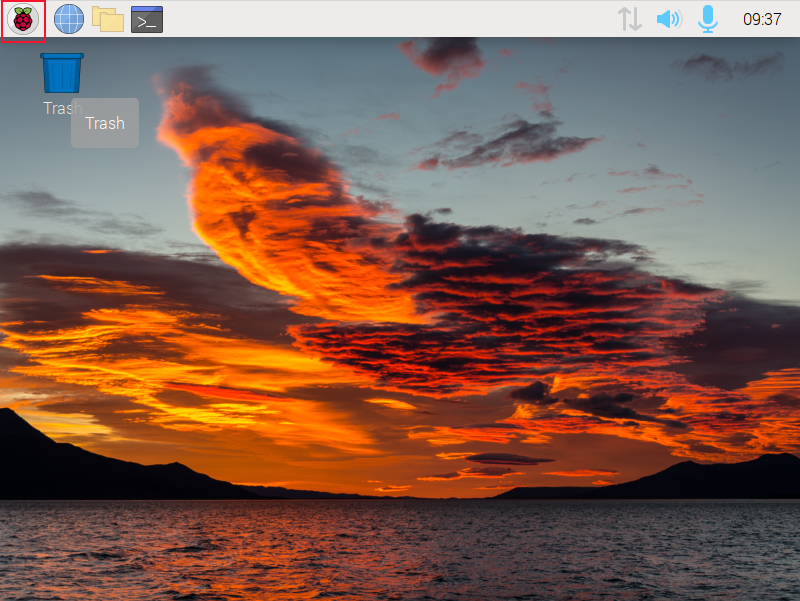
Setting a more realistic resolution is easy.
poke the Raspberry icon in the top left corner.
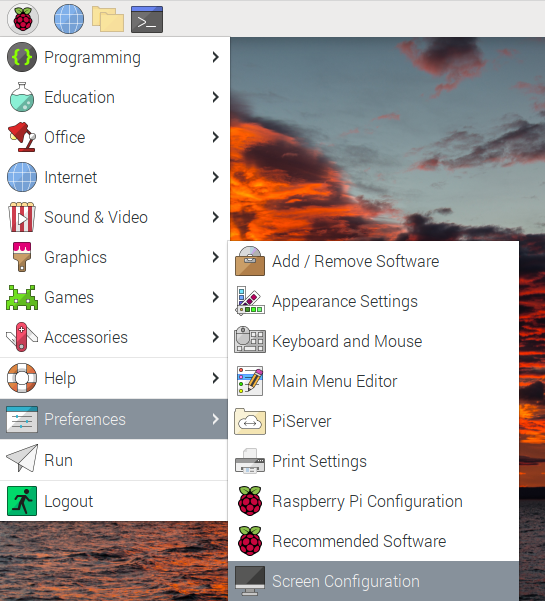
From the menus, select Preferences > Screen Configuration.
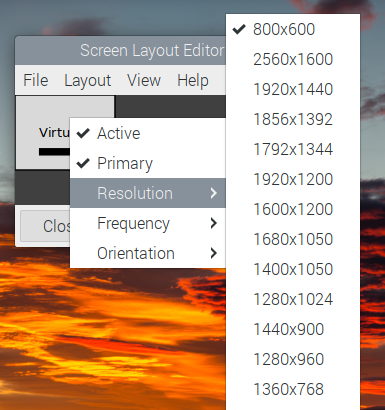
From the menus select Resolution and then the resolution youd like to use.
Youll need to reboot for the changes to take effect.
You’re All Set
That’s it.
You’re ready to experiment and explore in your virtual Raspberry Pi.
Related:16 Cool Projects for Your New Raspberry Pi
