Over time, as you update yourLinux kernel, old kernel versions accumulate and take up space.
What Is Boot Partition on Linux?
Mainly, it contains the kernel, the initrd, and thebootloader.
The boot partition is usually mounted at /boot/.
The boot partition is helpful for runningmultiple operating systems on a single machineor system.
It allows each operating system to have its own bootloader.
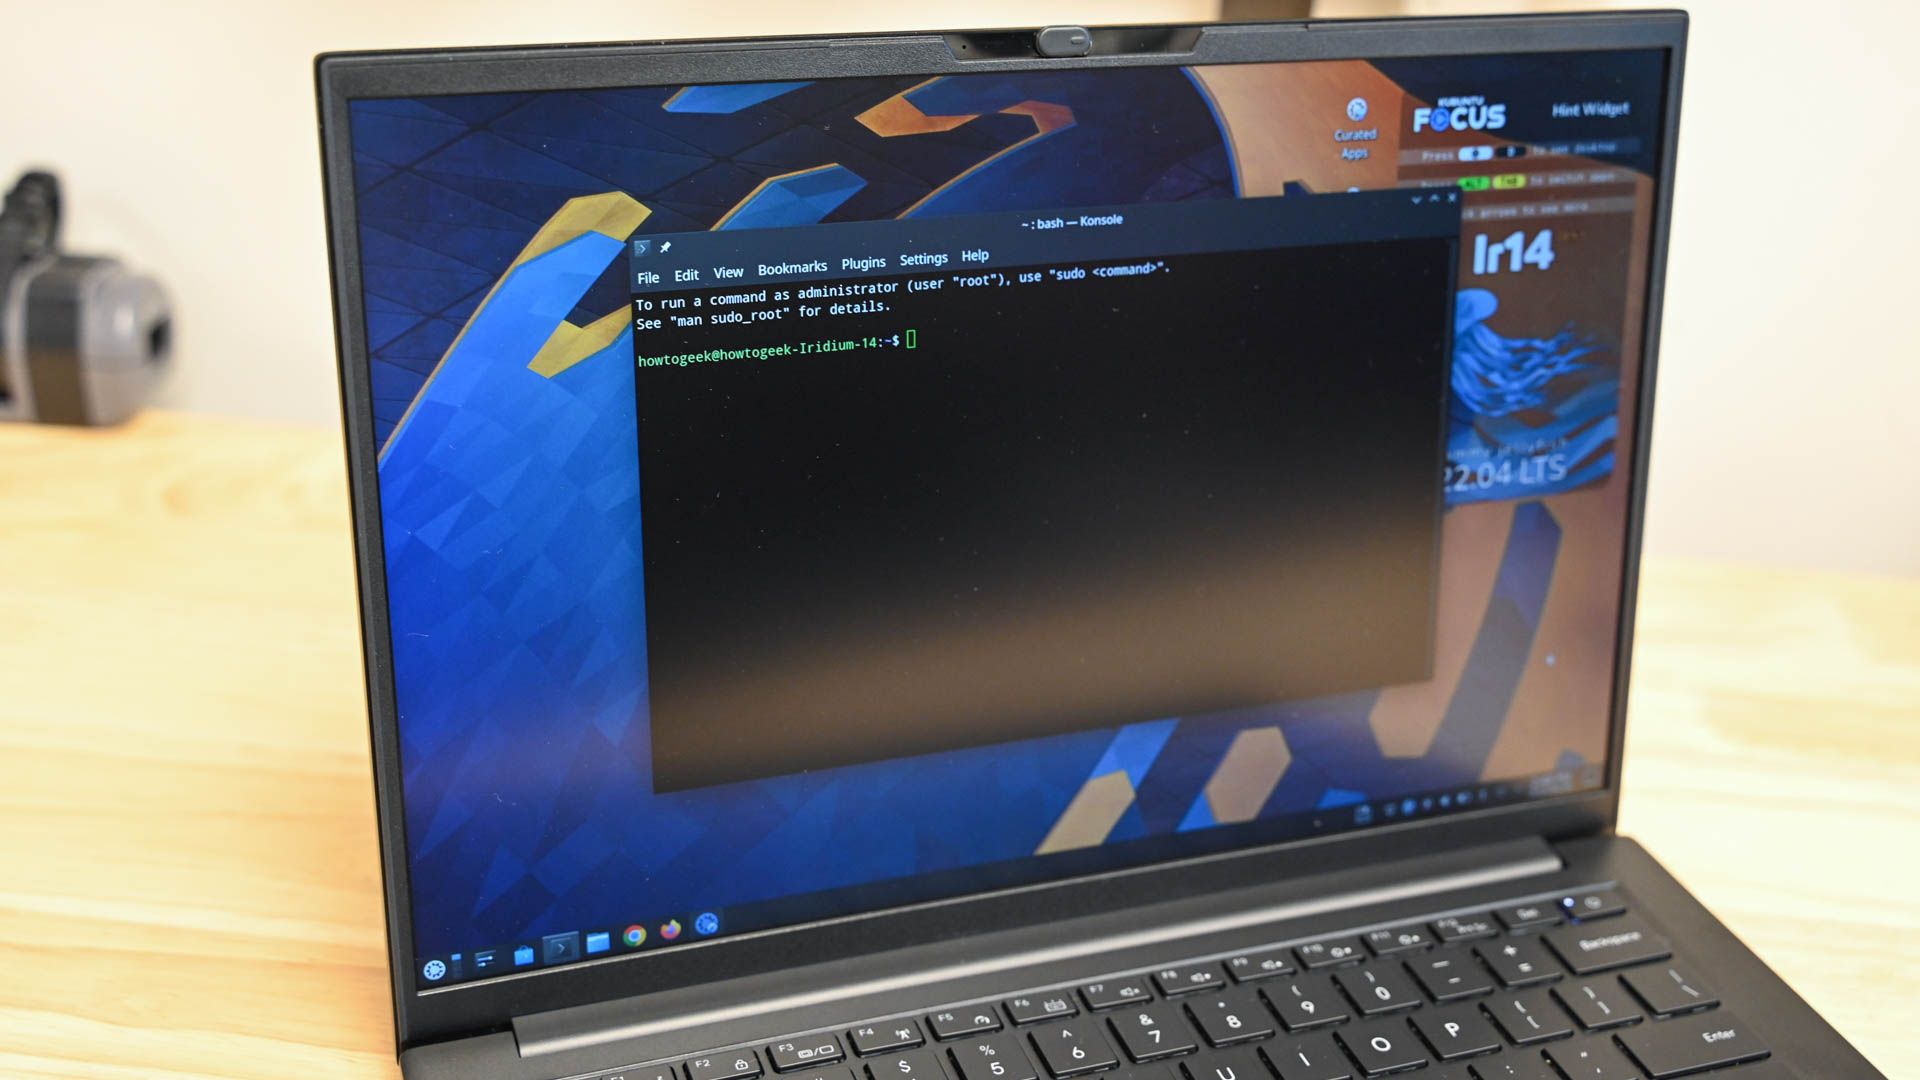
Hannah Stryker / How-To Geek
You should clean your boot partition periodically to remove old and unused kernels.
These old kernels take up a lot of space and cause problems whenupdating the system.
This can also prevent further updates and even slow down the boot process.
Some old kernels may contain bugs or vulnerabilities that can expose your Linux system to threats.
Do not delete thecurrent kernelor the files needed by the bootloader.
Otherwise, your system will not boot.

Before you attempt to modify the boot partition, back up your data and check disk health.
Check Boot Partition Usage
Before freeing up space, you must check the boot partition usage.
This will give you an idea of how low your system is on boot partition space.

It will also help to identify the space that boot partition needs.
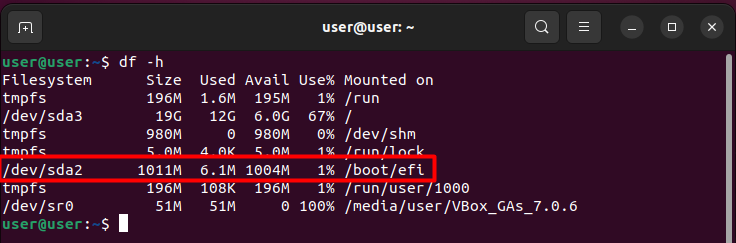
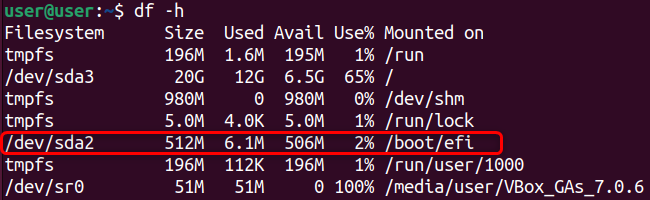
To check the boot partition usage you’re free to run thedf -hcommand.
These accumulatedolder kernel versionscan consume valuable disk space in the boot partition.

you could use theapt autoremovecommand to automatically remove the unused kernels.
This command also removes the unused associated dependencies.
You should press Y to proceed.
Theautoremovemethod will only work if you have some space left in the /boot partition.
If your /boot partition is full, you have to manually remove some old kernels first.
it’s possible for you to find the currently running kernel version using theunamecommand.

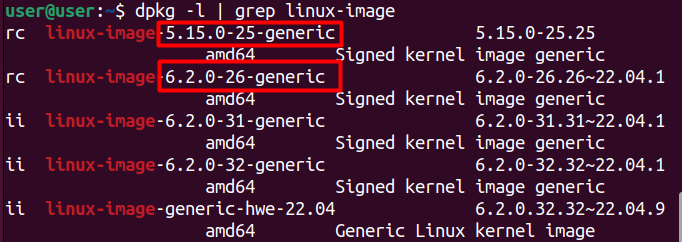
you could use thedpkgcommandto list all the installed packages that have “linux-image” in their package names.
It specifically targets packages related to the Linux kernel, including different kernel versions and related modules.
The ones labeled with the status “ii” are installed.

Those marked as “rc” have been removed but still have residual configuration files.
The kernels 5.15.0-25-generic and 6.2.0-26-generic are the older kernel versions.
The newest version is 6.2.0-32-generic, and the one before that is 6.2.0-31-generic.

You may have noticed that thels -l/bootcommand doesnt display the kernels 5.15.0-25-generic and 6.2.0-26-generic.
This is because both these kernels are already deleted and labeled as “rc” by thedpkgcommand.
It’s recommended to keep at least one or two previous kernels as backups.
you could use the previous kernel to boot your system if the latest one fails.
It also avoids data loss or any need to reinstall the operating system.
The kernel 6.2.0-32-generic is the current one, so we don’t want to delete it.

Here, it’s possible for you to specify the kernel you want to remove.
Confirm the action by pressing Y.
This is because theapt removecommand is more cautious about not removing packages that might be required by other packages.

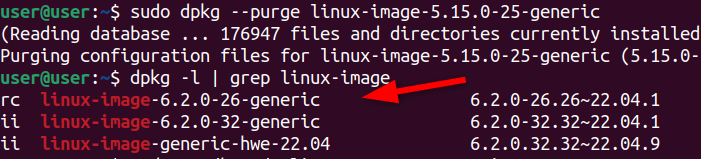
you might use thedpkg purgecommand to completely remove the package and its related configuration files from your system.
When you rundpkg –purge, it doesn’t check for dependencies.
Now the package will no longer appear in thedpkg -llist.

you’ve got the option to also use thermcommandto remove the old kernels from the boot partition.
you’re free to also specify multiple naming patterns to delete all of them at once.
The comma (,) in between the command specifies multiple values within a brace expansion.
It requires typing complex commands and knowing the exact names of the kernel packages.
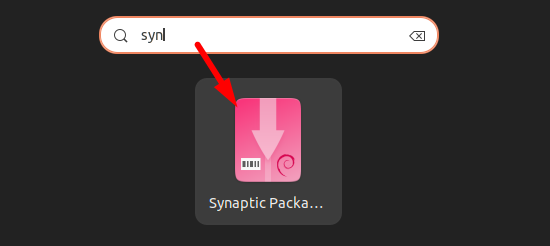
you might easily remove old kernels using a GUI-based package manager tool called Synaptic.
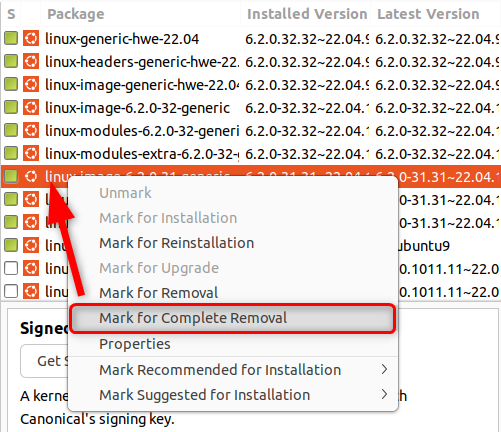
Using Synaptic, it’s possible for you to selectively remove the older unused kernels.
You should always keep the current kernel and the previous one as a backup for the system.
This will improve your system performance andsave disk space.
First, you oughta install Synaptic on your system.
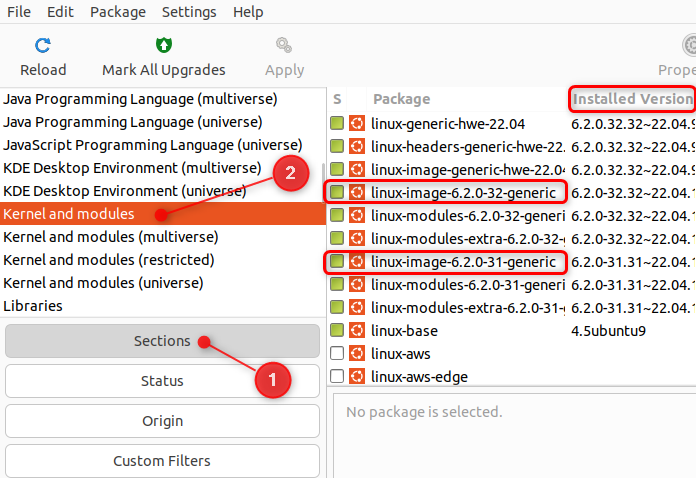
In the Synaptic window, hit the “Sections” button.
Now select “Kernel and Modules”.
This will display all theinstalled kernel versionson your system.
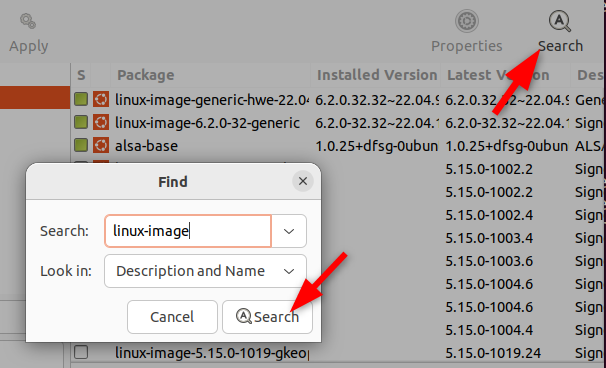
you’re free to also use the “Search” option to find older kernels.
jot down linux-image and click “Search”.
This will display all the installed kernel packages on your system partitions.
it’s possible for you to run theuname -rcommand in a terminal window to find the current kernel version.
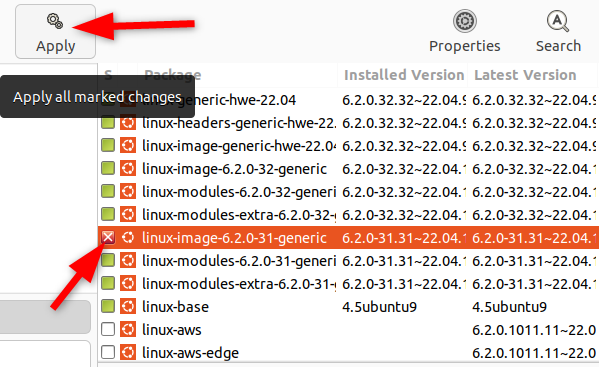
Now, tap on “Apply” to start deleting the selected kernel version.
You will see a summary of the actions about to be taken.
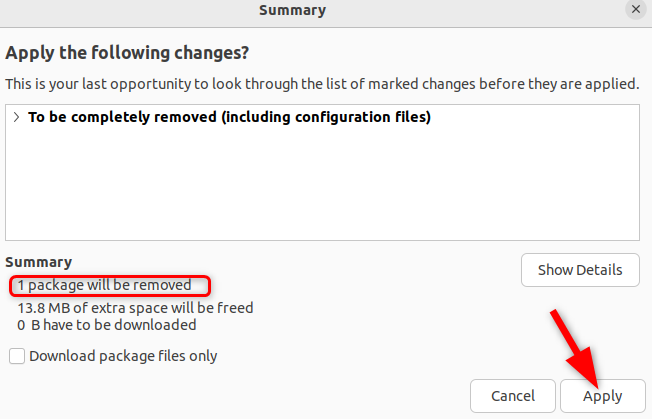
Confirm the removal of the selected packages by clicking the “Apply” button.
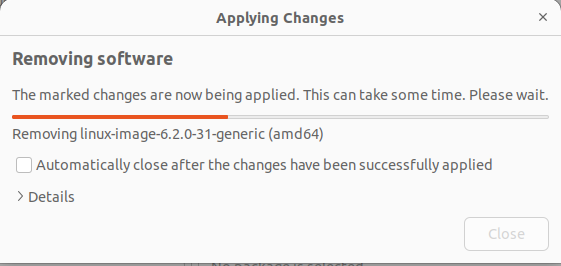
The selected kernel package files and their associated dependencies will be deleted.
It will free up some disk space on the boot partition.
But removing old kernels is not a permanent solution.
Your Ubuntu system boot partition could still fill up thanks to the packages you install.
you’ve got the option to easily resize the boot partition using theGParted toolon Ubuntu.
Before resizing your boot partition, confirm toback up your important data.
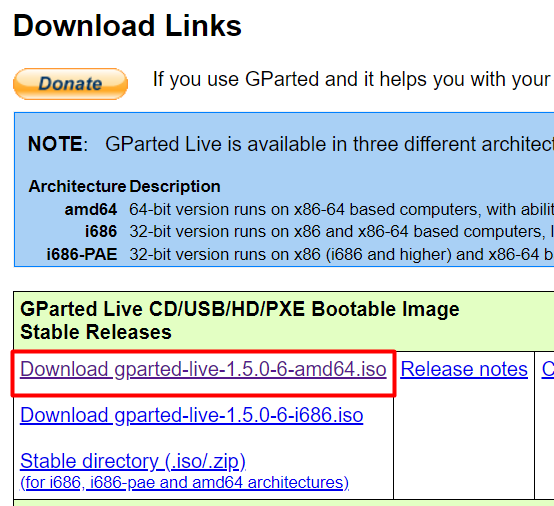
Begin bycreating a bootable USB drivecontaining the GParted tool ISO file.
GParted is a portable version of the Ubuntu system that can manage partitions.
Firstdownload the GParted ISOfile required for creating the bootable drive.
you might enter the BIOS after restarting the system.
you’re gonna wanna press a specific key toaccess the BIOS mode on your system.
The key may be different depending on the system model and manufacturer.
you might also check your system manual or on-screen instructions for which key to press.
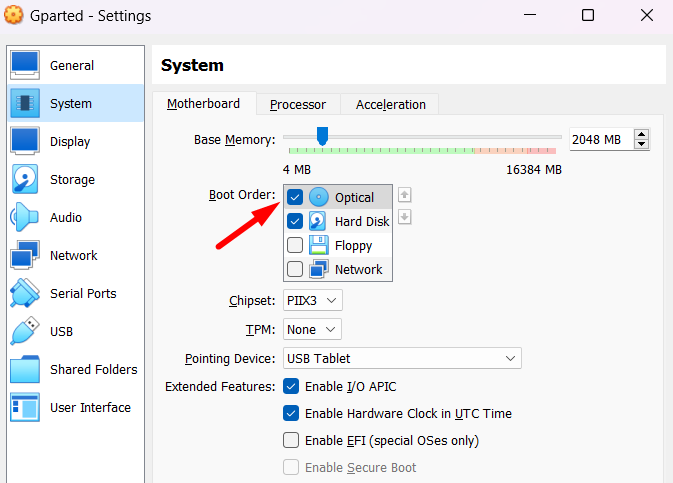
Change the boot order to prioritize the USB drive.
Move the GParted USB drive to the top of the list or select it as the first boot rig.
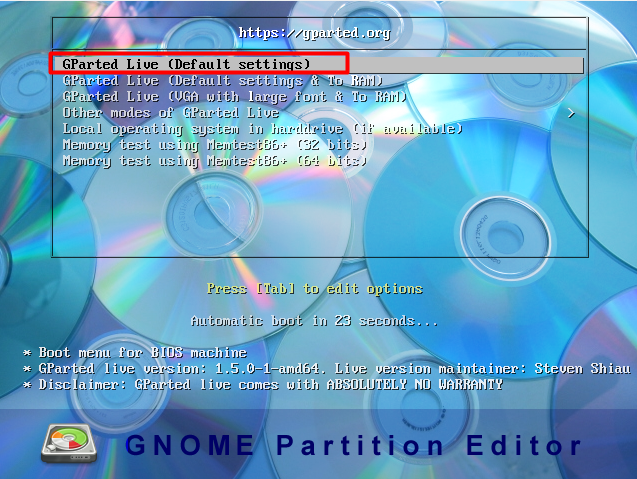
you’re free to also press “Enter” to directly boot GParted from the USB drive.
This will boot your system from the USB drive or CD/DVD that contains GParted.
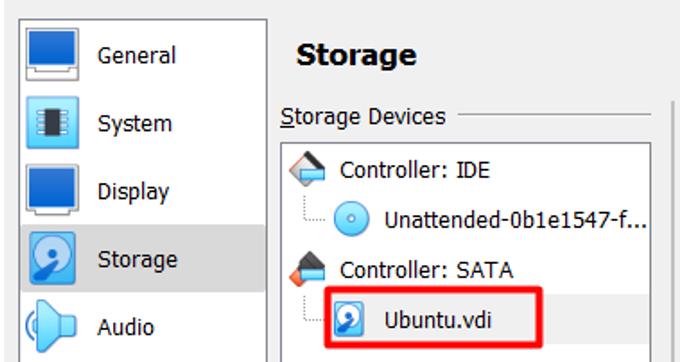
While setting the GParted virtual machine, do not create a virtual hard disk for it.
Promoting the optical disk option to the top means setting the virtual optical drive as the first boot equipment.
The VDI file represents your Ubuntu virtual machine’s storage.

The GParted window will open showing all partitions on your system.
Identify a non-system partition (/dev/sda3) and unmount it before proceeding.
This will detach the partition from file system and can be safely modified.
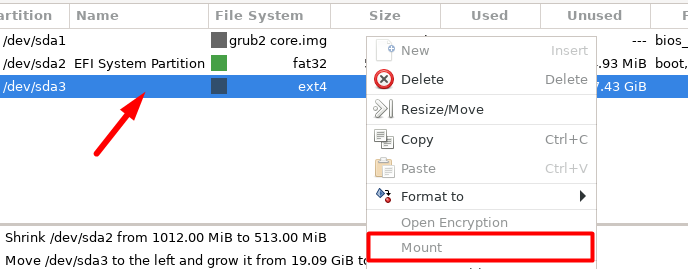
If you see a Gray “Mount” option, it means the partition is already unmounted.
First, shrink the non-system partition to get some unallocated space.
Right-opt for non-system or root partition and select “Resize/Move”.
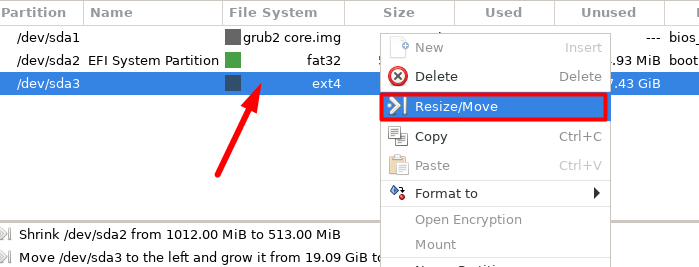
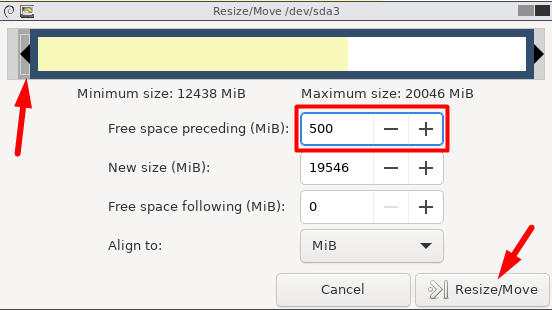
you’re free to also specify the size in the “New Size” field.
Click “Resize/Move” to apply the changes.
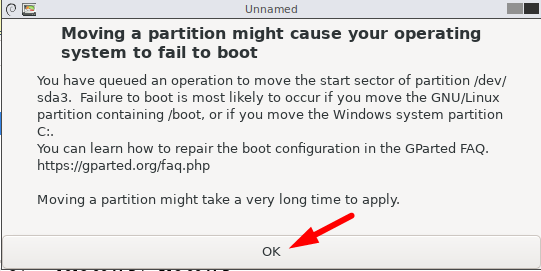
A warning message will prompt, showing that your system might fail to boot after moving the partition.
Hit “OK” to continue.
A new unallocated partition will be created right next to the boot partition.
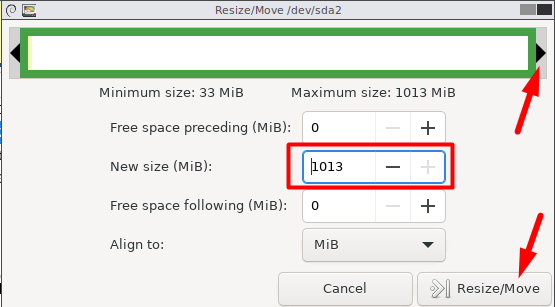
Next, you’re able to resize the boot partition after assigning it the unallocated space.
Right-hit the boot partition and go for the “Resize/Move” option.
Click “Resize/Move” to apply the changes.
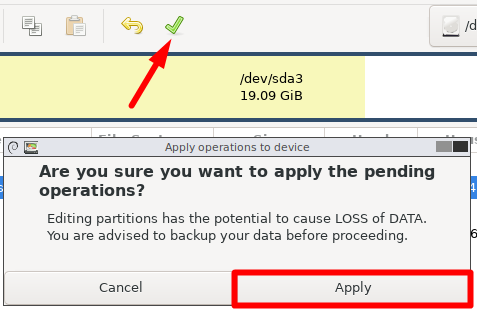
stash your change by clicking the green checkmark icon and selecting “Apply” from the new menu.

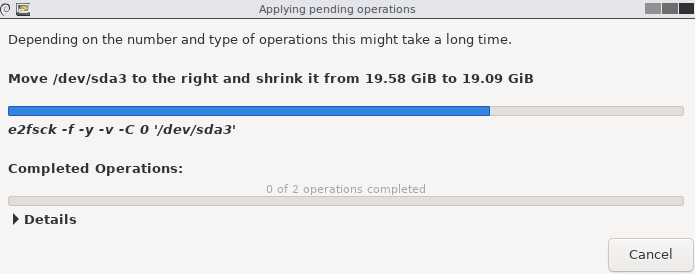
Now wait for the operation to complete.
GParted will shrink the dev/sda3 partition by 500 MiB and allocate this to the boot partition.
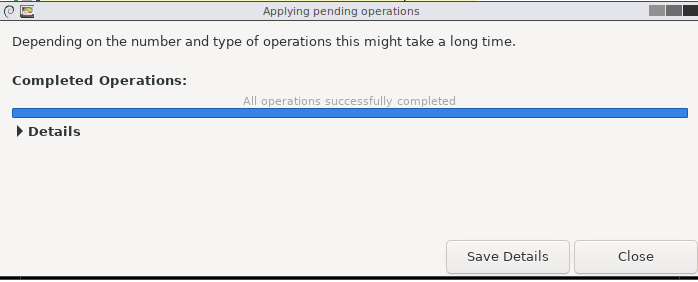
When the boot partition is resized, a completed operation message will appear.
you’ve got the option to verify the new boot partition size from GParted.
Reboot your Ubuntu system.
ensure you choose the default Ubuntu system as your boot option.
For virtual machines, boot from the default Ubuntu virtual machine.
After rebooting, trigger the command df -h to confirm the new size of the boot partition.
In our example, the boot partition has been expanded from 500 MiB to 1011 MiB.
Active monitoring includes keeping your system up to date, regularly purging old kernels, andmonitoring disk space usage.
Like the GParted tool, you’re able to also use thefdiskcommandto actively manage Linux partitions.
Thefdiskcommand will give you precise control over disk partitions.
you’re free to view existing partitions, create new ones, and set their file system types.
you’re able to also change partition attributes and manage the layout of disk drives efficiently.