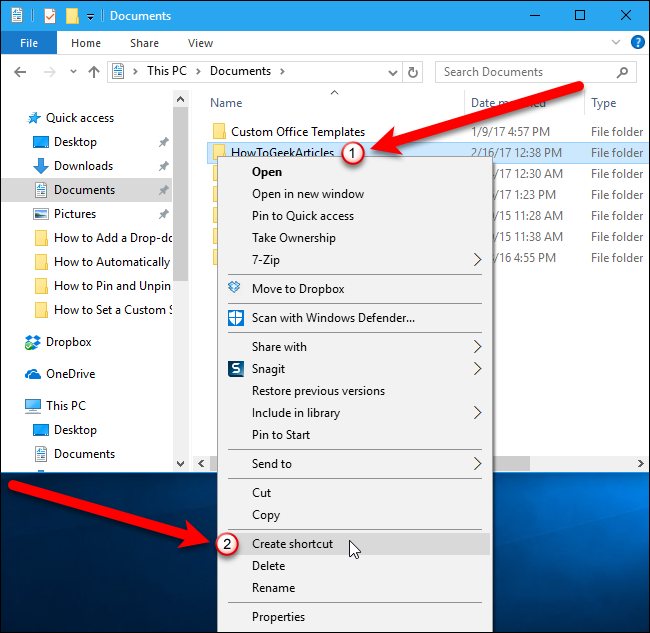
Instead, right-punch the folder and select “Create shortcut” from the popup menu.
A shortcut to that folder is created in the same location as the folder.
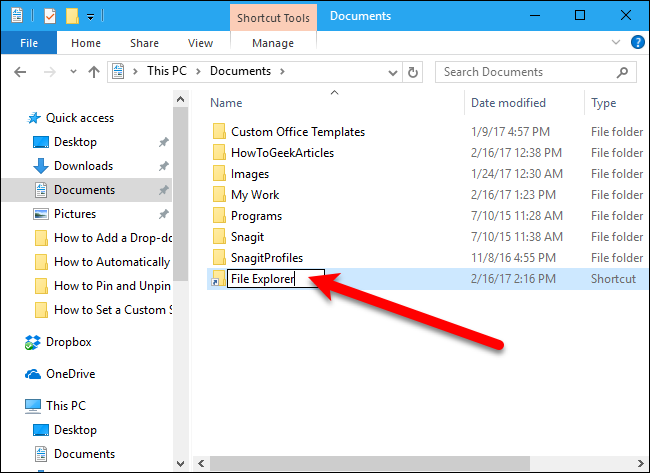
choose the shortcut and press F2 to rename the shortcut to File Explorer.
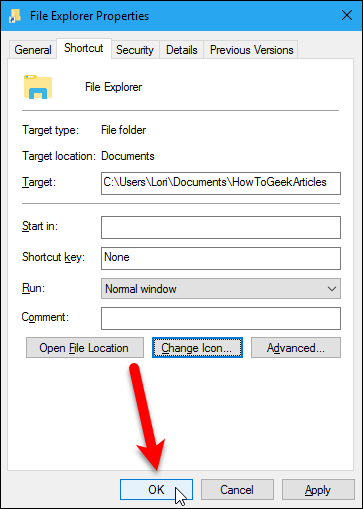
To do so, right-punch the new shortcut and select “Properties” from the popup menu.
We’re going to grab the File Explorer icon from the explorer.exe file itself.
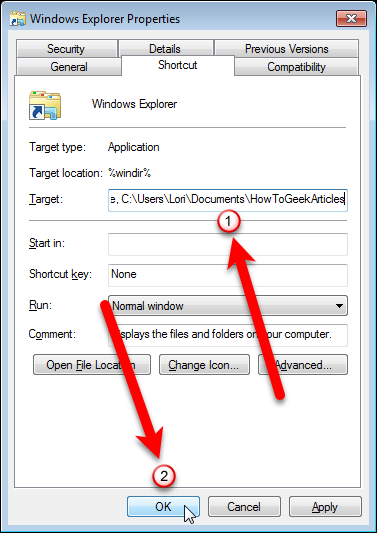
Click “OK” to shut the Properties dialog box.
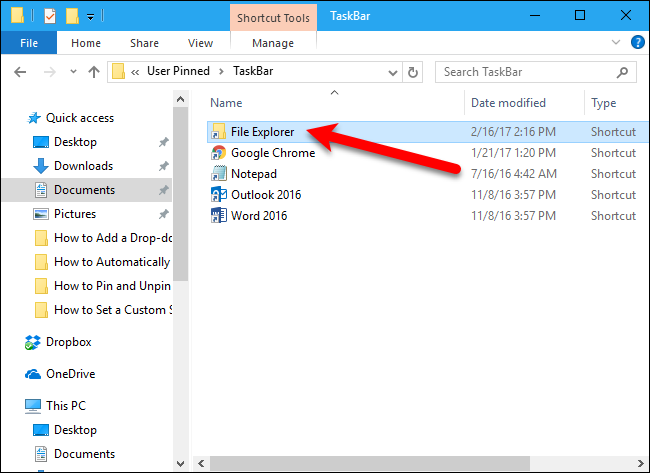
grab the new shortcut in File Explorer and press Ctrl+C to copy it.
Then, navigate to the following folder.
Press Ctrl+V to paste the new shortcut in the Taskbar folder.
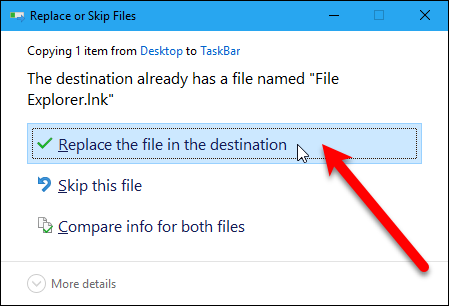
The following dialog box displays to double-check you want to replace the file already in the folder.
Click “Replace the file in the destination” to continue.
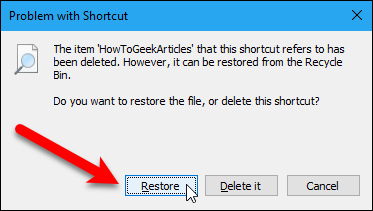
To undelete the folder, nudge the “Restore” button.

The folder is moved from the Recycle Bin back to its original location.
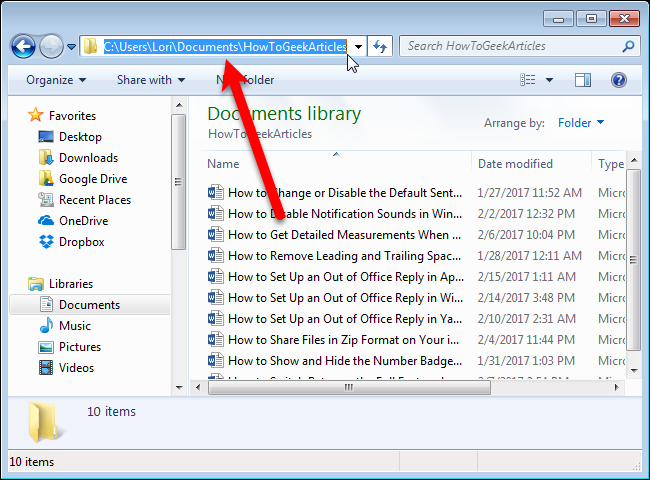
This makes it easier to add the correct path to the shortcut.
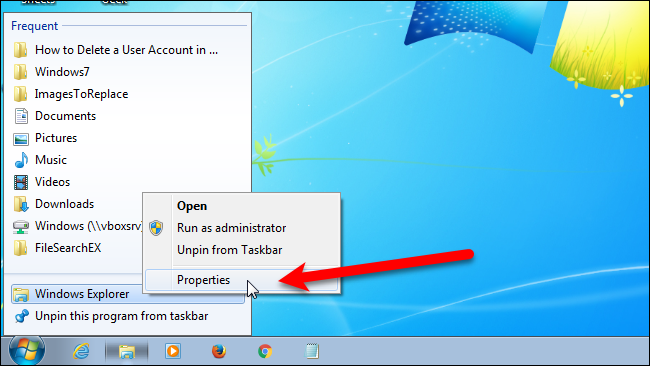
Now, we’ll change the properties of the Windows Explorer shortcut on the Taskbar.
To do this, right-press the Windows Explorer shortcut on the Taskbar.
double-check the “Shortcut” tab is active on the Properties dialog box.