This article will show you how to map shares across both operating systems for seamless file sharing.
Related:How to Easily Share Files Between Nearby Computers
There are two parts to this guide.
Depending on your situation, you’ll want to follow the appropriate set of instructions.
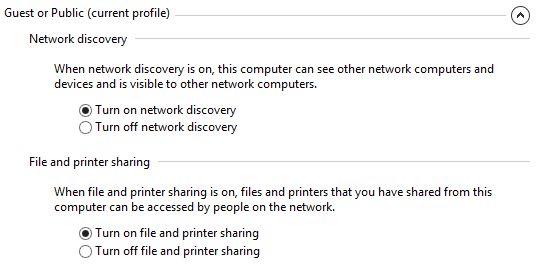
First, we’ll confirm sharing is enabled on Windows.
Once it is, we’ll share the actual folder.
And then, we’ll look at how to access that folder from a Linux system.

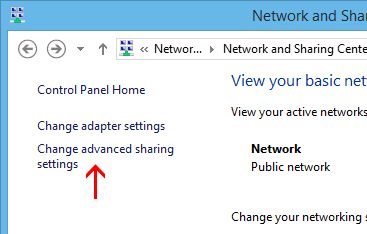
In the web connection and Sharing Center window, select “Change advanced sharing configs.”
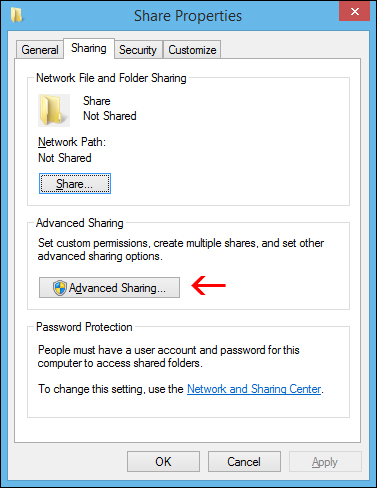
Right-nudge the folder you want to share over the online grid, and then click “Properties.”
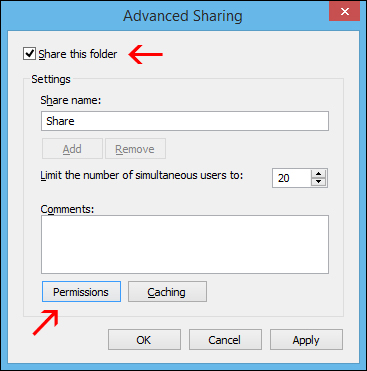
On the “Sharing” tab of the properties window, poke the “Advanced Sharing” button.
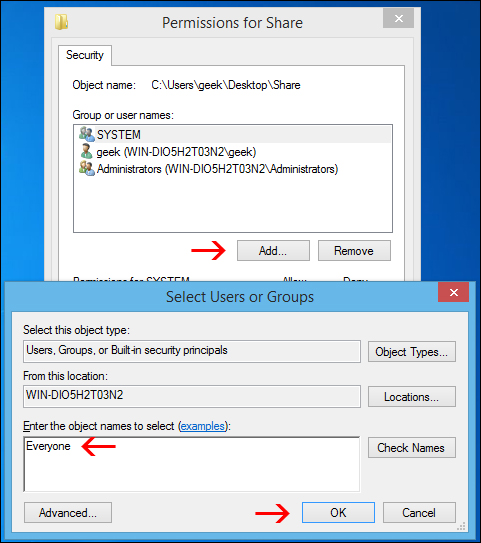
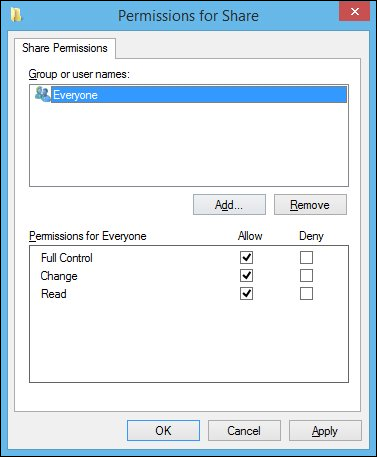
In the permissions window, you could restrict access to the folder to certain accounts.
This allows anyone to read and write changes to files in the shared folder.
Note: These user accounts are on the Windows computer, not Linux.
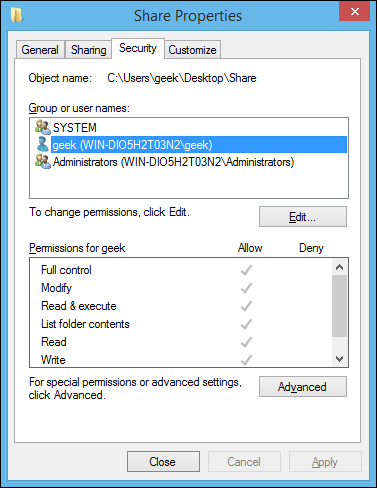
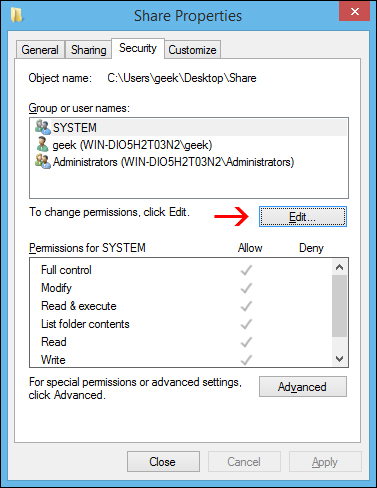
Back in the main properties window, switch over to the “Security” tab.
If the two parameters don’t match, the most restrictive parameters will take effect.
you could terminate the window and move on to the next step.
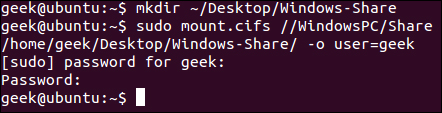
First, you’ll need the cifs-utils package for mount SMB shares.
In this example, we will create the folder on our Desktop for easy access.
First, we’ll create the shared folder on the Linux system.
Then, we’ll look at how to access it from a Windows PC.
Create the directory that you’d like to share out to your Windows computer.
We’re just going to put a folder on our Desktop.
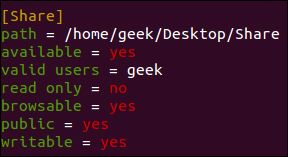
Now, use your favorite editor to configure the smb.conf file.
We’re using Vi here.
It should look something like this:
Save the file and close your editor.
Now, you just need to restart the SMB service for the changes to take effect.
Your shared folder should now be accessible from a Windows PC.
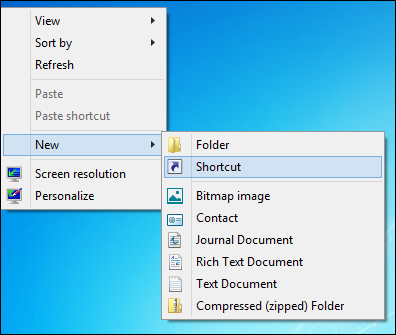
Right-click somewhere on your Desktop and select New > Shortcut.
You should end up with a Shortcut on your Desktop that goes right to the Linux share.