Or ever wish you could capture every detail of your favorite game without investing in an expensive 4K monitor?
Well, here’s how it’s possible for you to take take 4K screenshots on your 1080p monitor.
Taking 4Kscreenshotson a 1080p monitor isn’t just a neat party trickit has some serious practical benefits.
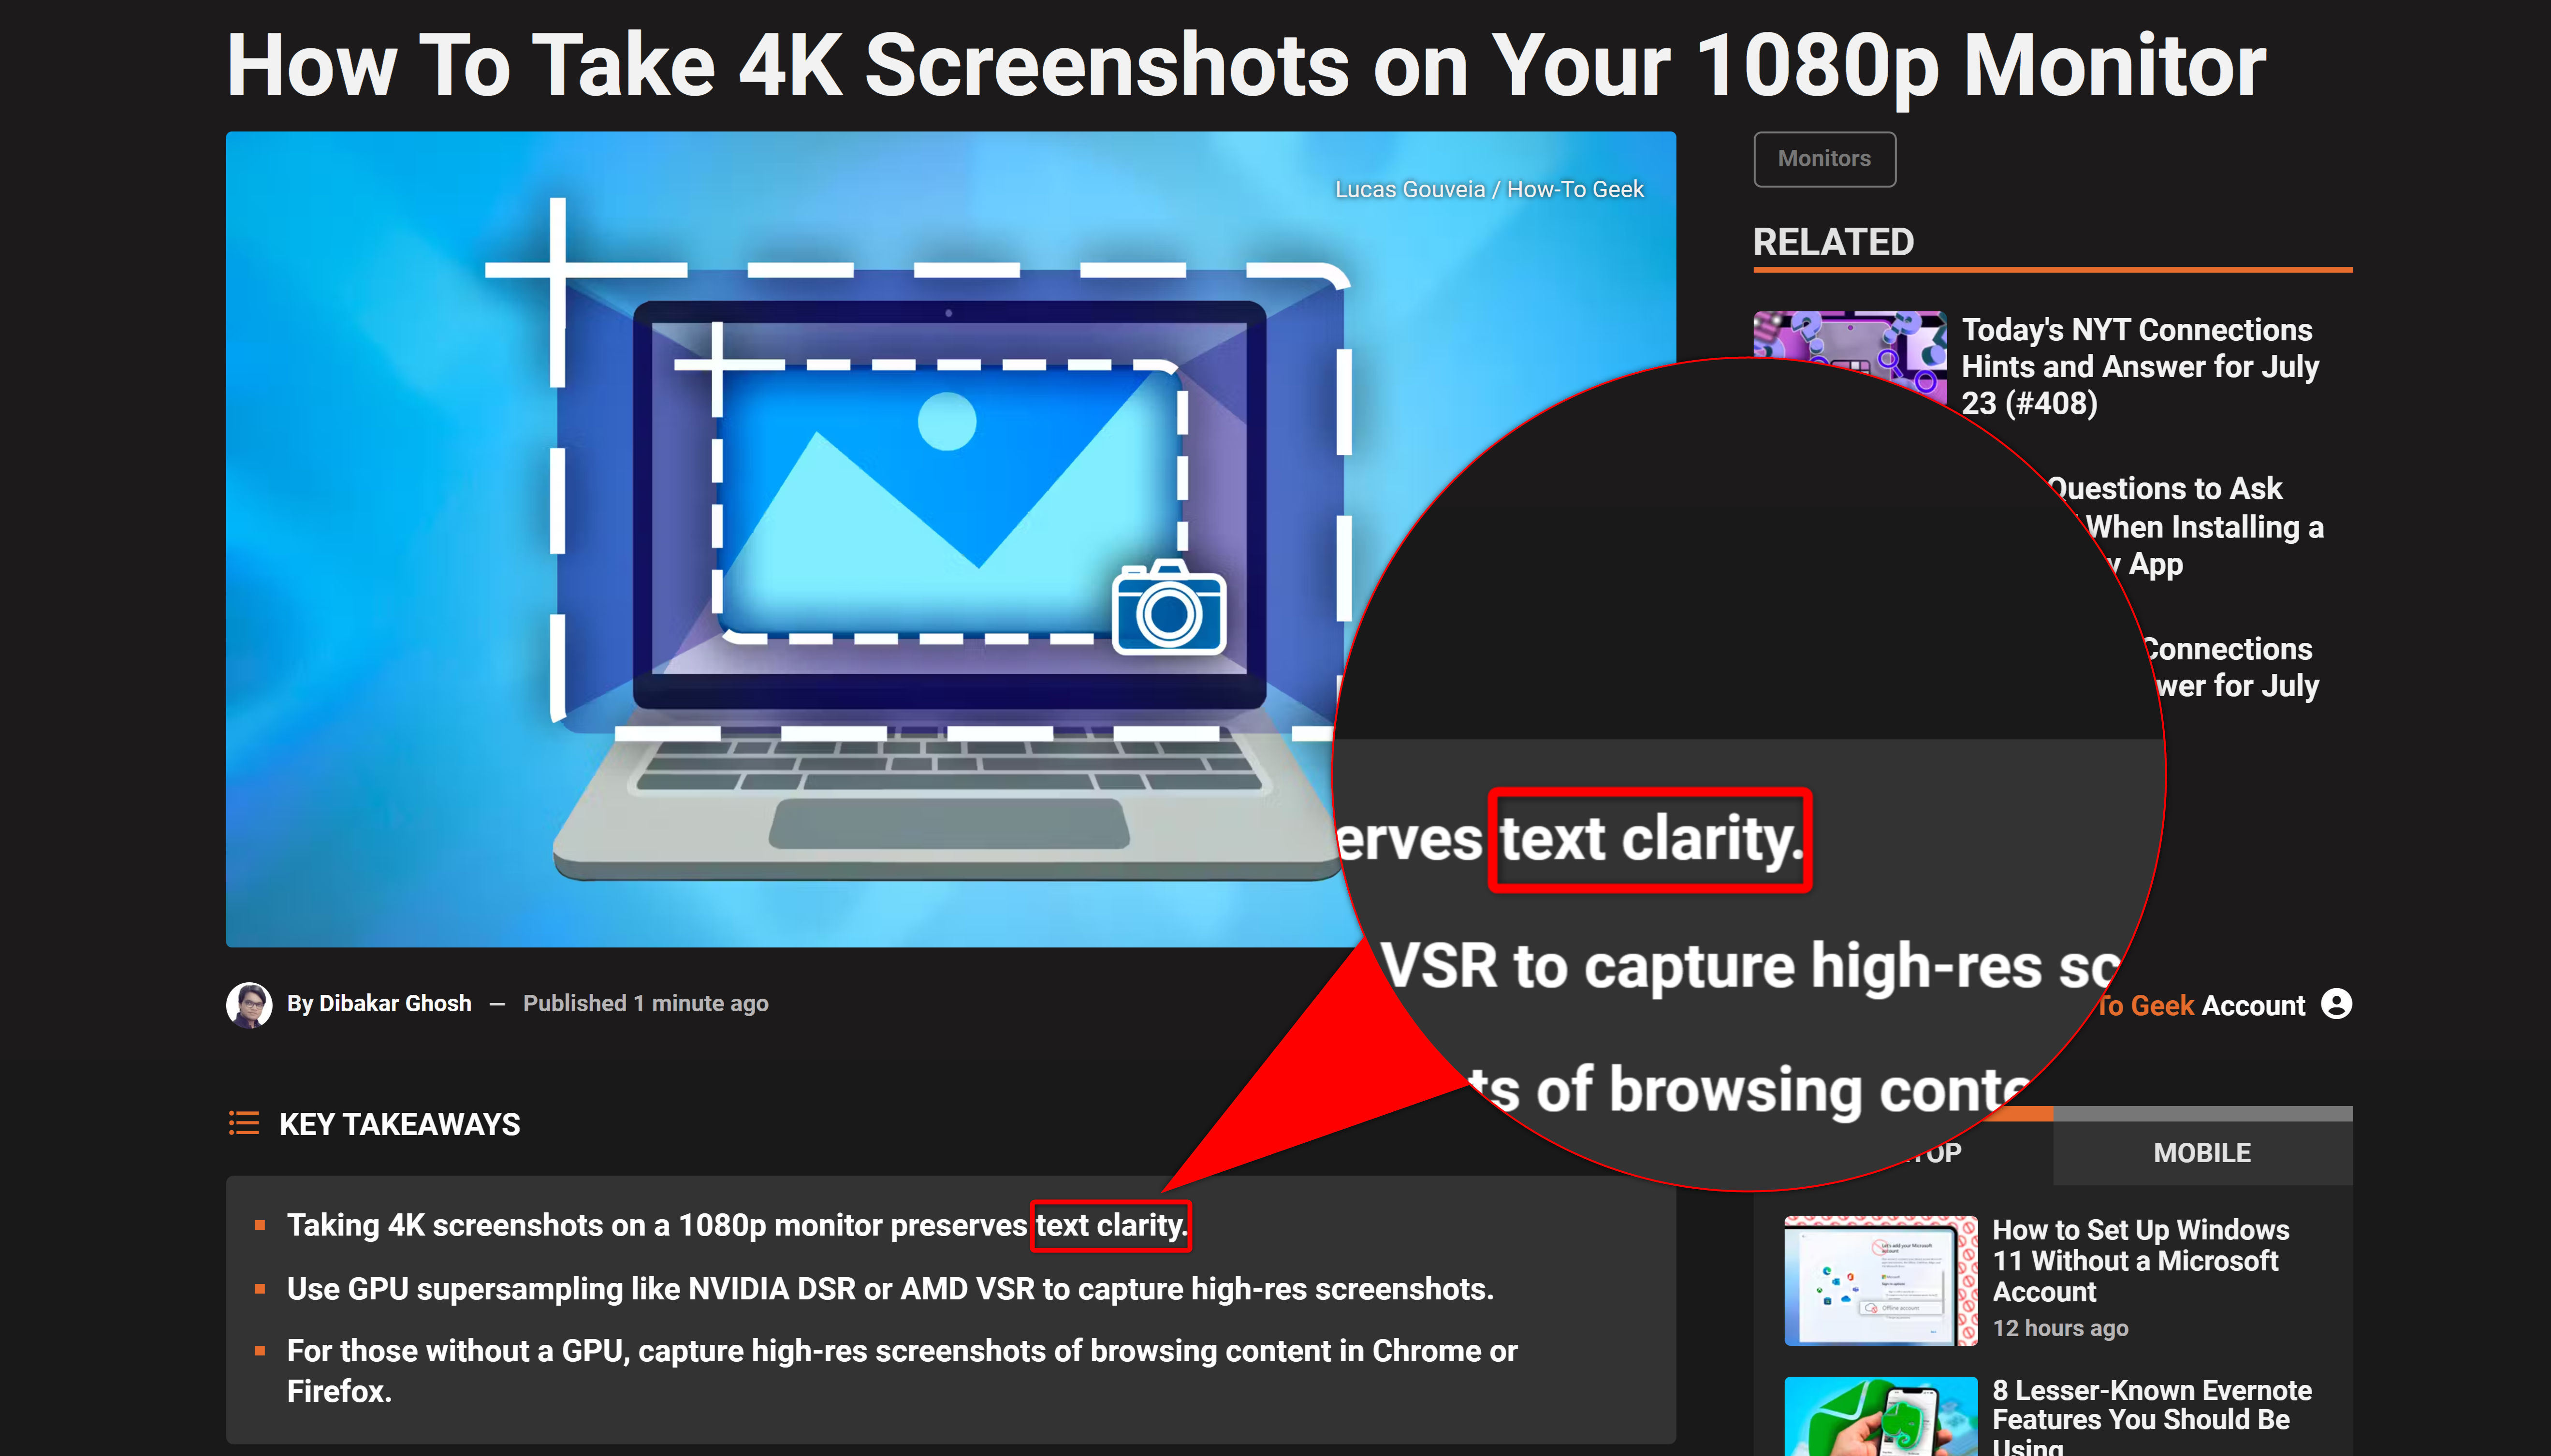
The most pragmatic use case is preserving text clarity.
On a 1080p monitor, text in screenshots can become pixelated.
For instance, as a writer, I need to share detailed tutorials and guides with you.
AMD
This is especially true if I have to crop and zoom in on a particular area.
I’ve also found 4K screenshots particularly handy ingaming situations.
you could capture the highest quality details, which isn’t quite possible in a 1080p screenshot.
This affects the quality of the screenshot, so having as much detail as possible helps.
Both NVIDIA and AMD offer ways to take high-res screenshots throughsupersampling.
This process creates a sharper, more detailed image by essentially cramming more pixels into the same space.
Here’s how to enable it:
1.
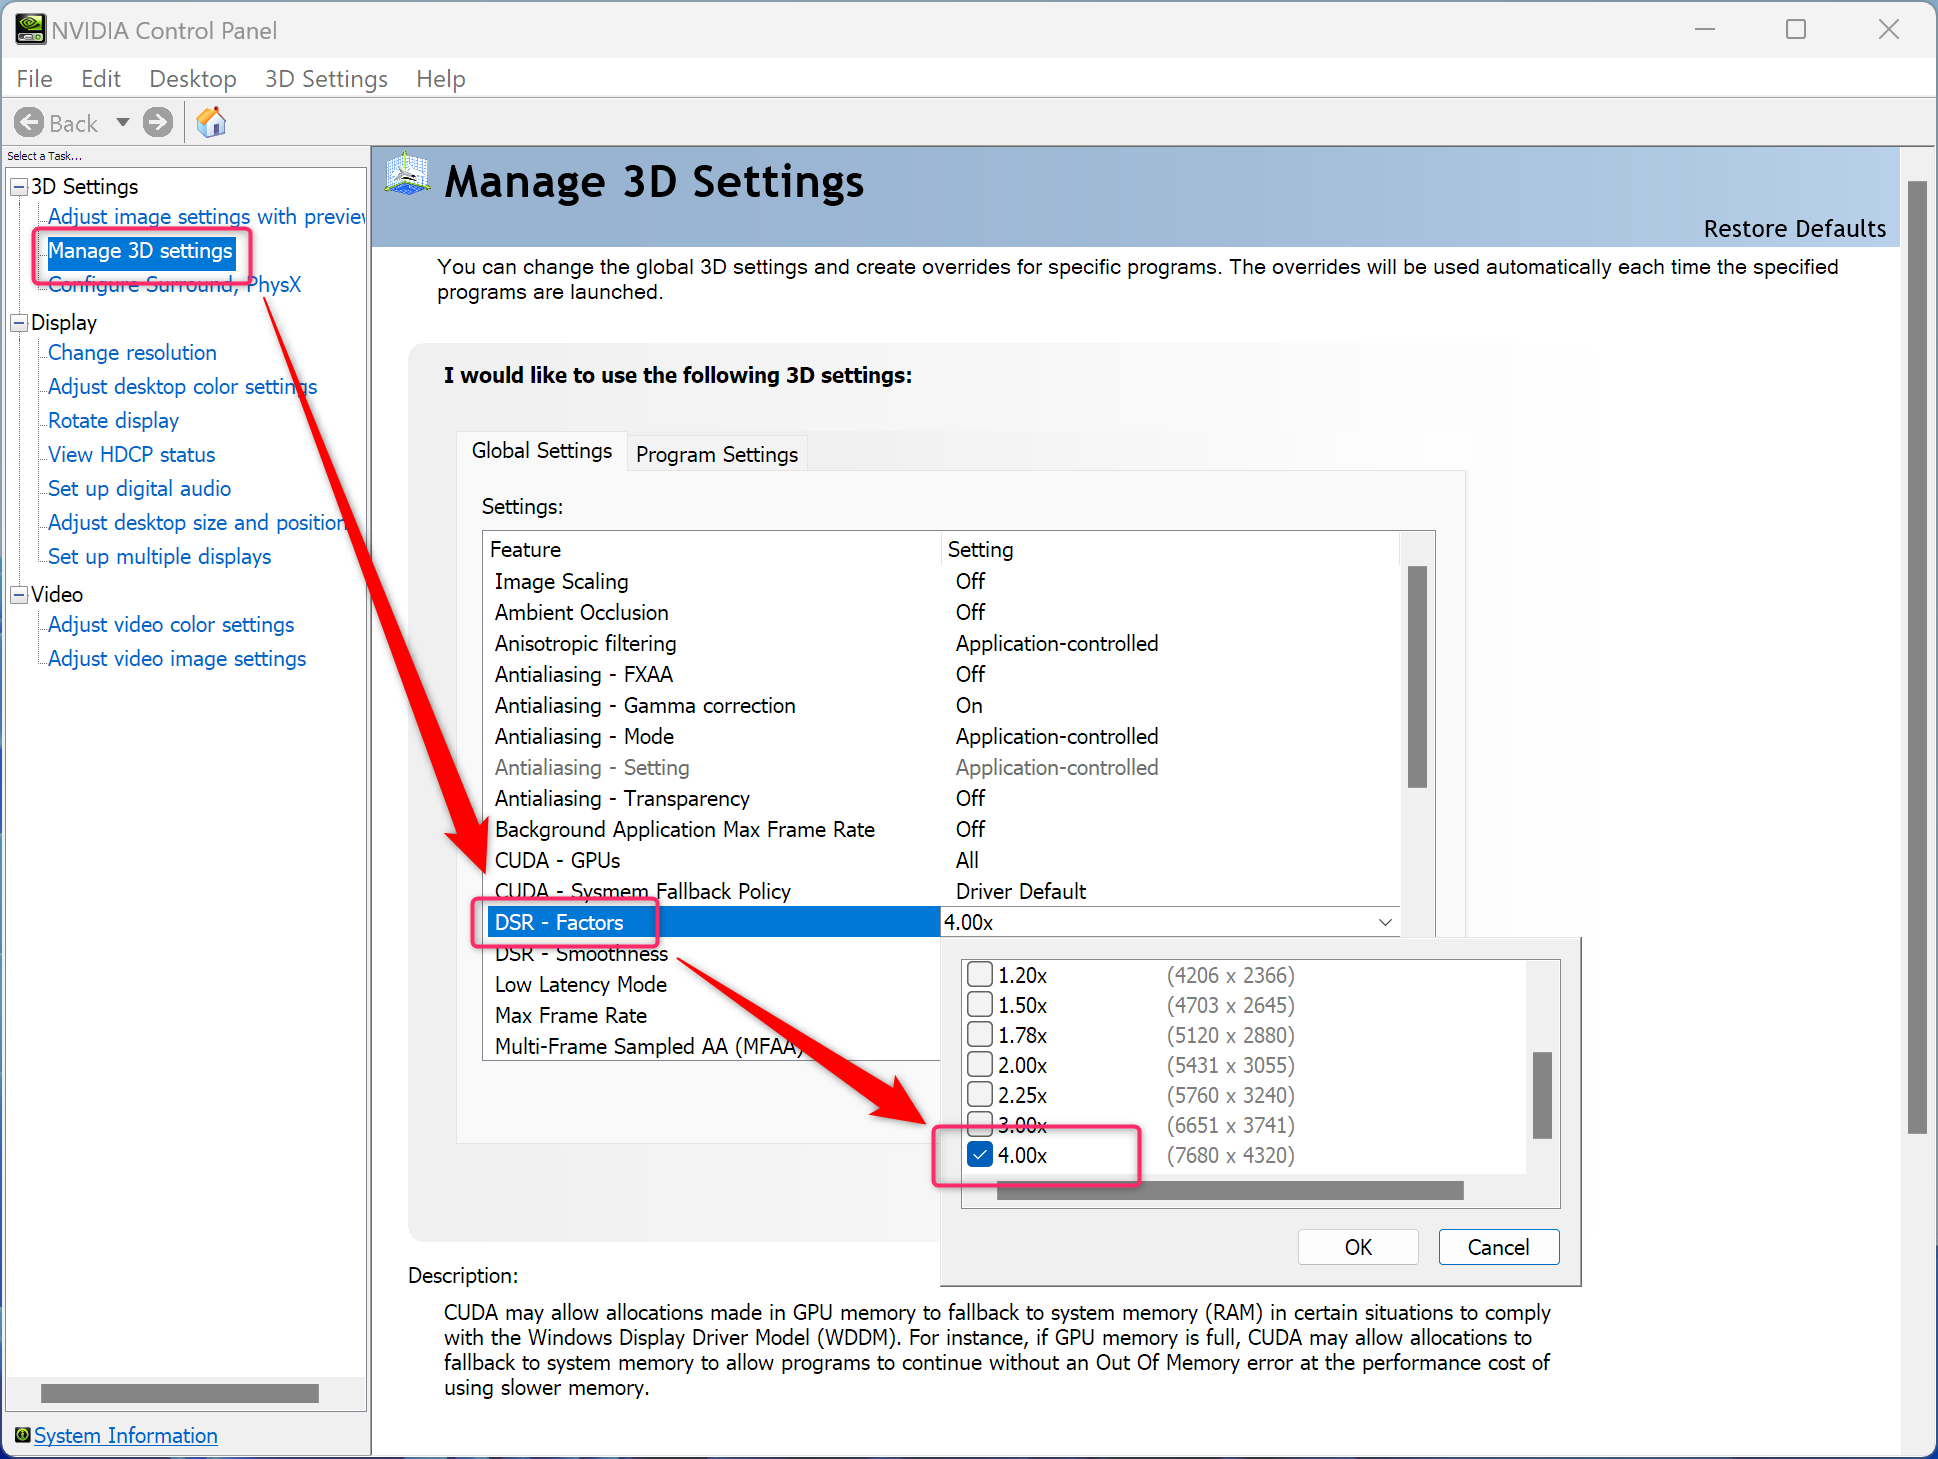
Right-tap on your desktop and select “NVIDIA Control Panel”.
If you’re free to’t see the option, punch “Show More Options.”
AMD
It should be located in the new menu.
Navigate to “Manage 3D prefs” in the left sidebar.
Scroll down to find “DSR - Factors” in the Global prefs tab.
Check the box next to “4.00x (Native Resolution)”.
Click “Apply” at the bottom of the window.
- kill the NVIDIA Control Panel and right-hit your desktop again.
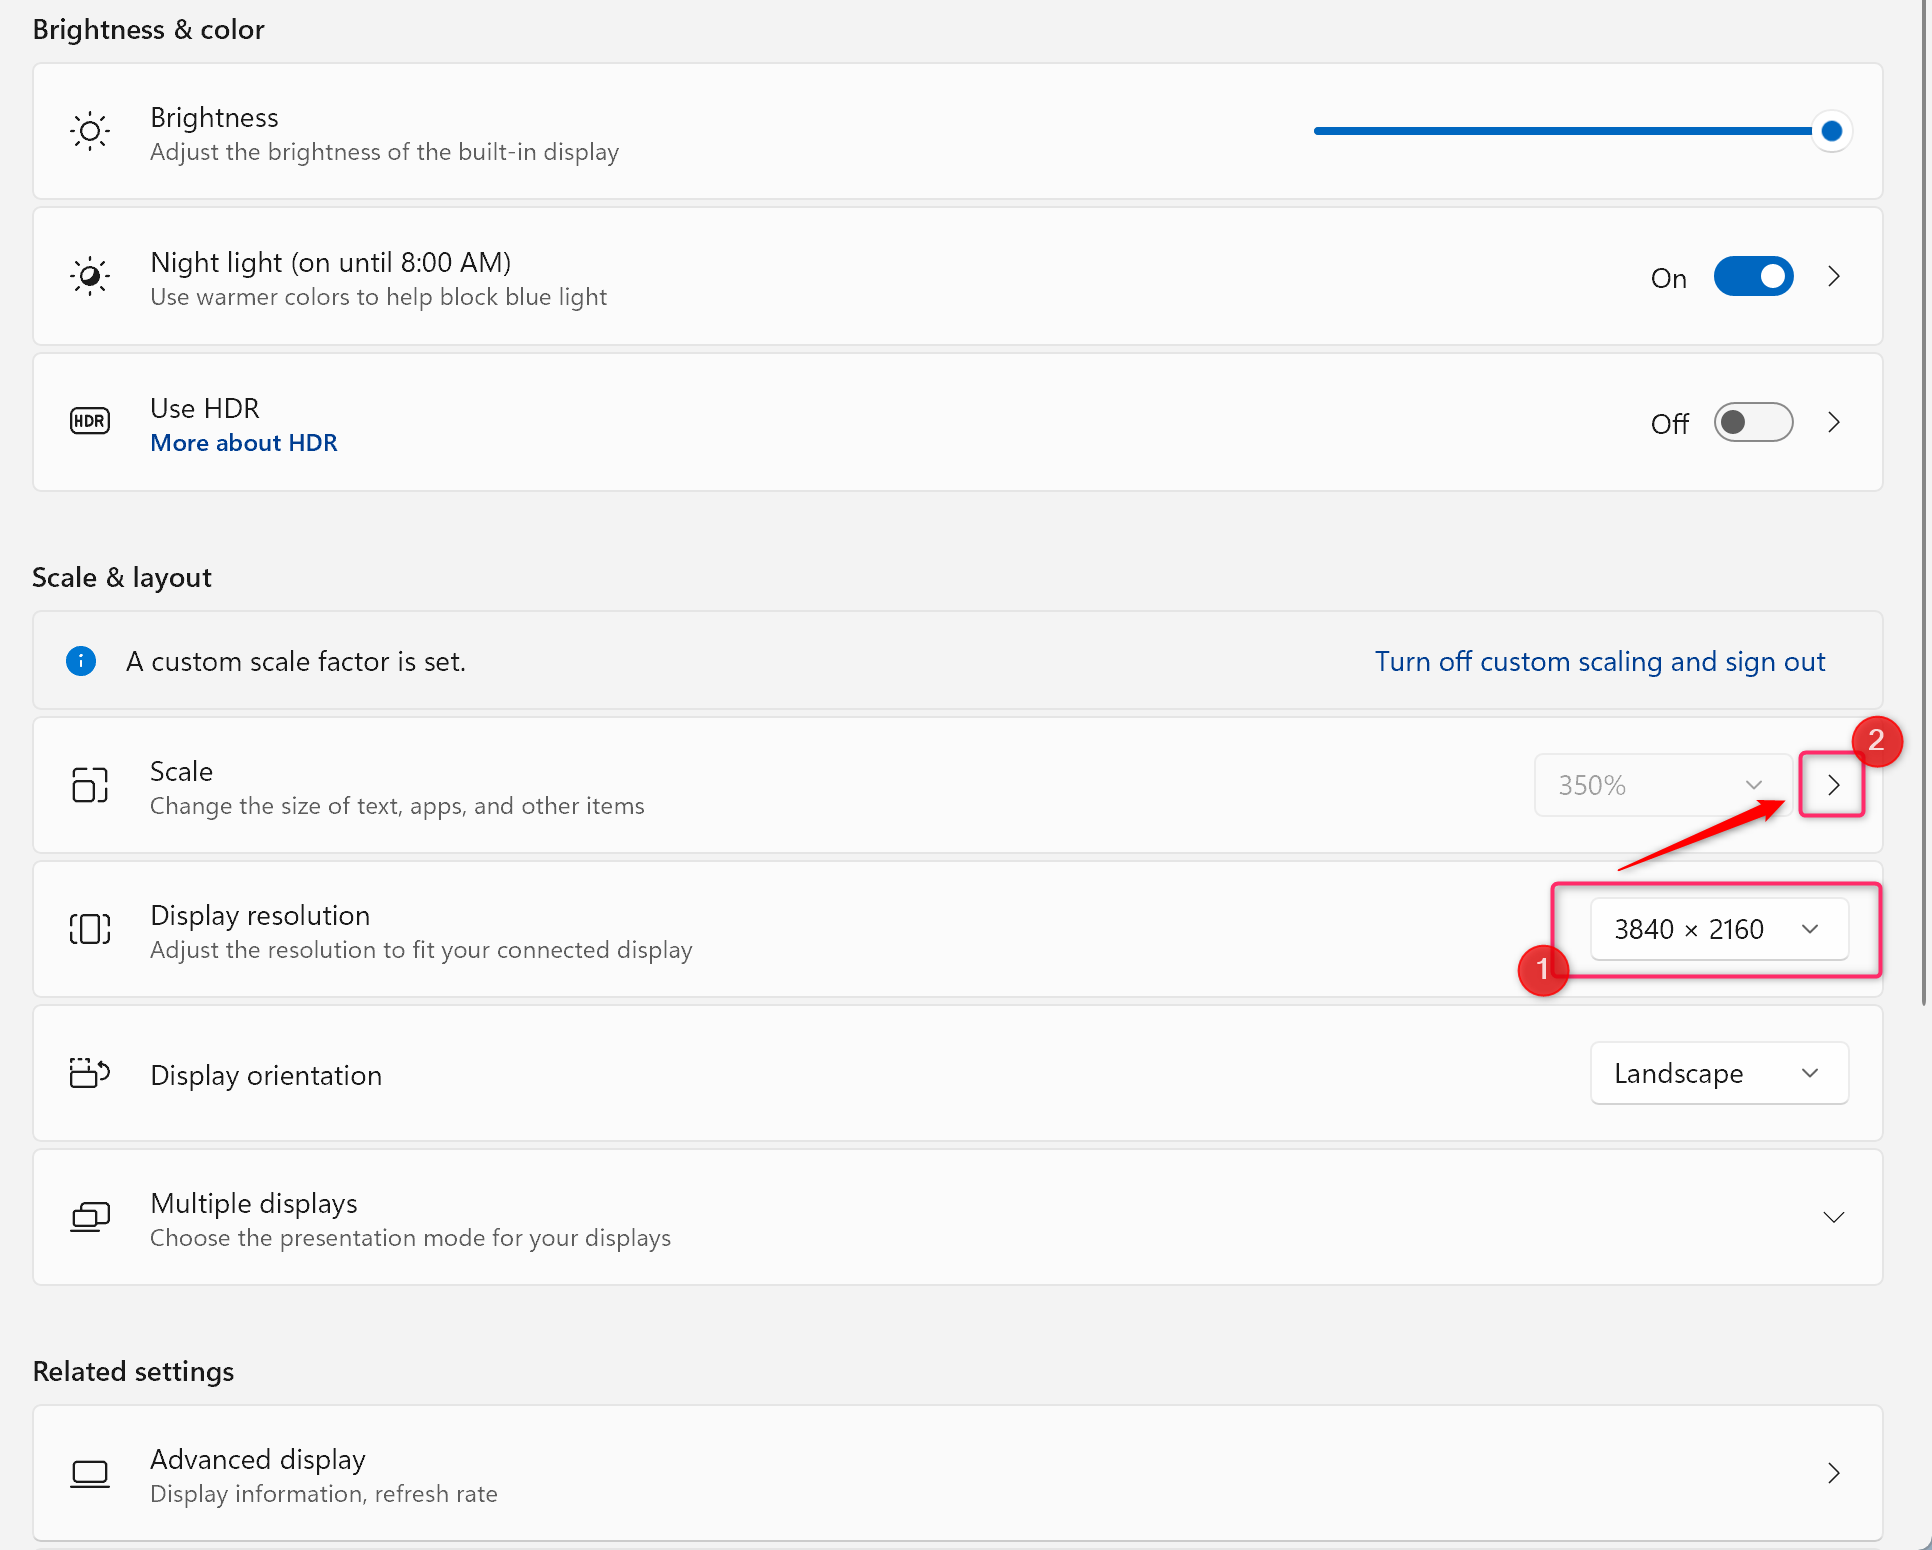
Select “Display configs” and choose “3840 x 2160” as Display Resolution.
After that, go into the Scale option and edit it to 200%.
Now, take your screenshots using your preferred method (like Windows+Print Screen).

Go back to Display tweaks and revert to your original 1080p resolution.
You now have a 4K screenshot.
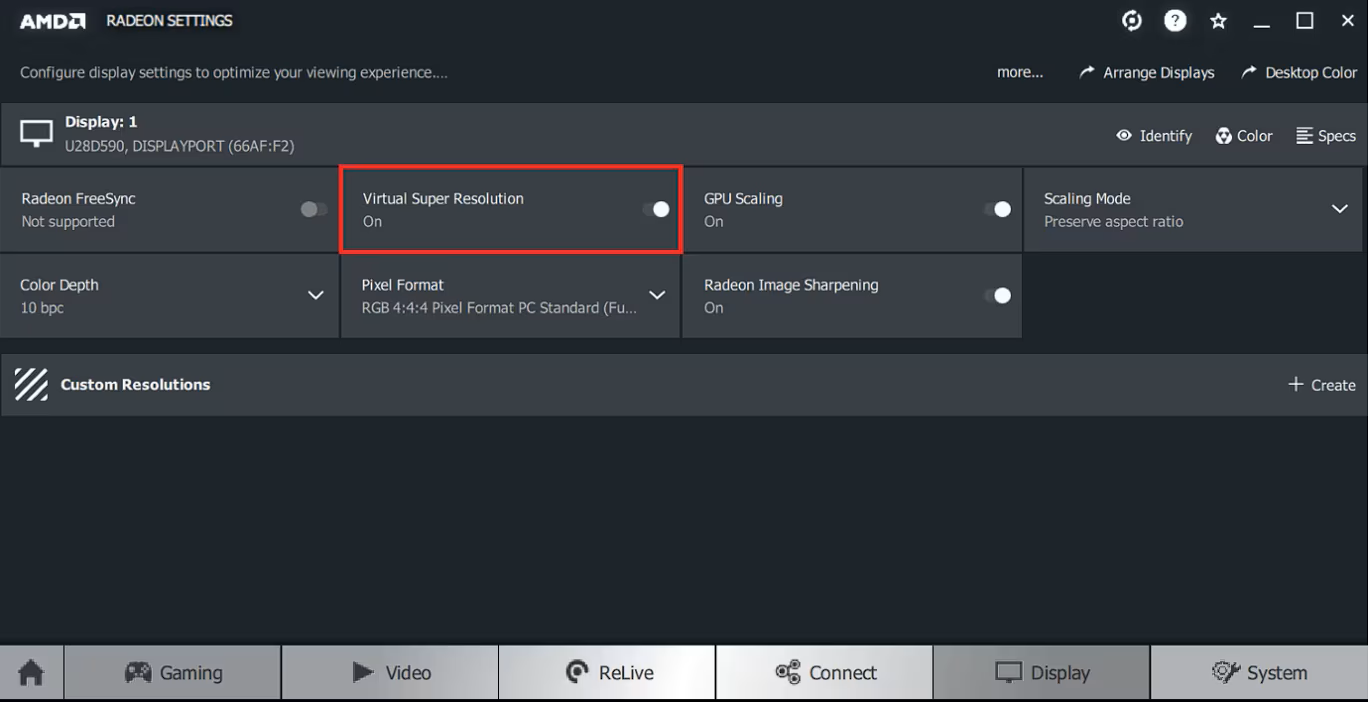
For AMD GPU Users:
AMD calls their supersampling feature Virtual Super Resolution (VSR).
Here’s how to use it:
1.
Open AMD Radeon controls.
- choose the “Display” tab.
Toggle on “Virtual Super Resolution.”
Close AMD Radeon parameters and right-punch your desktop.
Select “Display tweaks” and choose “3840 x 2160” resolution.
Revert to your original 1080p resolution.
Potential Drawbacks and Limitations
While these methods are incredibly useful, they’re not without their drawbacks.
First and foremost,rendering at 4K will strain your GPU.
You might notice slowdowns and non-optimal performance in graphically intensive applications or games compared to running at 1080p.
Don’t forget to revert to your original resolution after taking your screenshot.
Running your 1080p monitor at 4K for extended periods can strain your GPU.
The image on your screen is still limited by your 1080p display.
Now adhere to these instructions:
1.
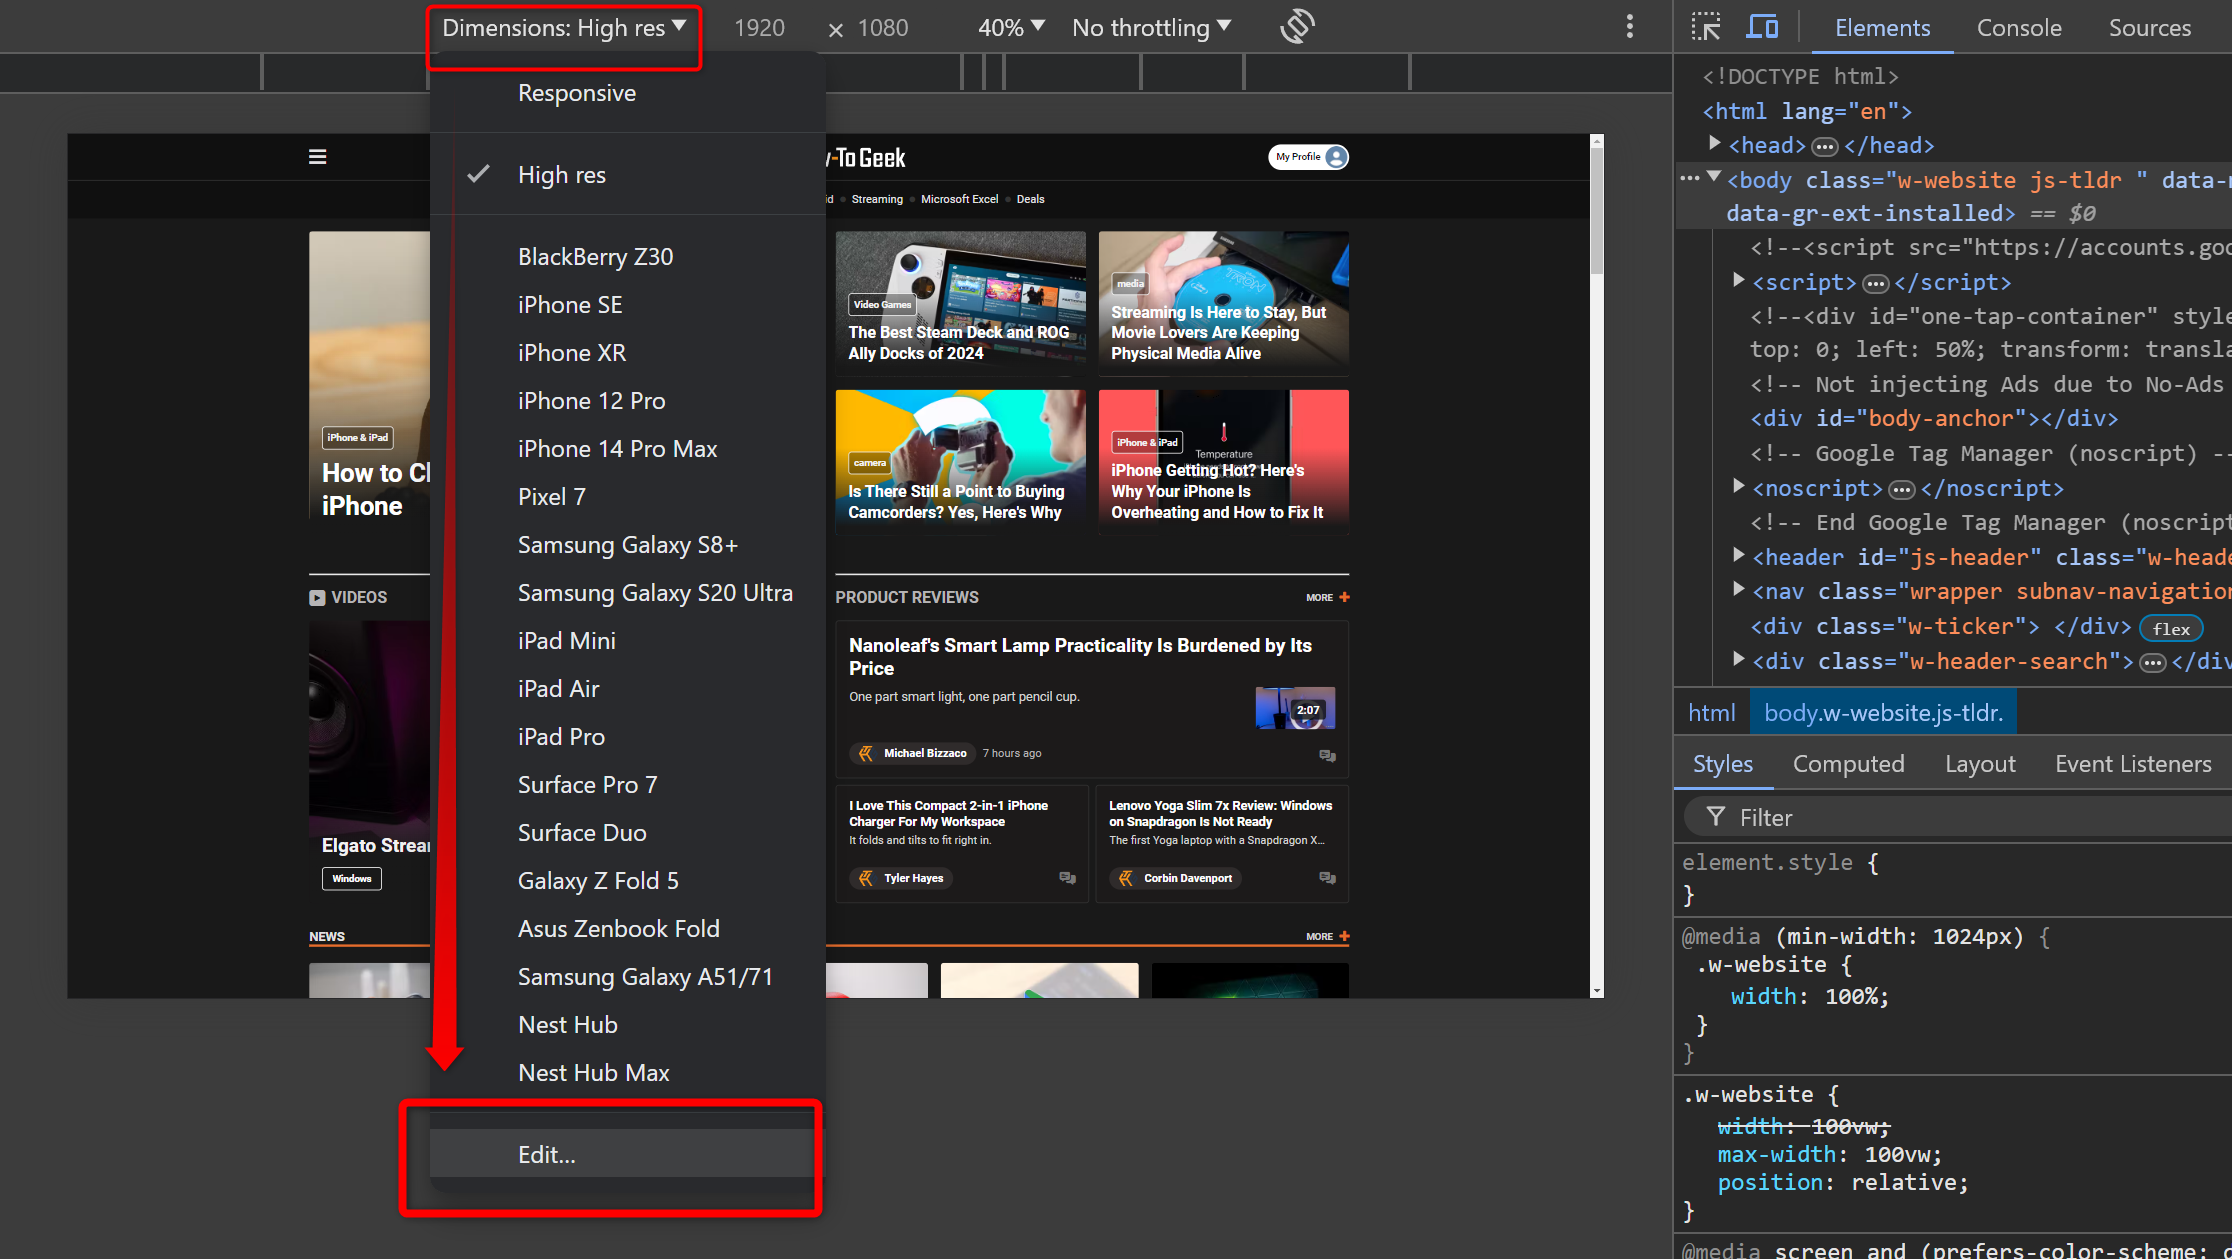
Press Ctrl+Shift+i (or Cmd+Option+i on Mac) to open Developer Tools.
Press Ctrl+Shift+M (or Cmd+Option+M on Mac) to toggle the machine toolbar.
In the machine toolbar, nudge the “Responsive” dropdown and select “Edit.”
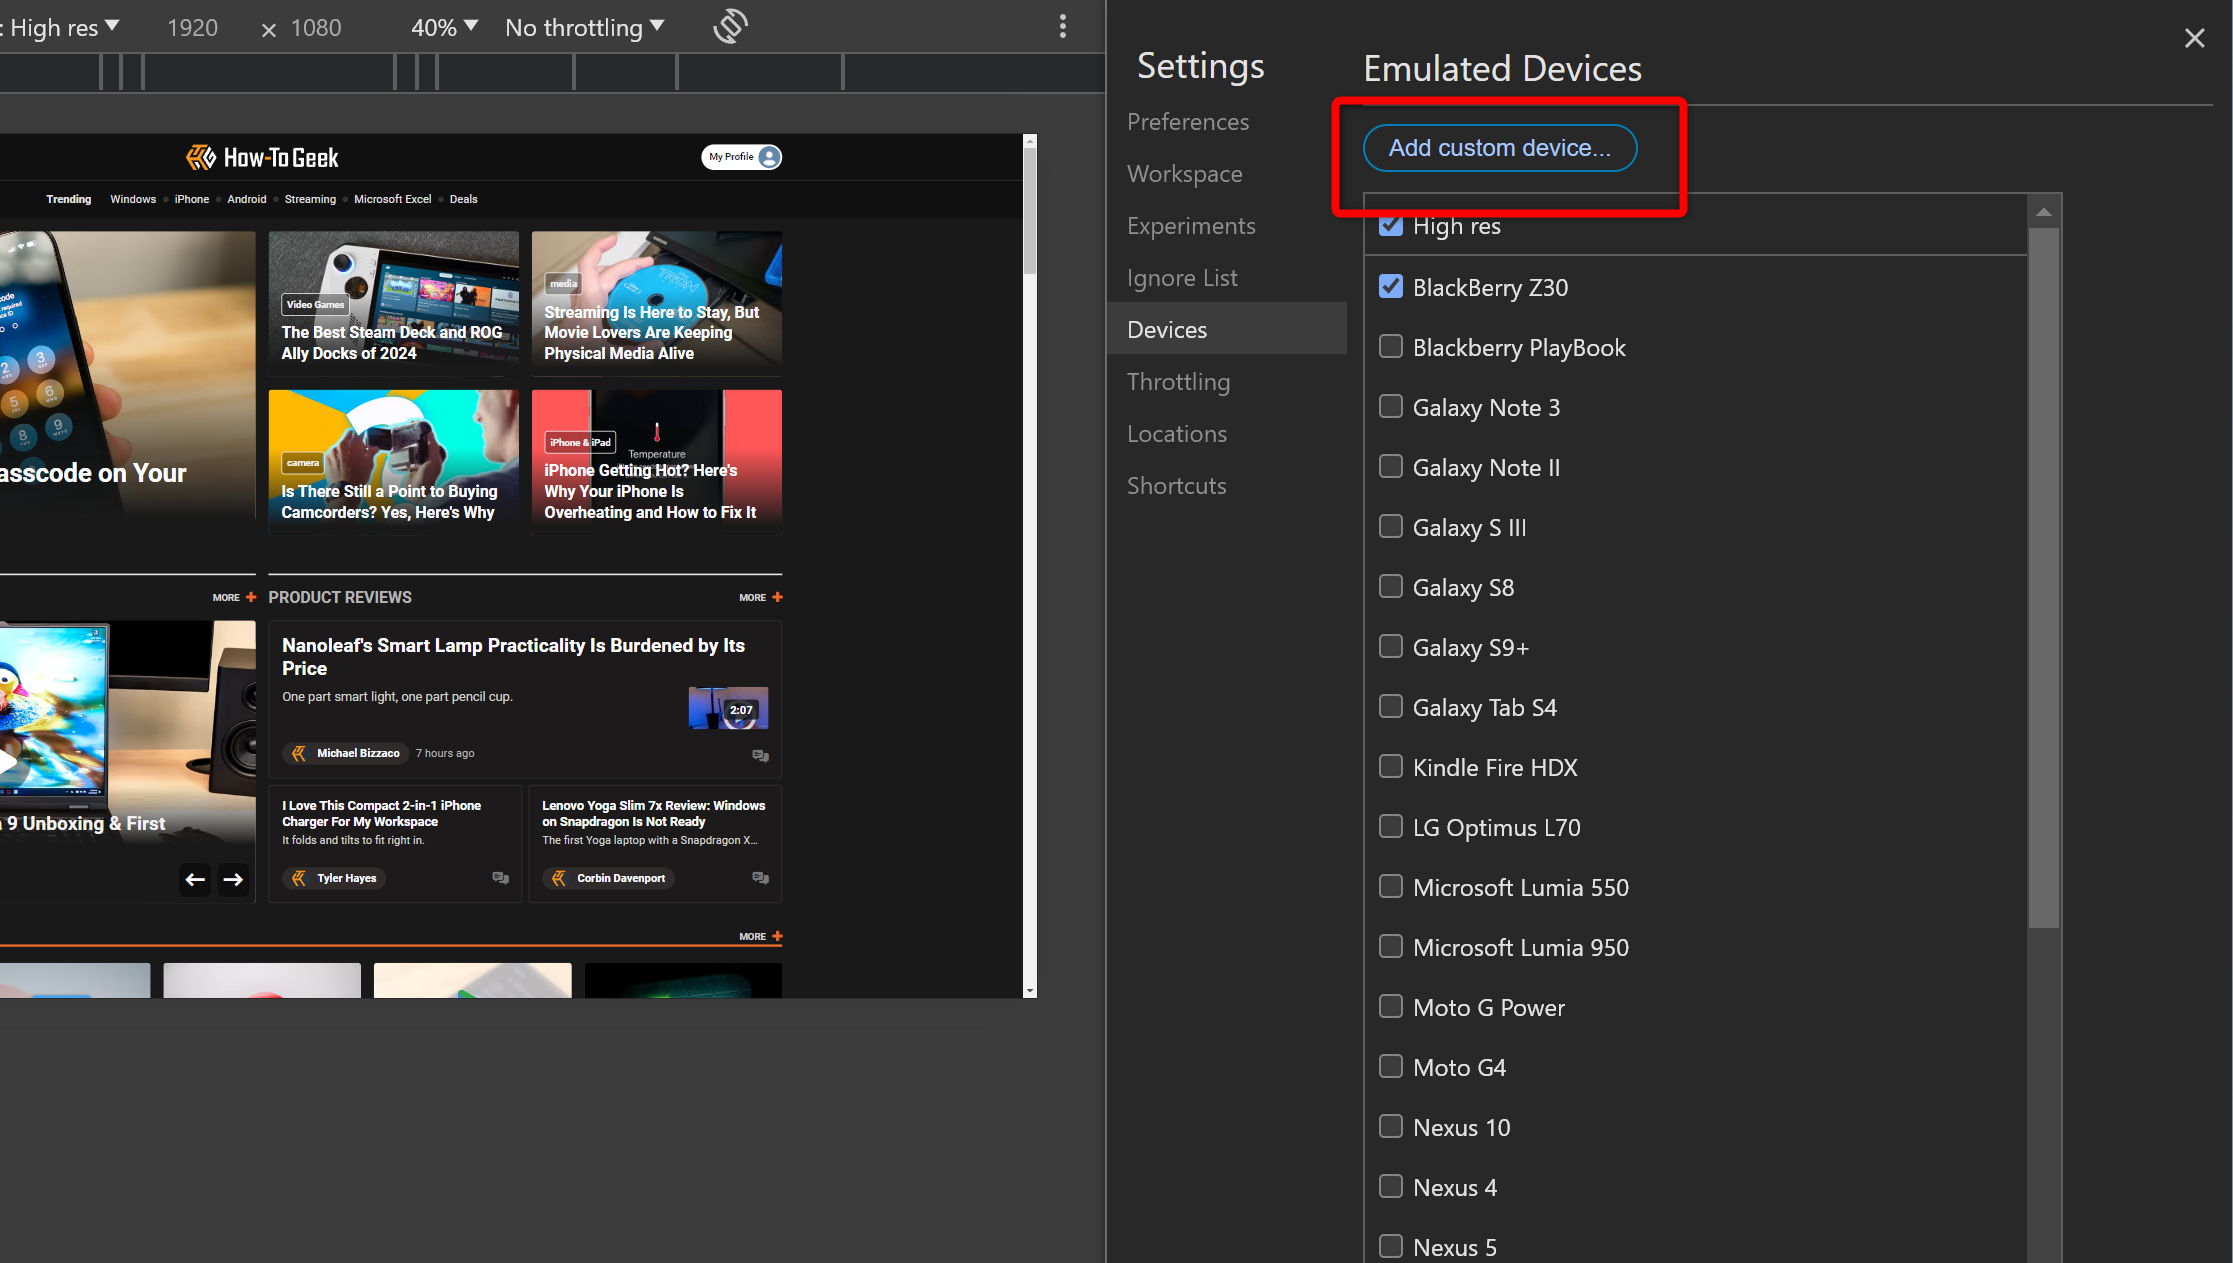
- punch"Add Custom unit."
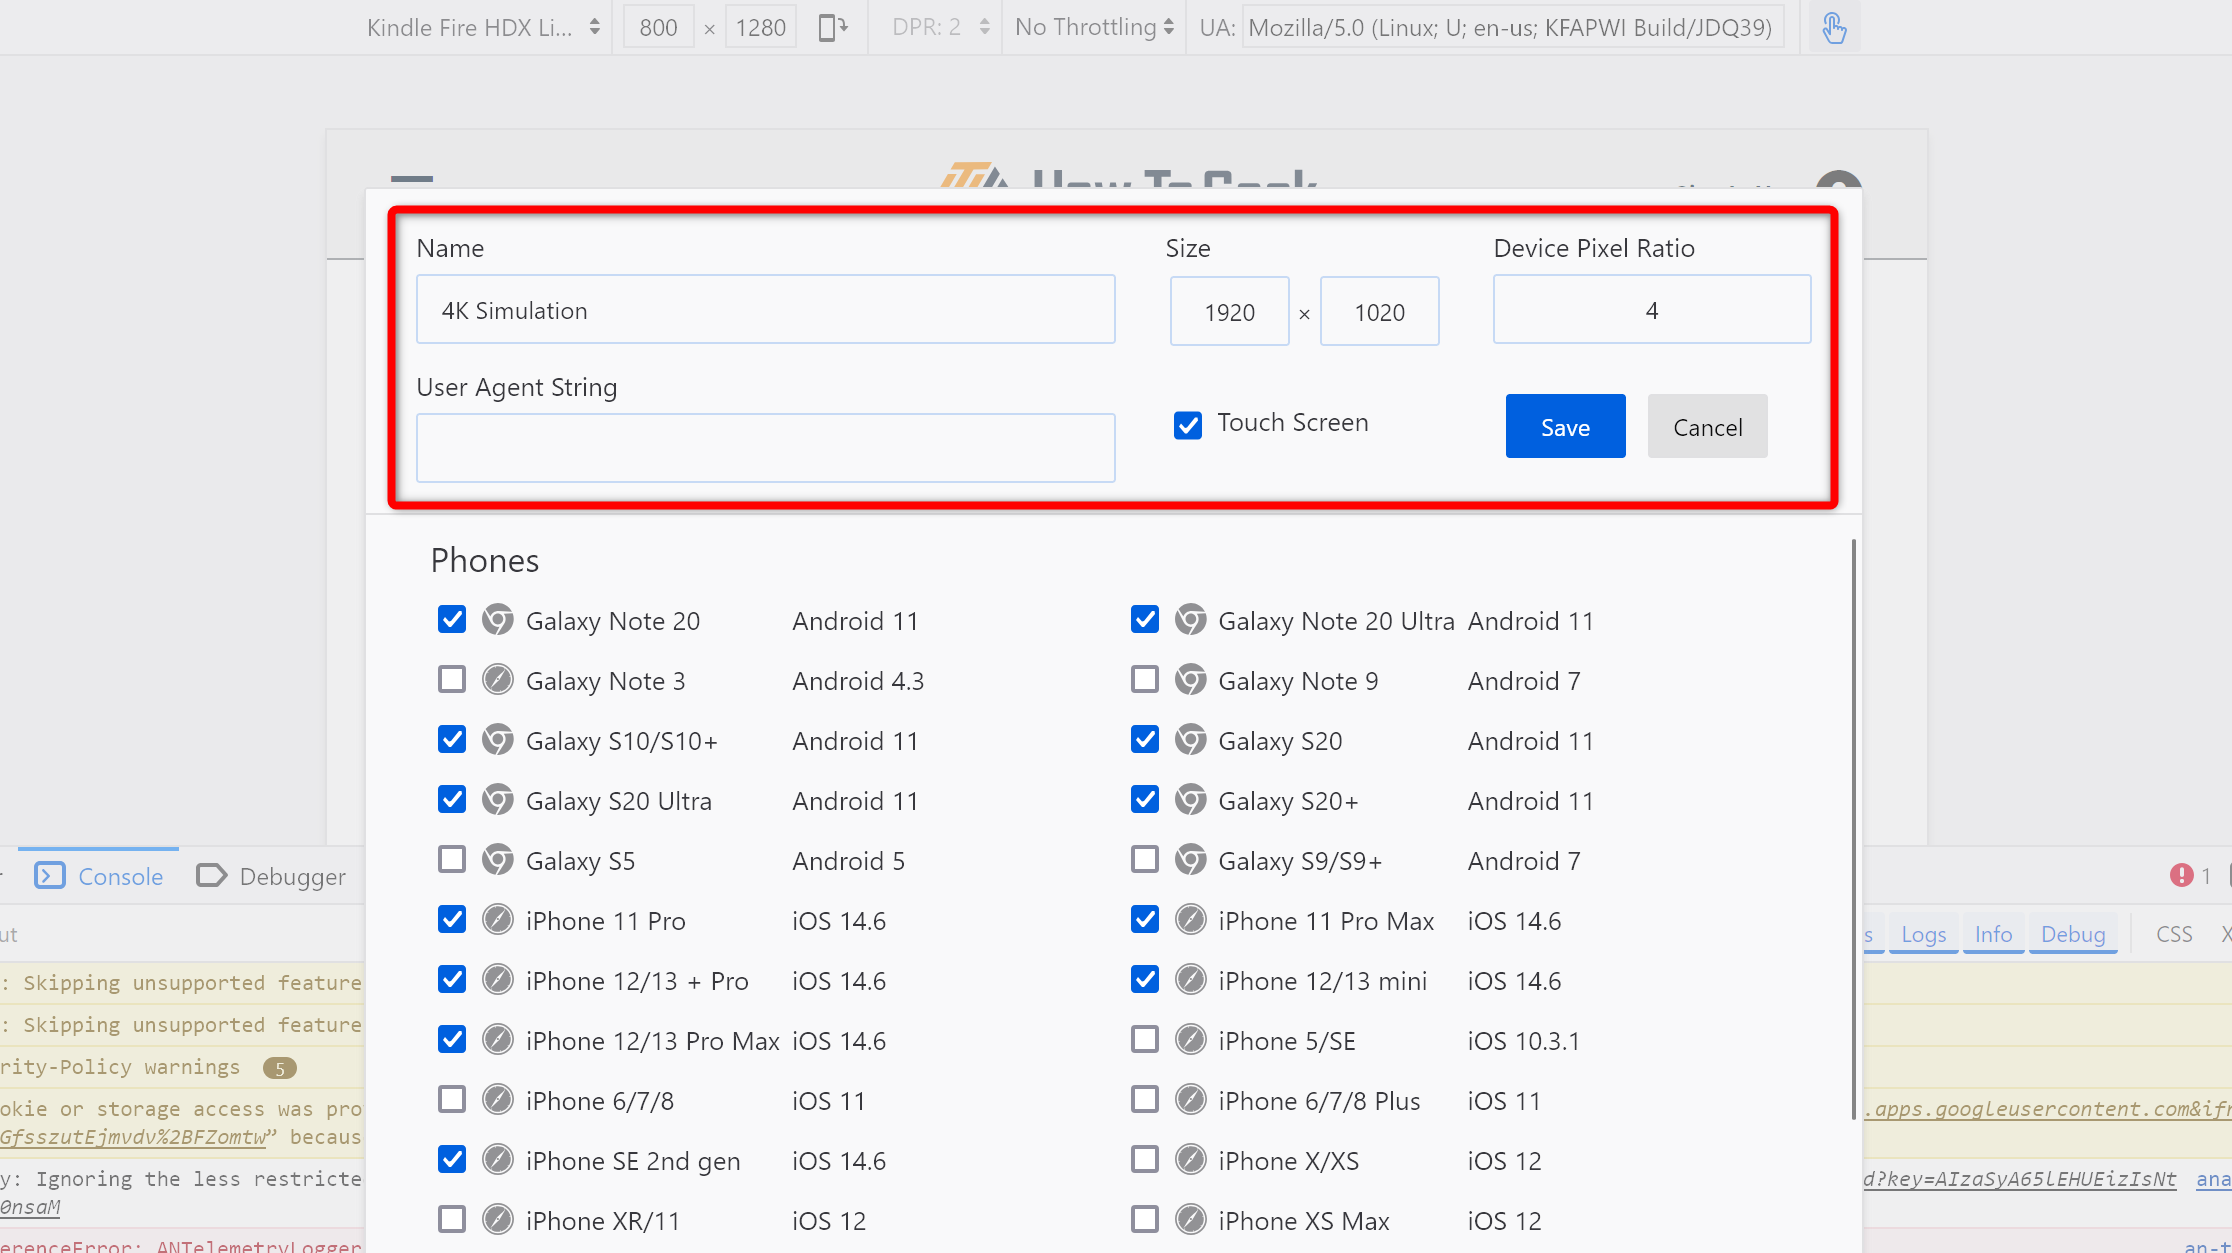
Enter these tweaks:
- tap on Save to save these prefs as a new Custom rig.
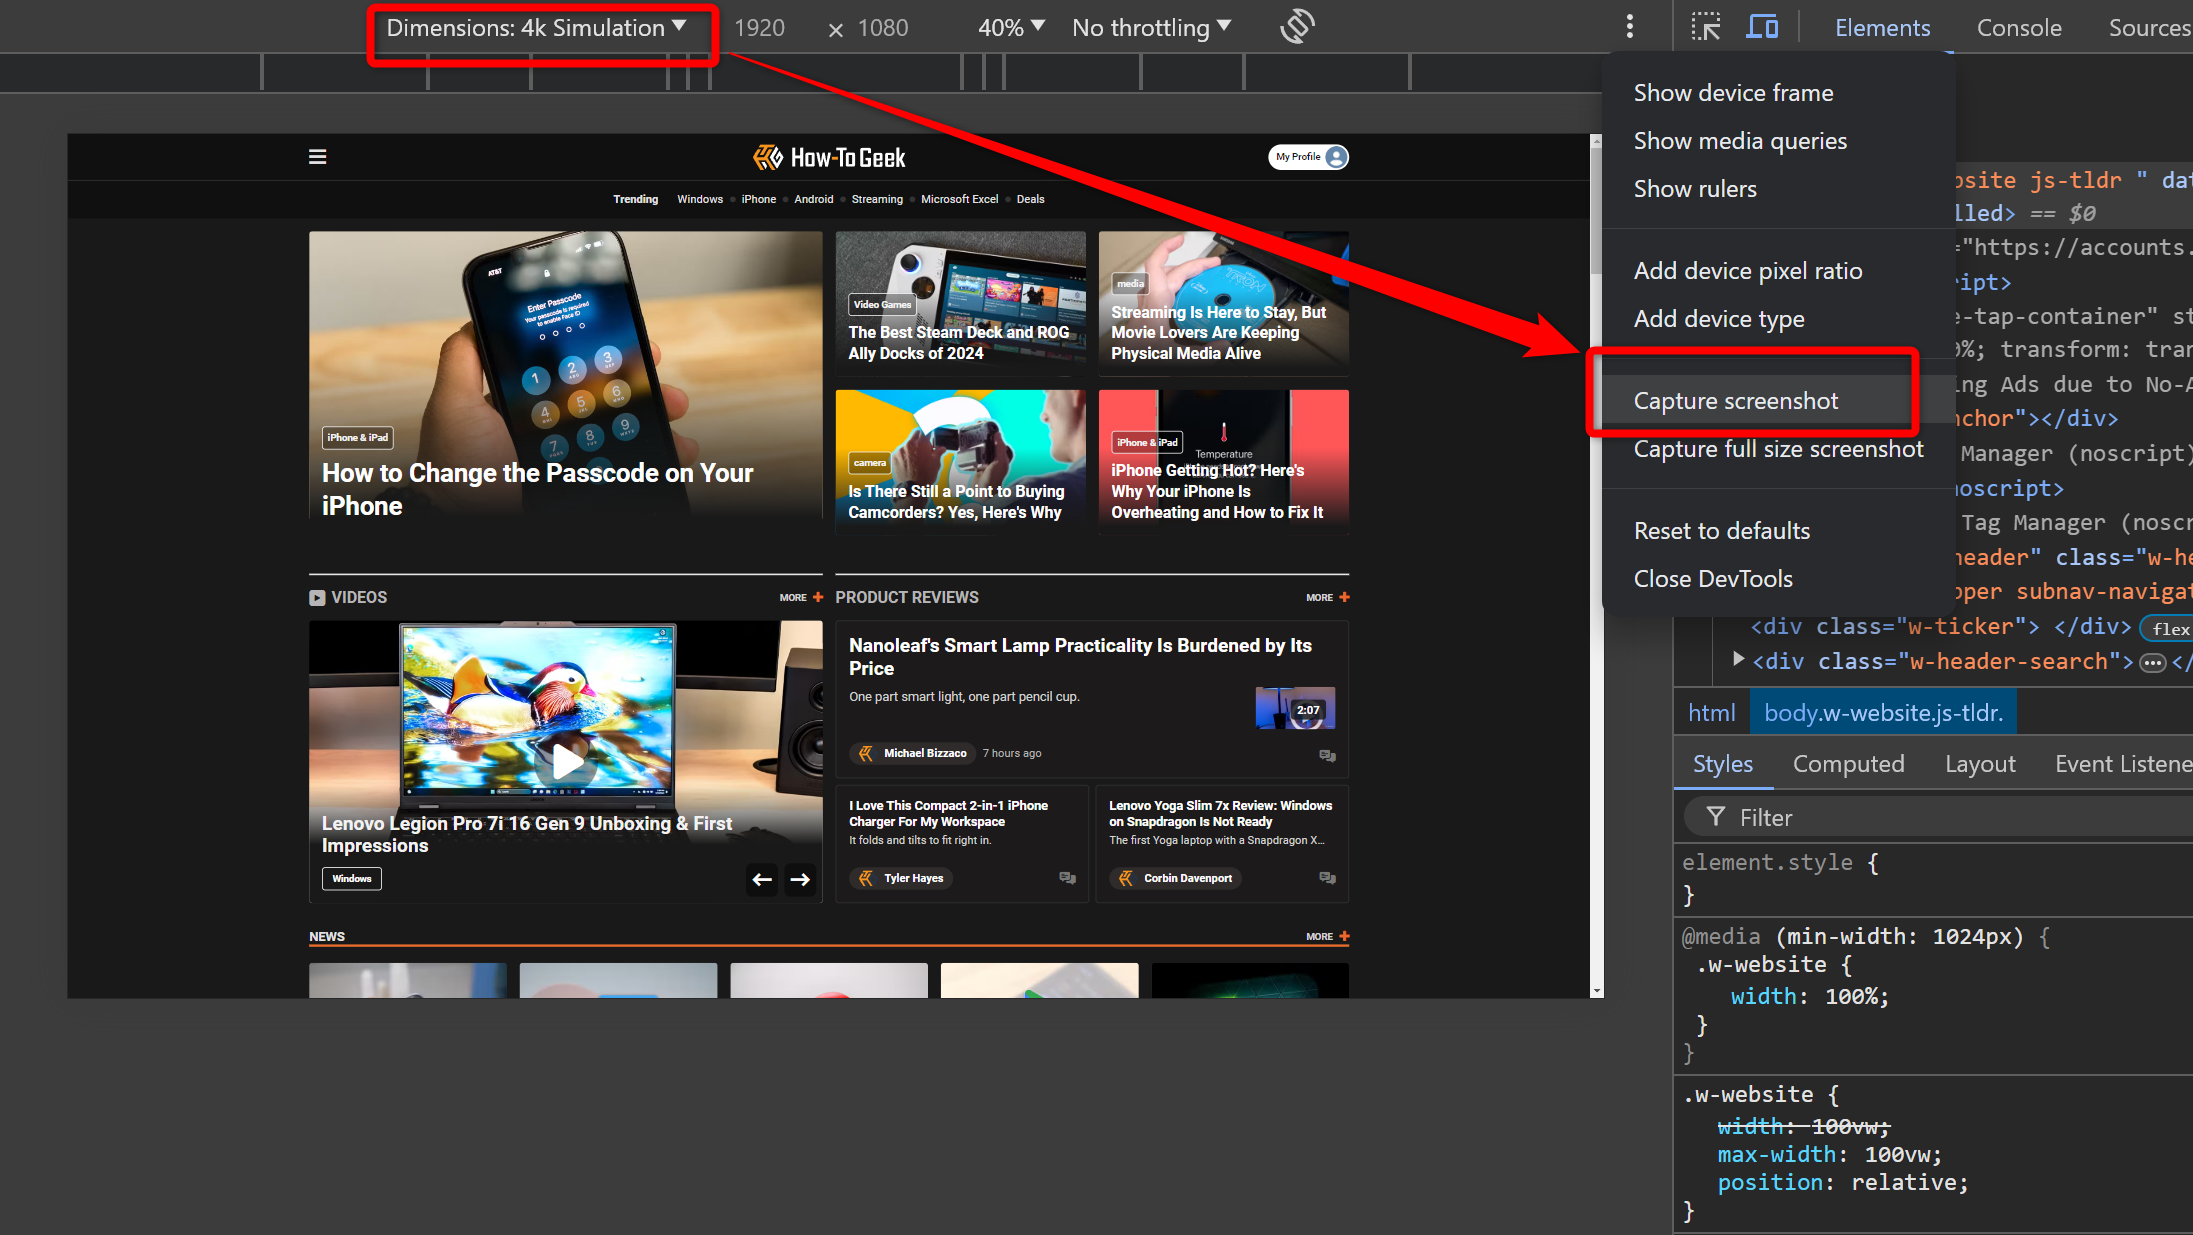
Select your new 4K equipment from the dropdown.
It should be the topmost option.
Use Chrome’s built-in screenshot tool in Developer Tools to capture your 4K screenshot.
Surprisingly, the process is very similar, just the UI is different.
First, visit the website or web app you want to capture and then take these actions:
1.
Press Ctrl+Shift+i (or Cmd+Option+I on Mac) to open Developer Tools.
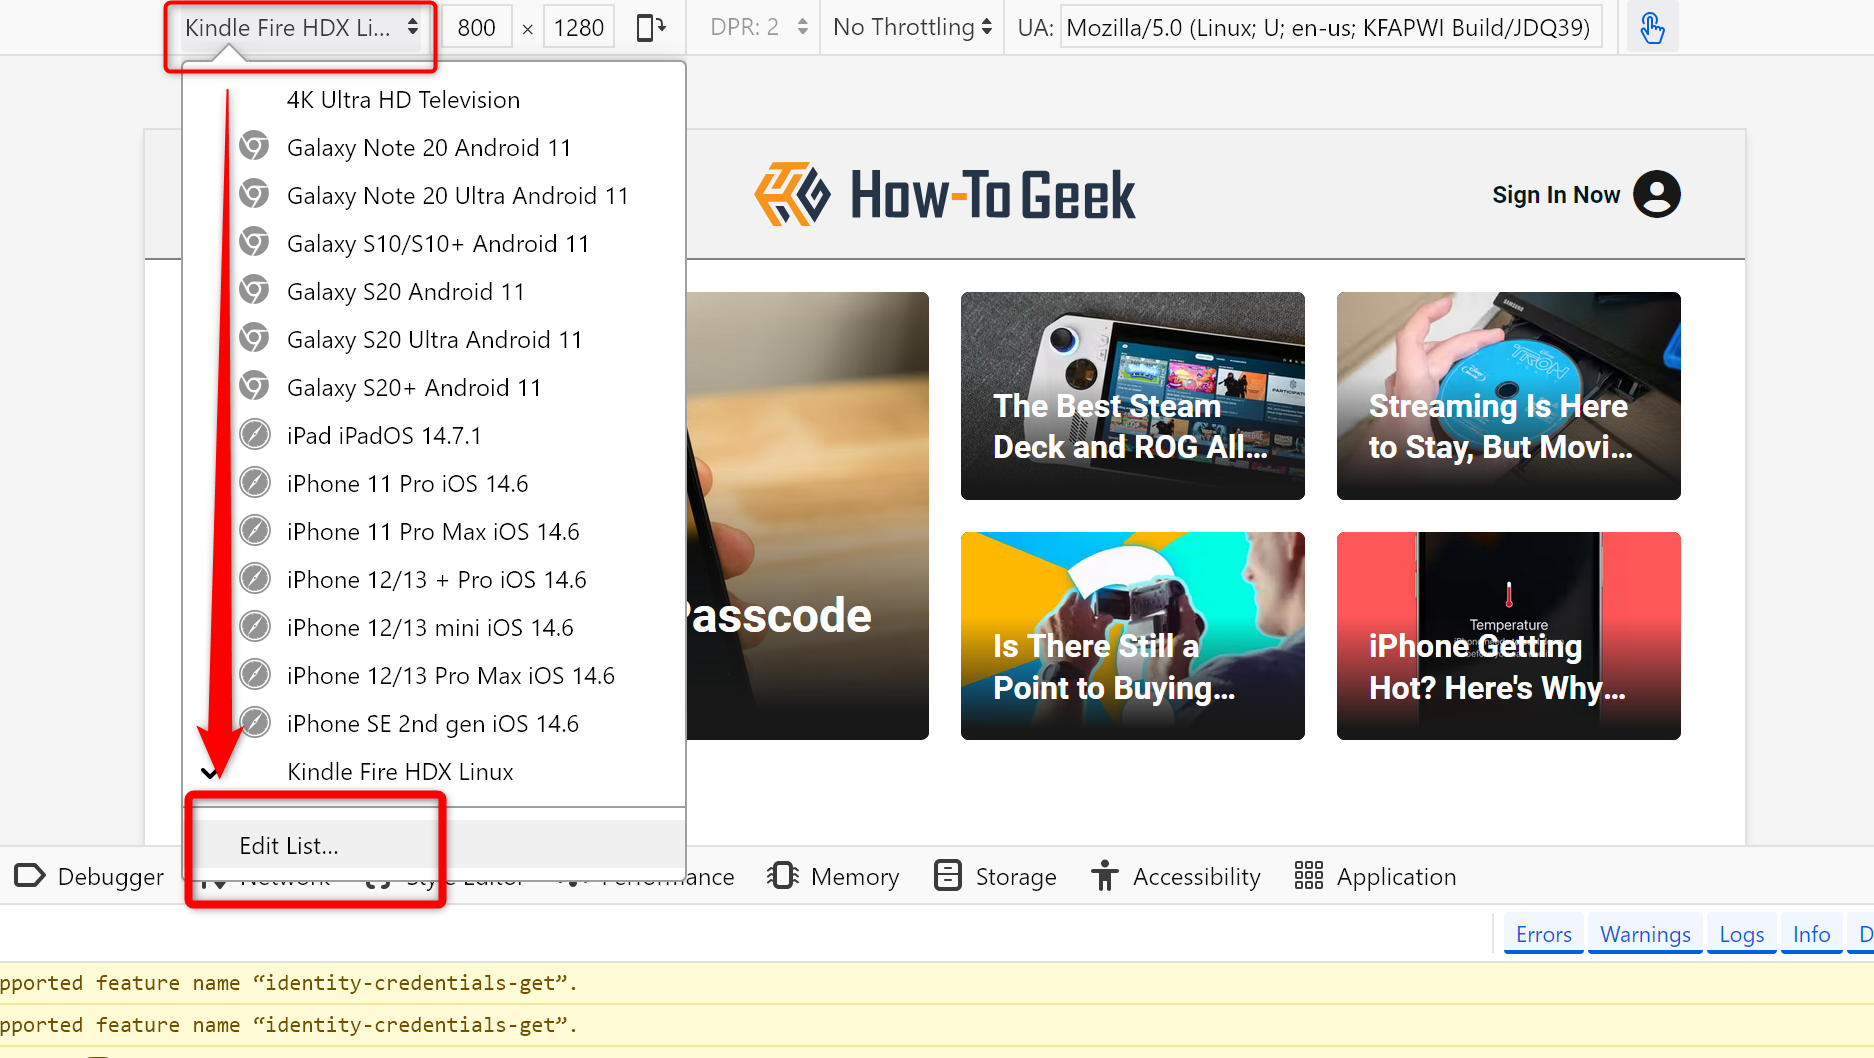
In the rig toolbar, tap on the “Responsive” dropdown and select “Edit List”.
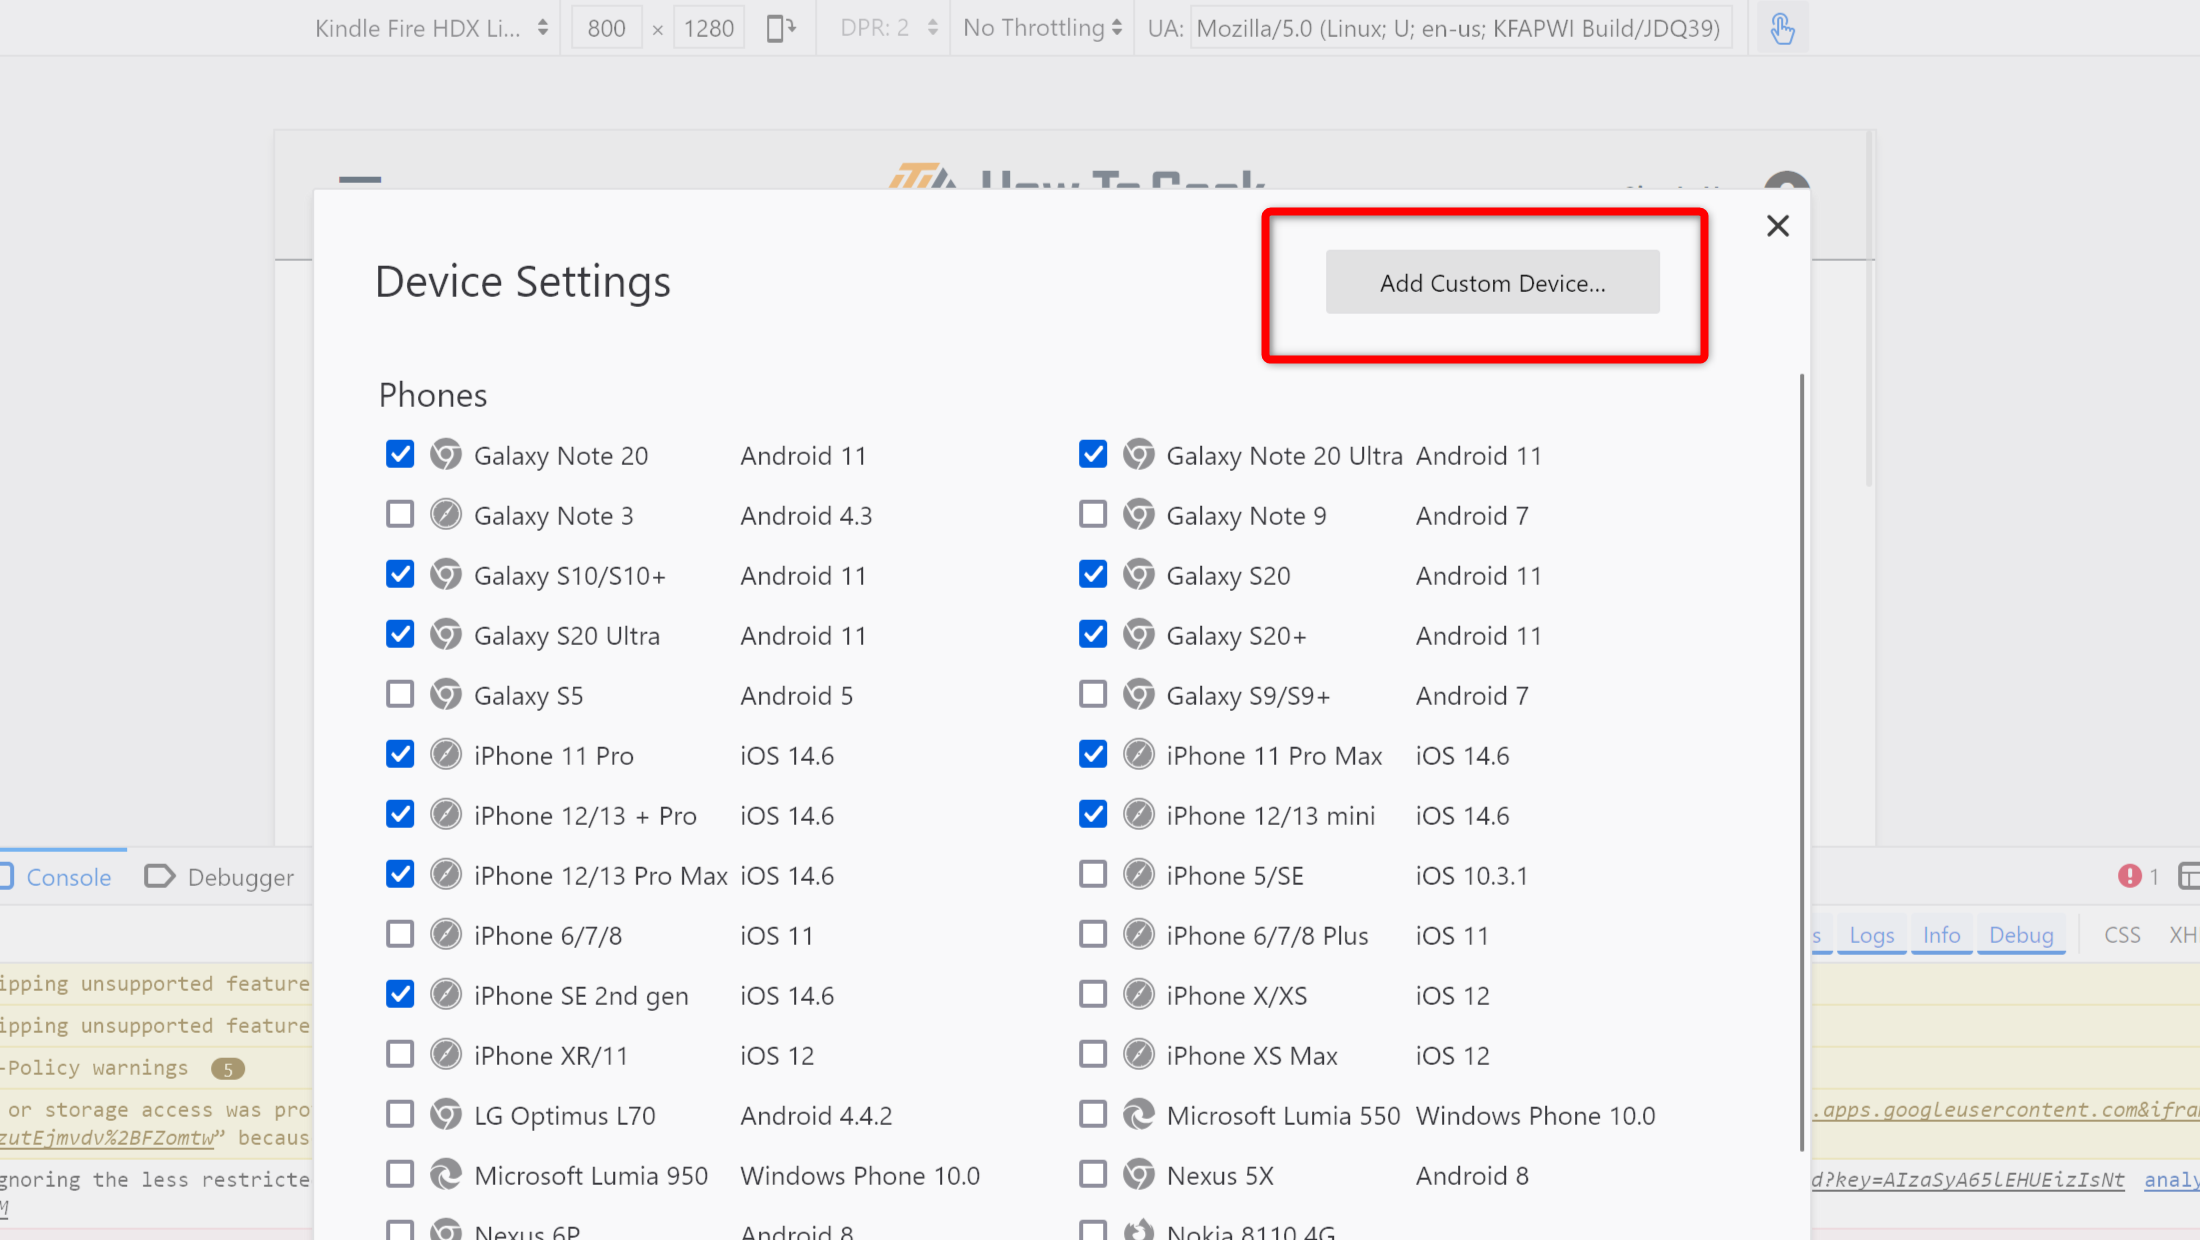
punch “Add Custom machine.”
select Save to save these prefs as a new Custom unit.
Select your new 4K rig from the dropdown.
It should be the top option.
Use Firefoxs built-in screenshot tool in Developer Tools to capture your screenshot.
It is located on the top-right corner of the screen.
There you have ityou’re now equipped to take stunning 4K screenshots on your humble 1080p monitor.
