Note that you should not attempt this if you aren’t ready to troubleshoot any problems that might occur.
The first issue we encounter is that computers with pre-installed operating systems take up the entire drive.
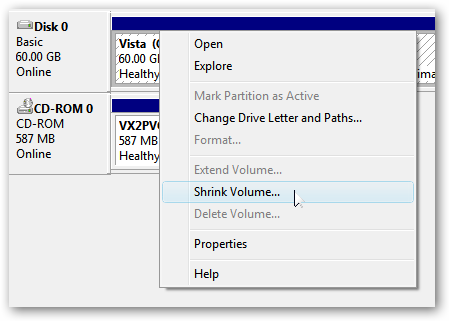
Find the Disk Management item in the list and select that.

Now we’ll shrink our volume down by right-clicking on the main hard drive and choosing Shrink Volume.
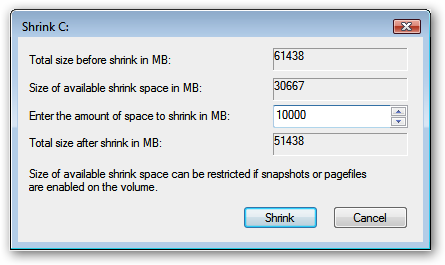
Whatever you do, don’t just use the default.
I chose roughly 10gb by entering 10000 into the amount.
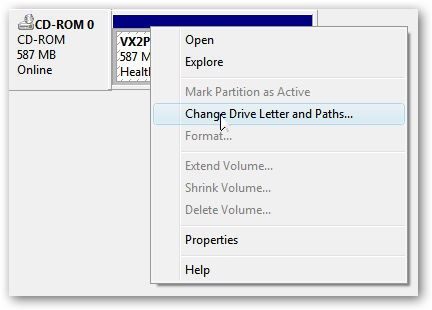
Right-punch the cd-rom drive in the list and choose Change Drive Letter and Paths from the menu.
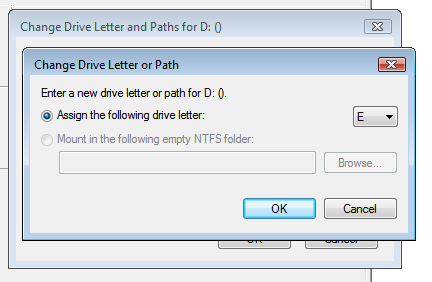
Now we’ll change the CD drive to use E: by selecting that in the drop-down.
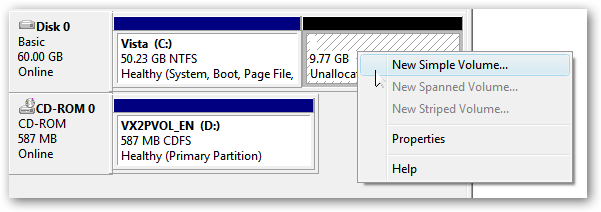
Right-choose the Unallocated free space area and then select New Simple Volume from the menu.
Now you will need to close out of disk management and reboot your machine.
This is because we can’t do the next step until we reboot.
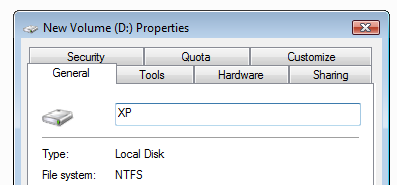
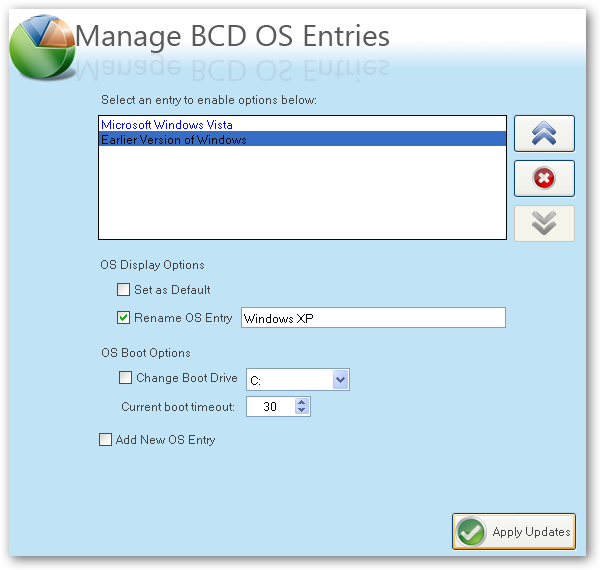
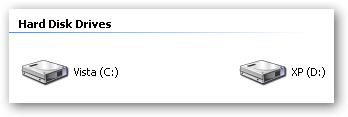
Give your partition a meaningful name like “XP”.
It would be wise to name the C: drive to “Vista” at this point as well.
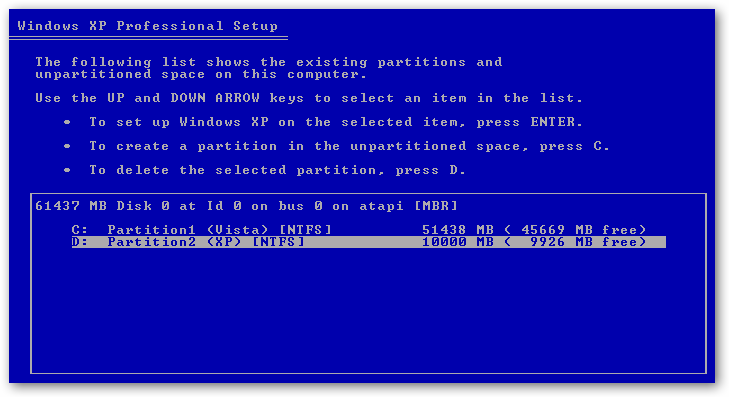
Now you’ll want to pop your XP cd into the drive and boot off it.
Whatever you do, don’t try and install onto your Vista partition!
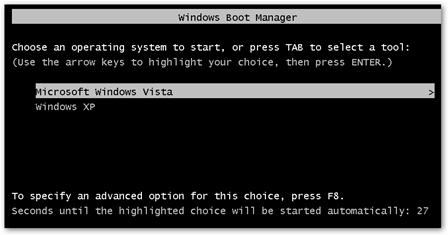
See how much cleaner it is now that we’ve labeled each partition distinctly?
Update:VistaBootPro is no longer free, but it’s possible for you to stilldownload the free version.
During the install you’ll be forced to roll out the .NET 2.0 framework.
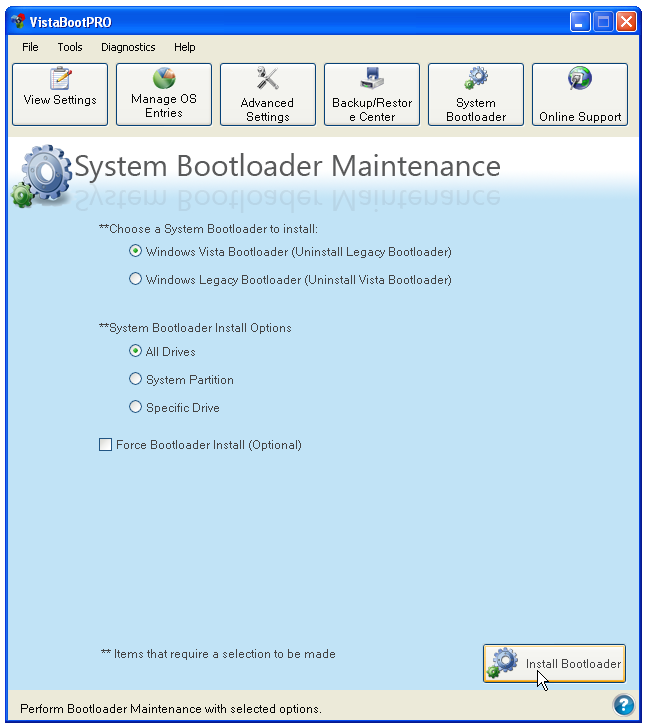
Open up VistaBootPRO and then punch the System Bootloader tab.
Or screw up your files.
If you have issues with using the shrink volume feature,check this articlefor some tips.