Quick Links
Reader Jeevus wrote in asking how to remove the “Troubleshoot Compatibility” item from the Windows context menu whenever you right-press an app—naturally, we were happy to explain how to do it, and share with the rest of you.
You’ll want to note that we’re not necessarily recommending that you remove this item, since it could be useful if you’rehaving compatibility issues with an app, but we’re fans of showing how to do something—also, we just like tinkering in the registry.
Removing Troubleshoot Compatibility
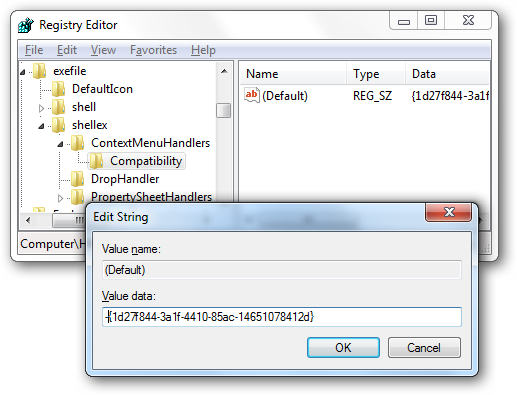
Open up regedit.exe through the Start Menu search or Run box, and then head down to the following registry key:
HKEY_CLASSES_ROOT\exefile\shellex\ContextMenuHandlers\Compatibility
You should see a key over on the right-hand side, and if you add a “-” character to the beginning of the value, the item will disappear entirely from the context menu for executables, at least .

Of course, you could also delete the key, but just don’t just delete it without testing this way out first.
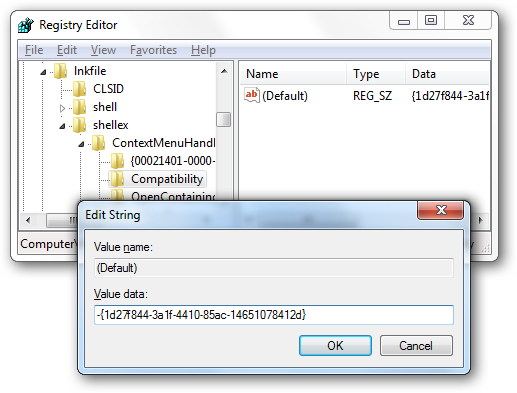
Next you’ll want to head down to this registry key, which does the same thing for utility shortcuts:
HKEY_CLASSES_ROOT\lnkfile\shellex\ContextMenuHandlers\Compatibility
Make the same change on the right-hand side.
It’s probably a better bet to right-choose the key on the left-hand pane, choose Export, and then save it out to a registry file that can be restored later by simply double-clicking on it.
Once you’ve done that, then you could remove the key entirely, which will reduce the registry calls for this item, and give you a solid 0.000000000000001% speed increase.
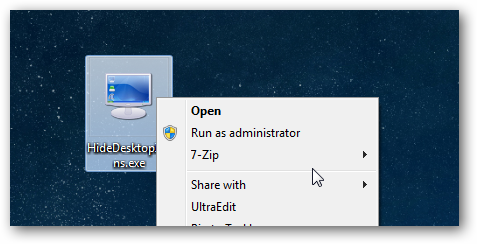
At this point you might right-punch an app file, and you won’t see the troubleshoot compatibility item anymore.
check that to check out our guide tousing Program Compatibility Mode in Windows 7before you make this registry hack—it’s really a very useful feature.