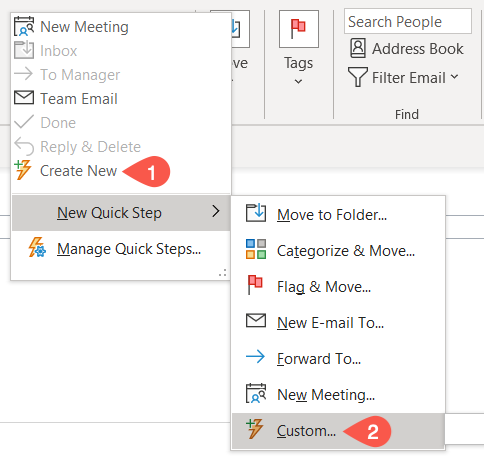
While Outlook gives you some handy premade Quick Steps, you may want to create your own.
Choose “Create New.”
Alternatively, move your cursor to New Quick Step and pick “Custom” in the pop-out menu.

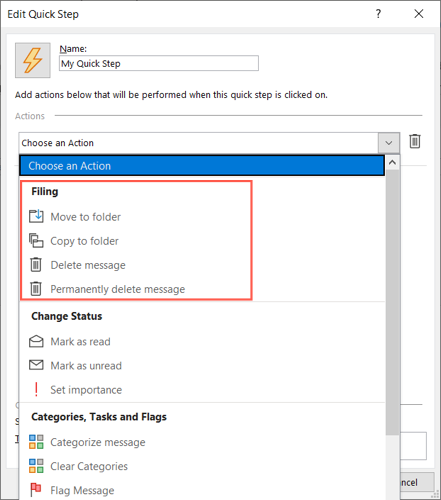
There are several categories to pick from when creating a custom Quick Step.
Each offers a useful automation that can truly save you time.
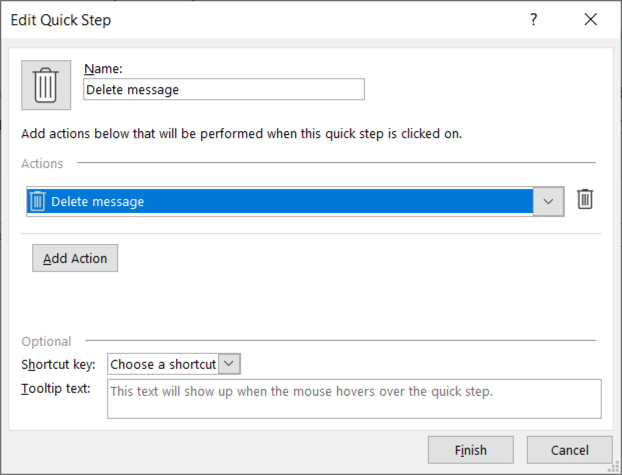
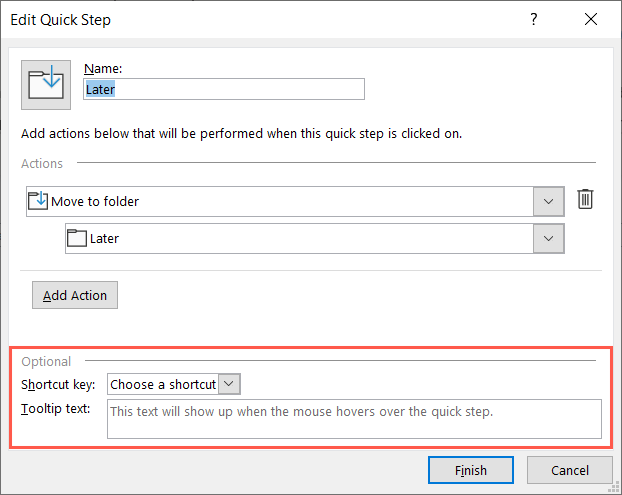
Give your Quick Step a name at the top of the window.
If you choose one of the deletion options, you don’t have to pick anything else.
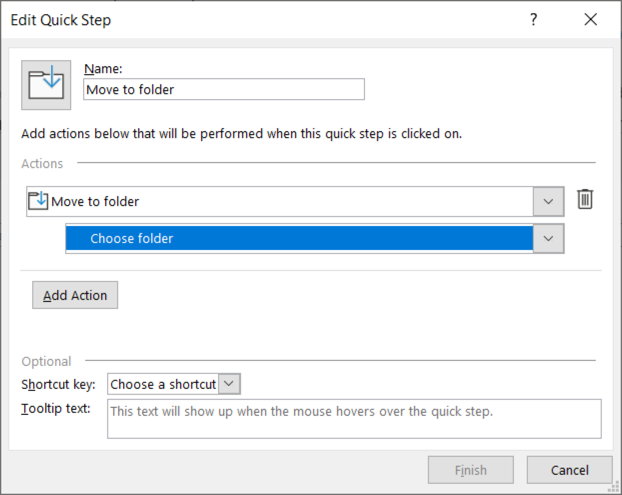
This is handy if you often move or copy emails to the same folder.
Click “Finish” to secure your new Quick Step.
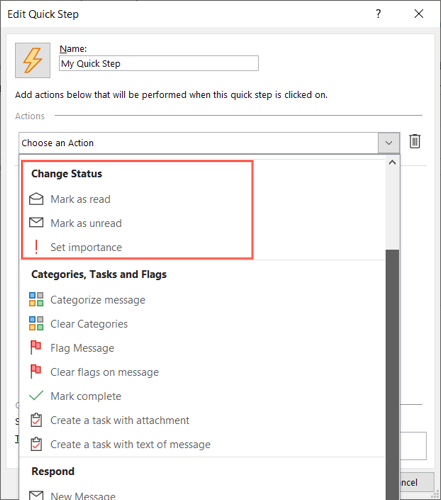
opt for Choose an Action drop-down box and pick an option in the Change Status section.
Then, give your Quick Step a name.
If you pick Mark as Read or Mark as Unread, you don’t have to select anything else.
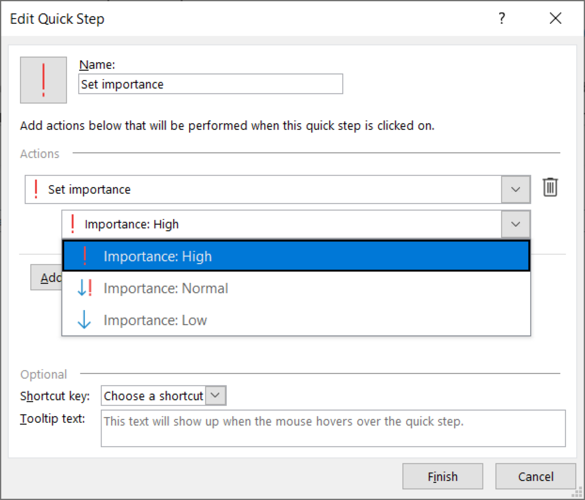
If you pick Set Importance, pick the priority in the subsequent drop-down box that appears.
This is convenient for quickly marking messages as Important.
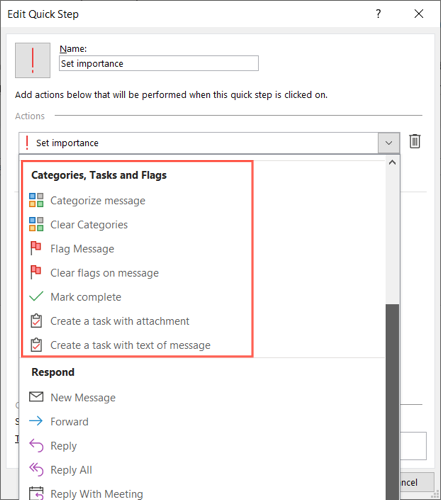
Assign a category, attach a flag, or create a task.
it’s possible for you to also dump the categories or tags or mark the message complete.
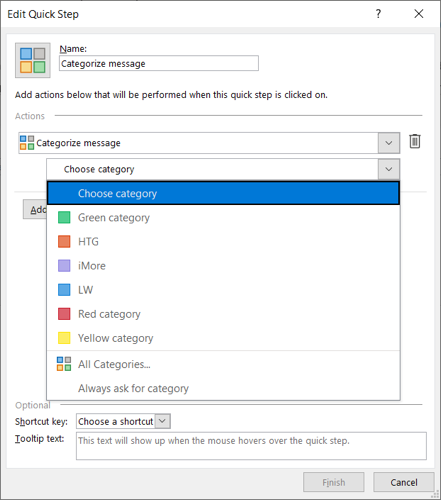
Then, name the Quick Step.
As an example, we’ll pick the Categorize Message action.
Next, snag the category in the subsequent drop-down box.
Then with a click, you might assign a category to the message.
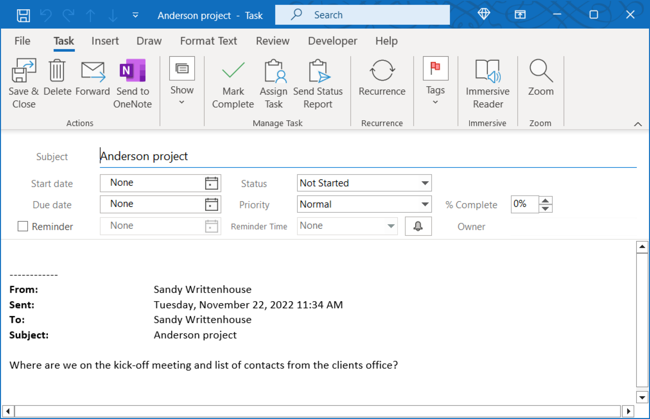
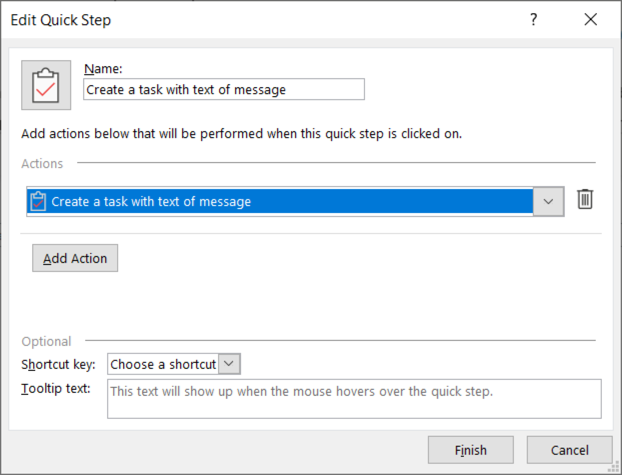
As another example, we’ll use the Create a Task With Text of Message action.
This is a terrific action to use if youmanage your to-dos in Outlook.
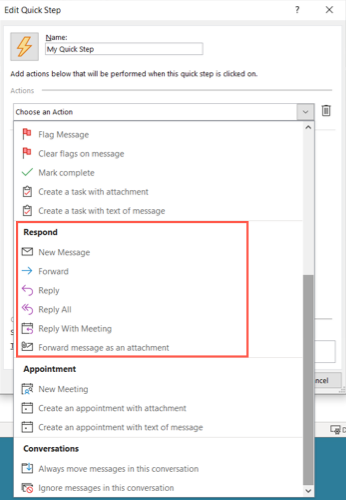
A good example here is to forward the message as an attachment.
This is perfect if you tend to receive emails that you often forward to someone else.

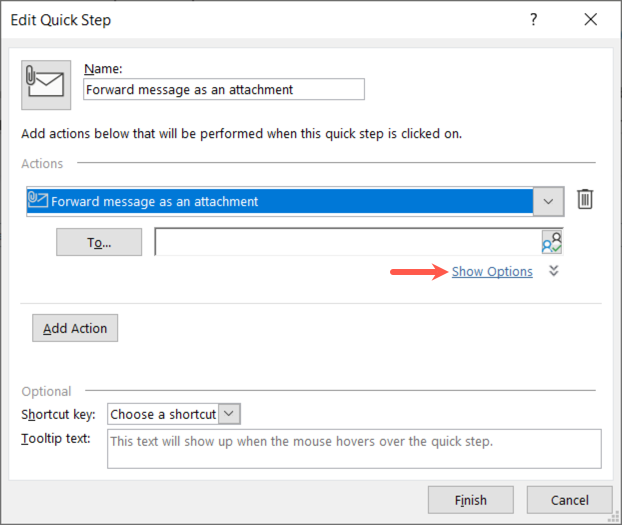
Pick Forward Message as an Attachment in the Choose an Action box.
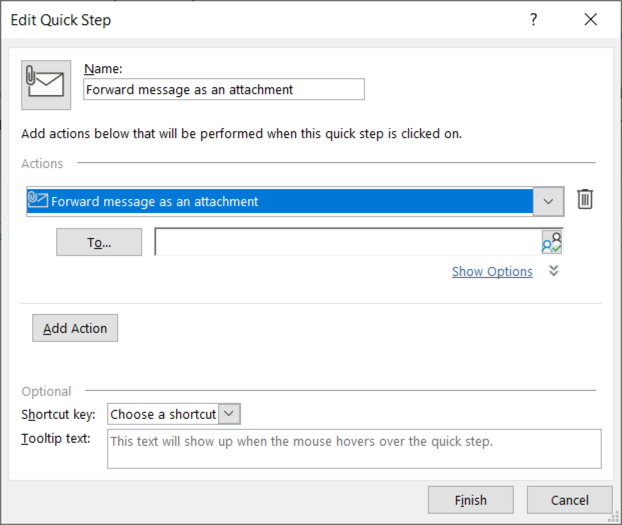
To complete the remaining details at the time, you don’t have to select anything else.
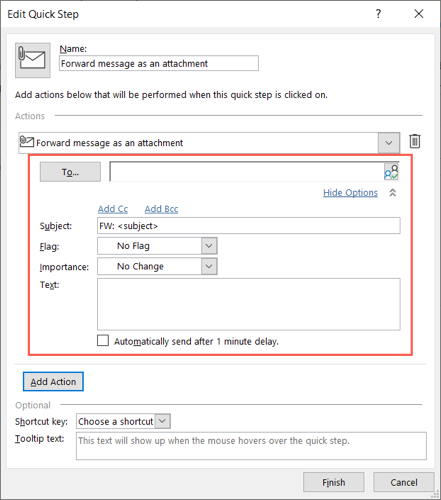
To prefill the details for the email you forward, select “Show Options.”
Just remember, these details apply every time you use the Quick Step.
Be sure to name the Quick Step and select any additional options at the bottom.
Click “Finish.”
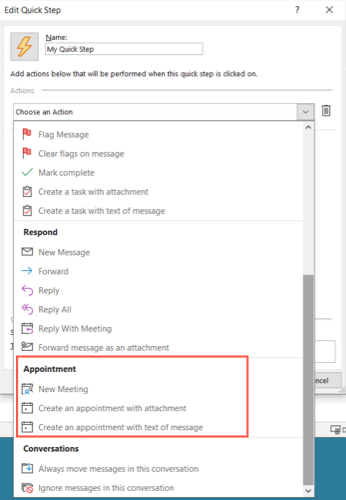
Create an Appointment
The Appointment category is ideal for those messages you receive that often prompt get-togethers.
You canset up a new meetingor create an appointment.
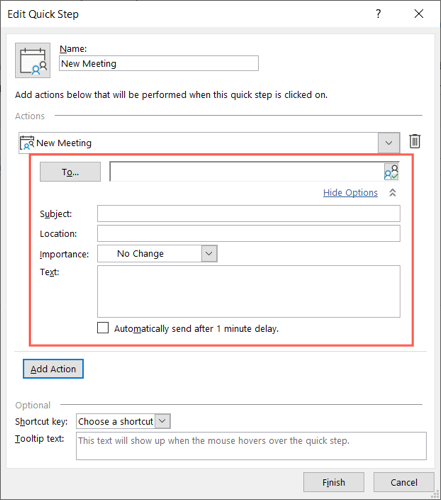
One awesome example is creating a new meeting.
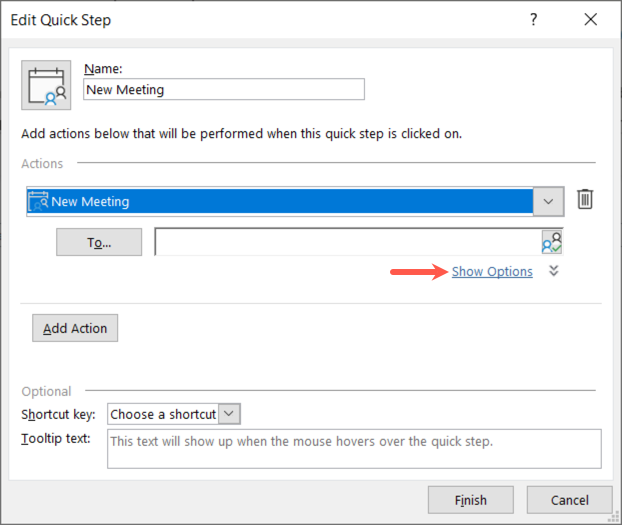
To prefill the meeting details, select “Show Options.”
Again, these details apply each time you use the Quick Step.
Give your Quick Step a name and select any additional options at the bottom.
Click “Finish.”
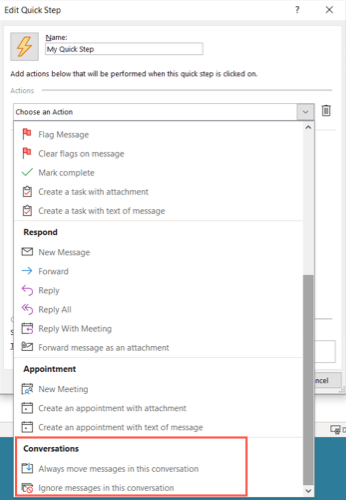
Handle Conversations
The last Quick Step category for custom actions isConversations.
With it, you’re free to always move messages in the conversation or simply ignore them.
If you choose to move the messages, opt for location in the subsequent drop-down box.
If you choose to ignore the messages, you don’t have to select anything else.
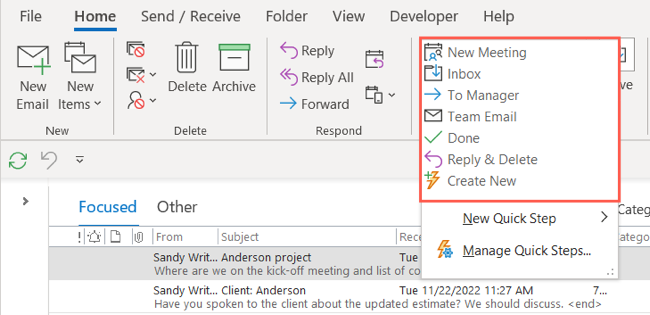
snag the email and head to the Home tab.
Choose the action in the Quick Step box in the same named section of the ribbon.
And that’s all there is to it!
This is the ideal time to use Quick Steps.