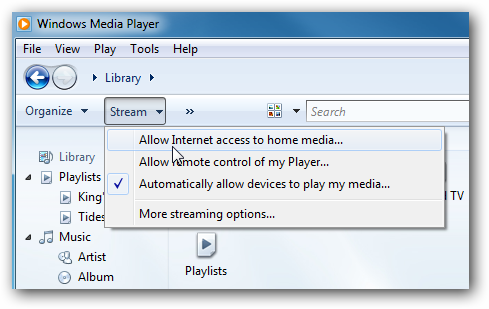
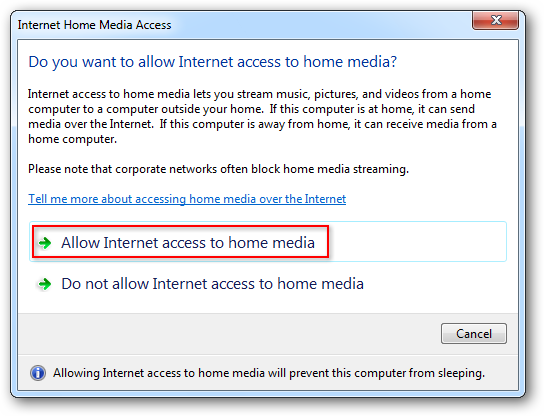
punch Stream and then “Allow Internet access to home media.”
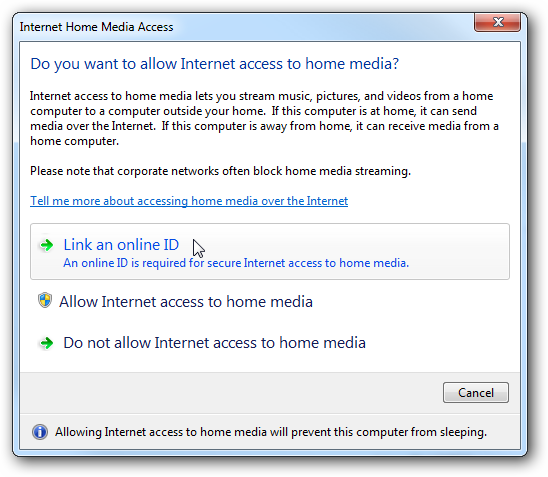
Click “Link an online ID.”
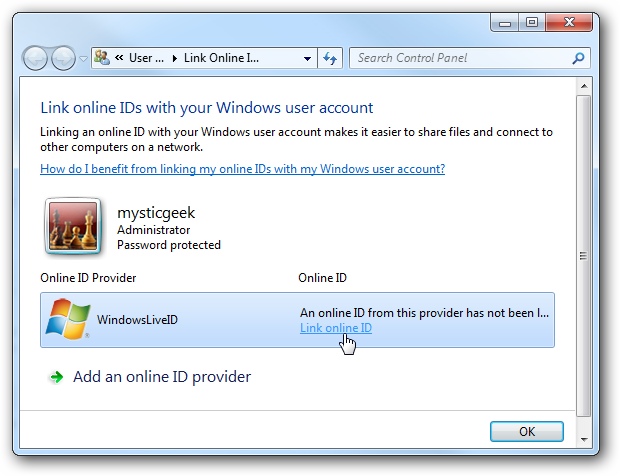
punch “Link Online ID.”
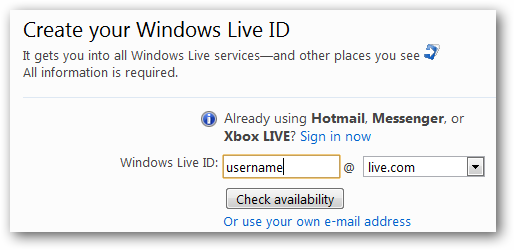
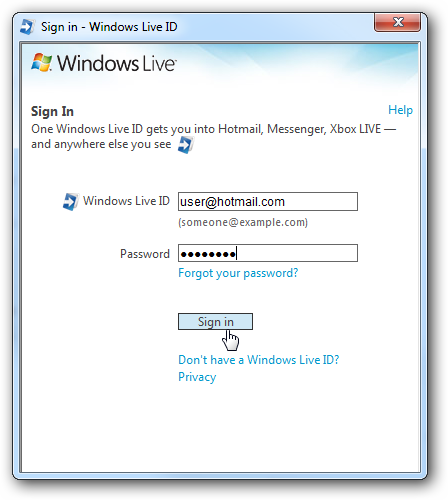
Next, you’ll be prompted for a Windows Live ID and password.
put in your Windows Live ID and password and click “Sign In.”
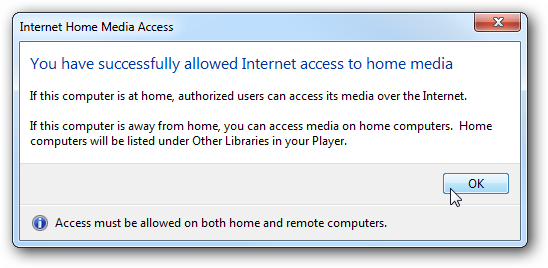
A pop up window will notify you that you have successfully allowed Internet access to home media.
Now, you will have to repeat the exact same configuration on the 2nd Windows 7 computer.
If your router supports UPnP, you may not need to manually forward any ports on your router.
So, this would be a good time to test your connection.
If not, you’ll need to manually forward the ports.
you’ve got the option to always choose to forward the ports anyway, just in case.
press “Stream” on the top menu, and select “Allow Internet access to home media.”

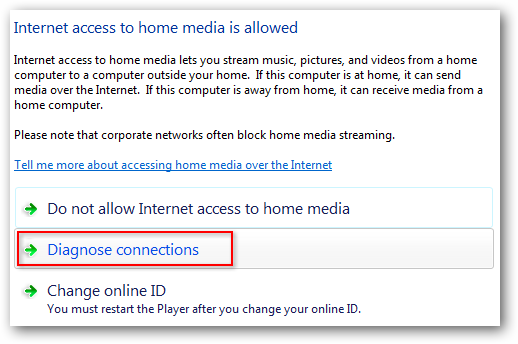
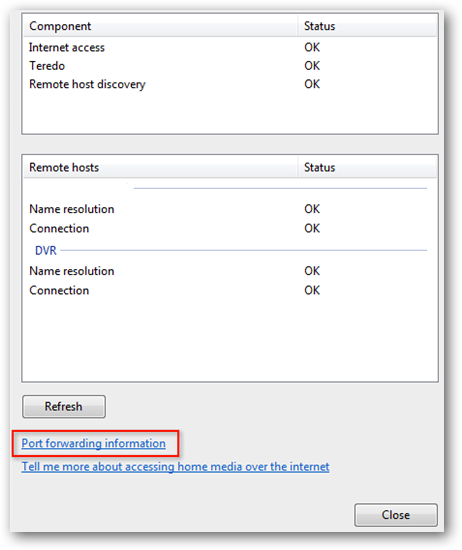
On the “Internet Home Media Access” window, select “Diagnose connections.”
The “Internet Streaming Diagnostic Tool” will pop up.
choose “Port forwarding information” near the bottom.
The Internal port number should always be 10245.
The external number will be different depending on your rig.
Microsoft also recommends forwarding port 443.
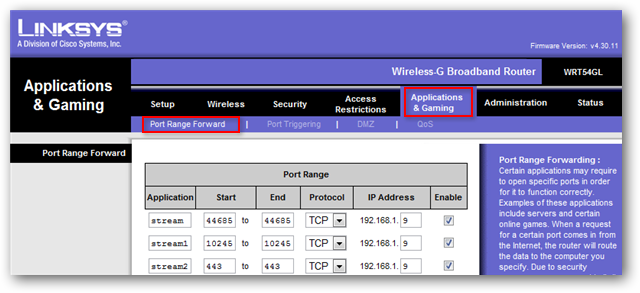
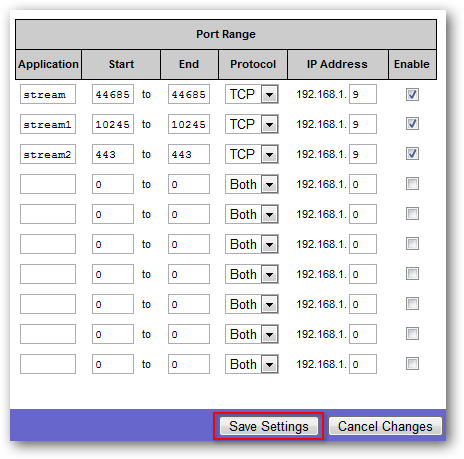
Configuring the RouterNext, you’ll need to configure Port Forwarding on your home router.
Under “software,” throw in in a name.
It can be any name you choose.
In both the “Start” and “End” boxes, jot down the port number.
Enter the IP address of your home computer in the IP address column.
nudge the check box under “Enable.”
Do this for both the internal and external port numbers and port 443.
When finished, smack the “Save parameters” button.
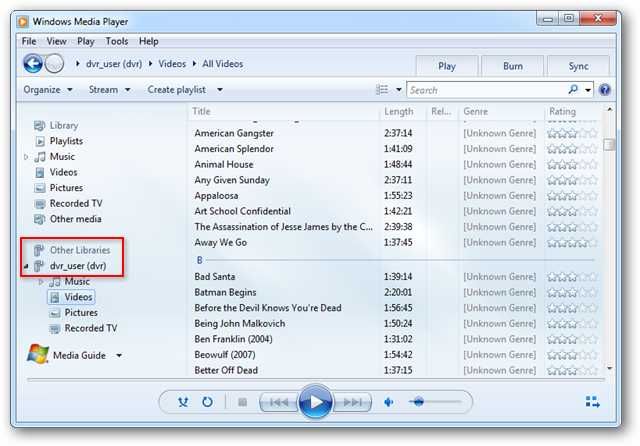
press it expand the list to see your media libraries.
Choose a library and a file to play.
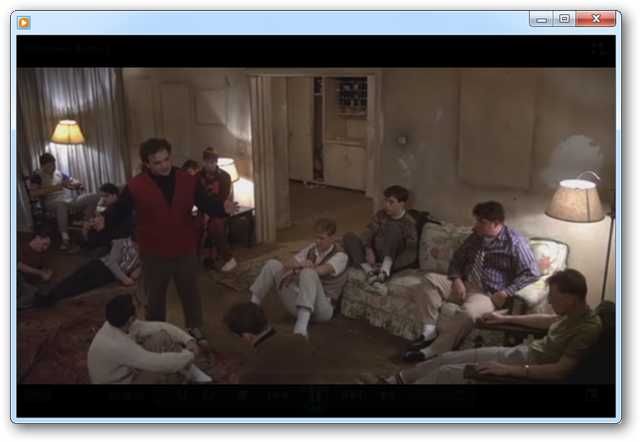
Now you’re free to enjoy your streaming media over the Internet.
ConclusionWe found media streaming over the Internet to work fairly well.
However, we did see a loss of quality with streaming video.
Also, Recorded TV .wtv and dvr-ms files did not play at all.