Now it is to be noted that upgrading to Lion is totally your own choice.
If you are satisfied, enjoy your hackintosh the way it is.
But if you want to upgrade, be sure to perform a backup first.

you could also use the recently releasedrBoot rescue CDby Tonymacx86.
Before you image your hackintosh, confirm you have everything working perfectly.
So before upgrading, you have to download the necessary stuff.

Firstly, visit tonymacx86’sdownloadssection, and download xMove.
You’re also going to need the most important download - Mac OS X Lion.
Be aware of the size of the download, its a huge 3.5GB.

So if you have a slow internet connection, you should have a lot of patience.
You might consider using the latest releasedMultiBeast 4.0(made specifically for Lion).
You might have some questions regarding compatibility of Mac OS X Lion on your hackintosh.
If Snow Leopard is working perfectly for you, Lion will probably work perfectly for you.
So before you make the move, have a look at the forums.
See how people with similar hardware got it to work.
Once you’re satisfied, gather all the required stuff and get started.
The installation proceeds as follows.
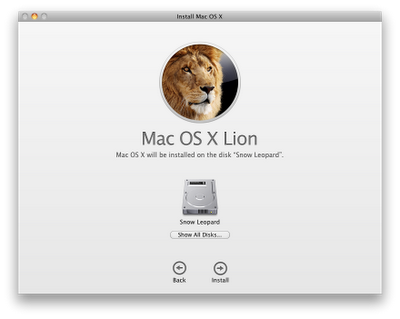
Once the installer is open, click Continue.

This installer is not going to actually install Lion right now, it will just copy the installation files.
If it isnt visible, click Show All Disks, select that drive, and hit Install.
This will take almost 3-5 minutes, and after that, youll be prompted to reboot.
TIP: Theres also a quick alternative to this.
Right press the Install Mac OS X Lion app, click Show Package Contents.
Navigate to Contents/SharedSupport/ and mount the file named InstallESD.dmg.
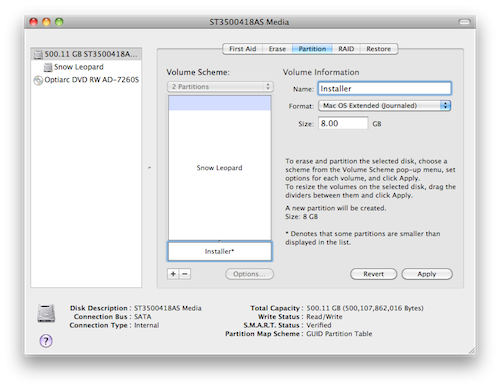
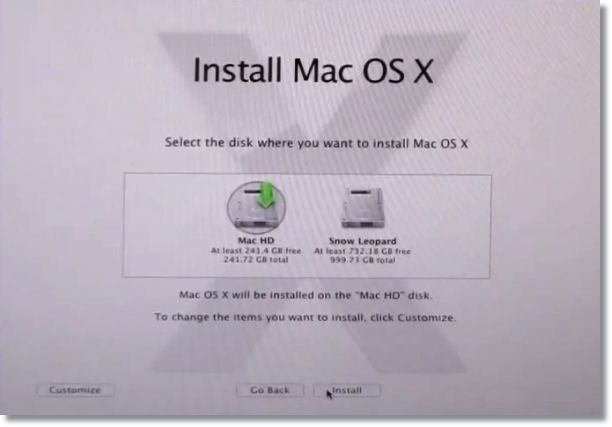
Select your hard drive on which Snow Leopard is installed.
grab the hard drive, and not the Snow Leopard partition.
Once selected, hit the partition tab, and hit the+button to add a new partition.
Name the new partition Installer and make it a bit more than 8 GB.
As always, the partition format should be Mac OS Extended (Journaled).
Once youve done this, click Partition to partition the drive.
Now theres one more option for you that many upgrading users overlook.
Mostly, users install Lion on top of their working Snow Leopard.
When you will boot into the Lion installer, where are you going to install it?
Obviously, on top of Snow Leopard.
This wont replace any files in the Snow Leopard partition, but it will just be upgraded Lion.
But as in some cases, Lion is perfectly installed, but doesnt boot.
Since it was an upgrade from Snow Leopard, theres no way to roll back to Snow Leopard.
To avoid this, however, you could choose to install Lion on a totally new, empty partition.
In this way, your Snow Leopard partition will remain intact.
So if youre interested in installing on an empty partition, dont exit disk utility yet.
Exit Disk Utility after youre done.
However, you oughta note two things if youre going this way.
you’re able to also install Lion on a separate hard drive, instead of an empty partition.
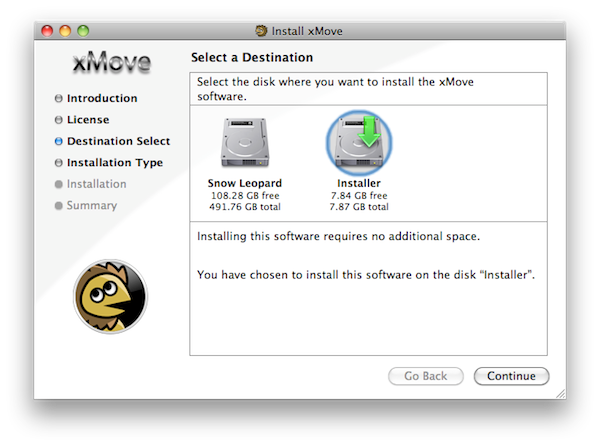
After creating the installer partition, run xMove.
Click Continue, and wait for the xMove installer to do its work, it takes a while.
Once its done, you’re free to exit it.
Now it is time to install Mac OS X Lion.
you’re free to choose to boot with some boot flags as well, if thats required.
TIP: If your installer gets stuck at [ PCI Configuration Begin ], boot with npci=0x2000.
Post in the tonymacx86 forums if you get stuck at any other point.
Boot with-v, and post where it halts.
When you see the Mac OS X Lion installer, recall Mac OS X Snow Leopards installer.
Everything from here onwards is the same.
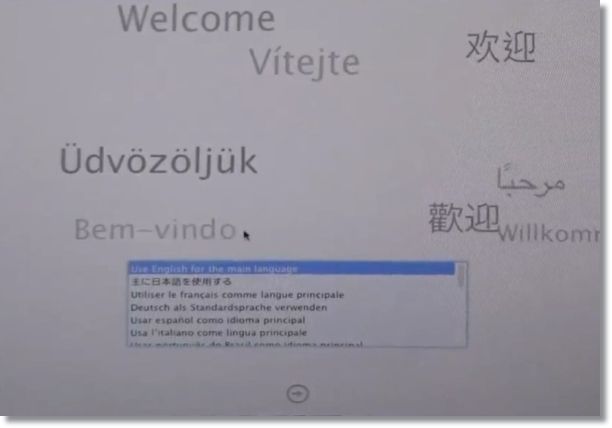
Select a language, and nudge the arrow button to continue.
Now you have two choices.
This usually saves you the hassle of installing kexts and stuff.
But if you want to proceed with care, better install Lion on an empty partition, i.e.
do a clean install.
When the installation finishes, your hackintosh will restart, and youll arrive at the bootloader prompt.
You may also use any bootflags that allowed you to jump into the Lion installer.
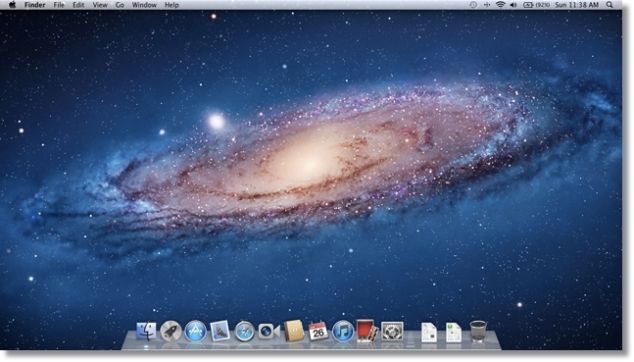
Congratulations, youre now running Mac OS X Lion on a PC!
All thats left to do now, is to enable any disabled devices.
You know what you need for that MultiBeast.
Remember, in the previous part of this guide, we asked you to note down your MultiBeast selections?
If you did an upgrade, use the selections for non-functional devices only.
And yeah, remember the 8 GB Installer partition?
Thats no longer required now.
So go ahead and open Disk Utility, and select your Mac hard drive.
Click Apply, and then click Partition to resize the partition and add the unallocated 8 GB to it.
In a couple of clicks, your Lion hackintosh will be roaring in its full glory!
But in case of a laptop, you will have only one hard drive to deal with.
So here is tonymacx86s tutorial forinstalling Mac OS X Snow Leopard and Windowson a single hard drive.
Its pretty much the same and simple, as long as you know the basics.
It will automatically detect your Windows hard drive and all its partitions.
You have to choose the System Reserved partition for booting into Windows.
Just use the arrow keys to select it, press Enter, and you might boot from it.
Disclaimer: This How-To Guide is written for the interested geeky users only.
A hackintosh isnt a replacement for a real Mac.
Moreover, we dont take any responsibility of any damage (if caused) by following these guides.
Do you want to stay updated with your Hackintosh?
Keep an eye on Lifehacker’sAlways Up-to-Date Guide to Building a Hackintosh.
