What is OctoPrint?
Its development has been continuous, with new versions and features released regularly.
The only way to use OctoPrint is withOctoPi, a Raspberry Pi image preloaded with the software.

This tool is available for Windows, macOS, and Linux, and simplifies the installation of OctoPrint.
you’ve got the option to download the latest version of the Imager from the Raspberry Pi website.
Once you’ve downloaded the Raspberry Pi Imager, install it on your system.
Then, insert an SD card into your setup and launch the tool.
Scroll down to “Other specific-purpose OS,” then select “3D printing.”
From there, choose “OctoPi (stable).”
Next, go for the “Choose Storage” button and select your SD card.
Once you’ve chosen your SD card, it’s time for some advanced configuration.
Press Ctrl + Shift + X in Raspberry Pi Imager to open up the “Advanced options” menu.
The imaging process will take a while to complete.
Plug in the power cable and power on the Raspberry Pi.
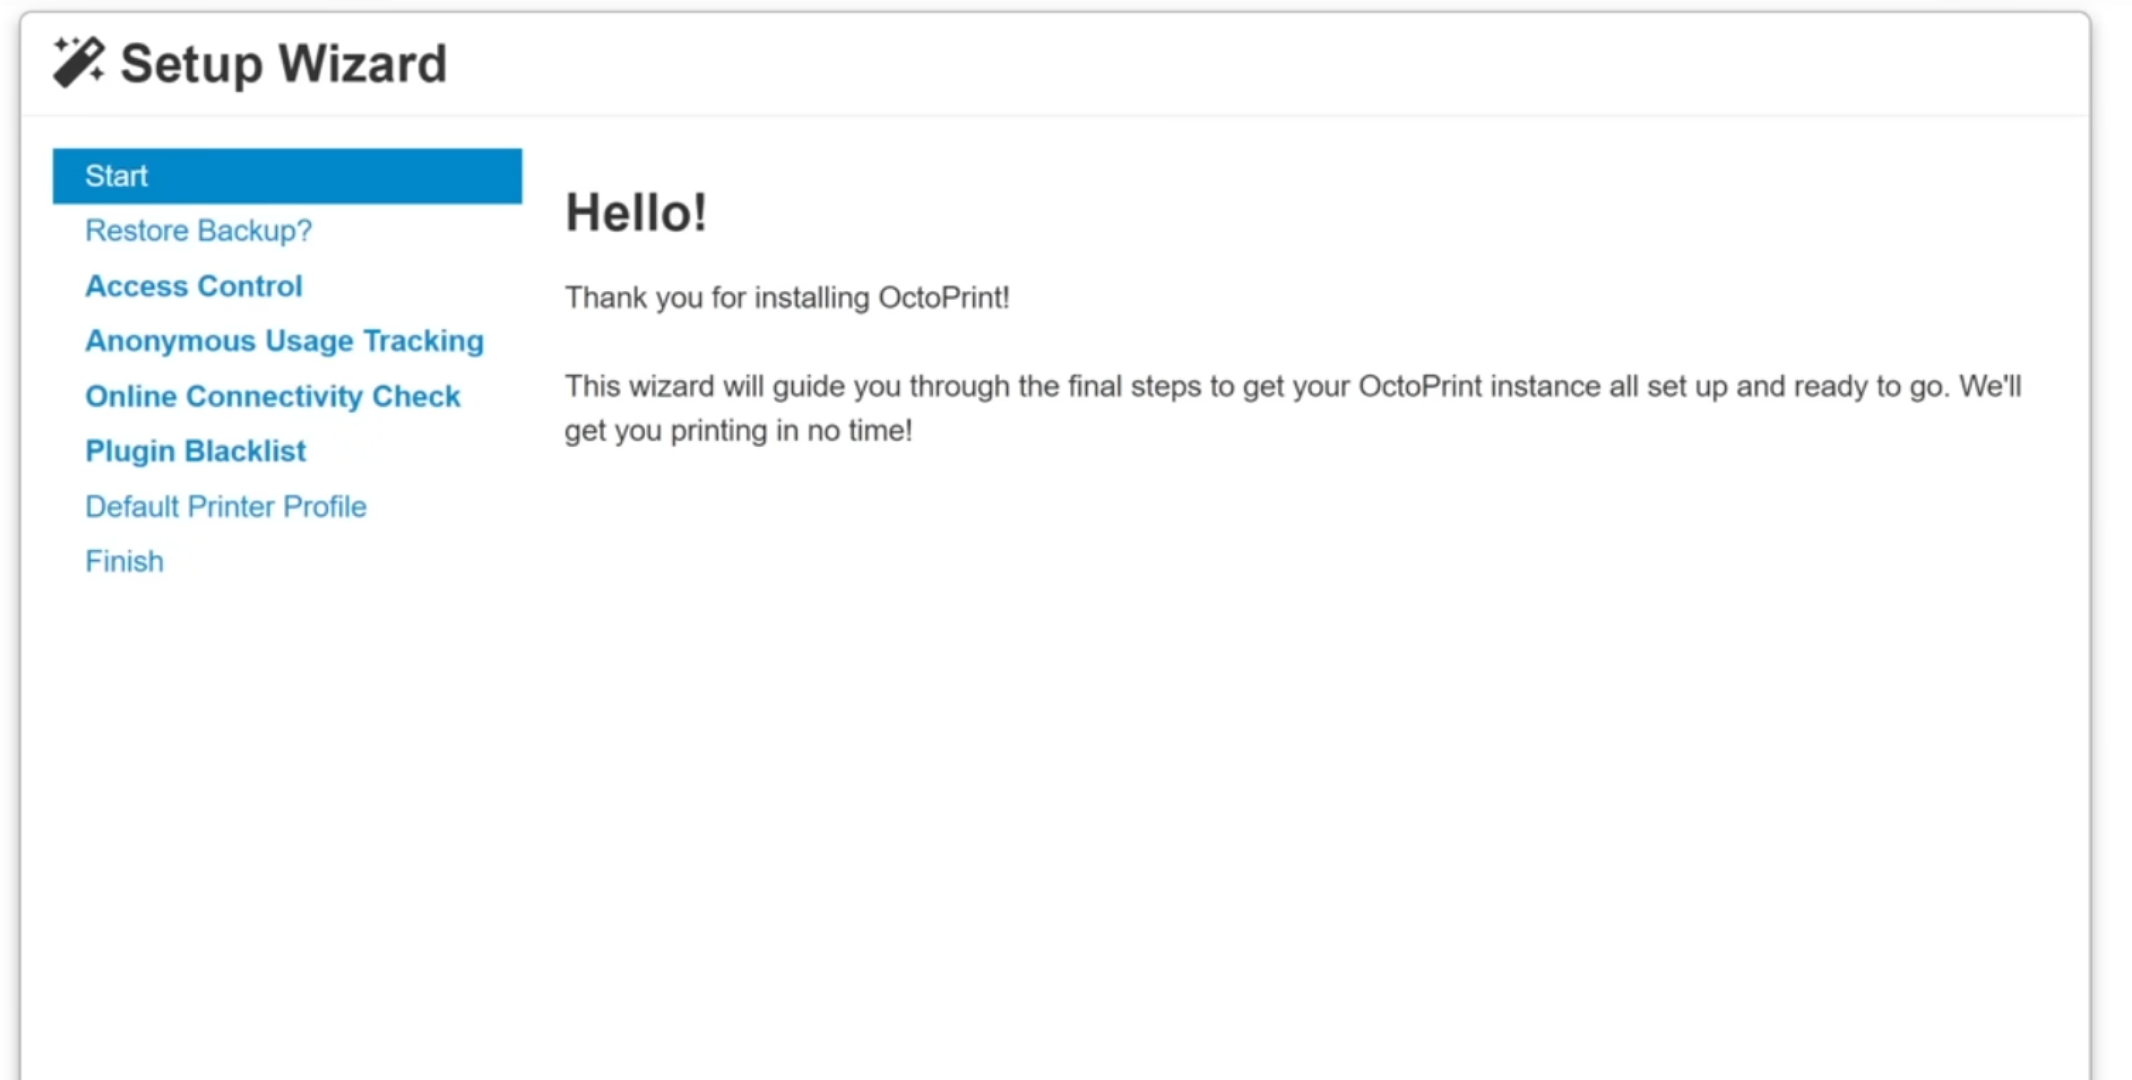
The initial page welcomes you to OctoPrint; click “Next” to proceed.
You’ll then be asked if you’d like to restore from a backup.
If you have one, upload it using the “Upload & Restore” button.
Once done or if you don’t have a backup, click “Next” to continue.
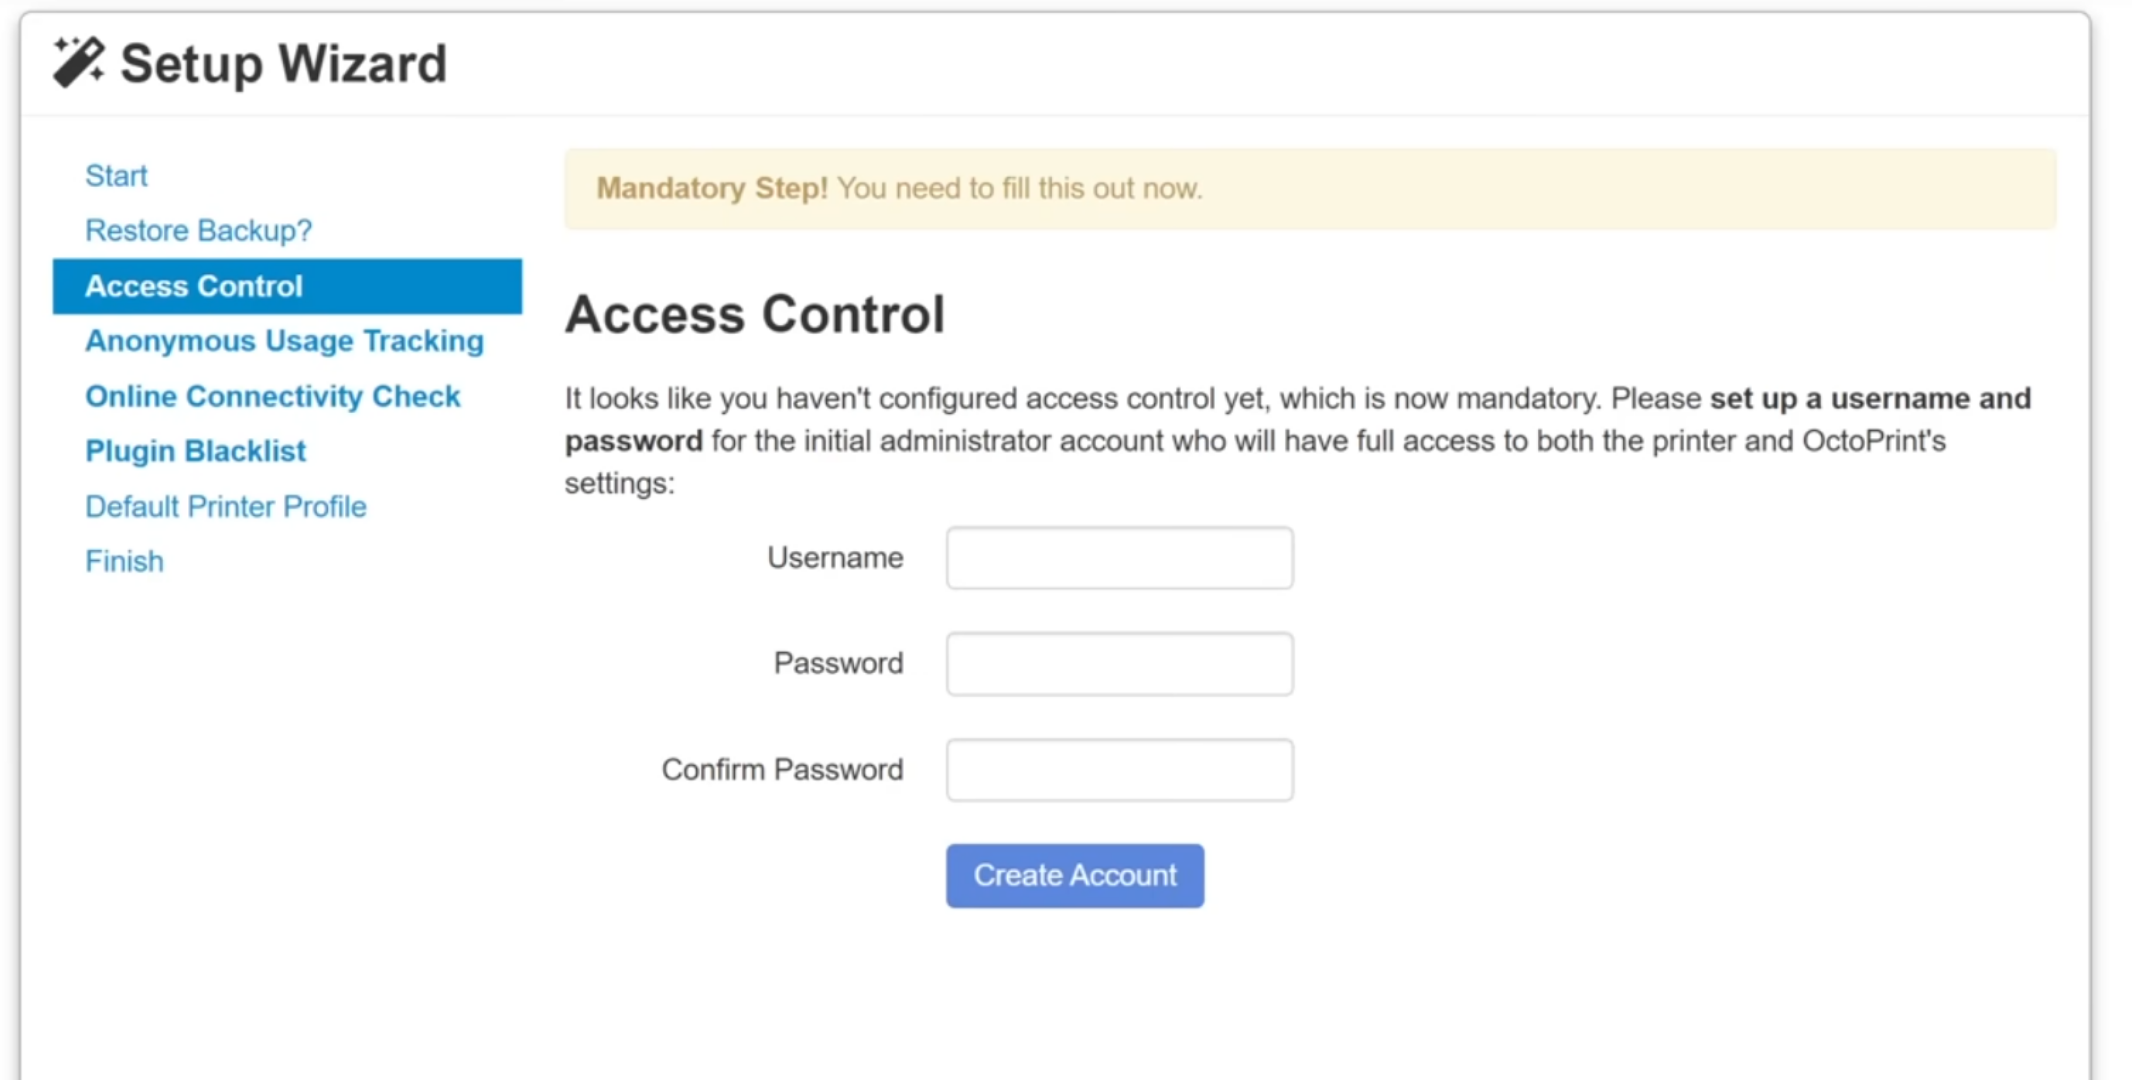
Now, you’ll need to set up Access Control (this step is mandatory).
Enter a username and a strong password, then click “Create Account.”
The following page addresses “Anonymous Usage Tracking.”
Enable this if you’d like OctoPrint to anonymously track your usage; otherwise, disable it.
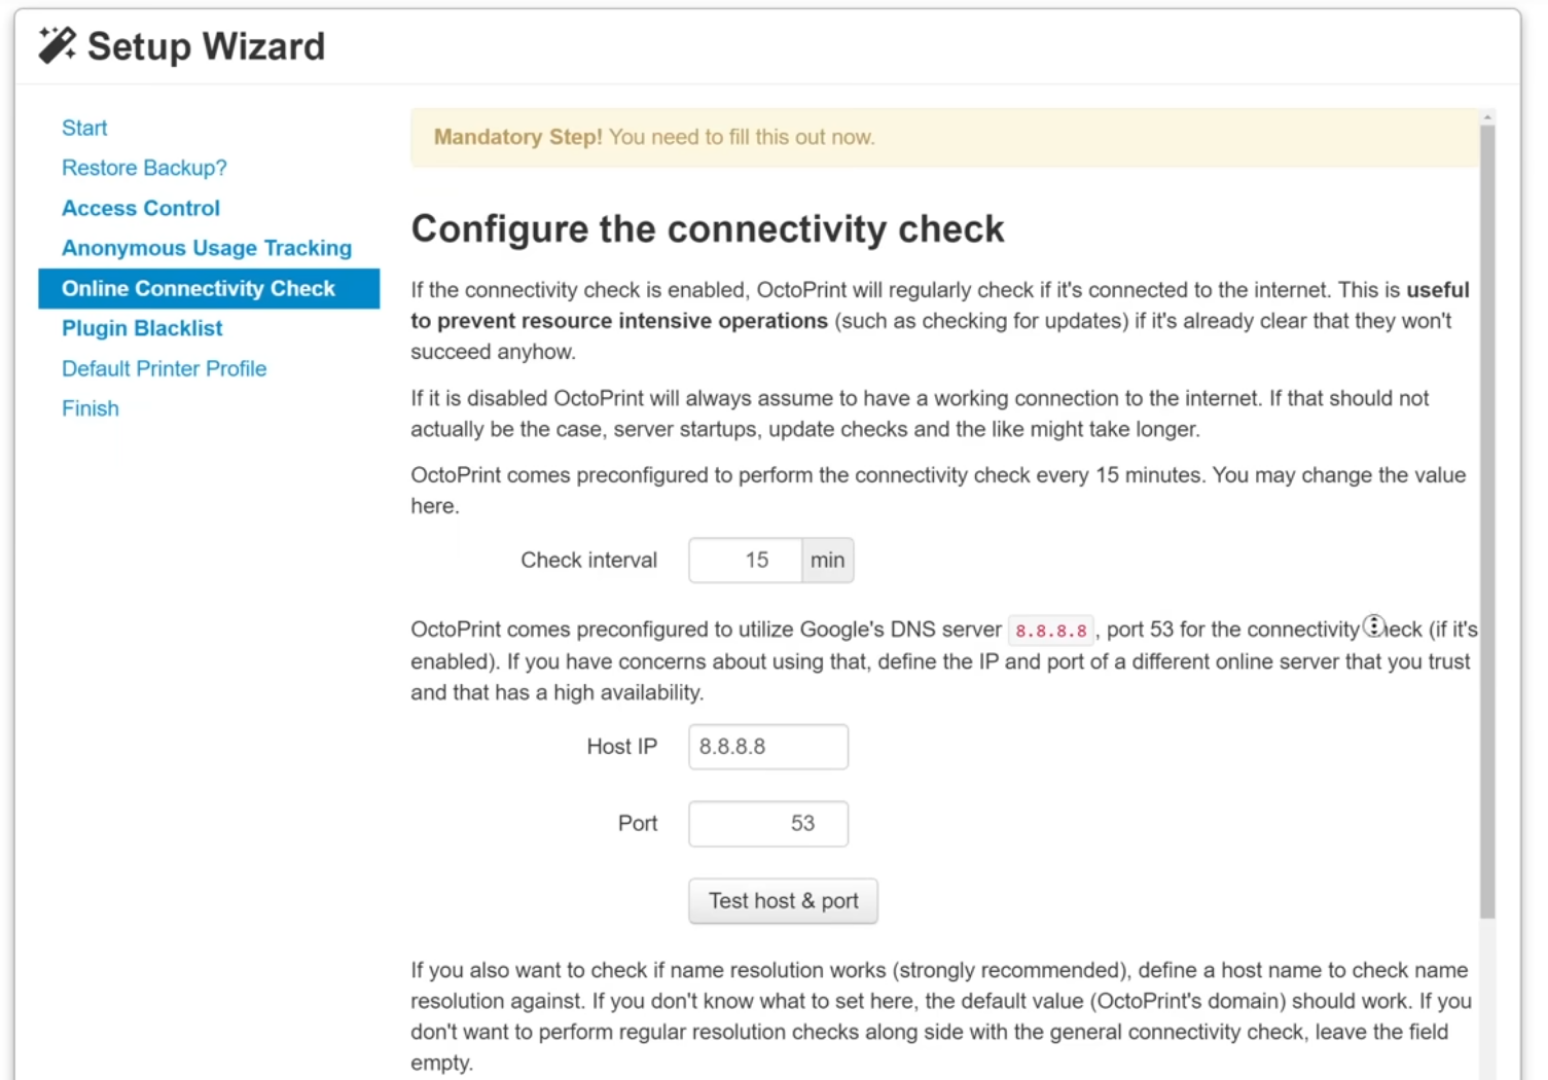
Next, configure online connectivity for OctoPrint.
This ensures that OctoPrint maintains a stable internet connection.
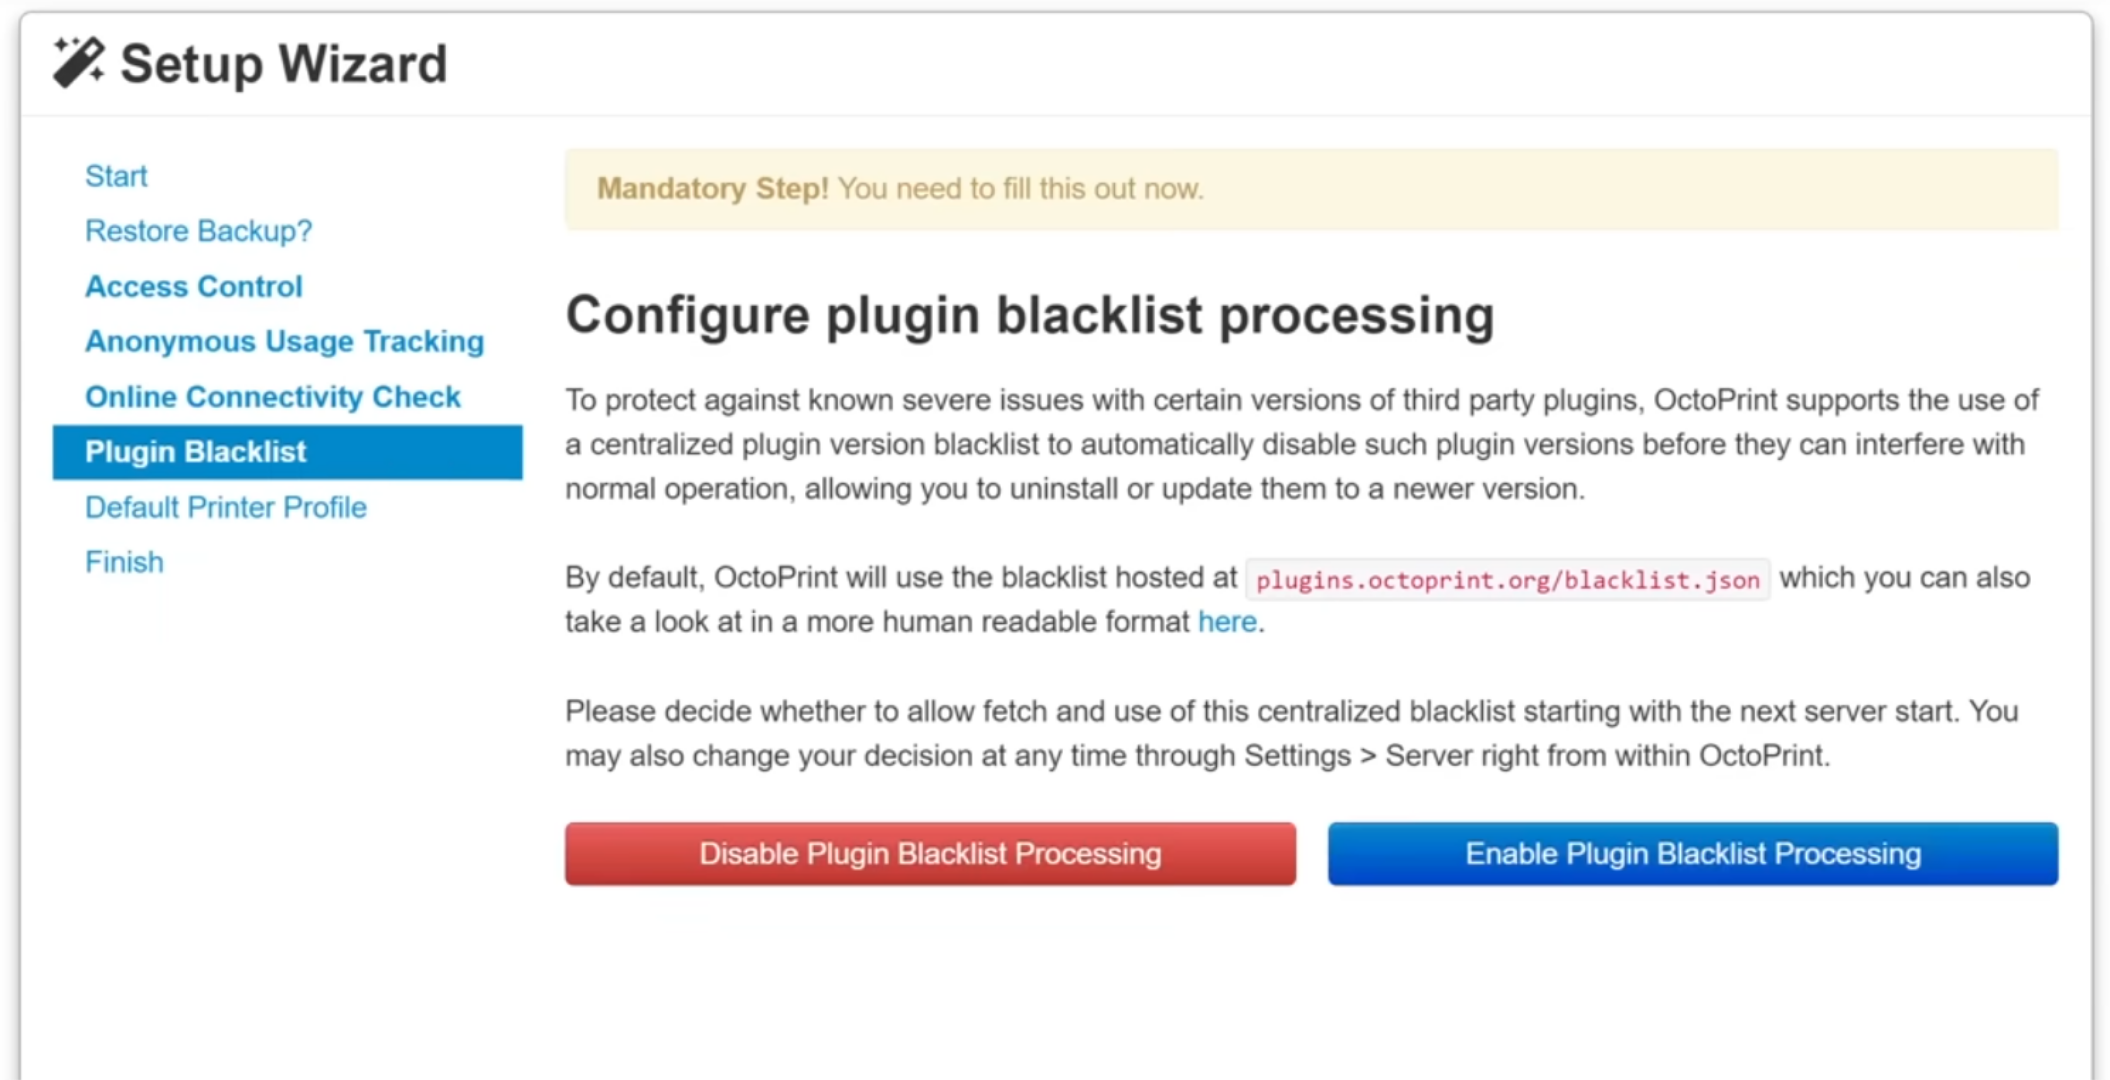
The Setup Wizard will then prompt you to configure plugin blacklist processing.
This feature helps protect against potentially harmful third-party plugins and is recommended for security.
Finally, create a printer profile for OctoPrint.
You’ll need to consult your 3D printer’s documentation for this information.
It’s also wise to check theOctoPrint community pageto confirm compatibility.
Insert the other end of the cable into the Raspberry Pi.
Once both ends are connected, turn on both the Raspberry Pi with OctoPrint installed and the 3D printer.
This URL gives you access to the OctoPrint interface.
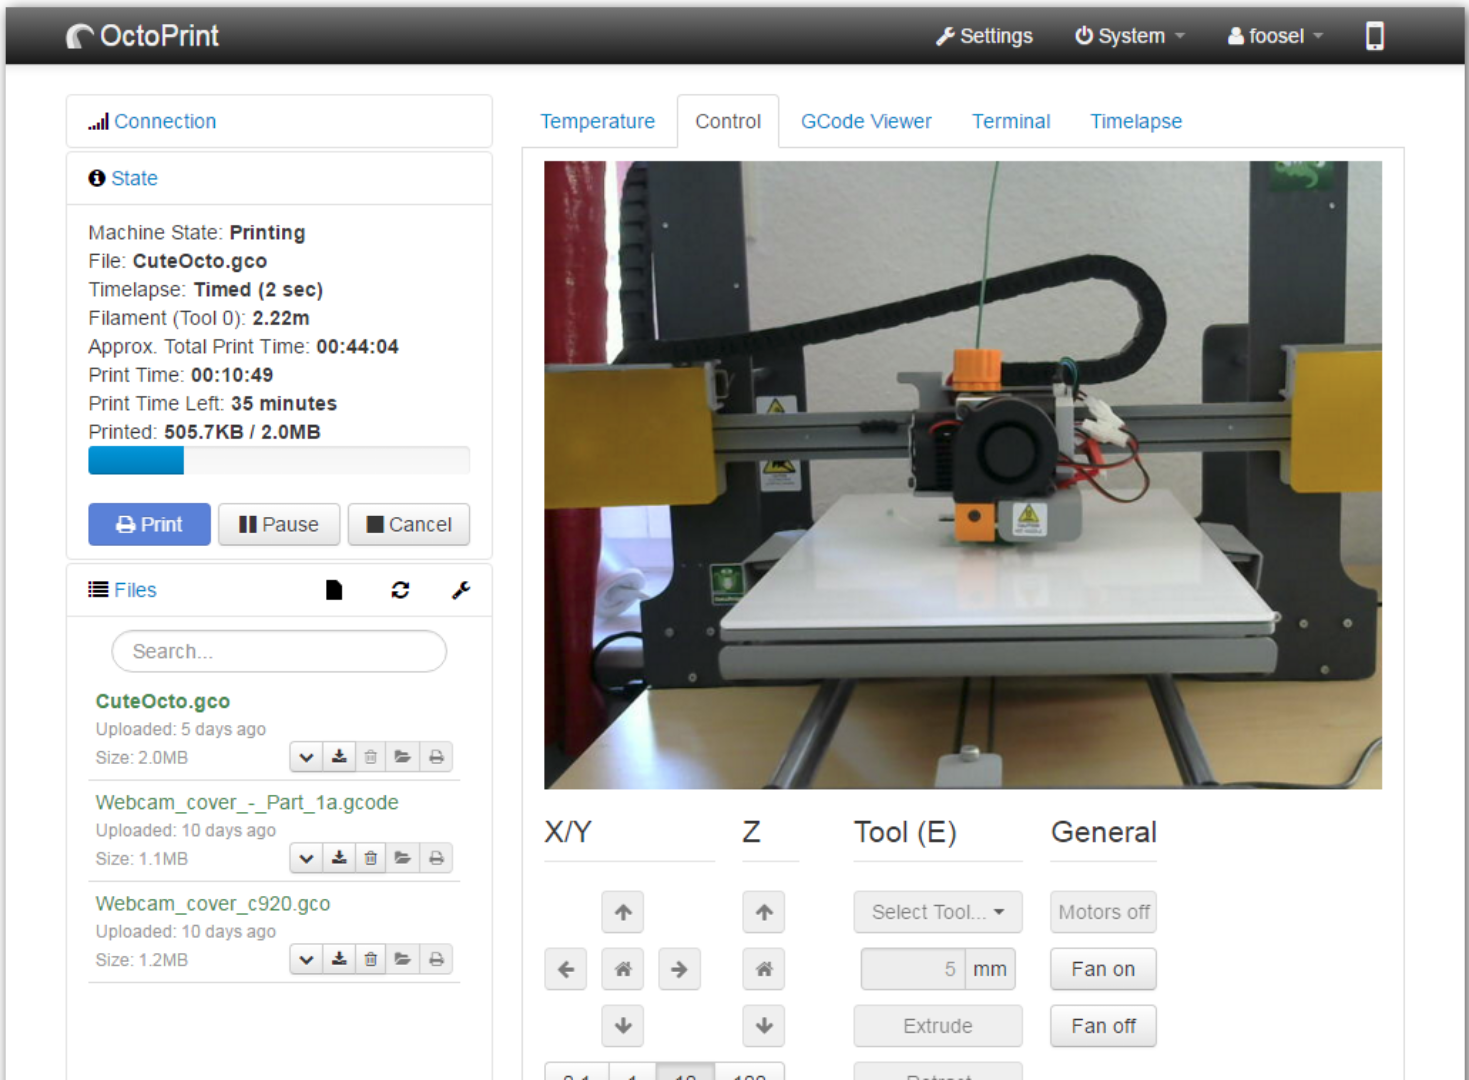
With OctoPrint loaded up, connect to your printer by opening up the “Connection” panel.
If this doesn’t work, you may need to connect it manually.
For more information on manual connections, check theOctoPrint documentation.
Printing with OctoPrint
Printing 3D models through OctoPrint is done by selecting the “Upload” button.
Open up your slicer, and configure your model.
Then, load up your printer with the filament you’d like to use.
Then, stash your print to ag-codefile (machine instructions for printing models on a 3D printer).
To begin the print, punch the “Print” button in the OctoPrint interface.
When you select this button, your prints will start on your 3D printer through OctoPrint.
Be sure to monitor the printing process.
