Summary
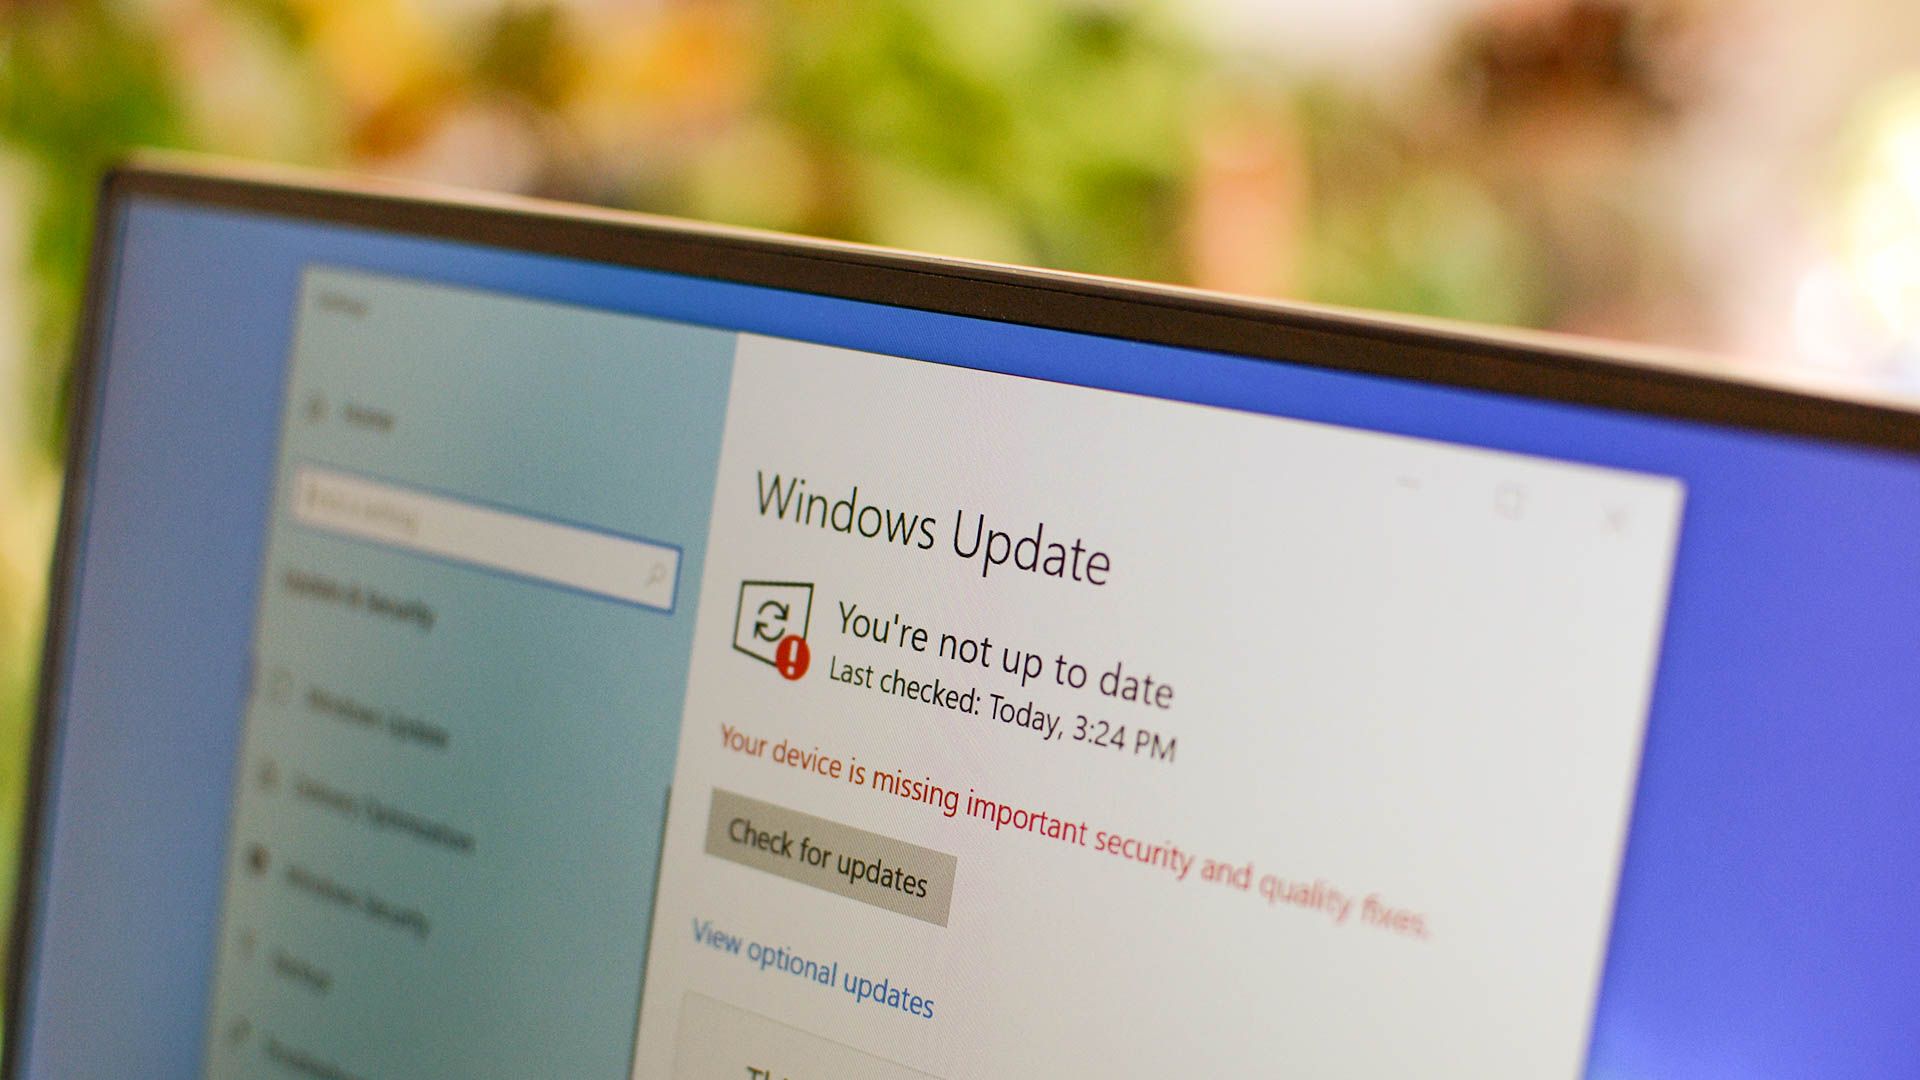
Has your Windows PC slowed down significantly after installing the latest Windows update?
While a buggy update could be responsible for the slowdown, other factors could also be to blame.
First, start your laptop or desktop PC.
Jason Fitzpatrick / How-To Geek
Windows often requires you to cycle your unit to complete the installation of updates.
If several applications are running simultaneously, consider closing some of them.
If these initial steps don’t fix the issue, try the steps we outline below.
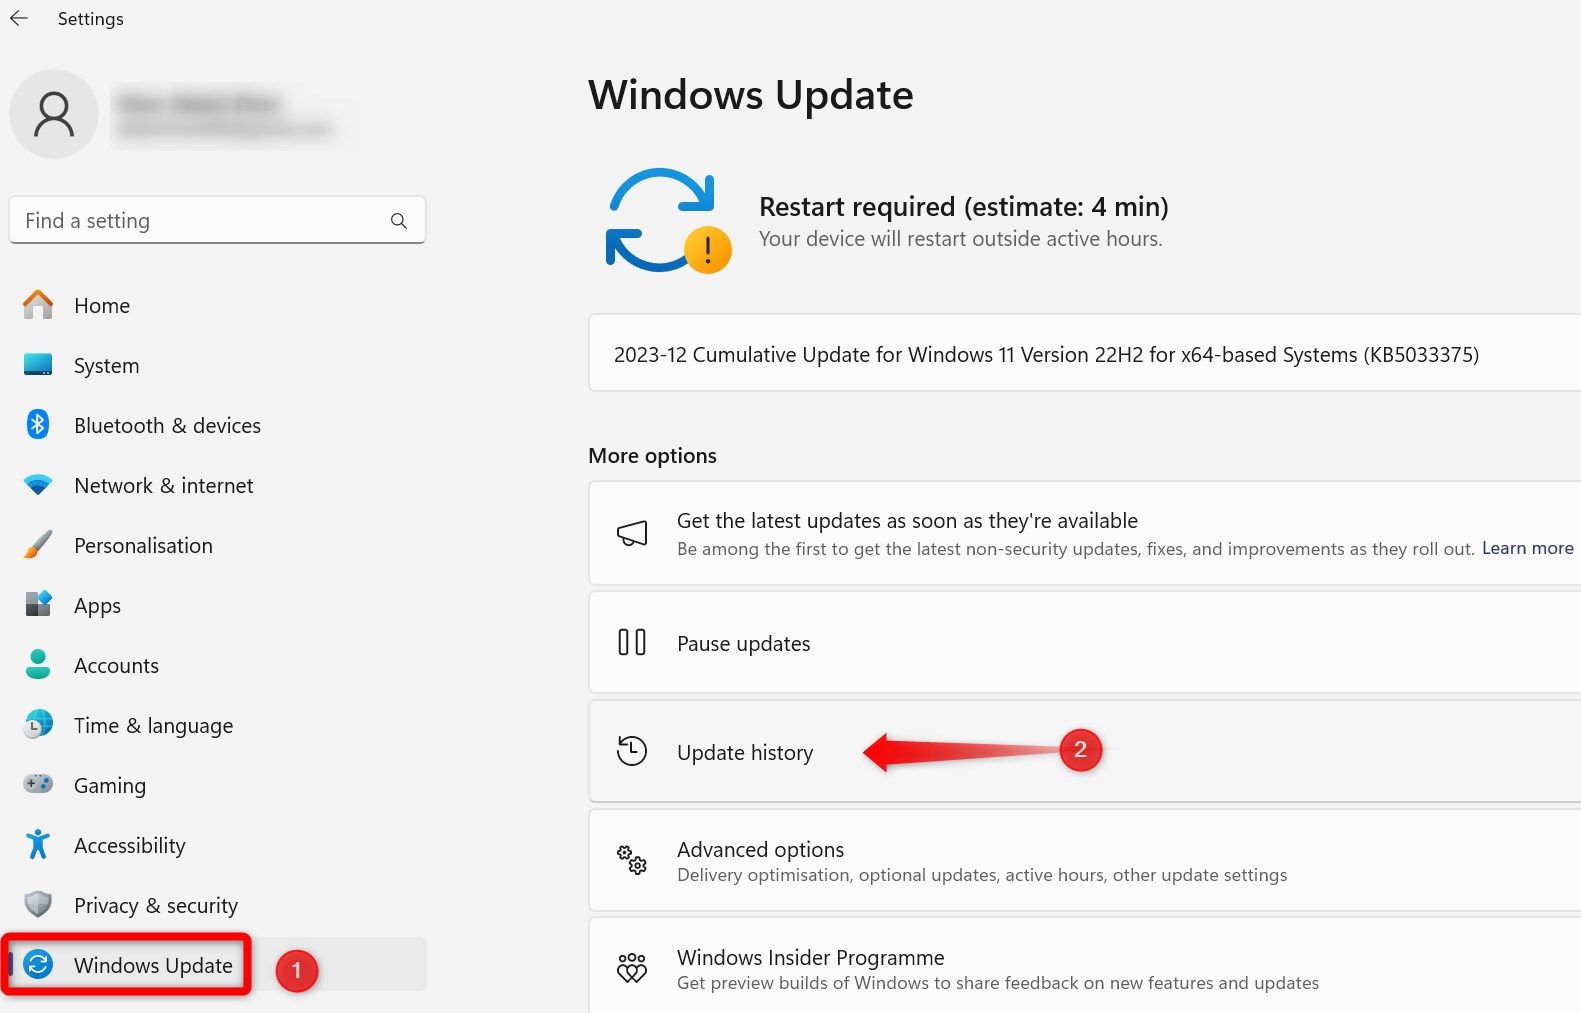
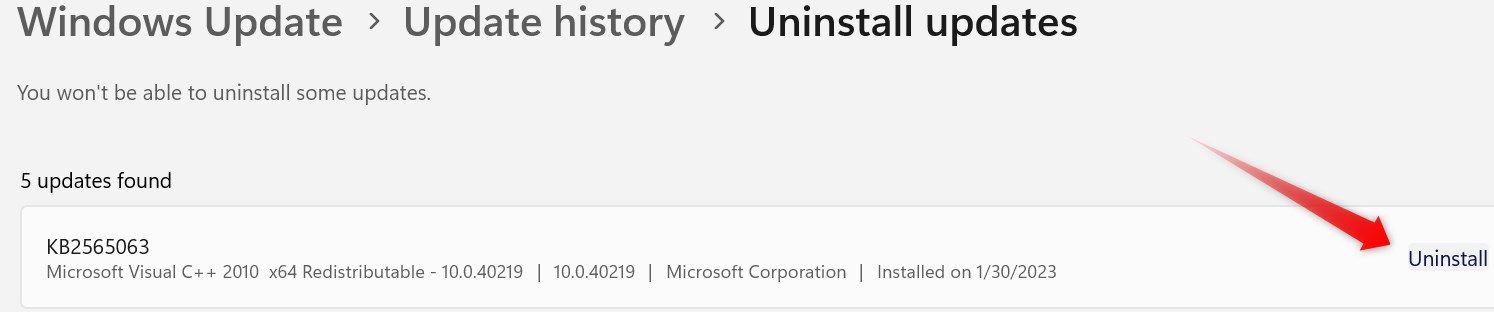
The easiest way to check is byuninstalling the recently installed Windows Update.
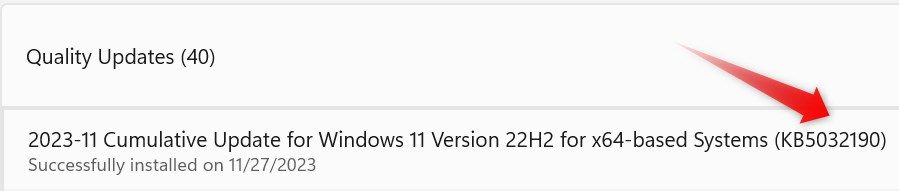
Take note of their version or any other relevant details.
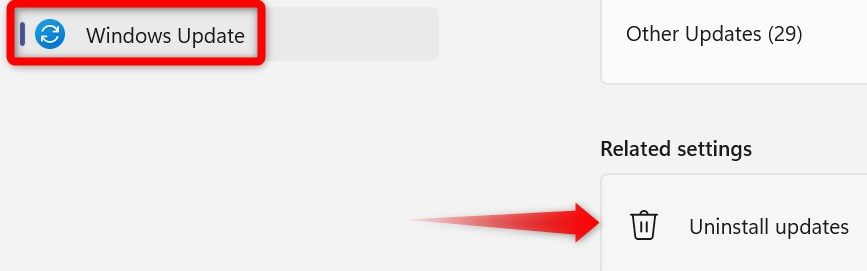
Scroll to the bottom of the page and tap on “Uninstall Updates.”
Identify the recently installed updates and click “Uninstall” next to the relevant update.
Then, follow the on-screen instructions to complete the uninstallation process.
To further confirm, search online resources about the update, particularly on the Microsoft Community forum.
If other users report experiencing similar issues it is almost certainly a problem with the update.
So, try the remaining fixes.
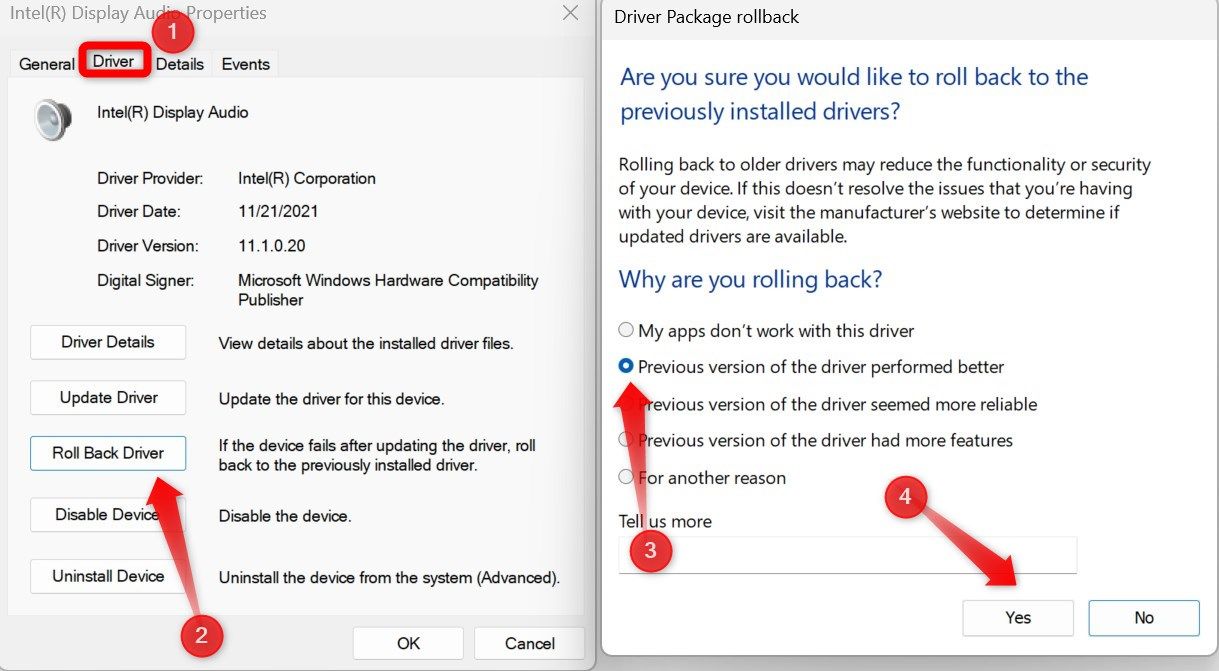
To rule out a problem with new drivers, considerrolling back the driver update.
To do that, right-snag the Windows Start button and select “unit Manager.”
Navigate to the “Driver” tab and click “Roll Back Driver.”
Choose the reason for rolling back, and click “Yes.”
This can lead to system instability, contributing to slow performance.
If your PC suddenly slows down, it’s worth checking the available storage on your drive.
pick the folder icon in the taskbar to open File Explorer.
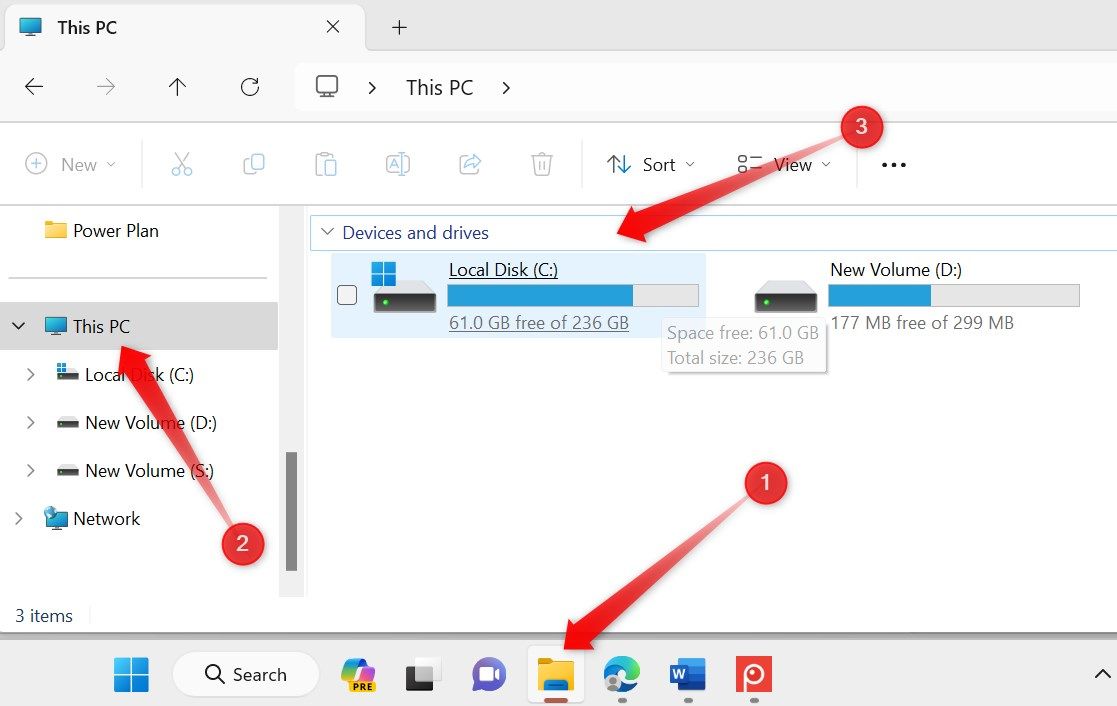
It will be the C:\ drive by default.
This provides ample space for virtual memory and temporary files.
If the drive storage is near its maximum capacity, takesteps to free up disk space.
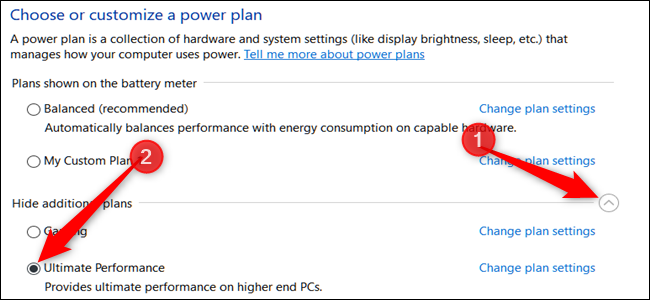
Windows mainly offers two main power plans: Balanced and Ultimate Performance.
The Balanced plan is suitable for general use and is recommended by Windows for its lower battery consumption.
On the other hand, the Ultimate Performance plan is ideal for high-end tasks where maximum performance is essential.
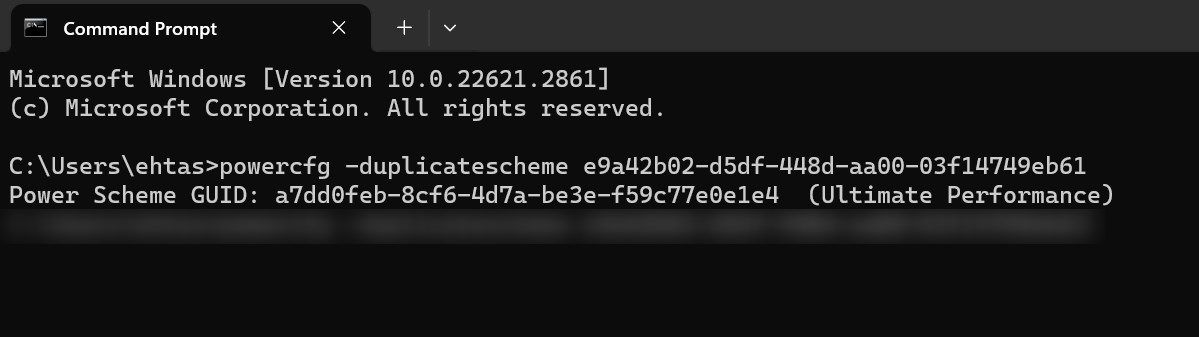
So, switching to this plan may improve your system performance and reduce slowdowns.
Then, navigate to System and Security > Power Options.
Click “Show Additional Plans” and choose the “Ultimate Performance” plan.
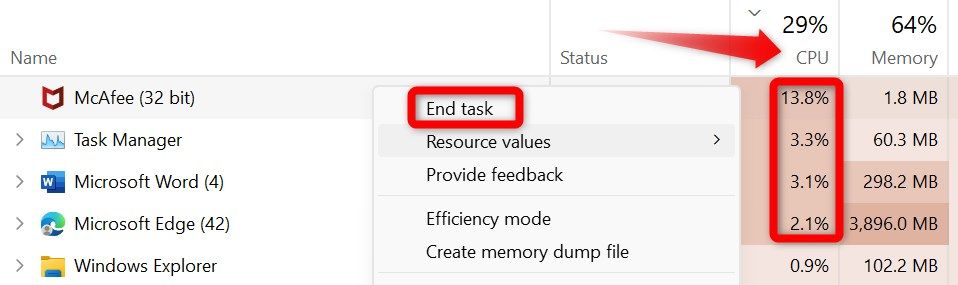
To find out if they are, right-nudge the Start button and open “Task Manager.”
Windows will then sort the processes by resource consumption in descending order.
Then, right-click each of them and select “End Task.”
Closing tasks will release the previously utilized resources.
Your unit should perform better after freeing up system resources.
This restarts your gadget with only essential services, eliminating potential interference from non-critical services.
